- Convert DVD to MPG and other 150+ vidoe formats.
- Merge multiple DVDs into one.
- Burn videos to DVD with DVD template.
- Built in video editor like trimming, cropping and rotating.
- Transfer DVD to your phone to eny everywhere anytime.
Best 3 Online DVD Burner
by Brian Fisher •
If you’ve been searching for an effective online DVD burner without much success, then you’re not alone. That’s because there is really no dedicated DVD burner. In that case, you’ll have to look at portable DVD burners. Simply put, these are DVD burner software that can be installed in portable flash drives. Keep reading to find out the best free online DVD burner options!
Part 1:Best Online DVD Burner Alternative
With most online DVD burners, you don’t need to go through the rigorous installation process. On the flip side, they come with limited DVD burning features. That’s why I recommend using the all-in-one professional DVD burner UniConverter. With this online DVD burner alternative, you can burn CD/DVD/Blu-ray and add custom DVD templates, images, audio, and more. And yes, you don’t need an internet connection to burn DVD with iSkysoft VCU.
Main Features of iSkysoft DVD Burner:
- Burn audio/video in any format to ISO/CD/DVD/Blu-ray discs
- Online DVD burner alternative with 90X faster conversion speed and lossless quality
- Built-in audio/video editor to personalize files by trimming, cropping, adding subtitles/watermarks/effects, etc.
- Free static and dynamic DVD menu templates to customize your disc.
- Preview video files before burning DVD.
- All-in-one toolbox featuring CD ripper, GIF maker, screen recorder, and many more.
Step by step guide on how to burn DVD with online DVD burner alternative
Step 1: Download and run online DVD burner alternative
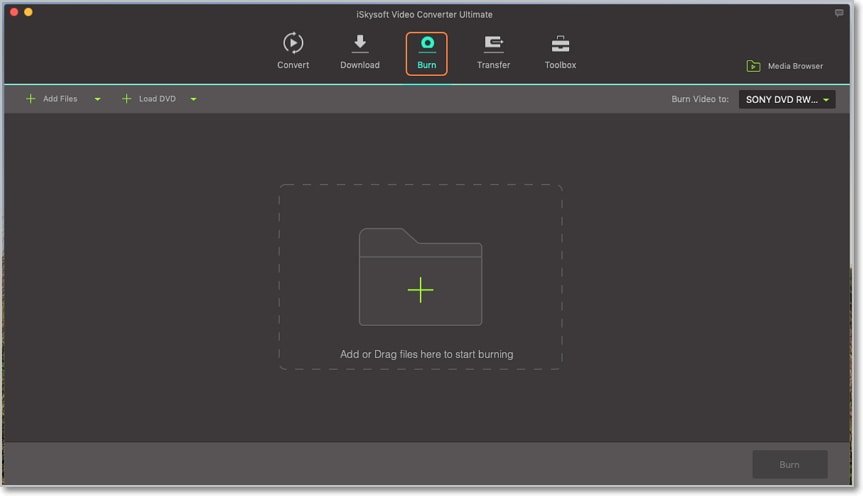
Download, install and open iSkysoft DVD burner on your computer. From the home window, click the Burn tab.
Step 2: Import and edit videos
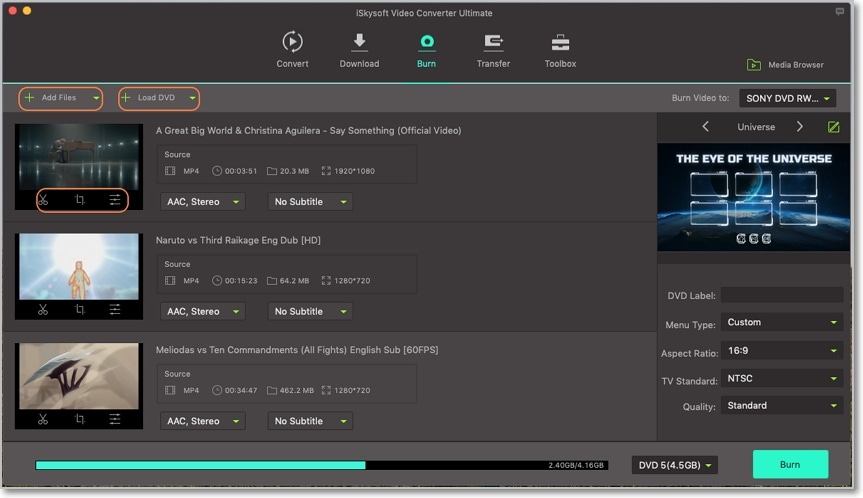
Now click the + sign at the middle of your home screen or the + Add files button at the top-left corner. To make work more manageable, you can just drag and drop your video folder/files to the home screen. Your imported files/videos will then appear as thumbnails.
Under each video thumbnail, you’ll see three small edit icons that you’ll click on. You can now crop, trim, or add watermarks/subtitles/effects. Once you’re satisfied, click OK to save the editing changes.
Step 3: Customize DVD template
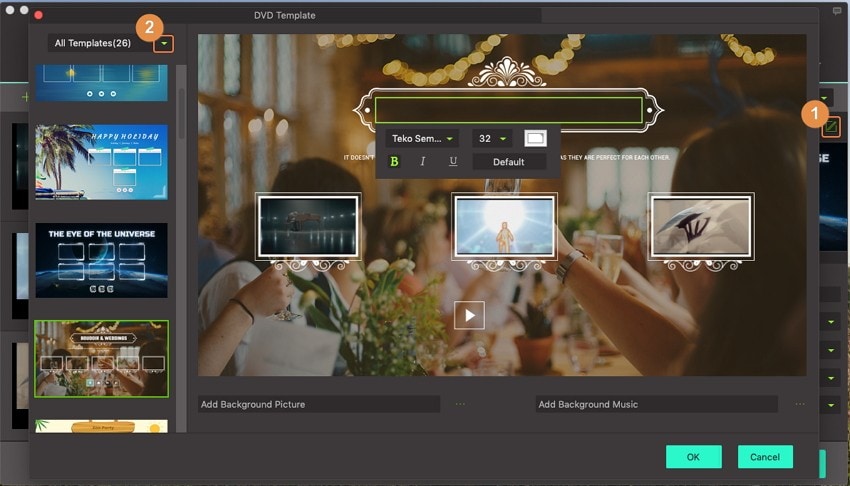
On the right side of your home screen, you’ll see a small, green pencil-like icon that you’ll click on. On the pop-up DVD template window, select your favorite DVD template from the 36+ available options. You can also add your background picture and music.
Once you’re satisfied, click OK and then label the DVD as well as set other parameters like TV standard, quality, etc. You’re now set to start burning DVD.
Step 4: Preview and Burn DVD
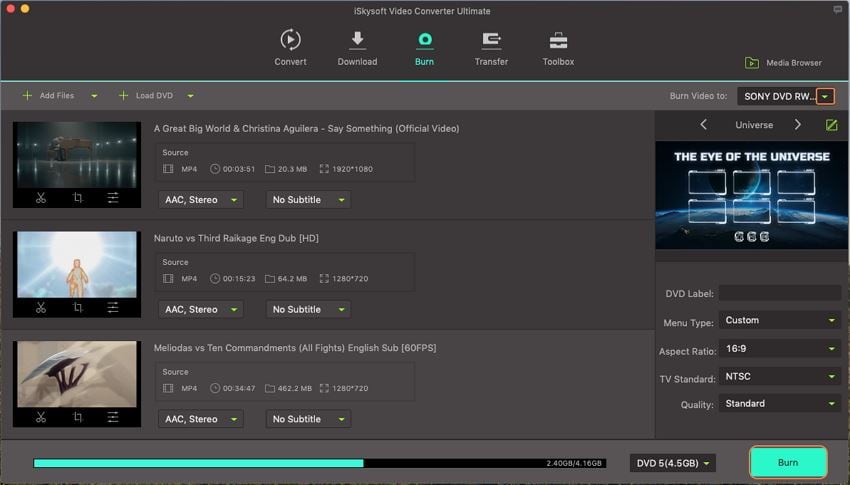
Now you can preview your DVD and make some minor changes if needed. Next, insert your blank disc and then click on the Burn video to drop-down menu. Select your disc and then click the Burn button to begin converting files to DVD.
Part 2: Recommended Free Online DVD Burner Alternative
The internet is laden with able alternatives if you’re looking to burn disc online for free. Even better, each burner comes with different features. So depending on your preference, you certainly won’t be short of options. Lucky for you, I’ve already done all the hard work. In short, you can pick one from the following three alternatives.
1. Burn
With Burn, you can create a standard audio/video DVD/CD with ease on Mac PC. All you have to do is to drag and drop your files to Burn. This powerful tool also offers other advanced options like MP3 tag editing and CD text editing to personalize your DVD. Plus lest we forget that Burn is open source software, therefore it’s absolutely free. So without wasting any time, here is how to burn DVD with Burn.
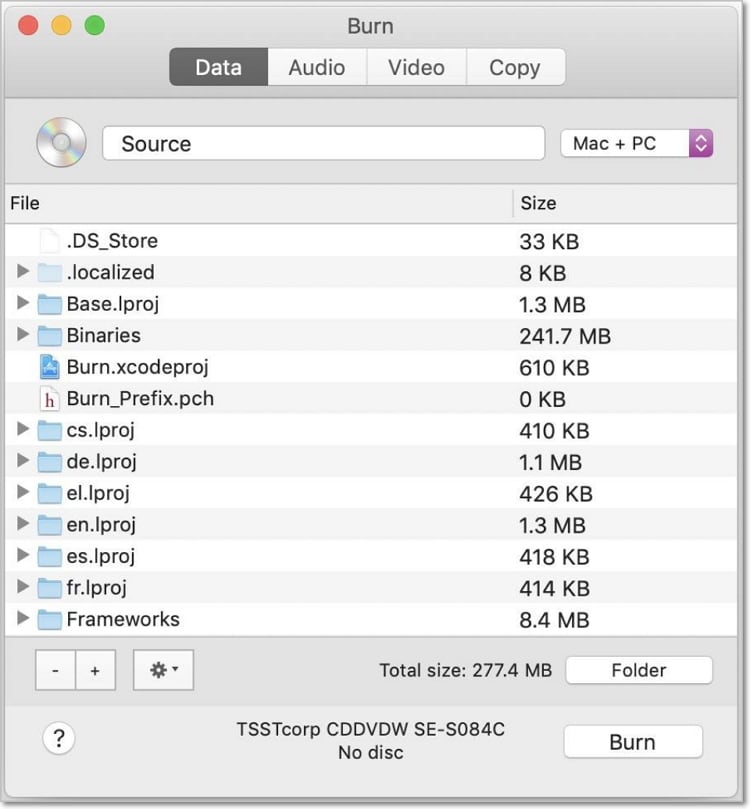
Step 1: Download, install, and run Burn DVD burner to your Mac computer. From the top menu bar, click the Video tab.
Step 2: Name your DVD and then select DVD-Video from the drop-down menu located on the far-right side.
Step 3: Now, click on the + sign located at the window’s bottom-left corner to import your video files.
Step 4: Finally, click the Convert button to begin the process. Burn will also ask you to specify where you’d like to save your video files.
Pros and Cons:
+
- User-friendly interface
+
- Supports file format conversion
-
- Slow conversion speed
-
- Supports limited file formats
-
- No video editing feature
2. Finder
Finder is a default Mac OS file manager that also doubles up as a free DVD burner. So, in this case, you don’t even need to download and install anything. The only downside is that it doesn’t boast of additional functions or features. Here is how to use Finder to burn DVD.
Step 1: Insert a blank DVD into your computer’s DVD drive, and a pop-up window will appear.
Step 2: From the Action drop-down menu, choose Open Finder, and then click OK.
Step 3: Open a new window, and you’ll see the black DVD appear on the sidebar. Now drag and drop your files to the blank CD.
Step 4:Last but not least, click the Burn button located on the upper-right corner of the Finder window. A window will appear where you’ll enter the DVD name, and then you’ll finally click the Burn button.
Pros and Cons:
+
- Free to use
+
- Fast conversion speed
-
- No additional video editing features
-
- Boring interface
-
- Only for Mac users
3. BurnX Free
BurnX Free is Mac OS software that you can use to burn files to DVD online effortlessly. However, you must be using Mac OS X or previous versions. That said, this program is relatively light. In that case, you won’t need lots of storage space. In fact, the software is prevalent in countries like the UK, the US, and Japan.
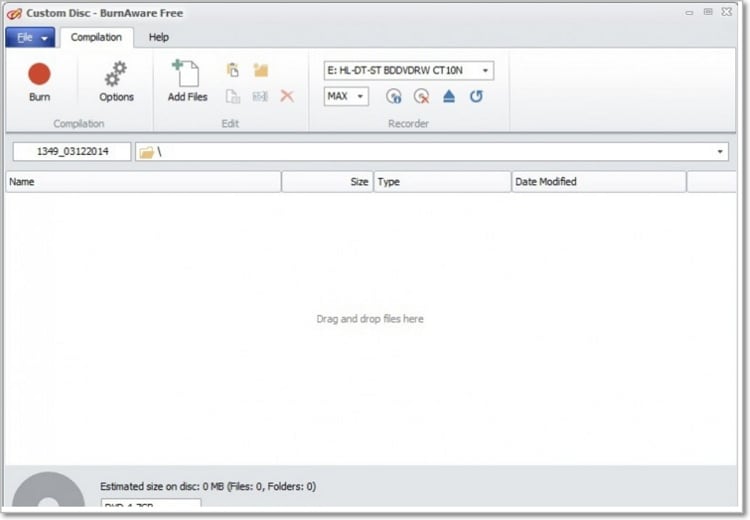
Step 1: Download, install and run BurnX on your computer.
Step 2: Insert a blank DVD on your computer CD drive then click on the Add File/Folder button. You can now select and import your movie files. Alternatively, you can drag and drop your movie files to the BurnX home window.
Step 3: Click on the Disc icon located at the upper far-right corner to begin the process.
Pros and Cons:
+
- Easy to use software
+
- Supports multiple file types
-
- Slow DVD burning speed
-
- No video edition feature
I’m now pretty sure that you won’t be having any trouble burning DVD. All the software mentioned above should get the job done with ease. But if you want fast conversion speed with additional DVD features, then you should install UniConverter now. And of course, this powerful software is compatible with both Mac and Windows OS.

Brian Fisher
staff Editor