How to Import Camcorder Videos to Windows Live Movie Maker
by Brian Fisher Proven solutions
Windows Live Movie Maker is a recommendable software for editing videos. Its only limitation is that it only works with the formats it supports.
If you like taking videos and posting them online, you need a free video editing software like Windows Live Movie Maker. It just requires you to import camcorder video to Windows Live Movie Maker so that editing can take place. However, you have to beware of the compatibility issues that arise if the format is not supported by the software. UniConverter is the answer to resolving such problems.
Part 1. Supported Video and Photo Formats by Windows Live Movie Maker
Windows Live Movie Maker is a convenient and simple video editing software that creates, edits and then publishes videos on various online platforms like Flickr, Vimeo, Facebook and YouTube, among others. Some of its editing features include adding music, credits and titles. Others are adding effects like animations, transition and visual effects and zooming.
This Microsoft product accepts these videos from multiple sources, including camcorders. So, if you take videos using a digital camera or video camera containing a flash memory card or internal hard drive, you can easily Preferencesimport camcorder video to Windows Live Movie Maker and proceed with editing and uploading online. Therefore, this software is designed for anybody seeking to edit videos, including videographers, bloggers and persons that are active in social networking sites.
As you import camcorder video to Windows Live Movie Maker, there are multiple things that you should consider such as the supported video and photo formats. The software works perfectly when your videos are in the formats it supports. These include the following.
- AVCHD - MTS, M2TS
- Windows Media Video (WMV)
- Apple QuickTime files - MOV, QT
- MPEG-1 - M1V
- MPEG-2 - MPEG, MP2, MOD, VOB, MPG, MPE
- MPEG-4 - M4V, MP4, MOV
- DV-AVI - AVI
- Windows Media files - ASF, WM
- Motion JPEG files- AVI, MOV
- Microsoft Recorded TV Show files – WTV, DVR-MS
It is advisable to have your videos in any of the above formats, so that you can import camcorder video to Windows Live Movie Maker without issues.
Part 2. Import Camcorder Videos to Windows Live Movie Maker Easily
The following steps will ensure that you accurately import camcorder video to Windows Live Movie Maker.
Install and launch Windows Live Movie Maker
For you to import camcorder video to Windows Live Movie Maker, you need the essentials. These include the Windows Live Photo Gallery and the Windows Movie Maker. Download and install both. When done, launch Windows Live Movie Maker; Select Start, in the search box type Movie Maker and in the results choose Windows Live Movie Maker.

Import the camcorder videos to the photo gallery
a. Connect camcorder to PC
This involves connecting your camcorder to the PC using a USB cable. When done, go to the program and choose the File function situated at the upper left corner. Select Import from device.
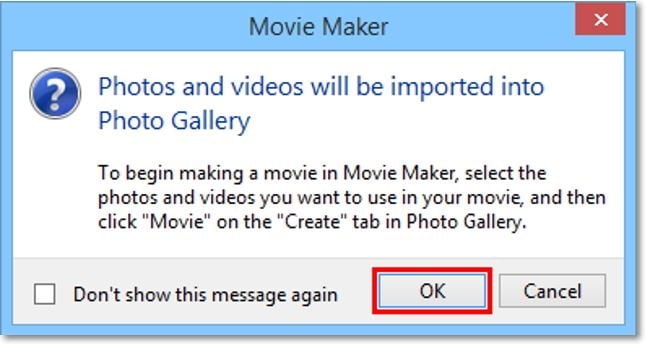
This will bring a message saying Photos and videos will be imported into Photo Gallery. Agree to this by selecting OK.
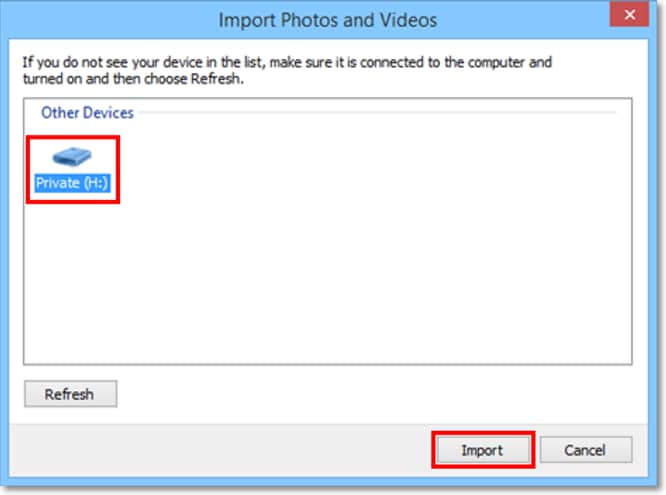
b. Import photos and videos
The import photos and videos window will appear, where you should choose the device containing the photos and videos you want to import. Verify by clicking on Import.
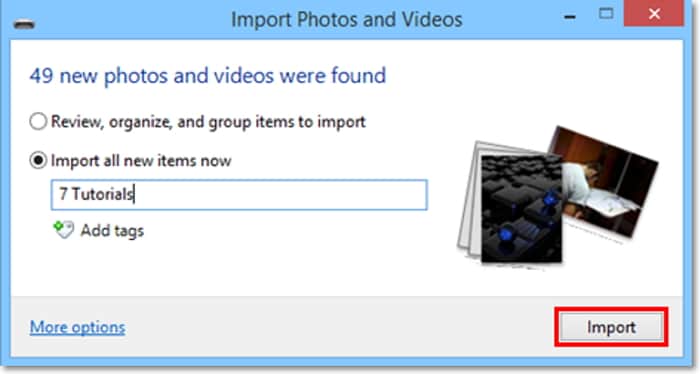
c. Import all new items
Another page named New photos and videos were found will appear. Here choose the option Import all new items, name the photos and videos and click Import. They should all appear in the photo gallery.
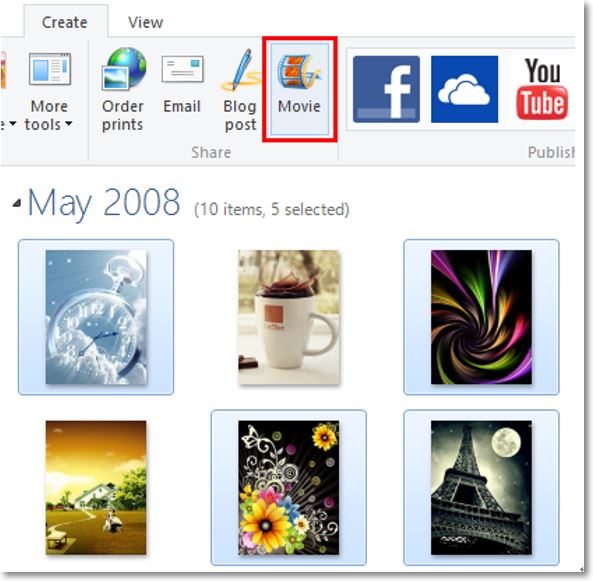
Add the camcorder videos to Live Movie Maker
In the Photo Gallery, choose the photos and videos you need sent to Windows Live Movie Maker. Go to the Create function and choose Movie. The chosen items will immediately be added in the Movie Maker storyboard.
Part 3. Import Camcorder Videos to Windows Live Movie Maker in Easier Way
In some cases, your videos may be in formats that Windows Live Movie Maker does not support. If you try to import camcorder video to Windows Live Movie Maker when the format is unsupported, the software rejects the process and is most likely to crash. Crashing indicates that the importation process is impossible.
Since you must import camcorder video to Windows Live Movie Maker despite this occurrence, you must use another method to achieve your goal. This method involves converting the unsupported format to one of the supported formats. An accurate conversion can only take place through iSkysoft Video Converter, a professional application that specializes in multiple tasks and functions concerning videos.
UniConverter is therefore, the ultimate format converter for your videos. It can change the video format instantly and at a high speed, without losing the quality. It is quite powerful and hence can handle high definition videos. It has amazing features such as the following.
UniConverter(formerly UniConverter)
- Support multiple photo and video formats like MOV, AVI, MP4, AVCHD, MPEG.
- Download videos from sharing sites like BBC and YouTube.
- Transfer content from computers to portable gadgets like iDevices.
- Convert formats to suit your requirements especially when using video editing software.
iSkysoft is the answer to your predicament when you face compatibility issues as you import camcorder video to Windows Live Movie Maker. It is reliable and trustworthy as well since it can handle batch process perfectly.
Steps to how to convert import camcorder video to Windows Live Movie Maker with iSkysoft
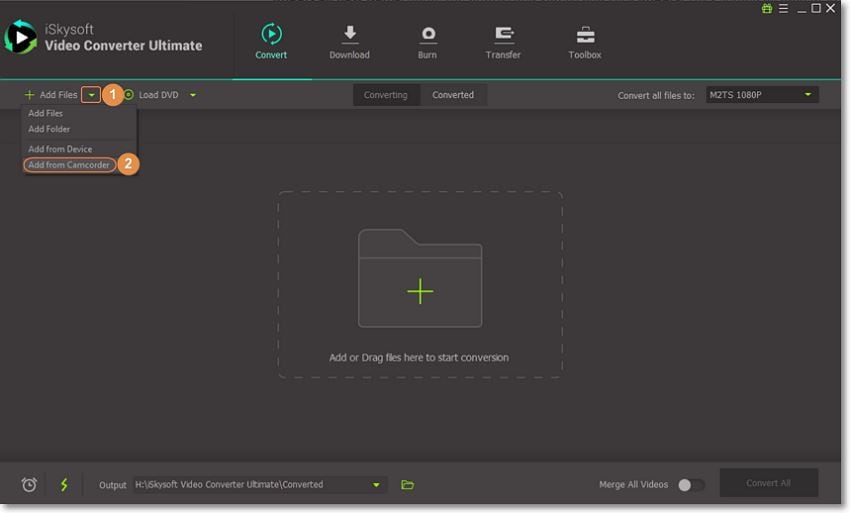
Add the camcorder video to the program
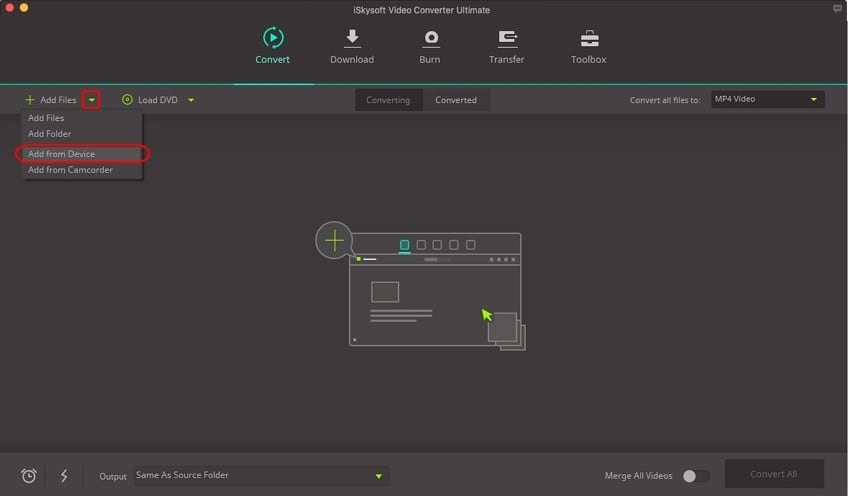
On the Convert tab, click on the drop-down arrow next to the Add File button and select Add from Camcorder. The program will load vidoes from your connected camcorder directly.
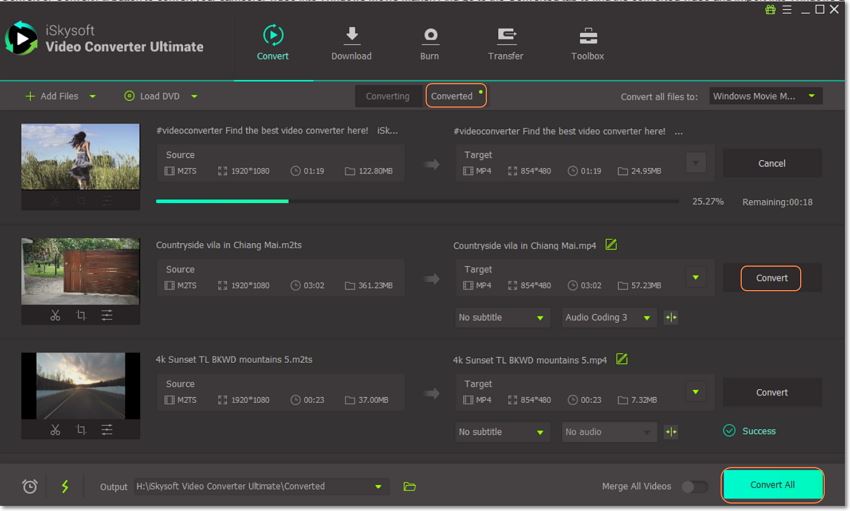
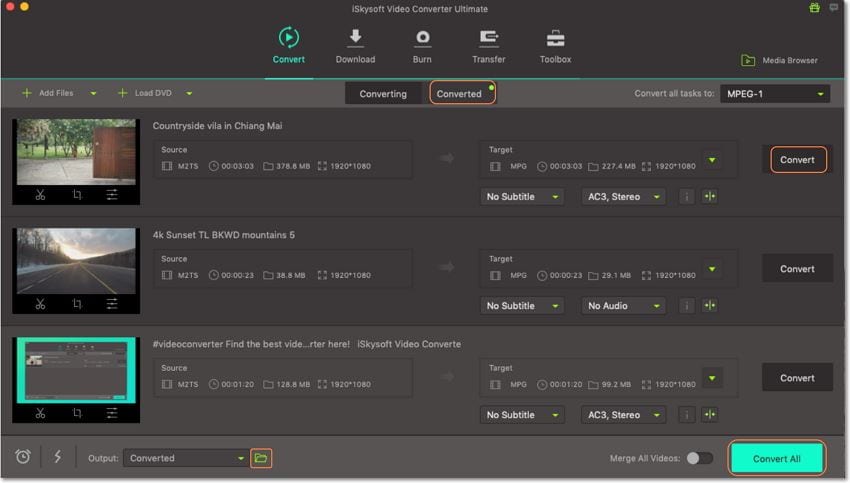
Set ouptut as Windows Movie Maker
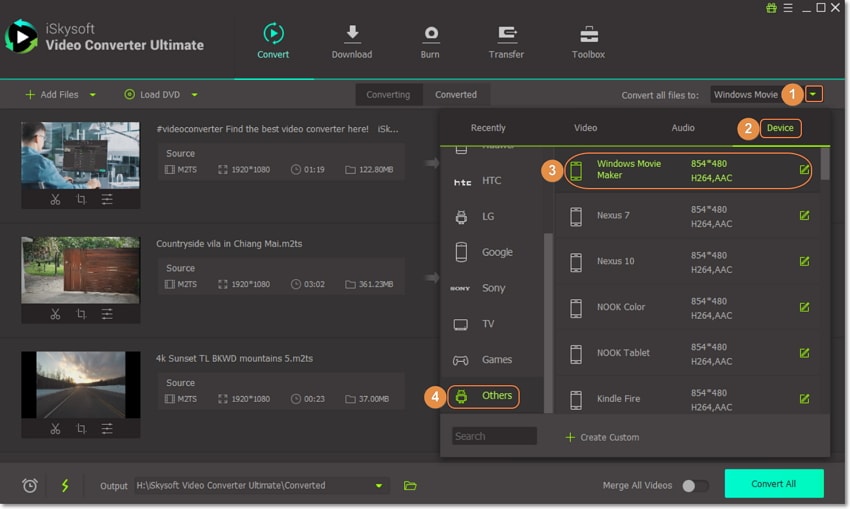
Convert camcorder video into Windows Live Movie Maker
After setting the output format, click on the Convert or Convert All button to convert your camcorer video into Windows Movie Maker. And go to the Converted tab to find the converted video and import into Windows Live Movie Maker for further editing.
Windows Live Movie Maker will cater to your needs when you want to edit the videos in your camcorder. However, it is imperfect and hence can crash if it does not support the format of your videos. The best way to resolve this issue is by using UniConverter to convert the unsupported format to the supported so that Windows Live Movie Maker can proceed working normally, and hence import camcorder video to Windows Live Movie Maker.
Camera Video
- 1. Import Camera Videos to Apps
- 2. Play Camera Videos on Devices
- 3. Convert Camera Videos to Other formats
-
- 3.1 Convert MTS to MPEG
- 3.2 Convert MTS to MKV
- 3.3 Convert MTS to MOV on Mac
- 3.4 Convert MTS to 3GP
- 3.5 Convert M2TS to AVI
- 3.6 Convert M2TS to MP3
- 3.7 Convert MTS to WMV
- 3.8 Convert M2TS to MP4
- 3.9 Convert MTS to FLV
- 3.10 Convert MTS to Prores
- 3.11 Convert MTS to QuickTime
- 3.12 Convert MTS to iMovie
- 3.13 Convert MTS with Handbrake
- 3.14 TS to MP4 Online
- 3.15 Convert MXF to MOV
- 3.16 Convert VRO to MP4
- 3.17 Convert DVR-MS to MP4
- 3.18 Convert MOD to MOV
- 3.19 Convert MOD to MP4
- 3.20 Convert HDV Video
- 4. Camera Video Converters
- 5. Camera Video Tips

Brian Fisher
chief Editor