Import Camcorder to Mac: Best Way to Import and Convert Camcorder Videos to Mac
by Brian Fisher Proven solutions
- "How do I connect my video camera to my Mac?"
Do you like shooting video? If so, you probably have a camcorder. It's a must-have to record video. As you know that camcorder supports limited video formats, such as DV, MPEG-2, AVCHD, etc. Want to play, edit or import camcorder videos on Mac ? Well, I'm afraid you need to convert your camcorder videos to Mac compatible formats like M4V or MOV first. Then you will be able to play camcorder videos with QuickTime or edit them in iMovie without any restriction. Don't worry! This article will show you how to import and convert camcorder video on Mac, step by step.
Part 1. Import Camcorder Videos to Mac by Converting for Playback
If you failed to import your camcorder video for playing or editing on Mac, ensure it's supported by your video player or editor software. If not, convert camcorder video to Mac supported format with a camcorder video converter. Now with UniConverter, you can easily convert camcorder video to Mac compatible formats within 3 steps.

UniConverter(formerly UniConverter)
- Directly convert camcorder videos to Mac players or editing tools supported format, such as MOV, MP4, AVI, FLV, M4V, etc.
- Directly transfer from camcorder with the help of this video converter.
- Convert camcorder videos to more than 150+ video or audio formats as you wish.
- Transfer converted AVCHD videos to mobile phones or tablets to enjoy on the go.
How to Convert Camcorder Video to Mac for Playing or Editing with iSkysoft
It only needs 3 simple steps to import and convert video from camcorder to Mac, no matter what macOS version running on your Mac. You will need to: connect camcorder - choose an output format - convert.
Let's dive into the detail below:
Connect and Import Camcorder Video to this AVCHD Converter
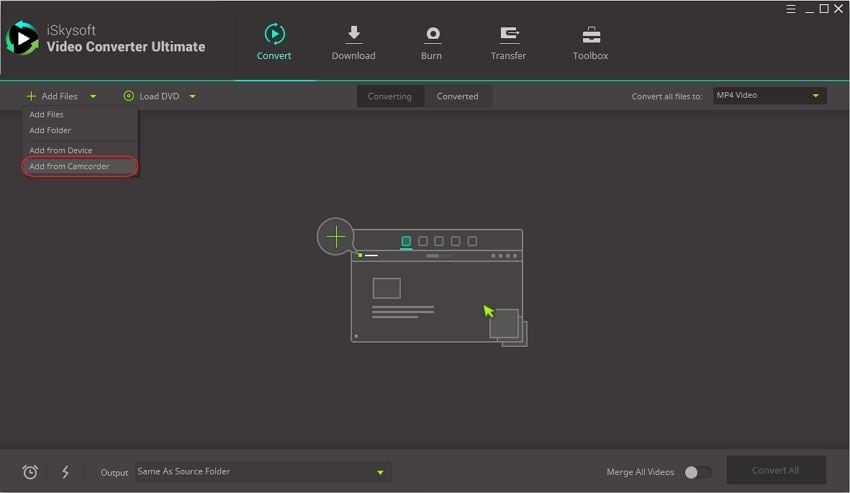
To start with, connect your camcorder to the Mac. Click the drop down icon and then select Import from Camcorder option, without extra process to transfer from your Canon/Sony/Panasonic/JVC or other camcorders to your Mac. Alternatively, if you have already have the camcorder video available on your Mac, you can easily add it by dragging and dropping.
Select Output Format
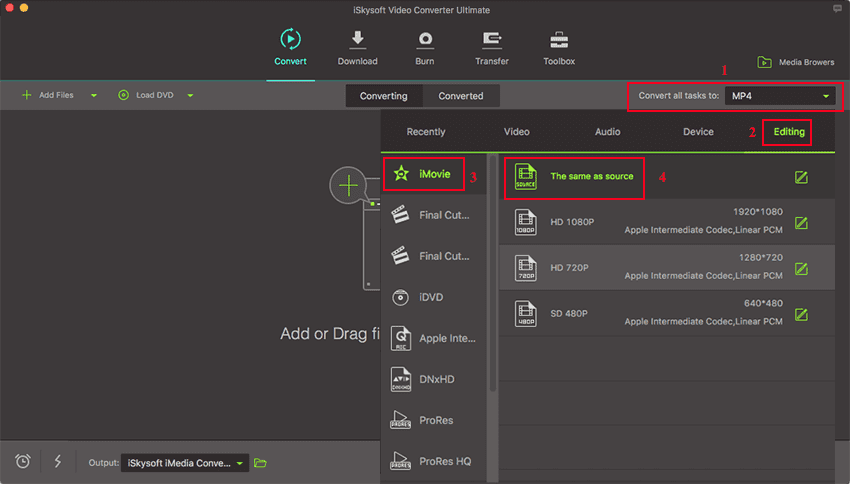
You will need to convert the camcorder video to Mac friendly format for further use. So after loading your camcorder video files, please check the format list on the right side and then go the Video or Editing option, and then MOV or iMovie as output format as needed.

Convert Camcorder Video to Import Video to Mac
Click Convert All button at bottom right and sit back. The conversion will complete in seconds. Now you can freely play your camcorder videos on Mac or edit them using iMovie. By the way, UniConverter can play camcorder videos whenever you want. And it is also equipped with a built-in video editor, which enables you to trim, crop and rotate video, or add subtitles/watermarks/special effects to your video. Just have a try.
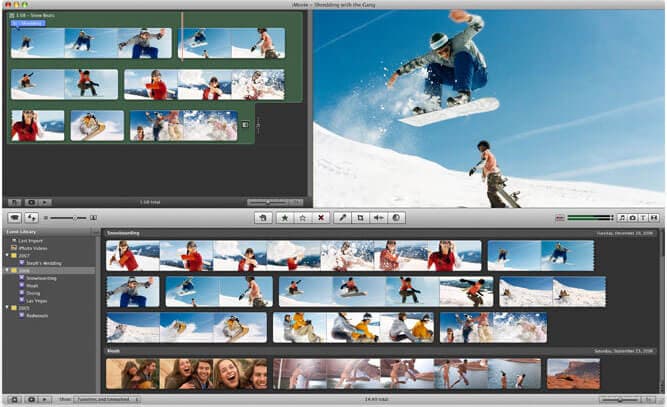
Part 2: How to Import Camcorder Videos for Editing in iMovie
Step 1: Connect your camcorder to Mac machine with cable (1394/FireWire/USB/Wifi).
Step 2: Switch to PC/Computer mode depending on your Camcorder model.
Step 3: iMovie will automatically open the Import window. Or you can open it by File > Import. If DVD Player opens, quit it.
Step 4: Choose the video or select "Import All"(make sure your camcorder's switch is set to "Automatic").
Step 5: If "Manual" is set, you can import some clip to iMovie.
Step 6: If you import from video from tape camcorder (DV/HDV), iMovie will automatically revise tape and import all videos.
Step 7: iMovie will automatically create video thumbnails after imported.
Part 3. More Useful Tips for Importing or Transferring Video to Mac
Tip 1. iMovie automatically detects your camcorder
iMovie will detect whether a camcorder is connected. When you have your camcorder connected with a cable, but is prompted "No Camera Attached", ensure your camera is powered on and re-connect your camcorder to your computer properly via a FireWire or USB cable. Also make sure your camcorder is set to VCR, VTR, or Play mode. Also click the Connection Help button for more suggestions.
Tip 2. iMovie supports different video formats
iMovie only compatible with limited video formats. For importing video from your camcorder, choose between DV, DV Widescreen, HDV 1080i, and HDV 720i. If you will add MPEG-4 files from your PDA or phone, select MPEG-4.
Tip 3. Import video as one clip (iMovie HD, iMovie '09)
Rather than importing your video as separate clips, you can set iMovie to import your MTS video as a single clip. This may be very useful if you're importing a movie that you've already edited and you just want to make a minor change. Do this: from the iMovie menu, choose Preferences, click Import, and then deselect the "Start a new clip at each scene break" option.
Tip 4. Make an HD video with iMovie
HD camcorders store more pixels than a standard camcorder, letting you record high quality video footage. iMovie supports importing and editing video from HD camcorders (HDV 1080i or 720p). But you decide whether to import HD camcorder video, or just large video. To make this settings, go to iMovie > Preferences > Video.
Tip 5. Import video to Mac before importing to iMovie
Many digital still cameras, PDAs, and mobile phones let you record videos in the MPEG-4 format, a standard compression that is used to significantly reduce the file size of video. While iMovie doesn't know how to import video from these devices directly. Therefore, you can copy them to your Mac first and then drag them into the iMovie Clips pane from Finder or import them using Import from the "File" menu.
Tip 6. Using video from your connected or built-in iSight camera
It's a good idea to use your iSight camera to record video directly into your iMovie project. To doso, connect your iSight camera to the FireWire port of your Mac and click the Record button to start recording. If you have more than one camcorder connected, such as an iSight and a camcorder, or an built-in iSight with iMac, you need choose iSight from the pop-up menu that appears when you switch to camera mode.
Tip 7. Monitor free disk space remaining on your Mac (iMovie HD, iMovie '09)
Digital video clips may consume a large amount of hard disk space. Generally, 5 minutes of DV footage uses approximately 1GB of space. The same amount of HD video can occupy between 2GB to 4GB, depending on codec and resolution. To save hard disk space, import and edit your video in segments instead of editing all at one go. Through the monitor located in the lower-right corner of the iMovie window, you're able to see how much space remaining on your Mac's hard drive.
Camera Video
- 1. Import Camera Videos to Apps
- 2. Play Camera Videos on Devices
- 3. Convert Camera Videos to Other formats
-
- 3.1 Convert MTS to MPEG
- 3.2 Convert MTS to MKV
- 3.3 Convert MTS to MOV on Mac
- 3.4 Convert MTS to 3GP
- 3.5 Convert M2TS to AVI
- 3.6 Convert M2TS to MP3
- 3.7 Convert MTS to WMV
- 3.8 Convert M2TS to MP4
- 3.9 Convert MTS to FLV
- 3.10 Convert MTS to Prores
- 3.11 Convert MTS to QuickTime
- 3.12 Convert MTS to iMovie
- 3.13 Convert MTS with Handbrake
- 3.14 TS to MP4 Online
- 3.15 Convert MXF to MOV
- 3.16 Convert VRO to MP4
- 3.17 Convert DVR-MS to MP4
- 3.18 Convert MOD to MOV
- 3.19 Convert MOD to MP4
- 3.20 Convert HDV Video
- 4. Camera Video Converters
- 5. Camera Video Tips

Brian Fisher
chief Editor