Wondershare UniConverter for Windows | Smart Trimmer
Video trimming is a typical procedure in video editing, yet it can be a simple but time-consuming task. Intelligently Trimmer in Wondershare UniConverter 13 can now auto-extract and delete clips, and you can smart trim videos by configuring parameters to recognize abnormal audio in your videos. You can auto-trim clips based on audio level and length, for example, smart delete clips whose audio volume is less than 20% of the maximum volume in the original video or auto-extract clips that are mute in the original video for more than 2 seconds.
How to use Wondershare UniConverter 13 to smartly cut videos?
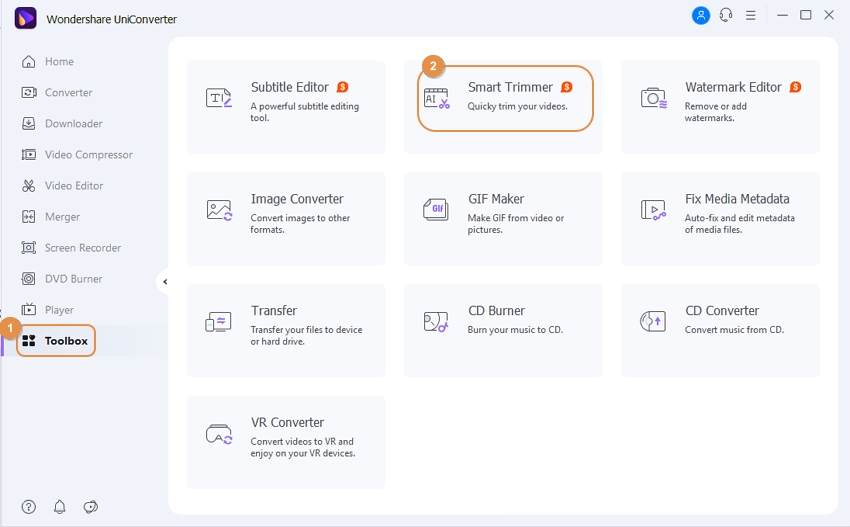
By default, when you download, install, and open Wondersahre UniConverter, you will be sent to the Homepage tab. To access the interface for the software's extra tools, click Toolbox. To open the window where you can import videos, click the Smart Trimmer.
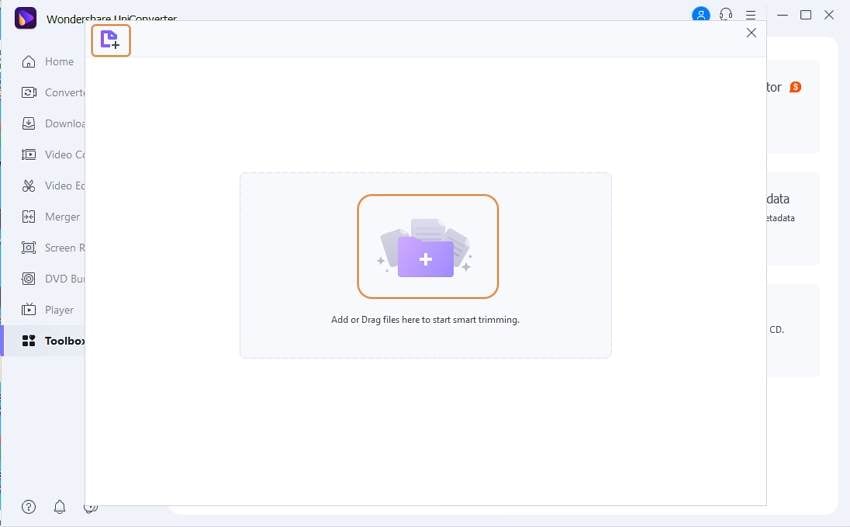
Select a file to import by clicking the Add Files button.
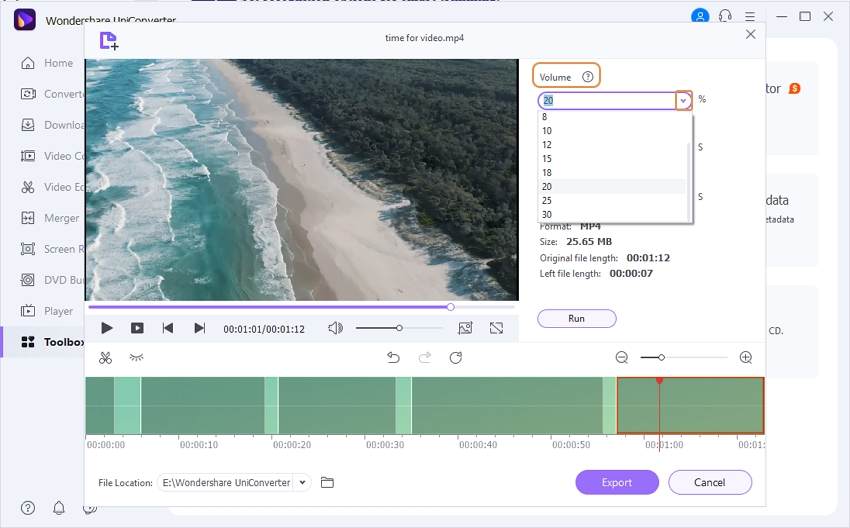
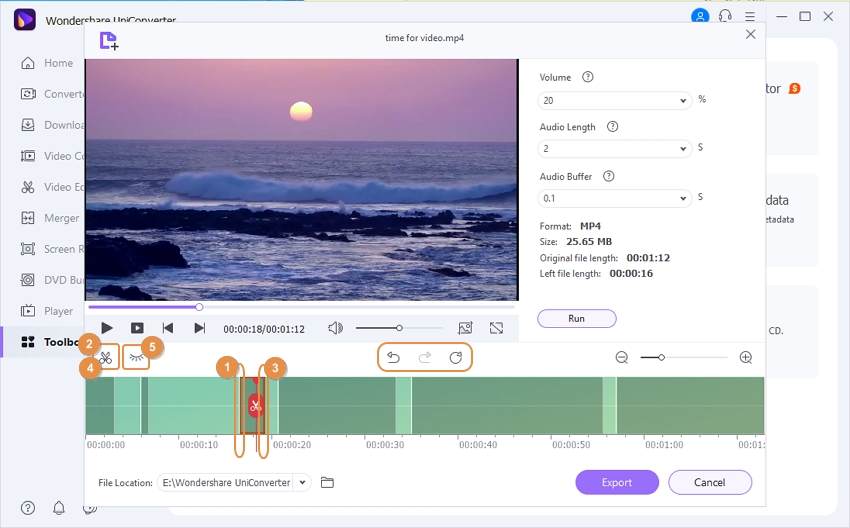
You must first pre-set the audio criteria, which are based on recognizing the irregular areas of your movie before you can begin auto-trimming. Audio Volume, Audio Length, and Audio Buffer are the three settings available.
1. Audio Level: You can set this to 0 - 30%, which means the Smart Trimmer will auto-recognize and delete parts of your movie whose audio volume is less than the percentage you pick when compared to the original video.
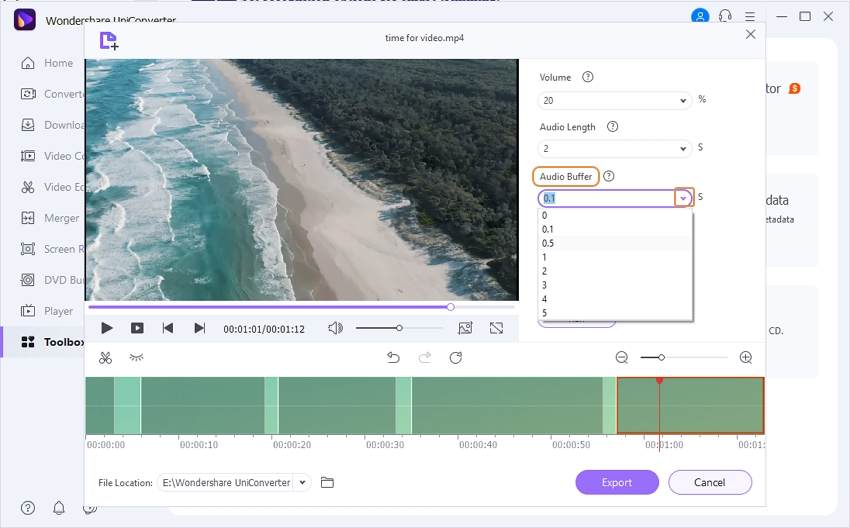
2. Audio Length: You can adjust this to 1 - 20s, which means you can have the Smart Trimmer auto-extract and eliminate clips that have no sound throughout the time you specify.

3. Audio Buffer: If you want to trim your video more precisely, you can increase the clipping node's extension area, which can more intelligently identify some parts that meet the above two conditions but are not suitable for trimming to make the video smoother, such as the voice of the speaker breathing. To prolong the buffer period, go to Audio Buffer and set 1 - 5s.
After you've established all of the recognition conditions, click the Run button to retrieve auto-trimmed clips, which you can watch on the timeline below to check which parts are hidden (and should be deleted). If you notice that there are more portions that should be eliminated, you can use the mark bar to choose and mark the parts you want to cut by clicking the Scissors icon, then hiding them with the Closed Eye indicator. Select the component you don't want to delete and click the Closed Eye button to make the parts visible (keep).
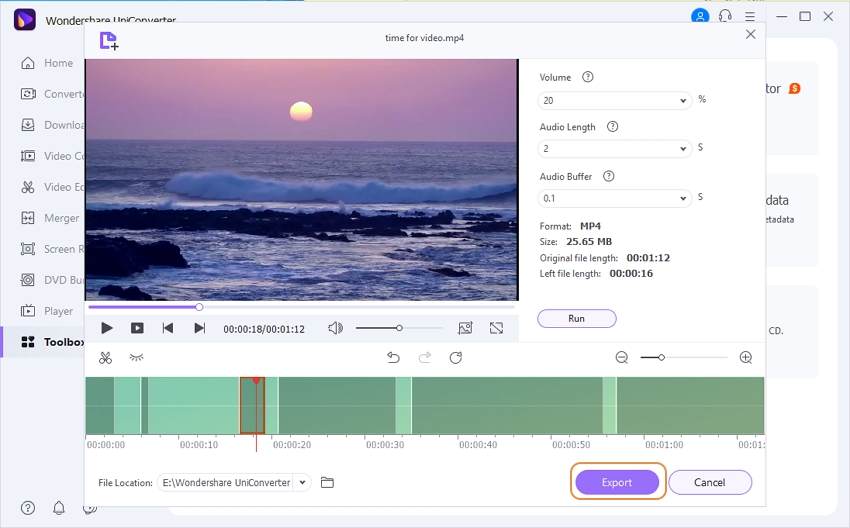
You can Undo and Redo in this video editing software.
Finally, click the Export button to quickly save the automatically cut movie.
User Guide
-
Get started
-
Video Converter
-
Video Editor
-
Video Compressor
-
Screen Recorder
-
Video & Audio Downloader
-
DVD Burner
-
Merger
-
Audio Converter
-
Toolbox of Uniconverter