How to Make GIF Files
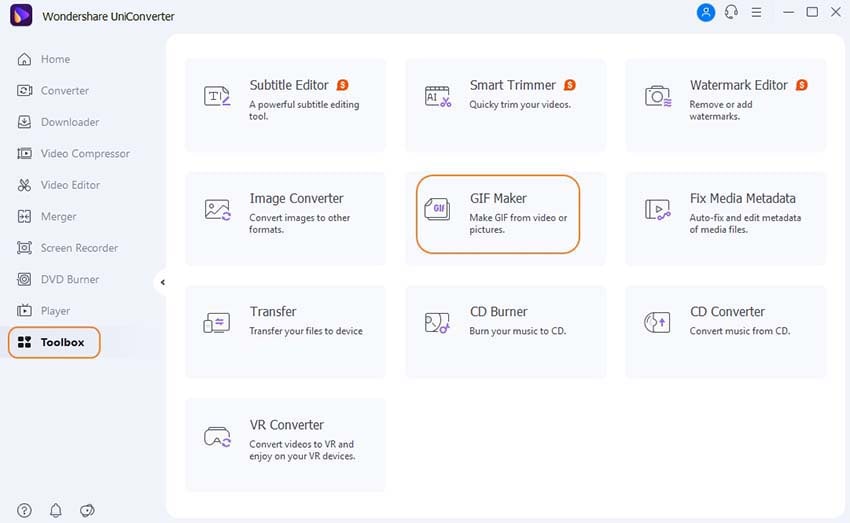
The list of primary functions appears on the left side of the main interface when you open the Wondershare UniConverter software on your machine. Select Toolbox > GIF Maker from the drop-down menu.
A new window will open, with the options to convert Photos or Videos to GIF. Select the option to convert photos to GIFs.
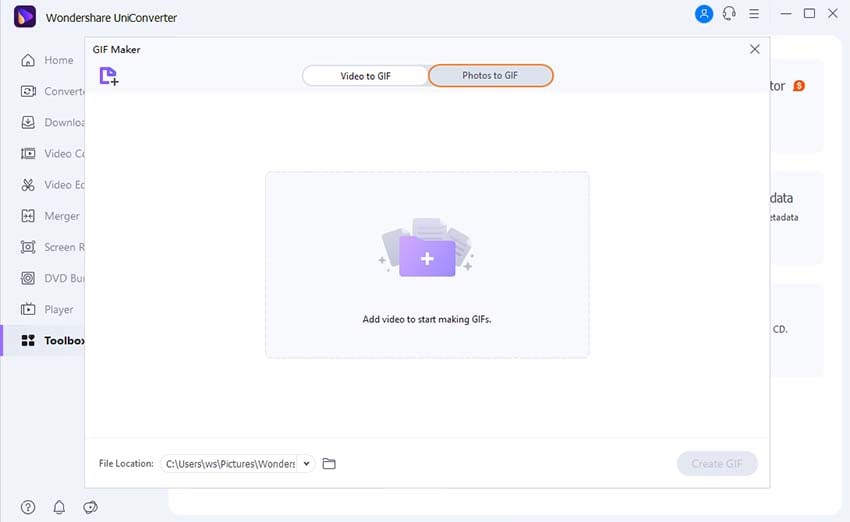
Part 1. Create a GIF from a photo.
JPG, JPEG, PNG, and BMP are supported as input image formats for Windows.
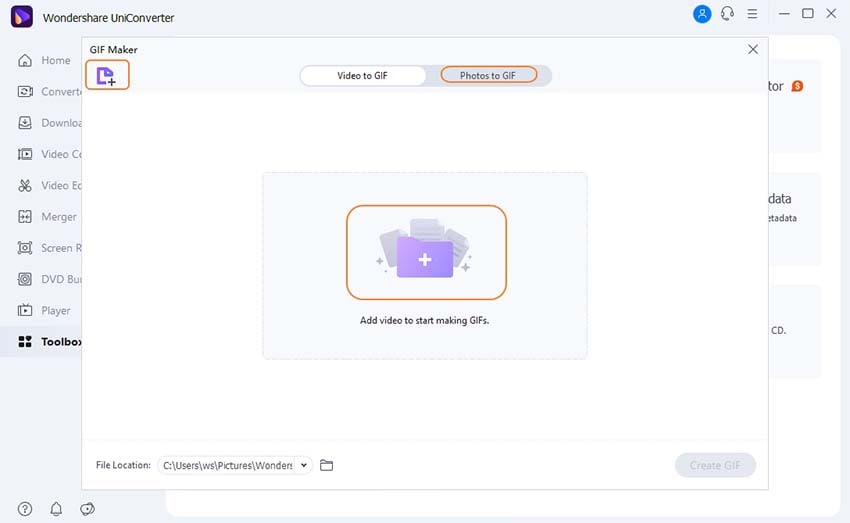
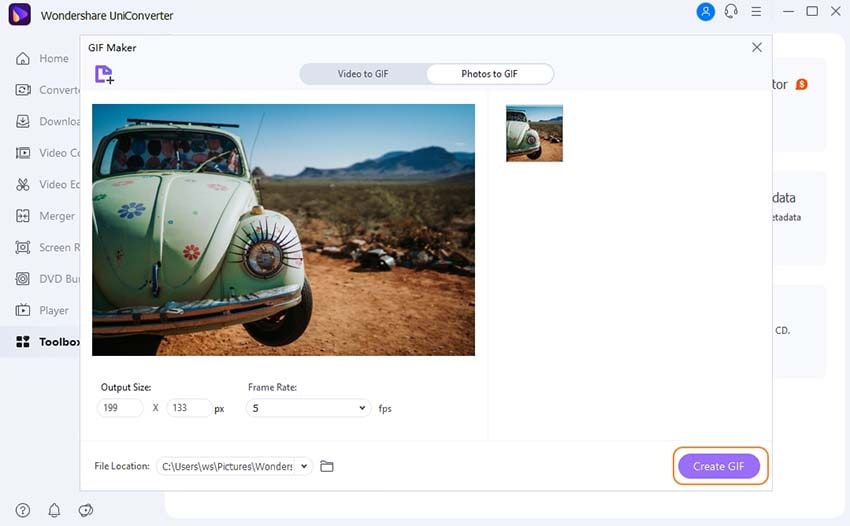
To browse and load an image from your computer, click the Plus icon in the center or the add files button in the top left corner of the window.
In the bottom-left corner, change the output size, frame rate, and file location.
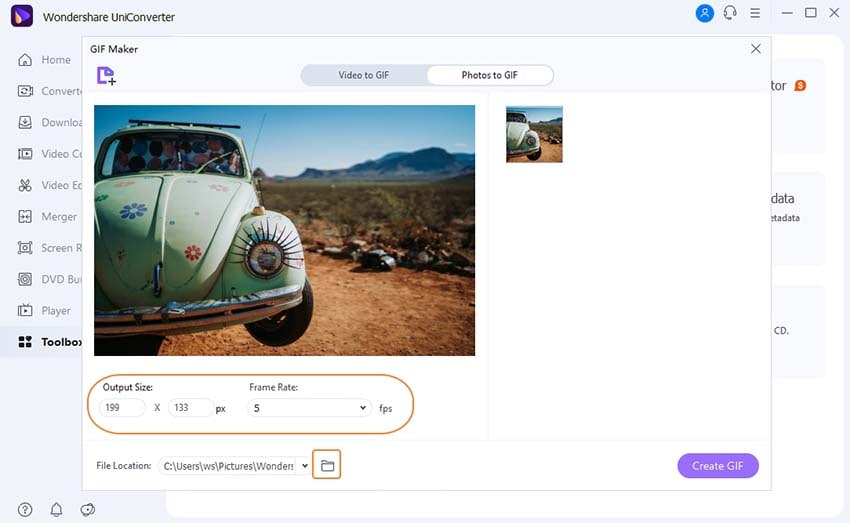
To begin converting photographs to GIF, click the Create Gif button.
Part 2. Making GIFs from Videos.
MP4, M4V, AVI, MOV, 3GP, MPEG, MPG, DAT, ASF, WMV, VOB, MKV, and 3GS are all supported input video formats for Windows.
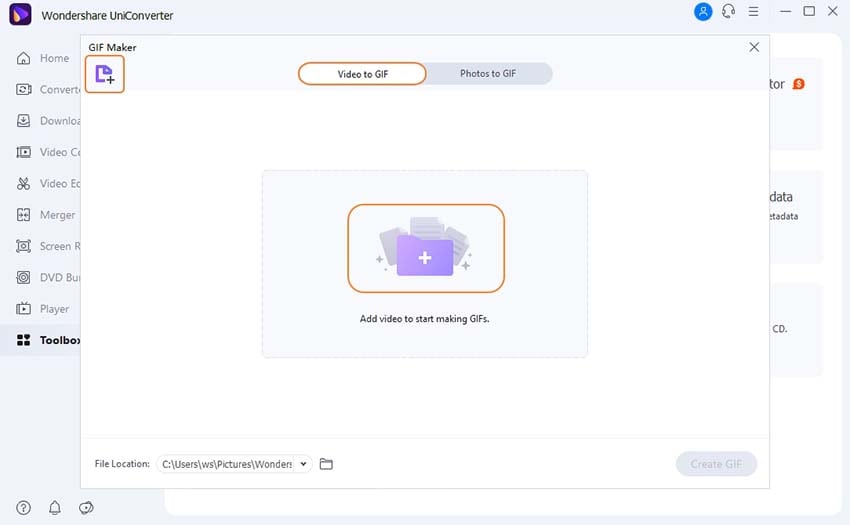
To import the video for which you need to make a GIF, go to the Video to GIF tab and click the Plus symbol or the add files button in the top-left corner.
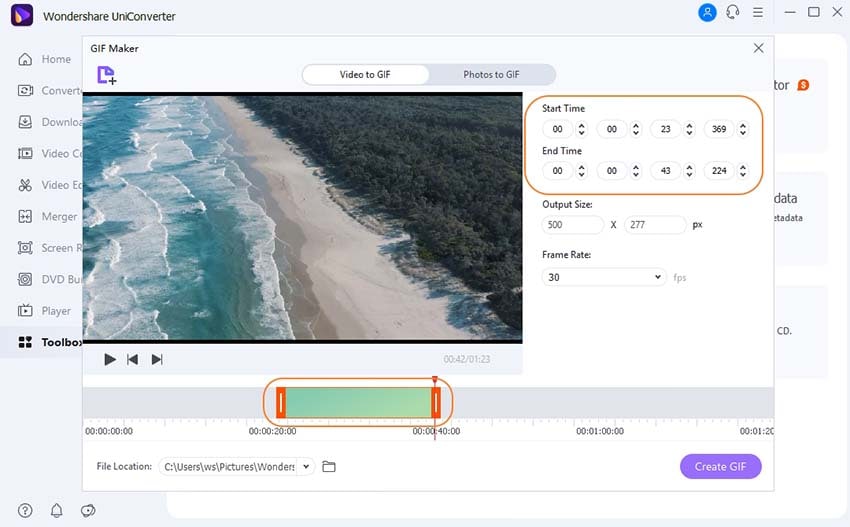
Choose the video clip you wish to convert to a GIF. You can either type in a certain start/end time or move the side lay beneath the video.
To continue, adjust the output size, frame rate, and file location as needed, then click Create Gif.
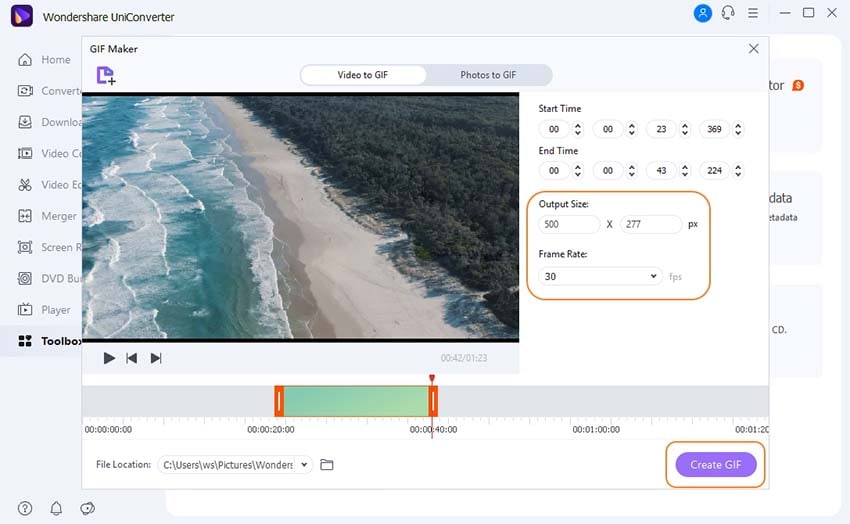
You've completed your GIFs! Share with your friends to immediately impress them.
User Guide
-
Get started
-
Video Converter
-
Video Editor
-
Video Compressor
-
Screen Recorder
-
Video & Audio Downloader
-
DVD Burner
-
Merger
-
Audio Converter
-
Toolbox of Uniconverter