How to Record Audio on Windows
To record the system sounds, you don't need to use a microphone on your computer. Because you may use a powerful audio recorder like Wondershare UniConverter to capture high-quality audio with no background noise. This program is compatible with Windows 10, 8, and 7, as well as Mac OS X 10.9 or later. Wondershare UniConverter allows you to select the input microphone, output speaker, and target format when recording audio. And, lest I forget, this fantastic piece of software allows users to chop, compress, convert, and merge their recorded audios.
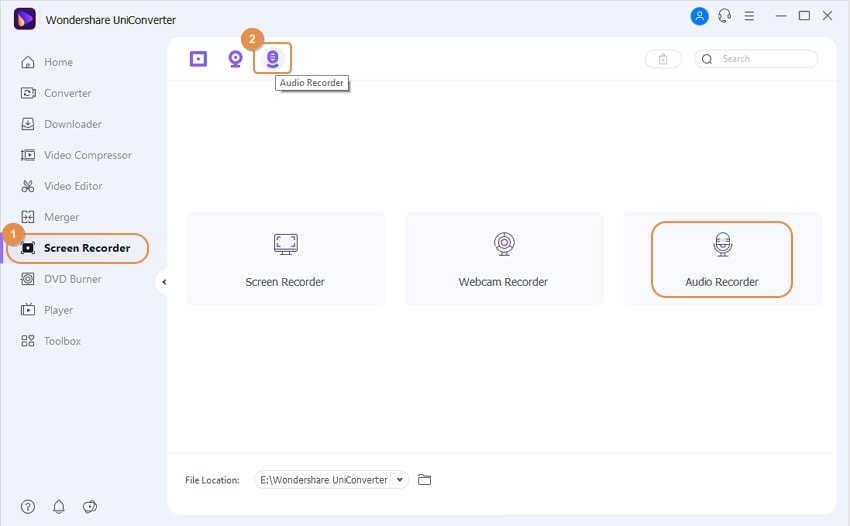
Wondershare UniConverter can be downloaded, installed, and loaded on your PC. On the left pane, select the Screen Recorder tab. Click the Audio Recorder icon in the upper-left corner of the pane or tap the Audio Recorder in the middle area of the pane from the available options, and the function will activate immediately.
Select an output speaker or headphone from the Speaker list after connecting it. Select your computer's internal microphone or connect and select an external microphone by clicking the Microphone menu. Finally, go to the Format list and select MP3, WAV, or M4A as the format for your recorded audio. If you wish to mute everything, click the Speaker and Microphone icons.
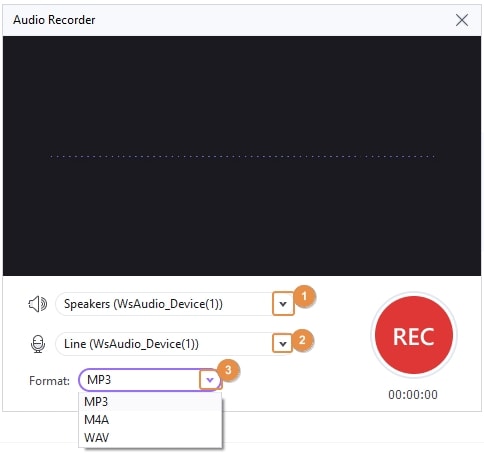
Tips: If your microphone is linked via Bluetooth, UniConverter will recognize it and display it in the Microphone option for you to select.
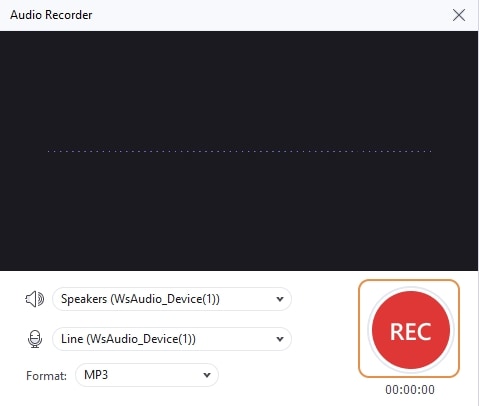
To start recording your voice on your PC, press the REC (record) button.
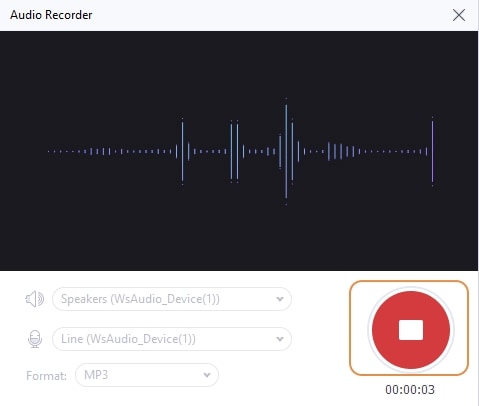
If you're happy with the results, press the Stop button and then dismiss the Audio Recorder tool.
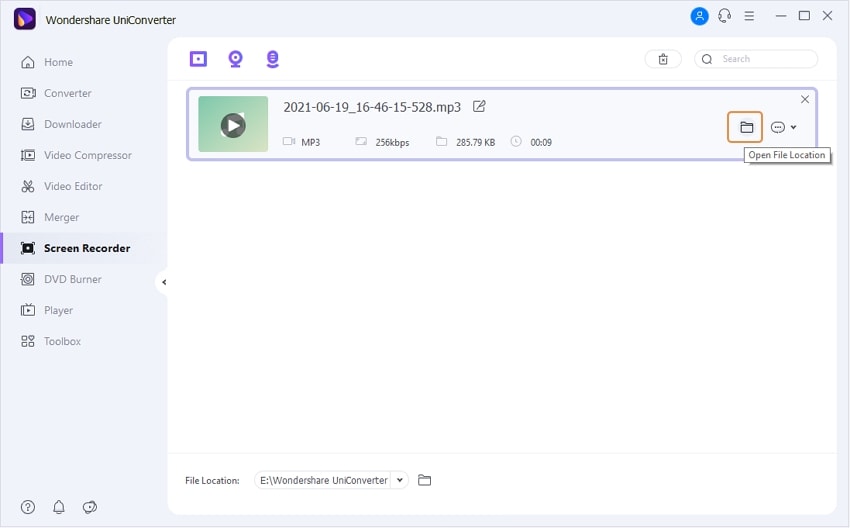
To hear a preview of your recorded audio, press the Open button.
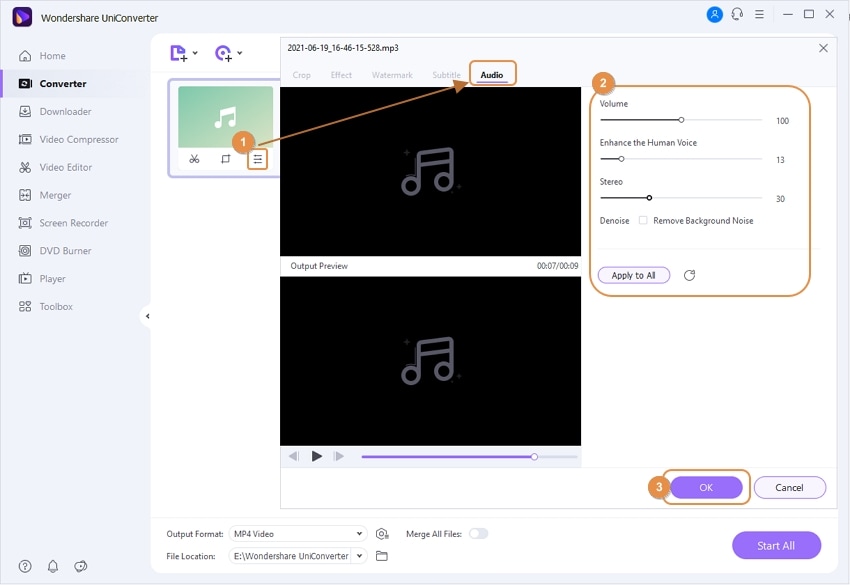
Don't erase your audio if the level is too low or too high; Wondershare UniConverter can let you change it straight away. Before sharing, you can also trim the audio to remove any undesirable sections. The steps are as follows:
You'll notice some options if you right-click the recorded audio file on the panel. Select the Converter option from the Add menu. Return to the Converter section, where you'll see that the recorded audio file has been added to this panel.
Then, on your imported audio, hit the Crop icon and drag the volume bar to change the sound level.
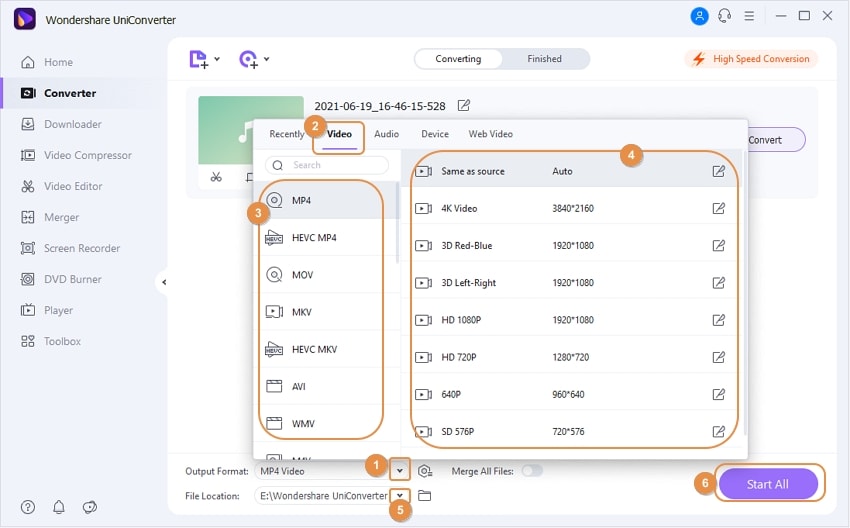
Do you wish to convert the audio you've captured to a different file format? Select a new file format beneath the Audio section after clicking the Output Format textbox. You can also provide a bitrate for the output. Finally, under the File Location section, select a folder path, then touch the Start All button. That's all there is to it!
By selecting the Options icon from the top-right portion of the interface, selecting Preferences from the menu, selecting location from the Location tab, and selecting Change from the Save recorded files to section, you can learn about or change the default save location for recorded files.
User Guide
-
Get started
-
Video Converter
-
Video Editor
-
Video Compressor
-
Screen Recorder
-
Video & Audio Downloader
-
DVD Burner
-
Merger
-
Audio Converter
-
Toolbox of Uniconverter