How to Convert CD to MP3 Audio Files without Losing Quality
Wondershare UniConverter enables you to convert CDs to popular audio formats like as MP3, WAV, M4A, and others. The steps for doing so are listed below.
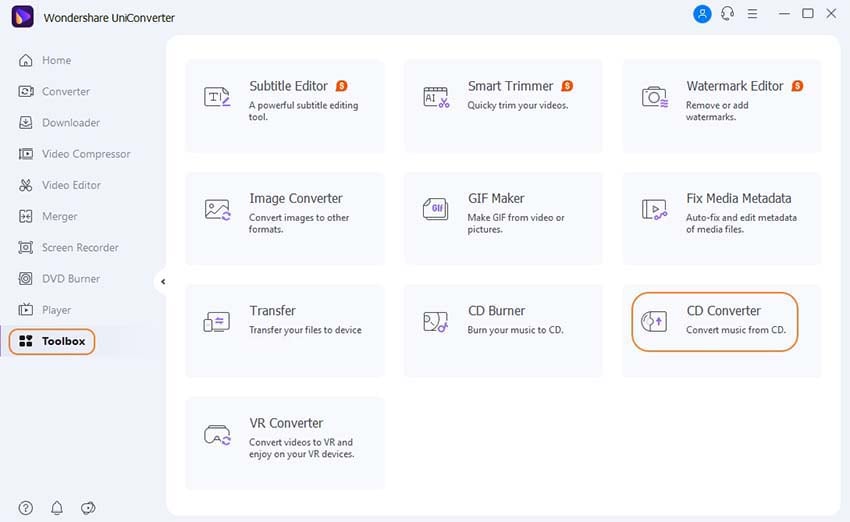
Go to the Toolbox section on the main interface of the Wondershare software. From the list of supported functions, choose CD Converter.
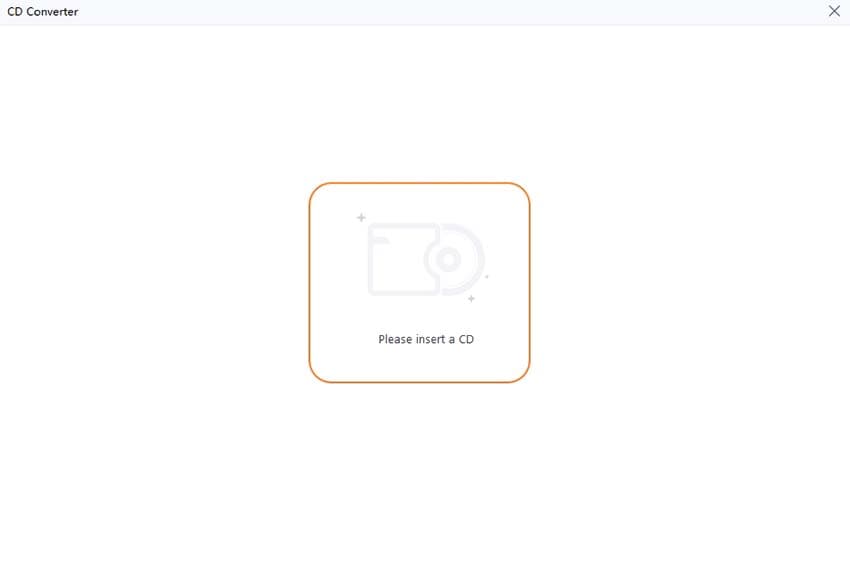
You will be prompted to insert a CD in a pop-up window.
All audio files will be presented on the interface after you've attached your CD to the computer. Select the audio files you want to convert, and then click the Play icon to listen to a sample.
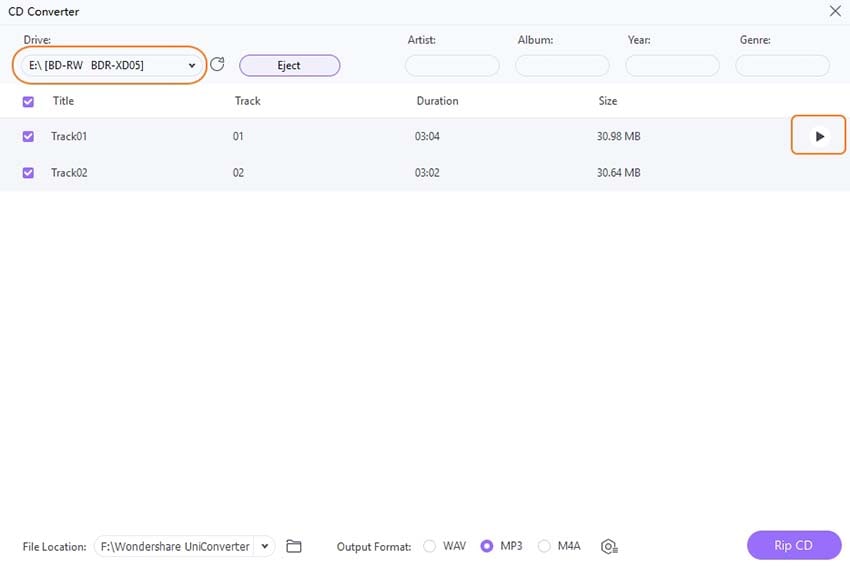
Tips: If Wondershare UniConverter is unable to recognize your CD, please restart the program and select the CD Converter option again.
Depending on your demands, select WAV, MP3, or M4A as the output format. More characteristics, such as Channel, Sample Rate, and Bitrate, can be customized by clicking the setting icon.
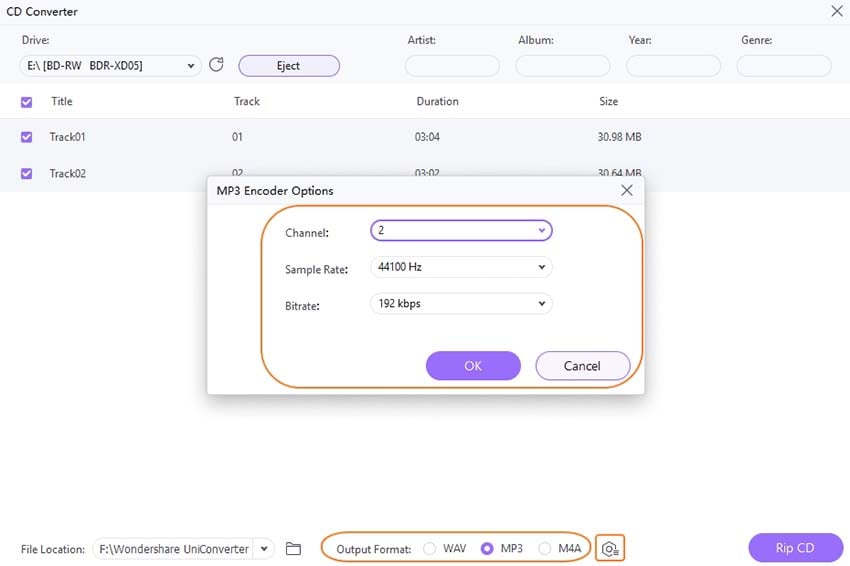
On the Output tab, select the file output folder. Finally, press the Rip CD button to begin the process of converting CDs to audio files without sacrificing quality.
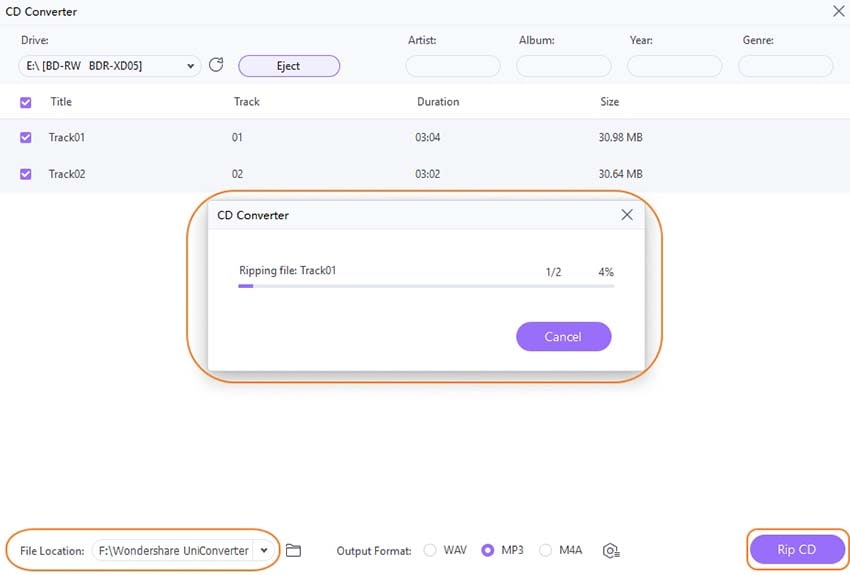
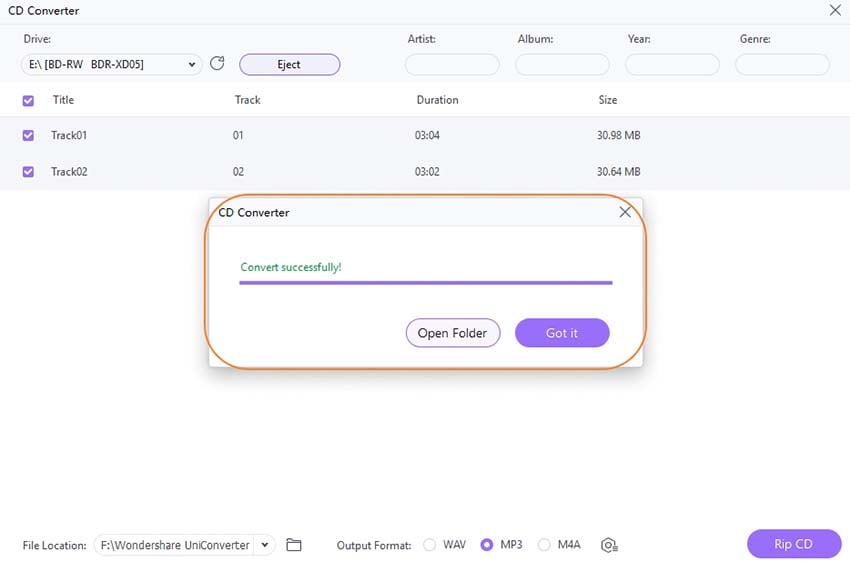
After the process is completed, you will receive a Convert successfully notification. To find your converted audio files, click the Got it button and then the Open Folder button.
User Guide
-
Get started
-
Video Converter
-
Video Editor
-
Video Compressor
-
Screen Recorder
-
Video & Audio Downloader
-
DVD Burner
-
Merger
-
Audio Converter
-
Toolbox of Uniconverter