How to Simultaneously Record Yourself and Your Desktop Screen
You'll need to explain everything on your PC with explicit instructions and audio narrations if you run a software review blog or a YouTube channel. Fortunately, the screen recorder tool of Wondershare UniConverter makes this simple. You may fast and effortlessly record a piece or the complete desktop screen with this program by simply cropping. You may even add text, fonts, colors, and shapes while recording. Plus, this app can edit the recording by cutting, adding subtitles, applying background music, and more.
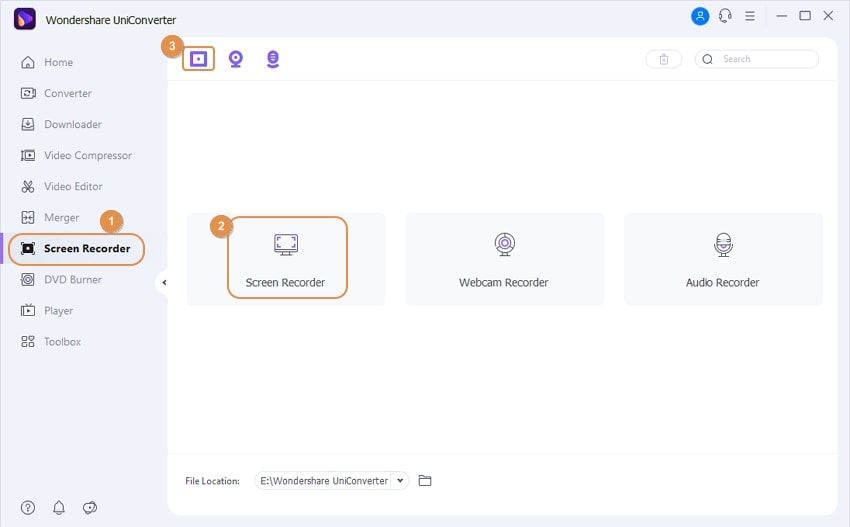
Install and launch Wondershare UniConverter on your Windows or Mac computer (as shown in this example). To use the Screen Recorder, go to the left pane and click it. Then, in the center of the display, tap the Screen Recorder icon to open the Screen Recorder function. Alternatively, you can start screen recording by clicking the Screen Recorder icon in the top-left corner.
Open the window or app you want to record, then drag the cropper to determine the capture area. Simply pick Custom from the drop-down arrow underneath the cropper and specify a recording location. Choose Full Screen option to capture the complete screen. Another option is to manually enter the Width (W) and Height (H).
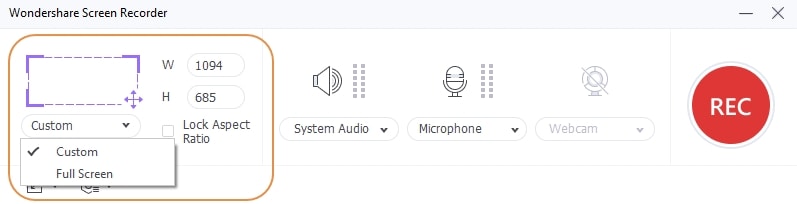
Note:To configure the capturing area proportionally, check the Lock Aspect Ratio option.
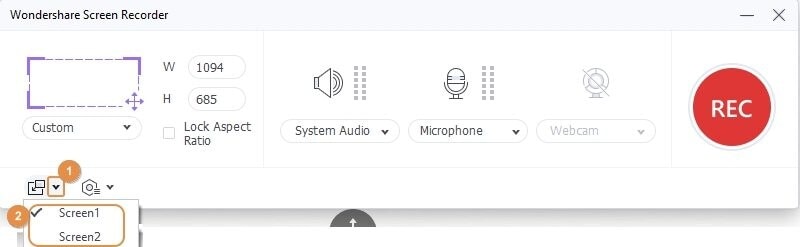
Tips:Wondershare UniConverter also enables dual screen recording; click the Swith Screen symbol beneath the Gear icon to switch the screen to record. Then repeat the procedure to begin recording your chosen screen.
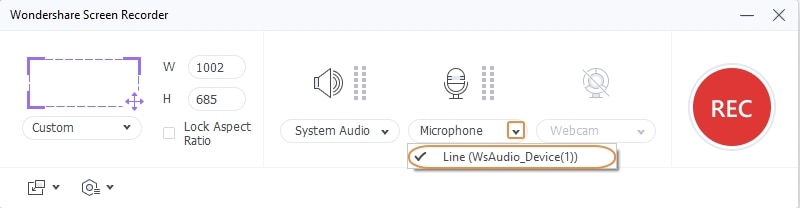
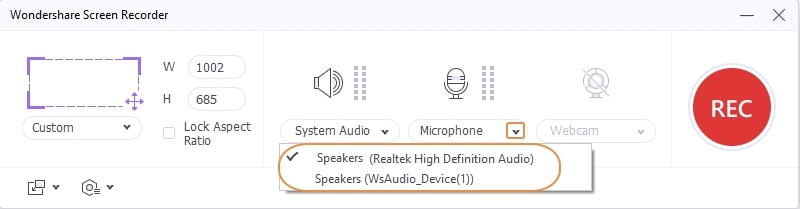
You can use the system's internal microphone or attach an external microphone and pick it from the Microphone list to record a desktop screen with voice narrations. To turn off any voice narration while recording, click the Microphone button.
You can also choose an audio source from the System Audio menu. Click the Speaker icon above the System Audio to stop the Screen Recorder from recording any sound the system makes.
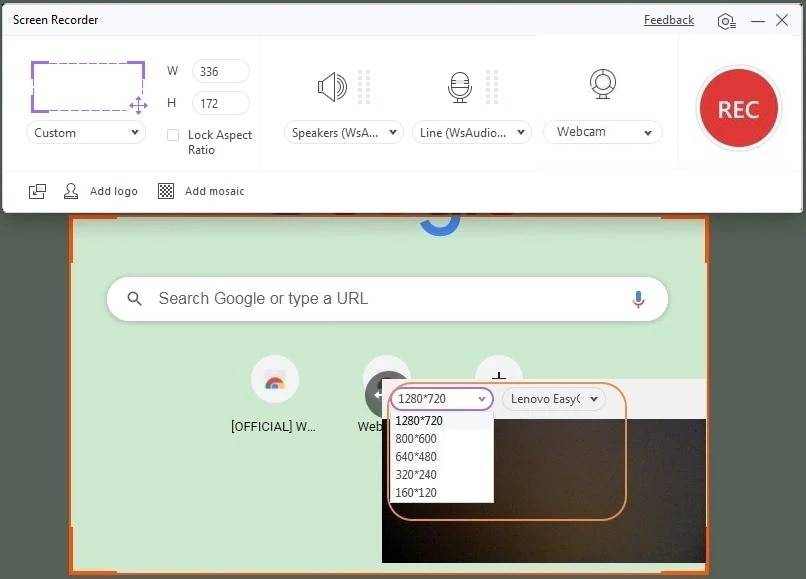
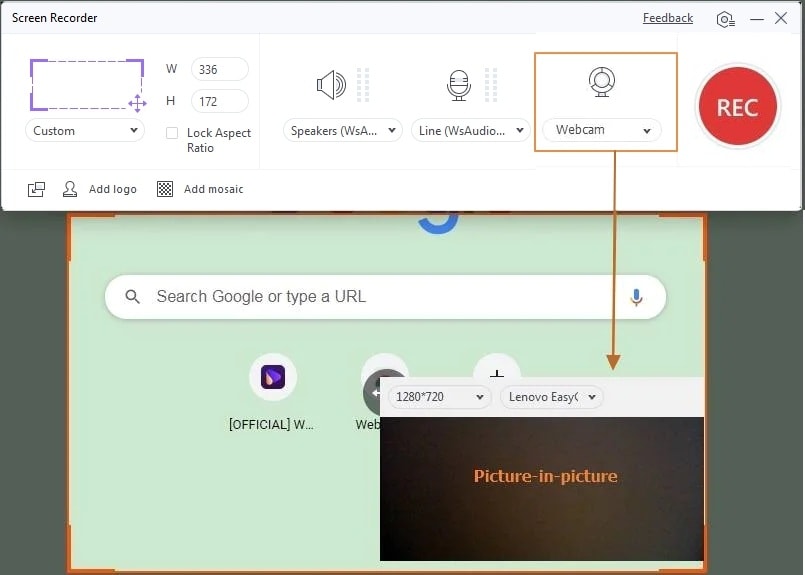
Activate the picture-in-picture mode to draw your audience's attention. You may see yourself when you record the desktop screen in this scenario. To choose a camera, press the Webcam symbol and then open the drop-down menu below it. The output resolution of the pop-up webcam window can be changed to 1280 x 720, 640 x 480, 640 x 400, and other options.

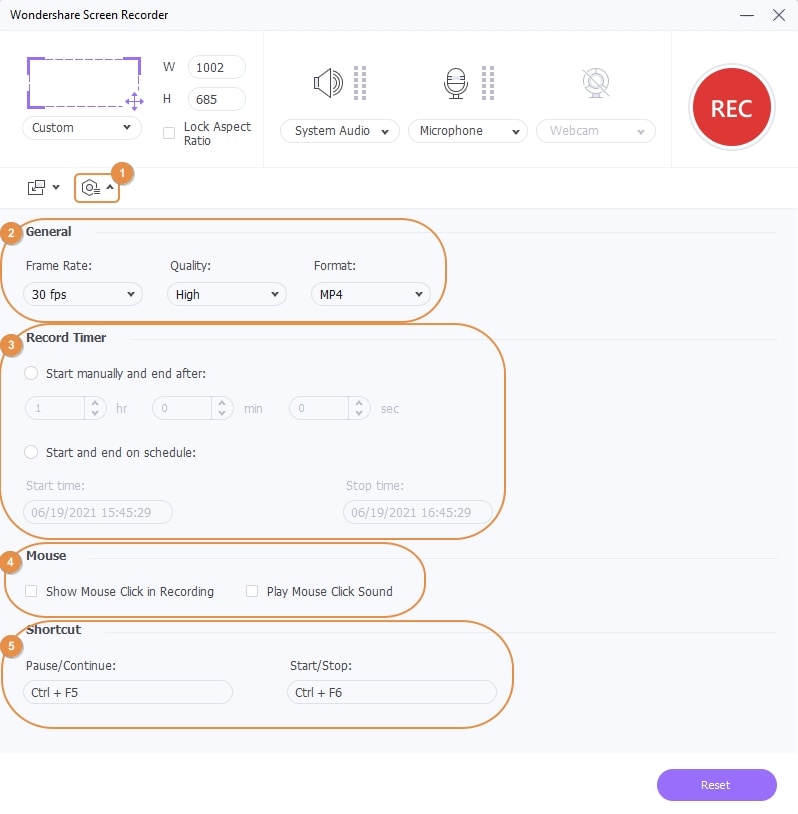
To open the settings box, tap the Gear symbol underneath the REC (record) button. Now go to the following pages to select your recording preferences:
General: Select the output frame rate, quality, and format from the drop-down menus. You can save the recorded video as an MP4, AVI, or FLV file.
Tap the Start manually and end after checkbox under this area to enter your preferred recording duration. You can also use the Start and end on schedule checkbox to choose a start and end time based on the date, month, or even year. Please keep in mind that you may only select one checkbox at a time.
Mouse: Allow or deny mouse arrow and click sounds during the recording session by checking the boxes under this section.
Shortcut: You can set keyboard shortcuts for starting and terminating the recording session, as well as playing and pausing the recording, under this section.
Note: To reset all custom preferences to factory defaults, click Reset in the bottom-right corner of the enlarged interface.
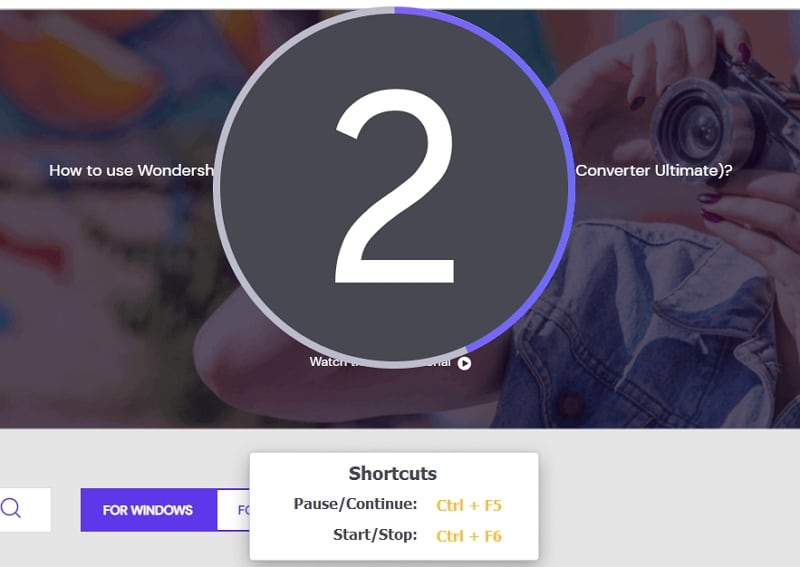
Close the Settings panel using the Gear symbol, then press the REC button to start the recording session. Wondershare UniConverter will begin capturing your desktop screen after the count of three.
But it doesn't end there; there are a slew of other tweaks to take advantage of. By pressing the Picture icon, for example, you can take a screenshot. By pressing the Webcam and Microphone icons while recording, you can mute the voice and turn off the webcam.

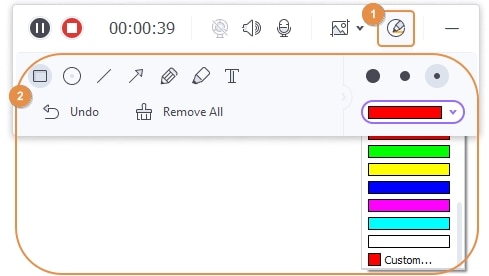
Meanwhile, to add custom shapes, colors, drawings, lines, words, and fonts, click the circle with a Pencil within. Remember that you can undo and erase your creative items using the app.
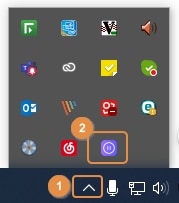
Note: If the screen recorder taskbar is becoming a nuisance in your workspace, you can minimize it during the recording session. Open it from your computer's Toolbars, which are always at the right-bottom corner, as shown in the image below.
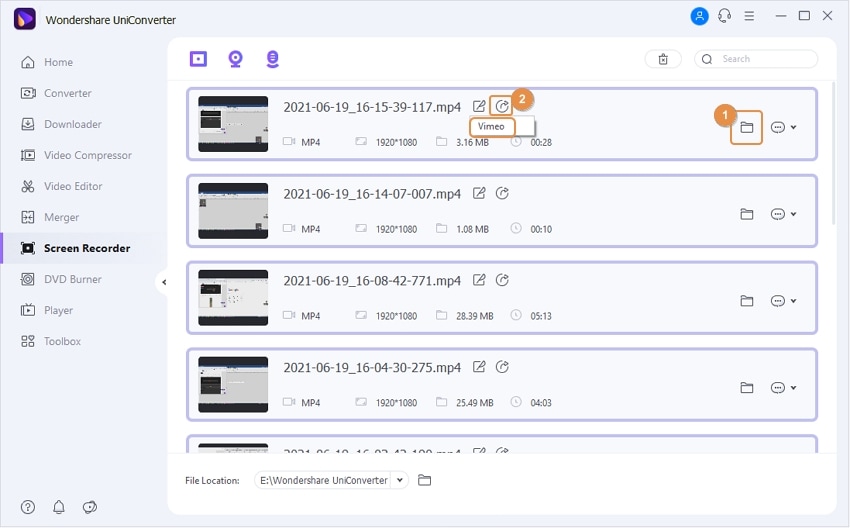
Finally, use the Stop button to end the recording session. The Screen Recorder function will shut down on its own. To preview your video, click the Open button, and then the Share icon to upload it to Vimeo.
User Guide
-
Get started
-
Video Converter
-
Video Editor
-
Video Compressor
-
Screen Recorder
-
Video & Audio Downloader
-
DVD Burner
-
Merger
-
Audio Converter
-
Toolbox of Uniconverter