What Is the Best Way to Burn Videos to DVD?
Wondershare UniConverter (previously Wondershare Video Converter Ultimate) offers a built-in disc burner that allows you to generate Blu-ray and DVD discs from your media files, in addition to being a powerful and efficient video and music converter with over 1,000 supported formats. The following is a step-by-step explanation on how to make a professional-looking DVD from videos on your local hard drive:
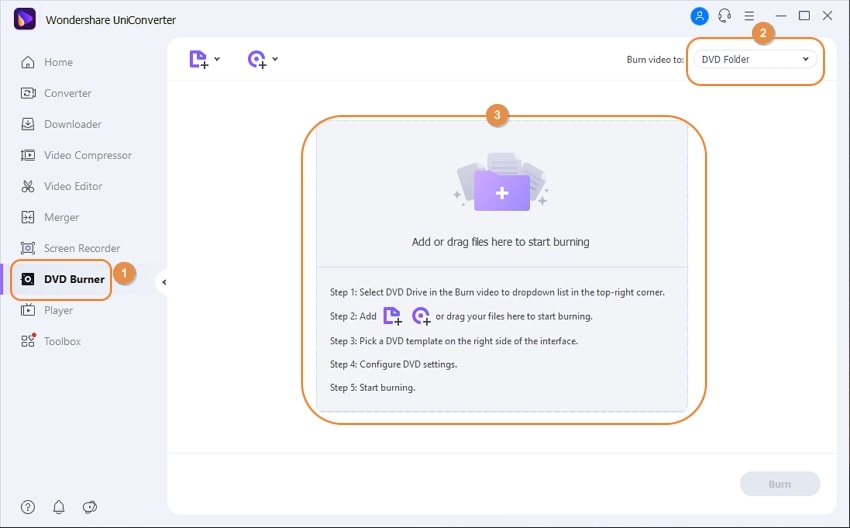
Insert a blank DVD into the DVD burner drive, launch Wondershare UniConverter, and prepare films for DVD using one of the techniques below:
- Method 1: From the left-hand navigation bar of the UniConverter interface, select the DVD Burner category, make sure the DVD drive is selected in the Burn video to drop-down list, click Add Files from the center, and import the video(s) you wish to create a DVD from.
- Method 2: From the left-hand navigation bar, select Video Converter, then go to the Finished tab at the top of the center window, right-click the video you want to make a DVD from, and then select Add to Burn List from the context menu that displays.
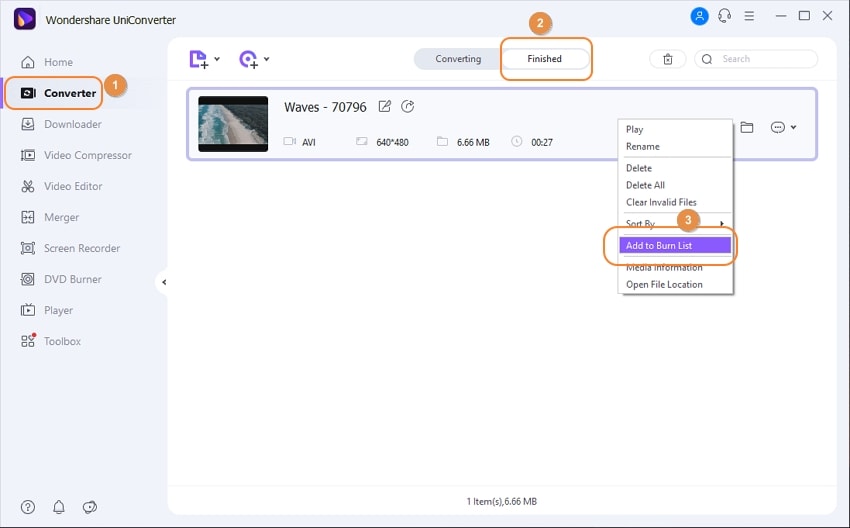
Note: Only when the clips have been converted do they appear in the Finished window. If you haven't done any video conversion yet, the Finished window will be blank, and you'll have to use one of the other two methods to add the clips to the burn list.
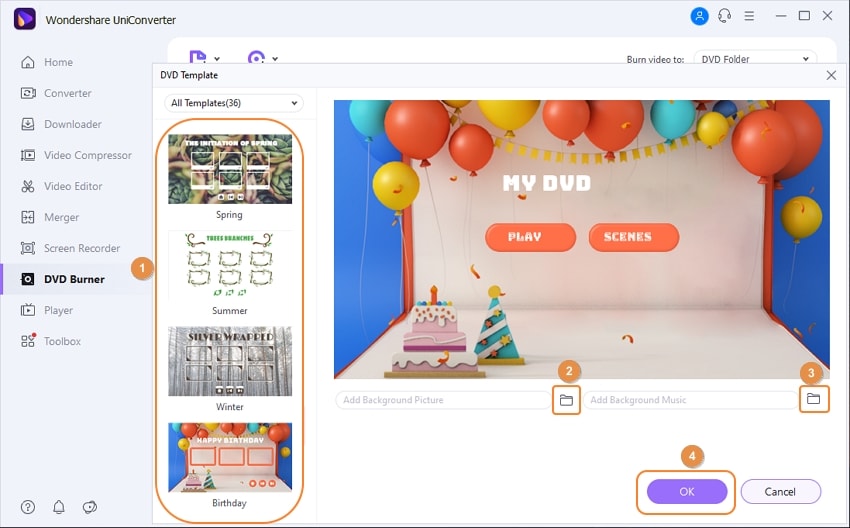
To receive the first template, click the right arrow above the DVD symbol in the right pane, then click the arrow a few more times to check the other possible templates, and then use the right and left arrows in the section to travel back and forth among all of them. Once you've identified the DVD template you wish to use, stop navigating.

Alternatively, you can open the DVD Template window by clicking any of the templates, scrolling through the templates list in the left pane, and selecting the one you want. Select a custom background image and audio track from your local hard drive by clicking the Browse icon (three horizontal dots...) adjacent to the Add Background Picture and Add Background Music areas. To save your preferences and return to the DVD Burner window, click OK in the bottom-right corner of the box.
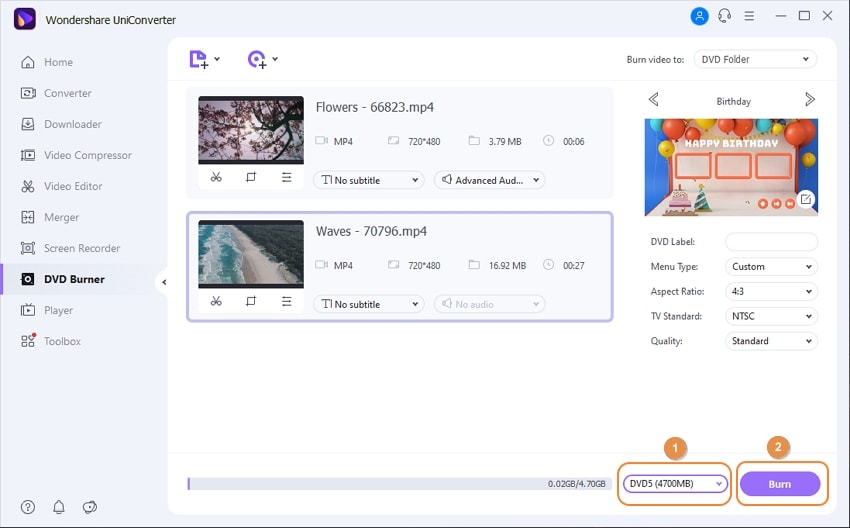
In the DVD Label field, type a name for the disc, select an aspect ratio from the Aspect Ratio drop-down menu, a color scheme from the TV Standard drop-down menu, and a quality from the Quality drop-down menu.
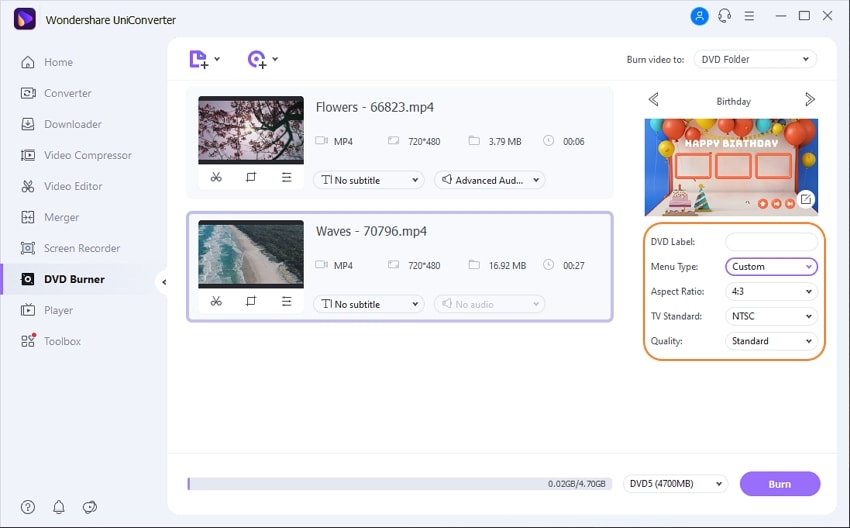
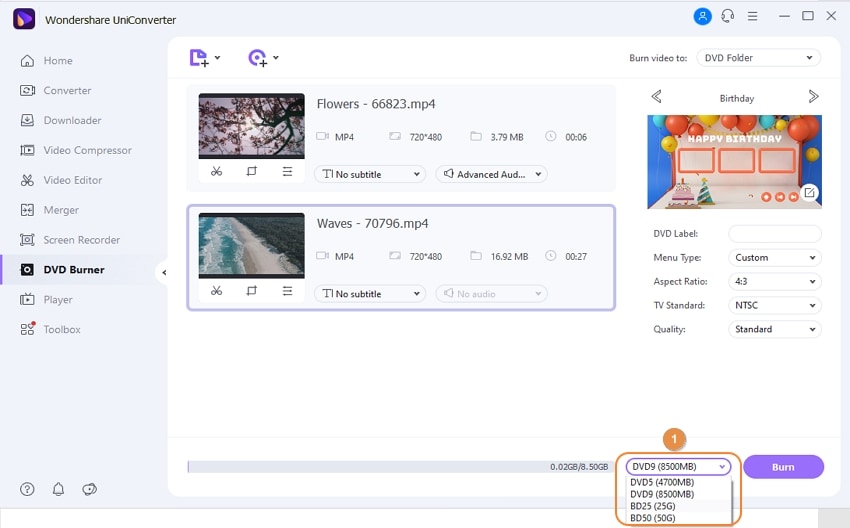
Make sure the relevant media is selected in the Media Type drop-down list at the bottom, and then click Burn to turn the videos in the burn list into a DVD.
Note: To generate a Blu-ray disc, make sure a blank Blu-ray media is placed into the Blu-ray burner drive and that the Media Type drop-down list is set to BD25 (25GB) or BD50 (50GB). The rest of the procedure is the same as it was in the previous sections.
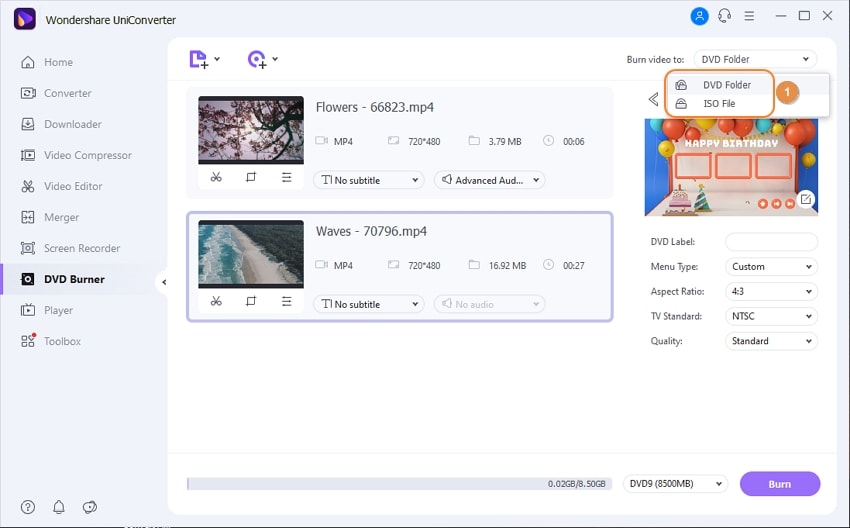
When you don't have access to physical optical media or a burner, or if you wish to make a disc later, you can make a DVD folder or an ISO image out of the films. Regardless of the reason, you can complete the task by following the steps outlined below:
To add videos to the burn list, choose a DVD template, and select DVD parameters, use the techniques described in Steps 1, 2, and 3 of the previous section.
In the upper-right part, select DVD Folder or ISO File from the Burn video to drop-down list, and then click Burn in the bottom-right corner of the interface.
Additional Information:
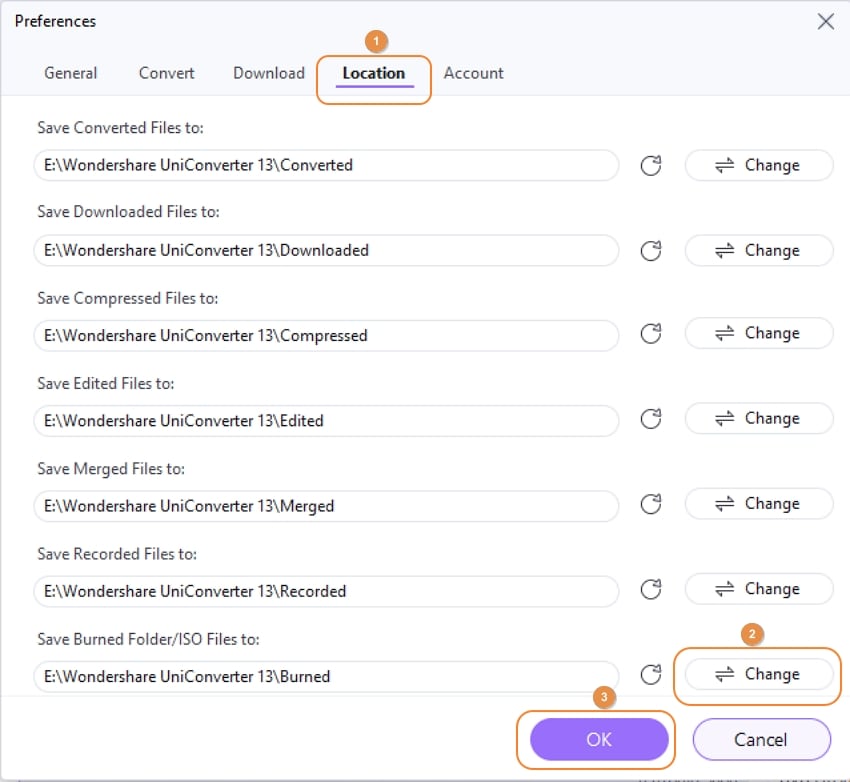
- From the top-right corner, select the Options icon (three lines).
- From the menu that displays, select Preferences.
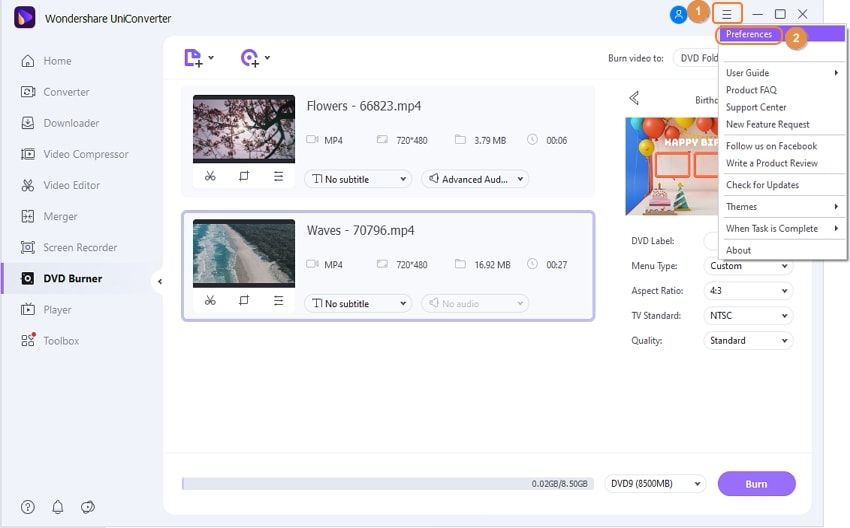
- Select a different, your desired folder from the Save Burned Folder/iSO file to section by clicking Change.
- To save the changes, return to the Preferences box and click OK.
User Guide
-
Get started
-
Video Converter
-
Video Editor
-
Video Compressor
-
Screen Recorder
-
Video & Audio Downloader
-
DVD Burner
-
Merger
-
Audio Converter
-
Toolbox of Uniconverter