How to Merge Videos into One
A built-in Merger feature in Wondershare UniConverter allows you to merge two or more video clips into one. When you receive film that has been broken into multiple little files for simple transfer and needs to be joined back together before it can be watched without interruptions, this form of assembling becomes necessary. Here's how to use the all-new Wondershare UniConverter to combine numerous videos into one:
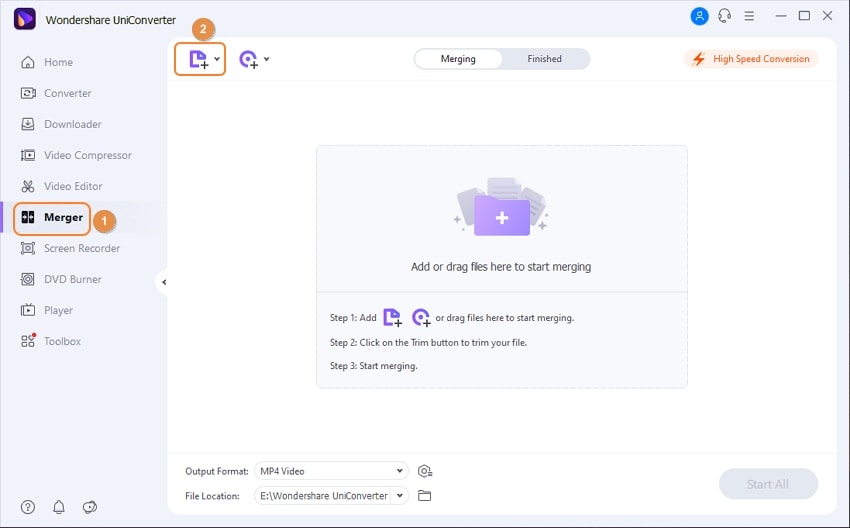
Select Merger from the left area of the Wondershare UniConverter interface on your Windows computer (a Windows 10 PC is used here as an example). From the top-left corner of the center window, click Add Files, and then utilize the Open box to pick and import the video clips you want to integrate. Note: If the files are saved in different locations on your computer, you'll have to go through the process again to import each fragment.

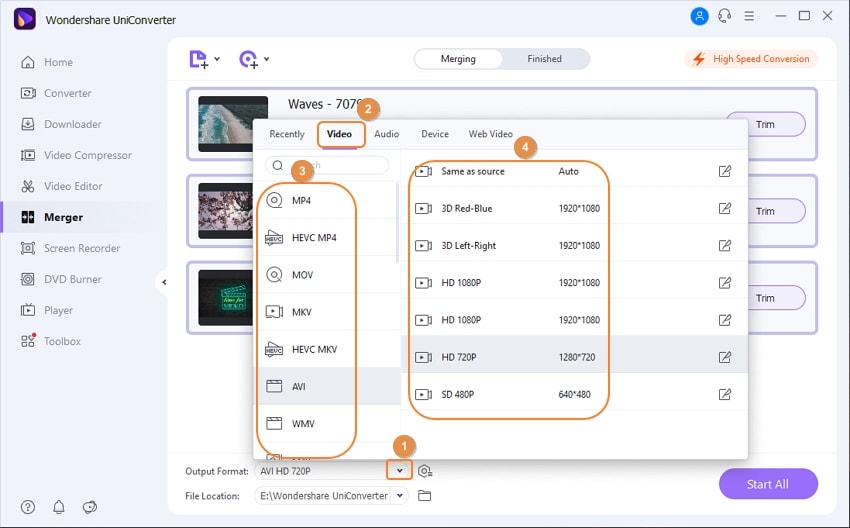
From the main window's bottom, select the Down Arrow tab, then the Video tab, select an output format from the list on the left, and select the resolution you want the combined clip to be in from the right.

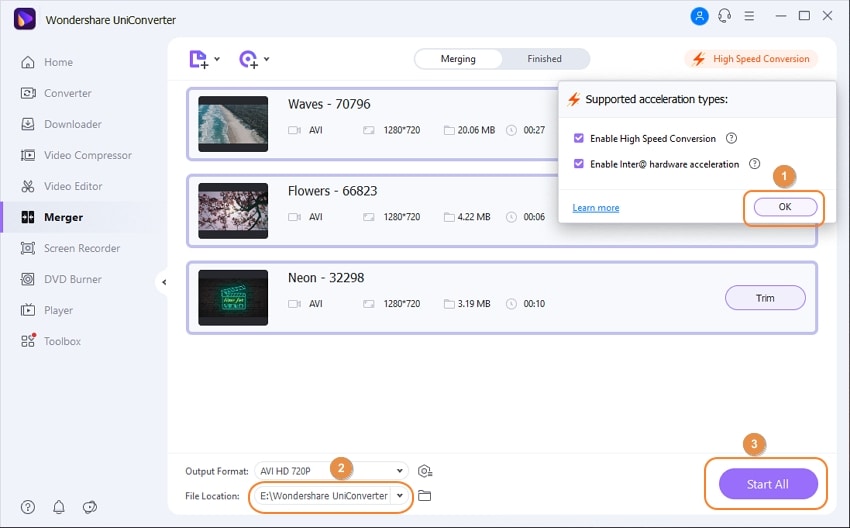
Choose one of the two supported acceleration types from the High-Speed Conversion tab in the top-right corner, then click OK to enable the High-Speed Conversion option. Then, at the bottom of the screen, select a destination folder in the File Location field, and click Start All in the bottom-right corner to combine all of the imported clips into one video.

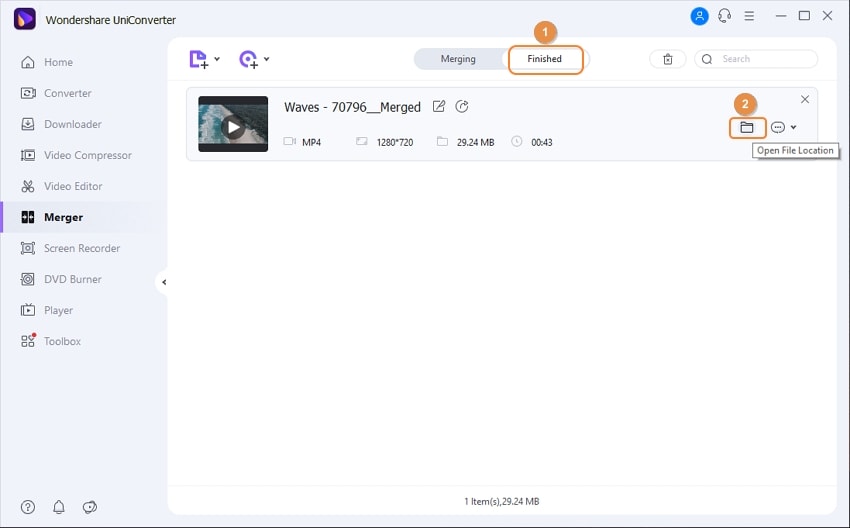
After the conversion, click the Finished tab at the top to see the merged clip.

User Guide
-
Get started
-
Video Converter
-
Video Editor
-
Video Compressor
-
Screen Recorder
-
Video & Audio Downloader
-
DVD Burner
-
Merger
-
Audio Converter
-
Toolbox of Uniconverter