Screen Recorder for Windows-UniConverter
- Show a gaming session, make tutorial video with customized settings.
- Record screen, audio and webcam simultaneously.
- Help you record a screen while working on another screen.
- Useful record timer to help you set the start and stop time.
- Convert, compress, and edit the recorded videos.
The concept of screen recording is not new to many people, yet some significant part of the populace has yet to contact anything screen recording. Maybe you just got your system, or you have been wondering how those Youtubers manage to record the screens of their computer to show you what they are doing, or you wonder how they can split-screen with a little part showing their face and reactions and the larger part showing what is going on in the screen. Yes, screen recording is how they do it. It is a process of capturing whatever is displayed on your screen, either for saving or posting. However, screen recording is not only for personal use. Businesses and schools use these amazing features to make informative content for the viewers. The internet has seen a lot of screen recorders come and go, and now, we have some of the best screen recorders that can allow us to easily record screens with audio on Windows 10 and save them for later or for posting on social media platforms.
In this article
Method 1. Game Bar - Built-in Screen Recorder with Audio for Windows 10
Game Bar is an option for recording screens on Windows 10 with audio, and Xbox creates it. From the game bar itself, you can see the Xbox logo. As the name implies, the Game bar is a game bar that can contain the screenshot option, a 'record that' option, and the record button. Then, there is a setting button for fine-tuning Game bar options to your preference. It also works with an Xbox controller if you have one connected to your PC. The Game Bar for Windows 10 is free and doesn't have any complicated interface, just the bar, and your recording options.
Steps to Recording Screen on Windows 10 with Audio using Game Bar
Screen recording on Windows with Audio has never been easier. With the use of Game Bar, you can start recording in the following steps
Step 1 Call up the Game Bar - Windows Screen Recorder with Audio
To call up the Game Bar is easy, just press Win + G, i.e., the windows key and 'G'. If the screen recorder feature can not be used, the reason would be that Game Bar has not been allowed by your system. Go to the Windows Start button, and then settings, now you can find the gaming option, from where you can open the Xbox Game Bar and the recording audio mode.
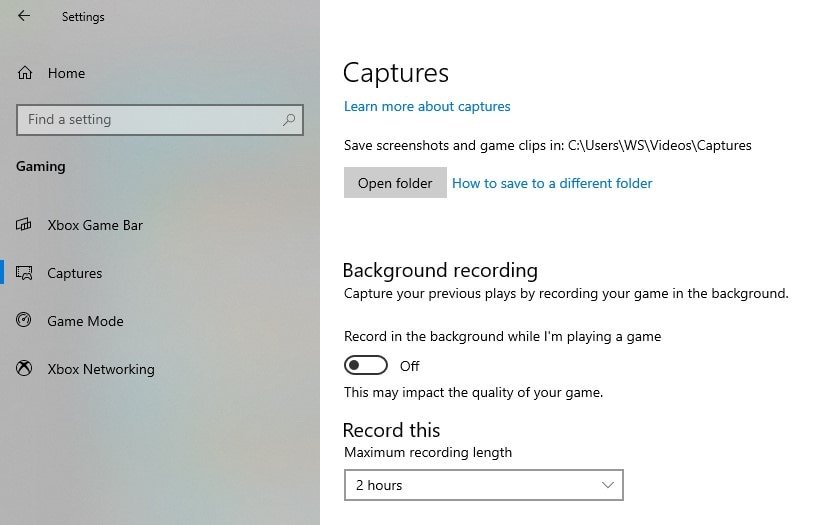
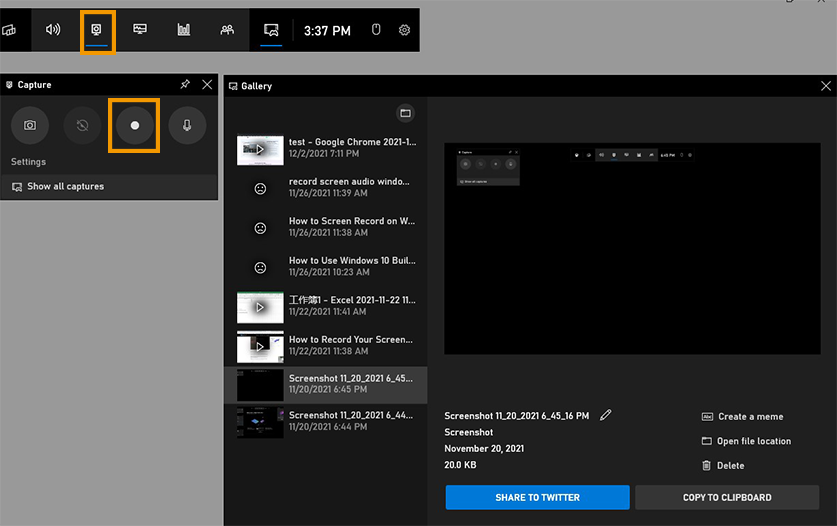
Step 2 Click on 'Start Recording'.
From the 'Capture' menu, choose the third icon which means start recording.
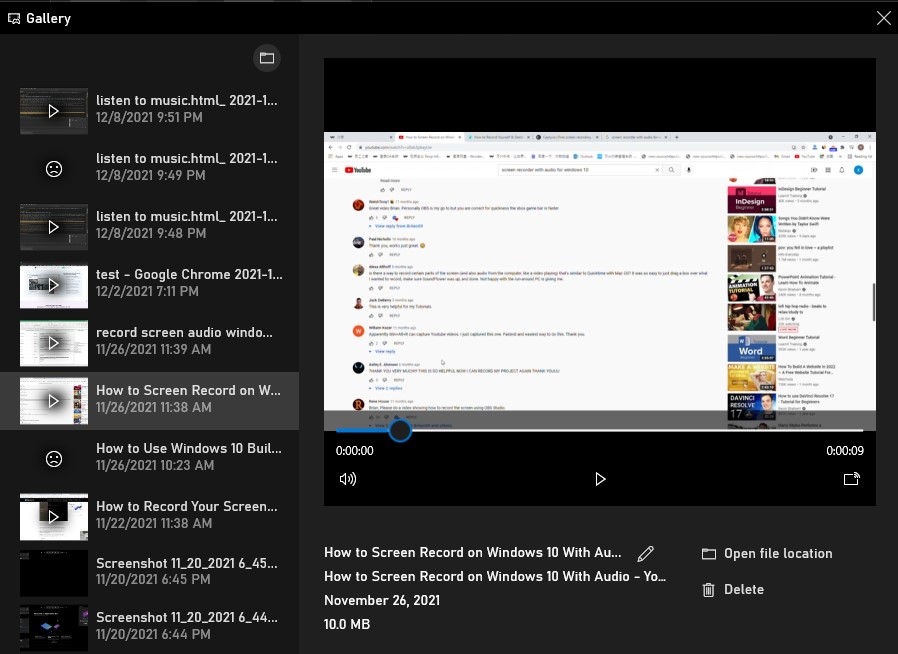
Step 3 Stop the Recording and locate the video
Bring up the Game Bar audio again and click on the blue button to stop the recording. Your recorded videos will be saved under the Video tab in Captures by default. Check for the 'Captures' folder and locate your recorded video.
Pros
Very simple to use
The 'record that' breaks recordings into a 30seconds clip
Accept both internal and external microphone
Cons
It can only record one window
It drains the battery excessively when used in an unplugged laptop.
Method 2. Office 365 PowerPoint - Another Screen Recorder with Audio for Windows 10
Many people would've been surprised to see PowerPoint on this list when it is widely known to be a presentation maker and not a screen recorder. Still, the new versions of Microsoft Office already have improved functioning, and if you don't have them yet, you are missing a lot. As previously stated, PowerPoint was merely an office for designing and making presentations, but now PowerPoint can also function as a screen and audio recorder on Windows 10. If you want a quick and simple Windows 10 screen recorder with audio, or you have an emergency recording task,. You don't have time to download professional screen recorders, or you are a teacher, and you want to make a presentation while recording your screen, PowerPoint can help you,. It even adds the recorded screen to your PowerPoint slides automatically.
How to Use PowerPoint for Windows to Record Screen and Audio
Step 1 Launch PowerPoint and click on the Insert tab
PowerPoint shouldn't be a new concept to users. It is part of the Microsoft Office package and Word, Excel, Outlook, etc. After launching the software, click on the Insert tab in the top section.

Step 2 Select Screen Recording and Select Area
At the end of the Insert options, you will see the Screen Recording tab. Click and from there, you will be required to select which area of the screen you want to record.
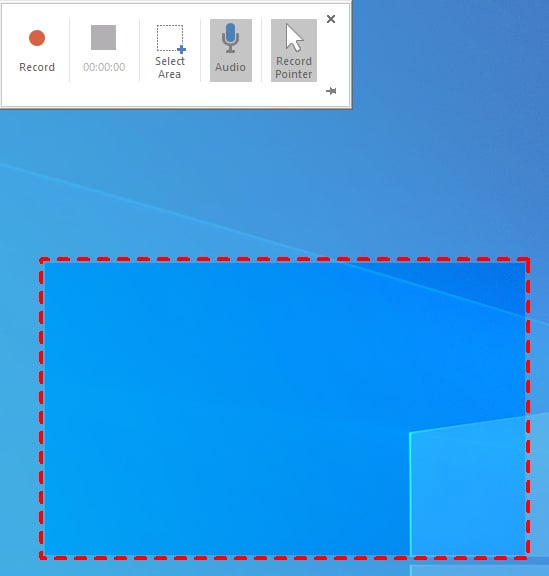
Step 3 Start Record
Click on 'Record' when you are done with the settings to start screen recording with audio on Windows 10. The control box also includes the pause option and the stop option. Click on the Stop option to end the screen recording, and it automatically appears on the current slide you are on.

Step 4 Save as a separate file
If you do not want the file to be on your slide and instead want it to be accessible on its own, then right-click on the video and click on Save Media as… Choose a folder to save it, rename and click on save.
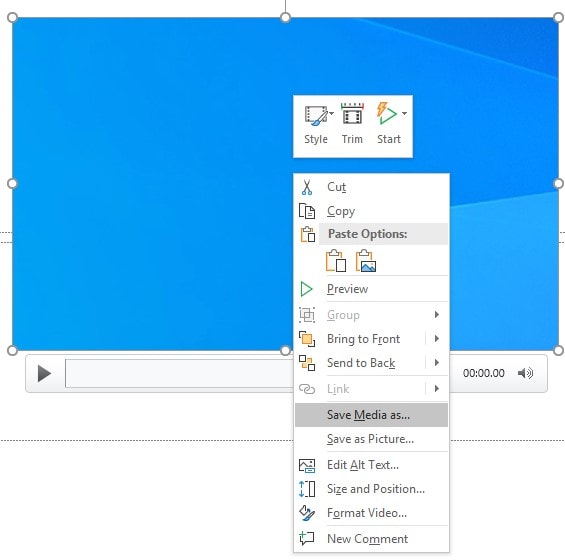
Note: PowerPoint allows you to trim videos, so you might want to trim unwanted starts and ends away before saving the video.
Pros
Has basic trimming options for screen recording with audio on Windows 10
It is a free Windows 10 screen recorder with Audio.
Can make annotations when you use a virtual pointer while recording.
Cons
Poor editing features.
It is mainly for saving videos for the presentation.
Available only on newer versions of the software and later.
Method 3. UniConverter – An Advanced Solution for Recording Screen on Windows 10 with Audio
The best tool for screen recording with audio on Windows 10 would be Uniconverter. Uniconverter has a lot of functions like converting, compressing, merging, online video downloading. Screen record on Windows 10 with audio is just one of the many functions of Uniconverter. With Uniconverter's screen recorder, you get to record your screen in easy, non-complicated steps. You can record screen, webcam, and audio. You can use both system sound and external mic to capture audio. You can record mouse movements and clicking sounds, it can record multiple screens; meaning that it records as you work on your window, closing an app doesn't end the recording, set record timer to record interesting live stream while reading books or working. Additional options include converting your recorded video to another format, compressing the size if you feel it is too large and Uniconverter also features some video editing functions.
How to Use UniCOnverter for Windows to Record Screen and Audio
Step 1 Launch UniConverter's Screen Recorder
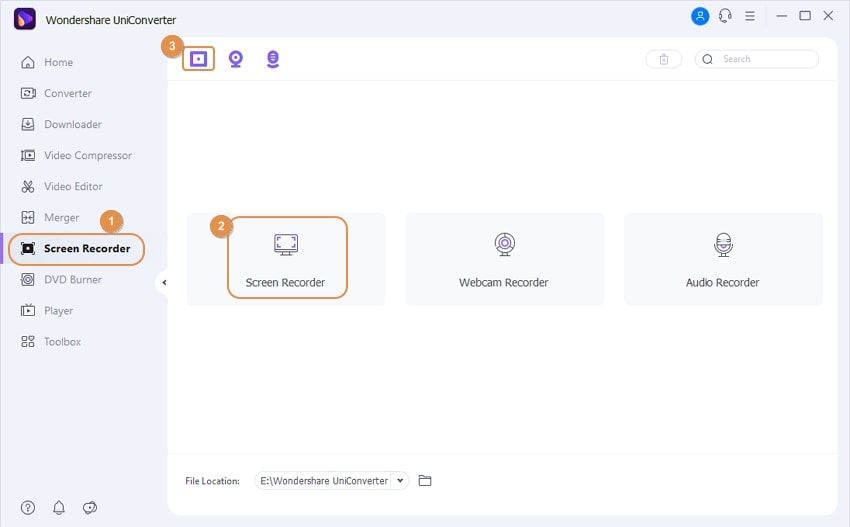
After installing UniConverter 13, open it. And then you can see the main features in the left section. If you want to record a screen on Windows, choose the 'Screen Recorder' feature and select the 'Screen Recorder' from the three recording options: Screen Recorder, Webcam Recorder, Audio Recorder.
Step 2 Adjust the recording settings
Now a new window has popped up. From there, you can choose the recording mode, aspect ratio, which audio source you want to record, webcam recording. Clicking the settings drop-down menu, you can see more settings options like output quality and format, record timer, mouse recording. And there is also a 'Swith Screen' feature available beside the settings icon.
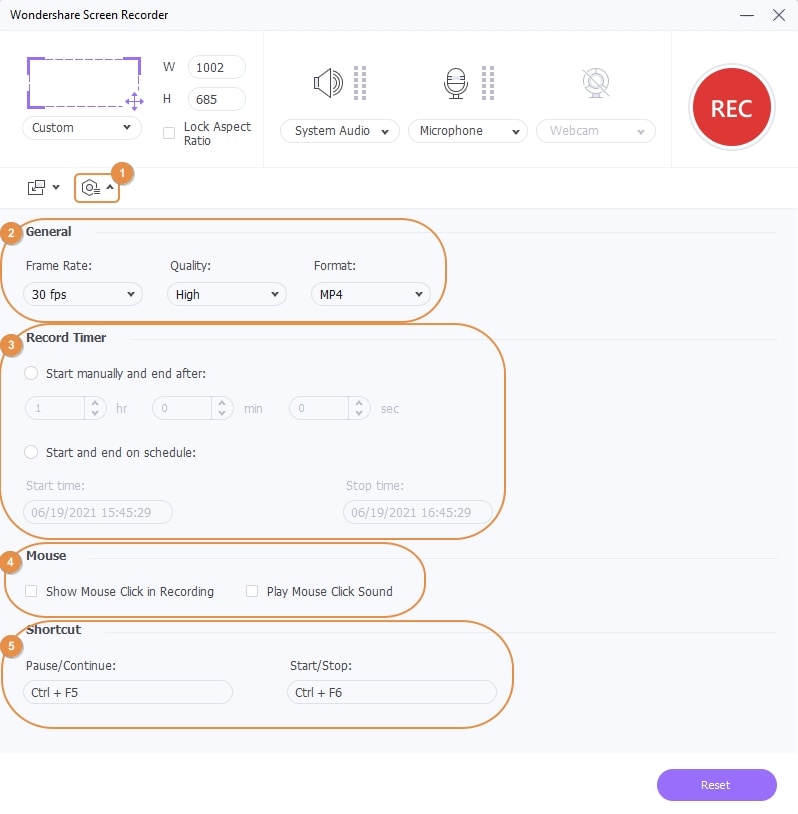
Step 3 Start and then finish the recording.
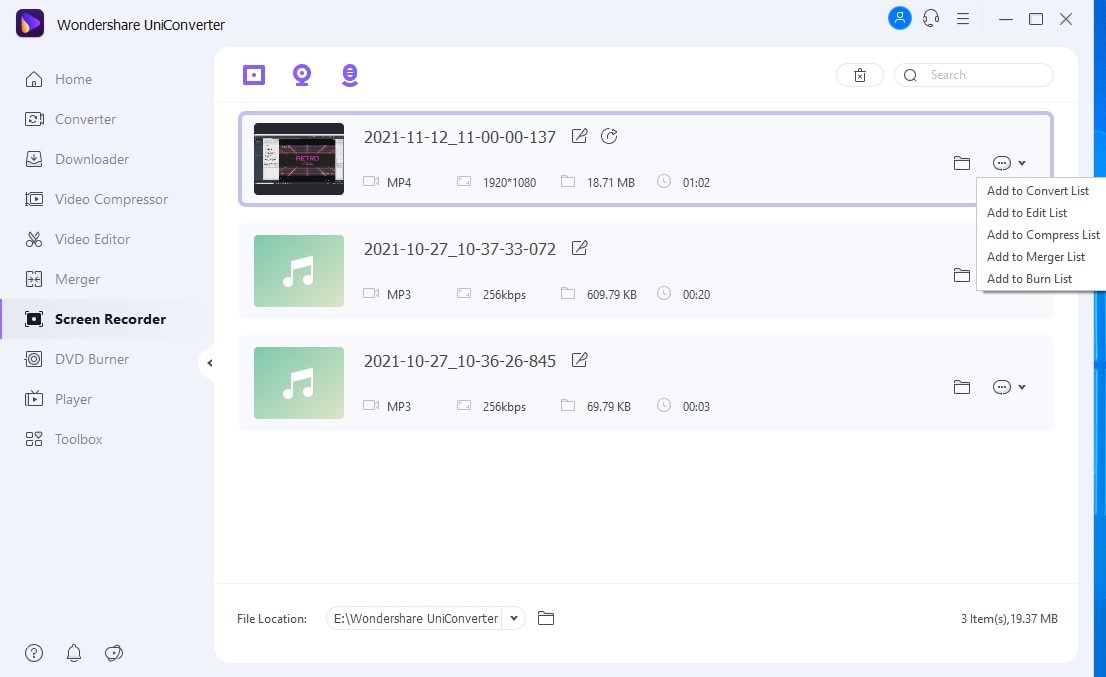
Once the above settings are done, click the 'Rec' button to record the screen on Windows. Click the relative icon if you want to pause or stop the recording process. After recording, the output video will appear at the UniConverter's interface, from where you can find the file location.

If you want to convert, edit, compress, merge, or burn your recorded videos, you can choose the options displayed on the right side of the template.
Pros
Easy to use, user-friendly interface,
Record audio, webcam, and screen at the same time
Record mouse move and clicking sound
Cons
It is not free
It is not supported on Linux
Wondershare UniConverter 13 - A Complete Meida Toolbox
5,481,435 people have downloaded it.
UniConverter supports many formats and handles conversion equally, ensuring that high quality is delisered at all times.
During the conversion process, you may add multiple files since the program does batch conversion of files.
You can use the editing suite that covers subtitle editing, watermark editing, AI portrait, Intro & Outro, Auto frame, Smart trimer, etc to make your results creative masterpieces.
This software facilitates file transfer to devices like Android and iPhone among others once the conversion is complete.
UniConverter is also capable of handling video compression hence ensures you acquire the video sizes you desire.
Method 4. Capty.io - An Easy to Use Online Tool for Recording Screen on Windows with Audio
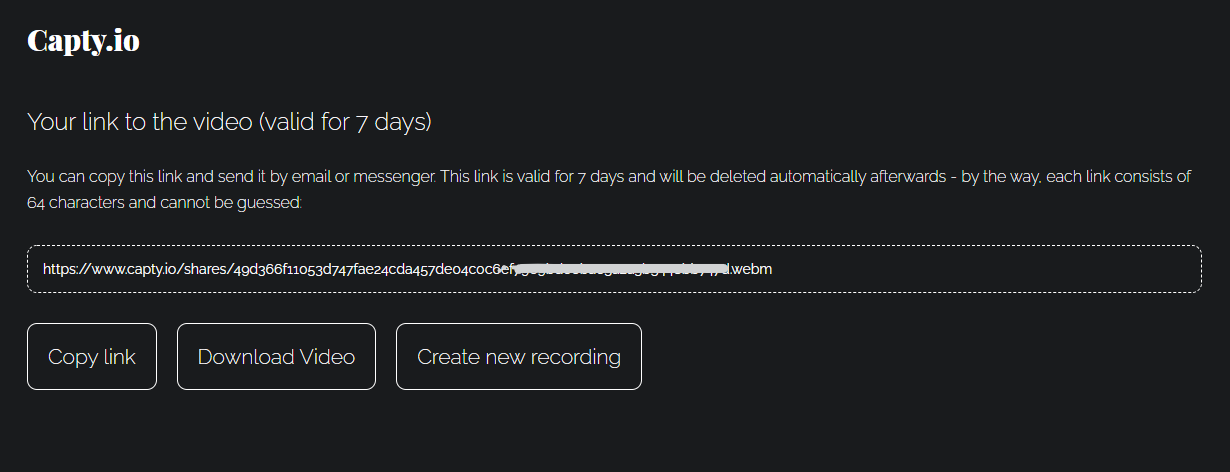
Online tools are very resourceful, and they can be used without needing to download any software or additional file. Capty.io stands out as one of the most useful among other screen recorders. The steps are simple and do not require you to sign in or create an account to screen record. Their German server saves all documents for seven days before permanently deleting them. During this time, you can download it or send it as a link to your friends. That way, they can watch the video from the capty.io site instead of downloading it, and you do not need to download the video to share it with your friends.
Steps to Windows 10 Record Screen with Audio using Online Recorder Capty.io
Step 1 Visit the Capty.io website
Use any of the supported browsers like Chrome, Firefox, or Edge to access the site www.caty.io
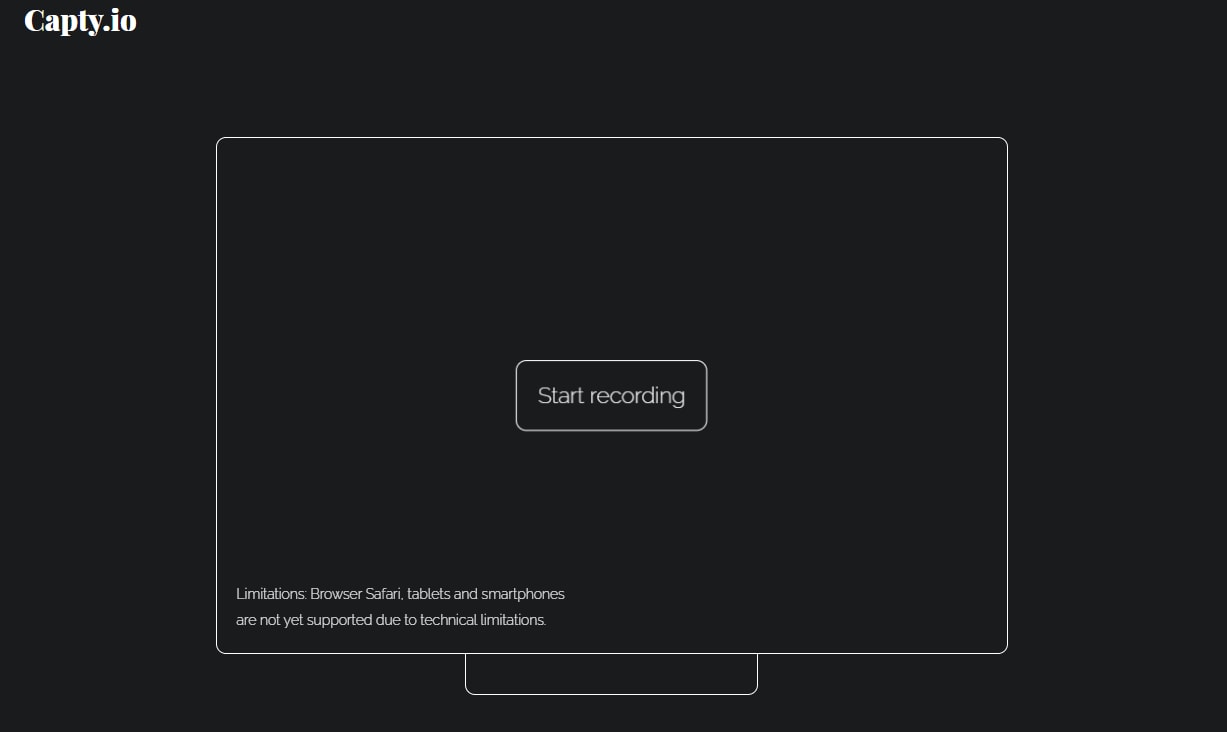
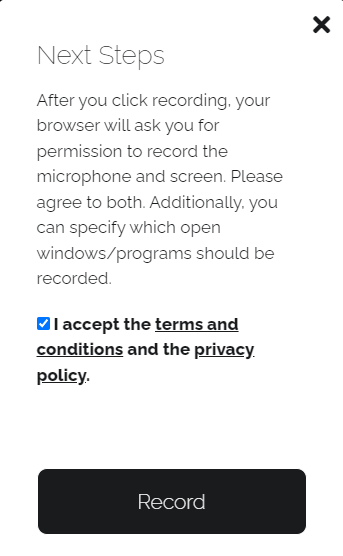
Step 2 Start Recording and Set screen record option
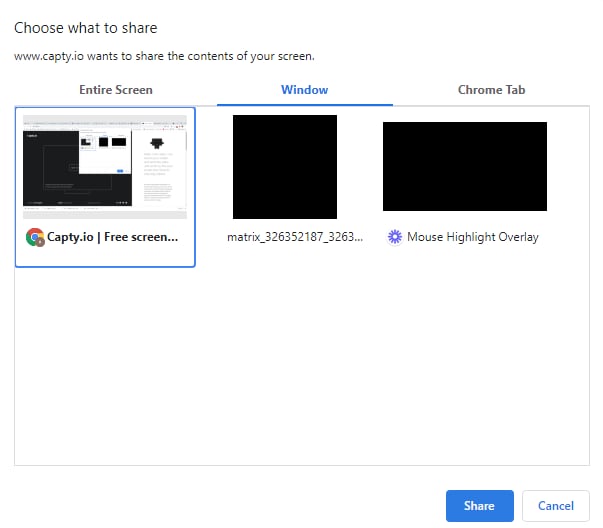
On the left side of the main interface, a monitor has a pulsing 'Start Recording' written on its screen. Click on the start recording, and an agreement box pops up. Check the agree box and continue. The next box that pops up will let you decide if you want to record the entire screen or just windows or only chrome tabs. Click on Share to start the Windows record screen and audio.
Step 3 Stop the recording and Save
Capty.io gets you a preview of the video you just recorded, and you can either delete it or download it. Download and save the recording in your desired folder.
Pros
Can record the entire screen, windows, or just chrome tabs
It is free
It is an online tool as such, doesn't need to be downloaded
Cons
Safari and smartphone browsers are not supported
It doesn't have any editing functions
Can only perform basic screen recording
The output video can only be in Webm format.
Conclusion
Now that we've had an explanation of what and how the four methods work, it is left to you to choose which way you think is best. Many factors can affect your selection, and each of these four methods has their strengths and weaknesses. We would, however, recommend Uniconverter for its complete toolbox. Not only can it record the screen, but you can also record the screen and webcam together. You get to select which part of the screen you want to record by manually adjusting the default box given to you, it supports system audio and external audio. After you are done recording, there are still some options left for you, like converting, compressing, editing, etc. All of these can be done on Uniconverter
More tips for recording: If you want to edit your recorded videos, UniConverter-a complete toolbox can help you be a better creator or presentor. Or if you are searching for some ways to record audio, UniConverter can also provide solutions.
For Win 7 or later (64-bit)
For macOS 10.12 or later

