
Record Your Screen on Mac-UniConverter
- Show a gaming session, make tutorial video with customized settings.
- Record screen, audio and webcam simultaneously.
- Help you record a screen while working on another screen.
- Useful record timer to help you set the start and stop time.
- Convert, compress, and edit the recorded videos.
Screen recording is a fun activity, you see a video on the internet and it doesn’t have a download link, no problem, just turn on-screen recording, and there you have it. That is just for the fun aspect, screen recording is used for more serious operations, to make a tutorial video, showing processes and steps just as it is being done and a lot more others. Unfortunately, most devices do not have a screen recorder, and there are a lot of apps that can help you do this but not all of them produce quality videos. That leaves you surfing around the internet looking for the best screen recorders. How to screen record on Mac? Well, it is pretty easy but your screen record on Mac process will be much easier when you use any of the apps on our list.
In this article
Part 1. How to Record Your Screen on Mac with QuickTime Player [For Basic Recording]
QuickTime is a multimedia tool that comes pre-installed on most Apple devices. It is sure to be on Mac systems no matter the version and it saves users a lot of stress with the Mac record screen video function to record your screen on Mac. Apart from screen recording, as a multimedia tool, QuickTime performs most media tool functions like playing audio and video. When permitted to access the internet, you can watch online videos on QuickTime. It also performs basic sound and screen recording, lets you increase and decrease playback speed, supports a lot of media formats both video and audio formats, and can convert to and from these formats as well. QuickTime can also be used to share screen, where you connect your Mac to a TV and watch your movies on the big screen
How to Screen Record on Macbook with QuickTime
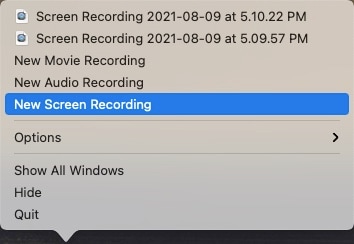
Step 1 Launch the QuickTime software
First, you launch the software. From the toolbar choose file and select New screen recording. Selecting ‘New screen recording’ will open a screenshot box and you will see some screen recording tools that will help you with editing.
Step 2 Start Recording
Click on the Screen Recorder icon to activate the Screen recording function. Then a little bar will appear on the desktop.

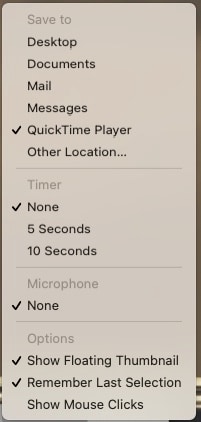
You can click on ‘Options’ to adjust some Screen recording settings like the area to record on the screen, activate the option to show pointer in the screen during recording, or to no show pointer. Click on Record at the far end of the bar when you are ready to start recording.
Step 3 Stop Recording and Save
To stop recording, you only need to click on the stop recording icon; it is located on the top of the interface, and it is the circle with a square in it. You can now save to any location of your choice
Pros
Works on all Apple devices
Works as a media converter
Supports lots of media formats
Cons
Video recording quality is low
It doesn’t support Webcam recording
Export recorded video only. MOV format
Part 2. How to Record Your Screen on Mac with Camtasia [for Professional Recording]
In terms of Screen Recording, then Camtasia is the best software for you to use. It possesses a lot more functions and features than QuickTime which is just for simple screen recording and doesn’t even support system audio. Camtasia was made for screen recording. If you looking to record for professional purposes then Camtasia is recommended. You don’t need any editing skills before being able to create amazing videos for the internet or academic purpose. It comes with some templates that are preset for a great recording experience, hence why there is no need for you to learn any editing skills before being able to use Camtasia. It is also worth mentioning that possesses some video editing functions as well but it is incredibly limited and lacking. You can create your own presets and save them on the software for future uses, the software has some stock backgrounds and songs that you can use to make your videos more engaging.
How to Screen Record on Macbook with Camtasia
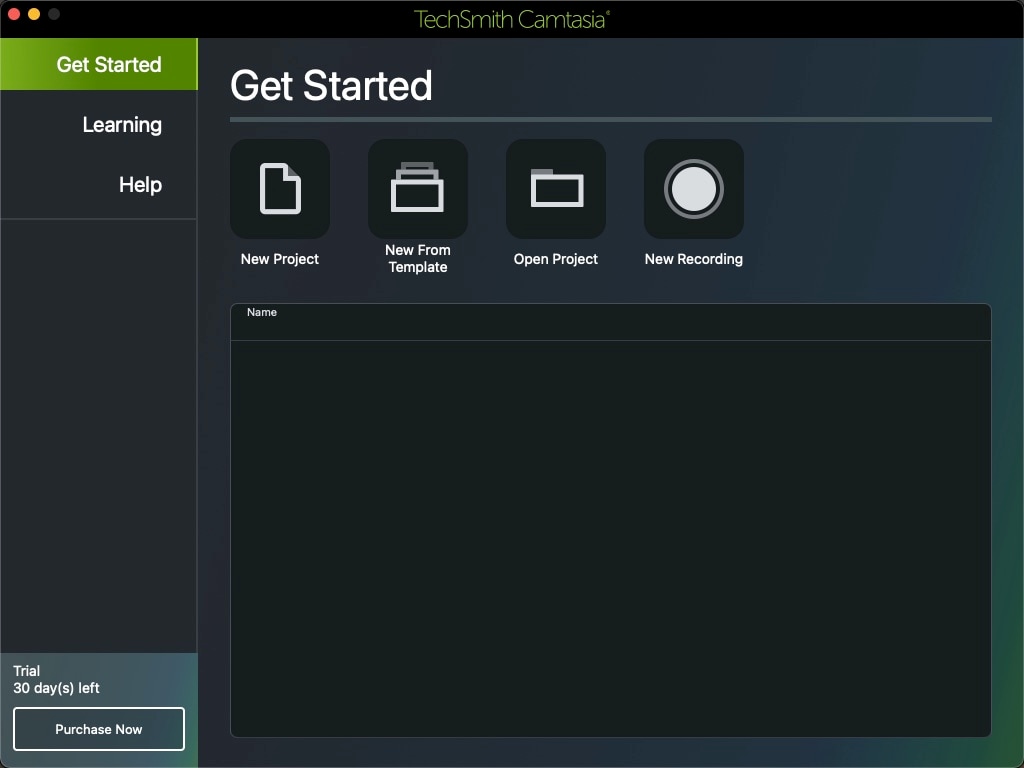
Step 1 Launch the software and Select Record
Camtasia is software built originally for screen recorder so all of its features and functions are for screen recording. On the main interface, click on ‘New Recording’ at the top left corner.
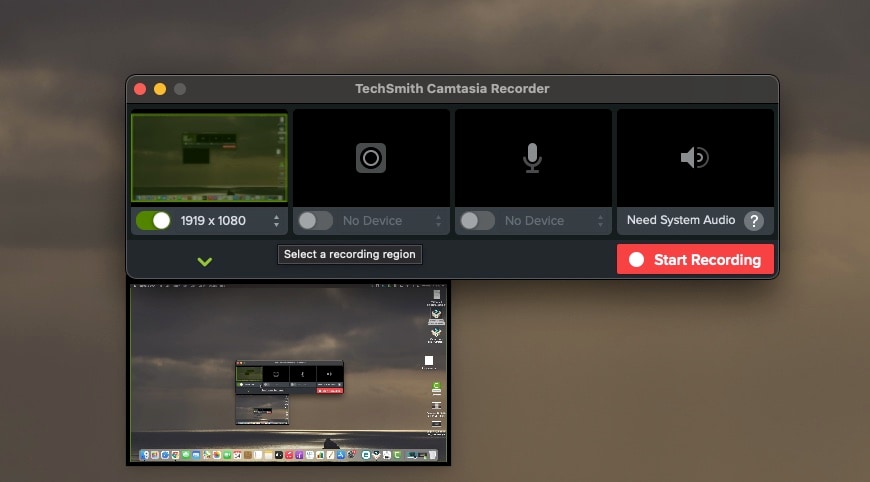
Step 2 Edit the Options
By default, the software is set to capture and record everything on the screen. It is now left to you to change the area you want to record. Click the ‘Select a recording region’ to change the coverage area. Next, you need to select which other features you want to activate, for example, a webcam, an external mic, or the system sound.
Step 3 Start Recording
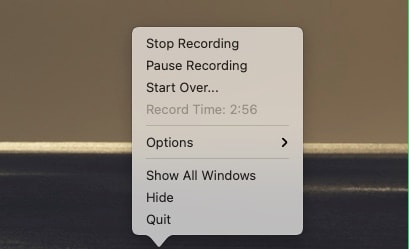
When all settings have been completed, click on the red ‘start recording’ button next to all the options to start recording. If you want to finish the recording, you can click the stop icon to stop the process. For Mac users, click on the Camtasia icon in the menu bar and then Stop recording. Or use shortcut ⌘ + ⌥ + 2 to stop recording and ⇧ + ⌘ + 2 to pause or continue recording.
Step 4 Finish the Recording
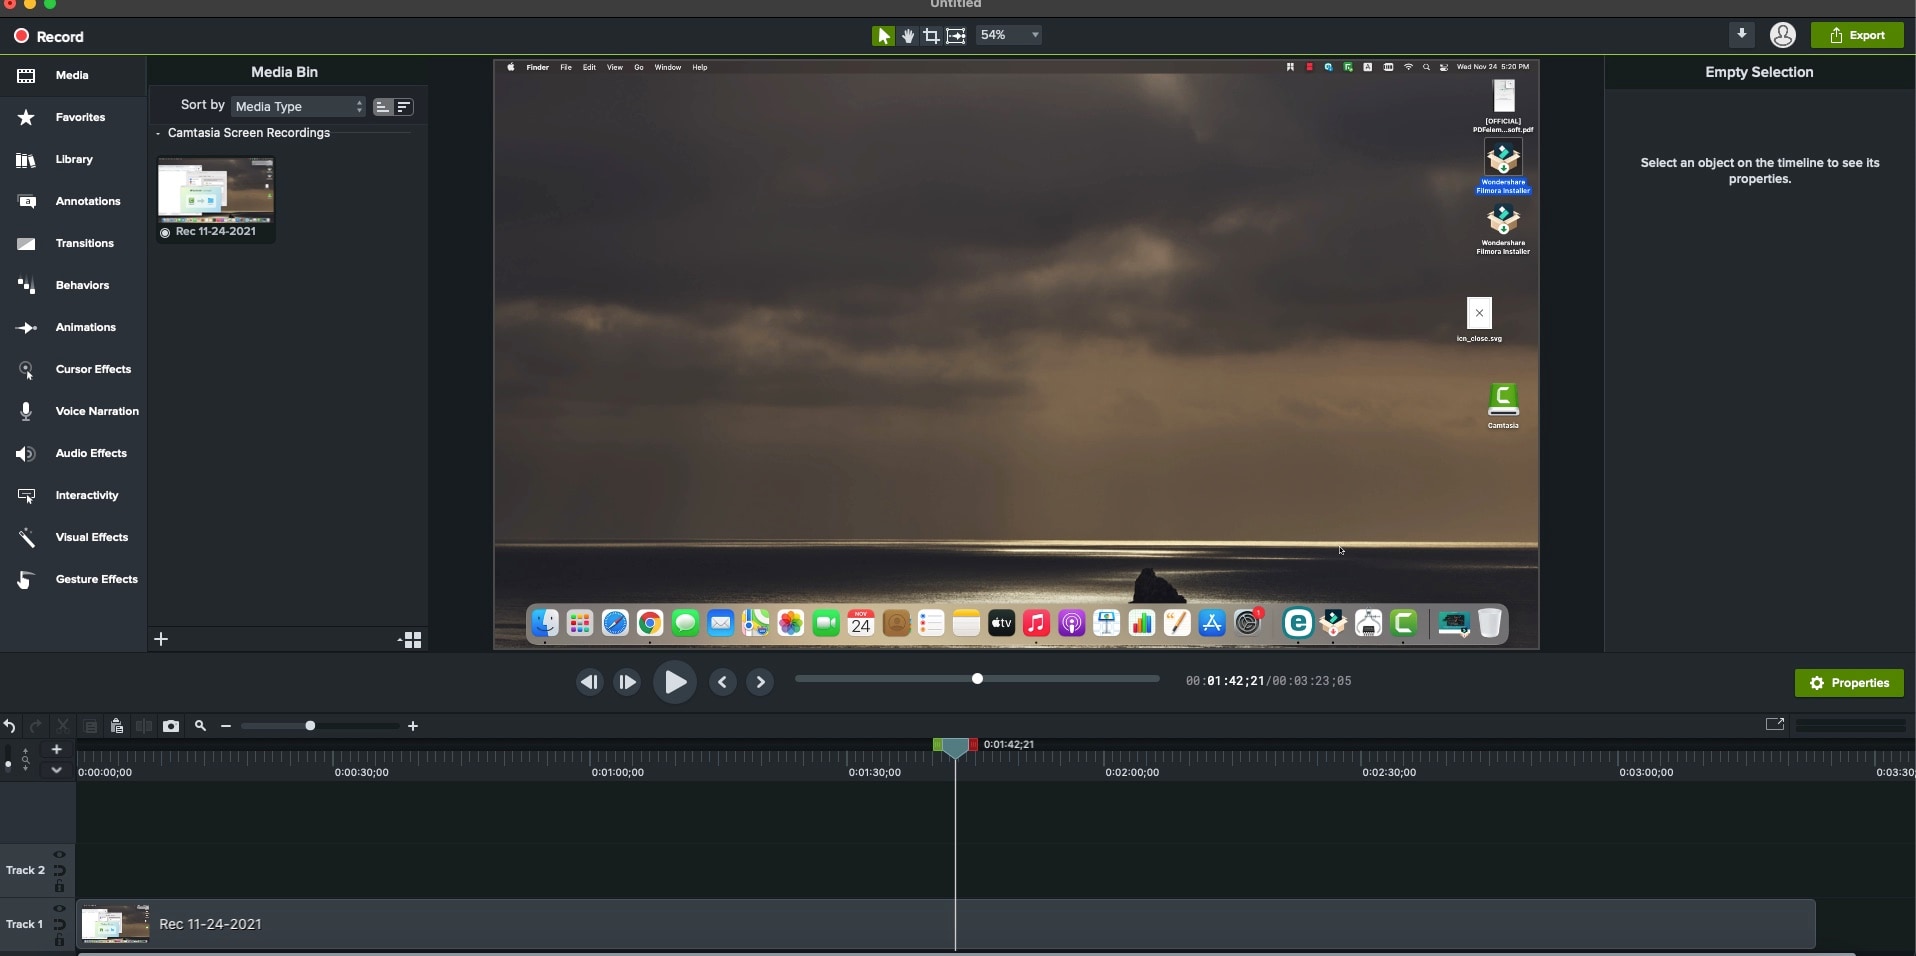
Once the recording ends, the video will appear at the Camtasia's interface, you can use the editing tools to edit the output video.
Pros
Easy for beginners to get used to.
It is a complete tool for screen recording.
Export your video directly to the desired platforms.
Cons
It is not completely free.
Processing video takes time.
Part 3. How to Record Your Screen on Mac with UniConverter 13 [For Easily Recording and Editing]
If you are looking for how to screen record on Macbook or screen record on Macbook pro then you should use the most complete video creating and editing tool then and that would be Uniconverter. Unlike QuickTime, it has a lot more features and is best at everything and unlike Camtasia, it is not built for screen recording only, screen recording is just one of its many features. It supports importing and exporting directly from and to the cloud, it supports converting to and from over 100+ media formats, it can compress videos without quality loss, it can record screen, record webcam and record sound all at once or separately, it can download videos from video-sharing sites like YouTube, Vimeo, Facebook, Instagram and other thousands and millions of sites. Do you want to mention the video editing function? It can add subtitles and captions to videos, remove and add watermarks, add effects to videos, create metadata for videos and audio, add cover photos, merge audios and videos, burn a disc, and can perform lots more amazing features.
Wondershare UniConverter 13 - A Complete Meida Toolbox
5,481,435 people have downloaded it.
UniConverter supports many formats and handles conversion equally, ensuring that high quality is delisered at all times.
During the conversion process, you may add multiple files since the program does batch conversion of files.
You can use the editing suite that covers subtitle editing, watermark editing, etc to make your results creative masterpieces.
This software facilitates file transfer to devices like Android and iPhone among others once the conversion is complete.
UniConverter is also capable of handling video compression hence ensures you acquire the video sizes you desire.
So, how do you screen record on a Mac with Uniconverter?
How to Record Screen with Uniconverter
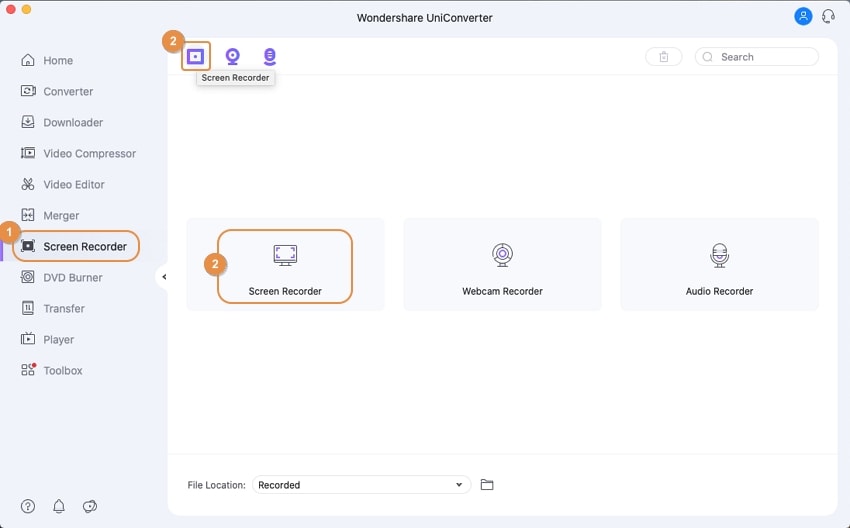
Step 1 Launch Uniconverter and Click on Screen Recorder
Open the Uniconverter app and from the list of tools on the left, click on Screen Recorder. The new interface will show three options; screen recorder, webcam recorder, audio recorder. Click on the Screen Recorder tab and it will open the screen recorder window in the background.
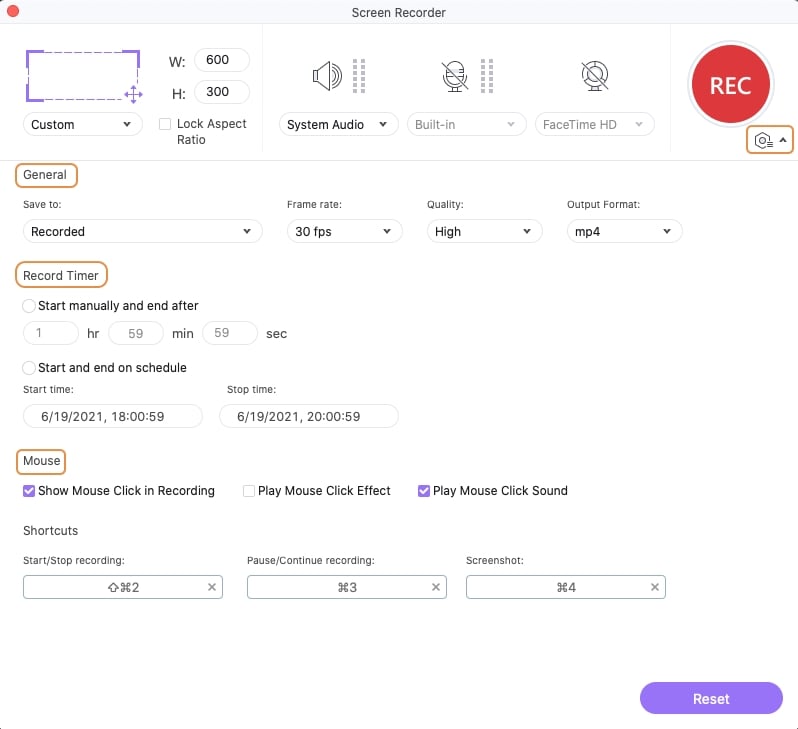
Step 2 Set the coverage and click on REC
Next, you get to set which part of the screen you want to record. It works just like the cropping function, drag the box inwards to reduce the size and outwards to increase the size. You can increase horizontally, vertically, or at the edges. You can select speakers as well if you have an external speaker connected, if not, then just leave the settings as they are. Click on the red circle with REC when you are done with the settings
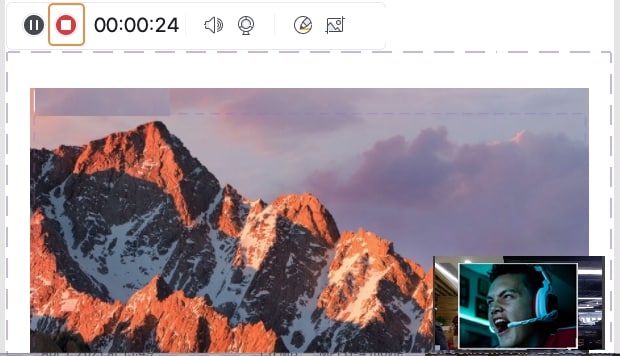
Step 3 Stop and Save
When you want to stop it, click on the Uniconverter icon on your taskbar, and the record bar pops up. You can pause or stop recording.
Pros
Can perform video editing functions like converting, compressing, etc.
Has a lot of video editing effects.
Supports more than 1000+ formats.
Cons
It is not available on Linux
It is not completely free
Part 4. How to Record Your Screen on Mac Using Capty.io [For Quick Recording and Go]
Have you ever wondered ‘How do I record my screen on Mac without downloading any software?’. Well, you do not need to think about it anymore because with Capty.io you can record screen video on Mac and screen record on Macbook Pro. Capty.io is an online tool which means all its resources are online and do not need any additional file download to function effectively, you will only need to download your file once you are done with the screen record on Mac. Although, Capty.io will help you save your video on their database for 7 days before deleting it.
How do you Screen Record on a Mac Using Capty.io
Step 1 Use either Chrome, Edge, Opera, or Firefox to open the site
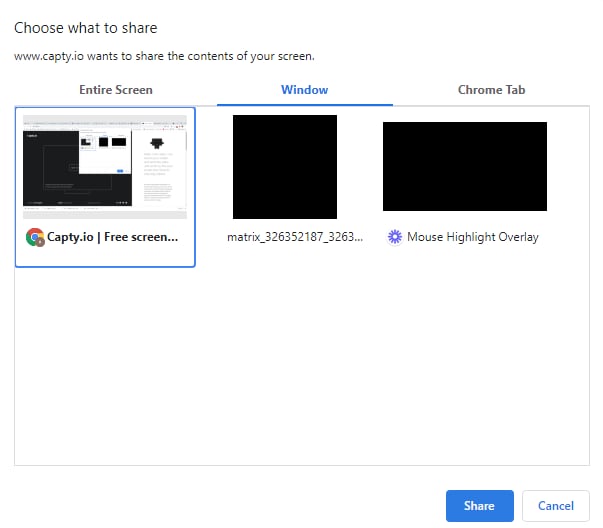
Visit www.capty.io using any of the browsers mentioned above. Unfortunately, smartphones and tablets are not supported, nor is the Safari browser
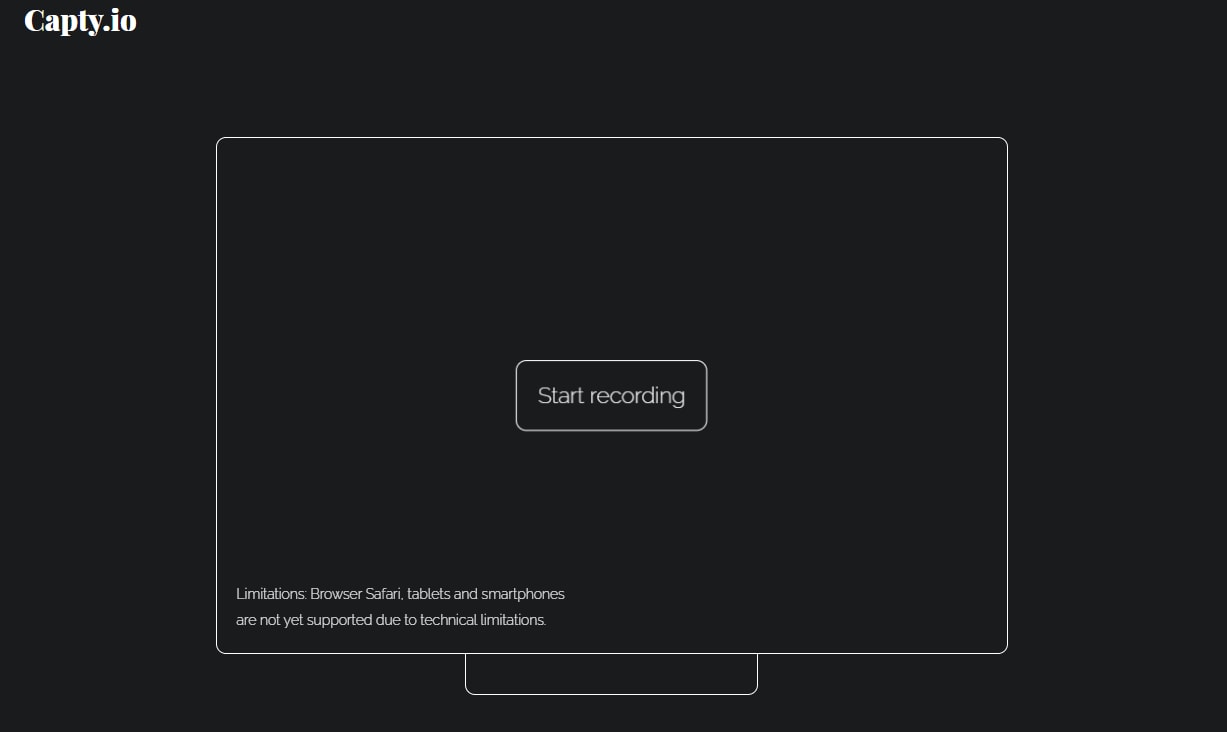
Step 2 Click on the animated ‘Start Recording’
On the main interface, there is a monitor with a pulsing ‘Start recording’. Click on it and a new box pops up asking for permission to record the screen. Give your consent and your recording starts.
Step 3 Stop Recording and Save/Send
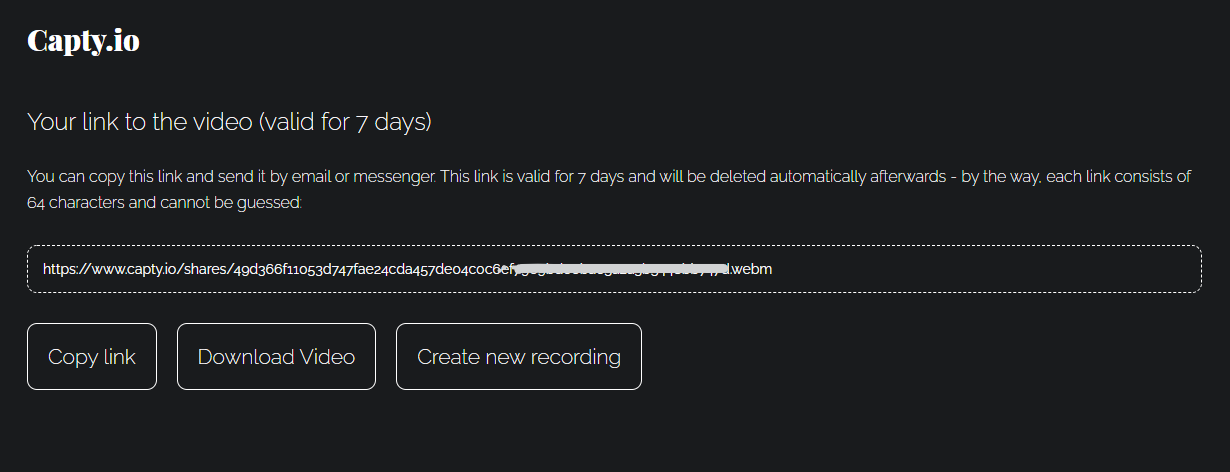
After choosing the window to be recorded, click ‘Share’ to start recording. If you want to end the recording, click on the ‘Stop’ button at the bottom left part of the screen to stop recording. Capty.io saves the video on their database for at most 7 days before deleting it. In the meantime, you can choose to download the video on your phone for long-term storage or you can send the link to a friend and they can come and watch the video on the city website.
Pros
An online tool as such no need to download.
It is safe to use.
Its interface has no ads.
Cons
Smartphone, tablet, and Safari browser not supported
Requires a stable internet connection lest your recording breaks midway
Only Webm output format is available.
Conclusion
QuickTime for basic recording, Camtasia for professional recording and simple editing, Uniconverter for professional recording, simple and extensive editing and other video editing features, Capty.io for simple screen recording, temporary cloud storage, and link sharing. All of them have their strength and weaknesses but for our recommendation, we would go with Uniconverter because of its wide range of resources and abilities. It is available on both Mac and Windows and works just fine. It is also constantly being updated and you get regular discounted prices for their subscription plan.
For Win 7 or later (64-bit)
For macOS 10.12 or later
