gameplay recorder-UniConverter
- Show a gaming session, make tutorial video with customized settings.
- Record screen, audio and webcam simultaneously.
- Help you record a screen while working on another screen.
- Useful record timer to help you set the start and stop time.
- Convert, compress, and edit the recorded videos.
Recording gameplay on a PC is quite easier than it seems. Some record gameplay because they need it to post content on their YouTube account or other social media like their Facebook account, Whatsapp status, Instagram, etc, while some do it just for amusement purposes. To record gameplay, we use Game recording software which helps to record gameplay in HD quality.
You do not need a very expensive or special PC to record gameplay, as most PC can record gameplay. Though, professional gamers use expensive configurations to record gameplay.
In this article, we will list some game recorders for pc that will be helpful to record your PC screen while playing games with steps that will serve as a guideline to complete the process.
Part 1. Guide for Recording Gameplay on PC with Free Game Recorders
We can use Free Game Recorder to record gameplay, which you don’t have to pay to get. The following are a few selected Free Game Recording Softwares for PC with their guidelines, pros, and limitations;
Game Bar
Game Bar is an app that helps to record and share gameplay. It allows a record clip of about two hours. Users do not have to manually download the Game Bar on their PC as it comes with Windows 10.
Features
-
It supports shortcut keys.
-
It captures the screen of the PC with just one mouse button.
-
Game Bar supports adjusting the maximum length of clips, background recording time, etc.
-
it has a user-friendly interface.
-
It supports Windows.
Guidelines
You can always use the Game Bar with any Windows 10 PC, it can be switched on and off by the user. For it to work well, the PC meets the minimum system requirement. The following are guidelines to follow to use a Game Bar;
STEP 1 Select the game you want to record with the Game Bar
The first step in using Game Bar to record gameplay is to select the game you want to play and thereafter record. Any game preferred by the user can be selected because the Game Bar embraces most games.
STEP 2 Bring out the Game Bar control
After you must have selected the preferred game you want to play, the next step to take is to use or employ the controllers. You can also press the WIN ICON + G keyboard combination to bring out the controls of the Game Bar. Remember to open the Xbox Game Bar from the gaming menu.
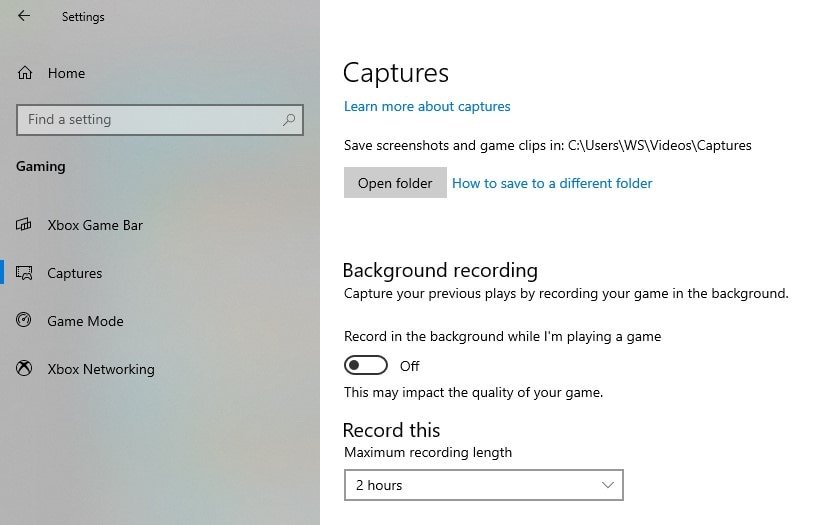
STEP 3 Setup the settings
The next step to take is to set up the Screen video record on the control panel (that we got from STEP 2). It's from the control panel that you will be able to set up how you want your game to be recorded.
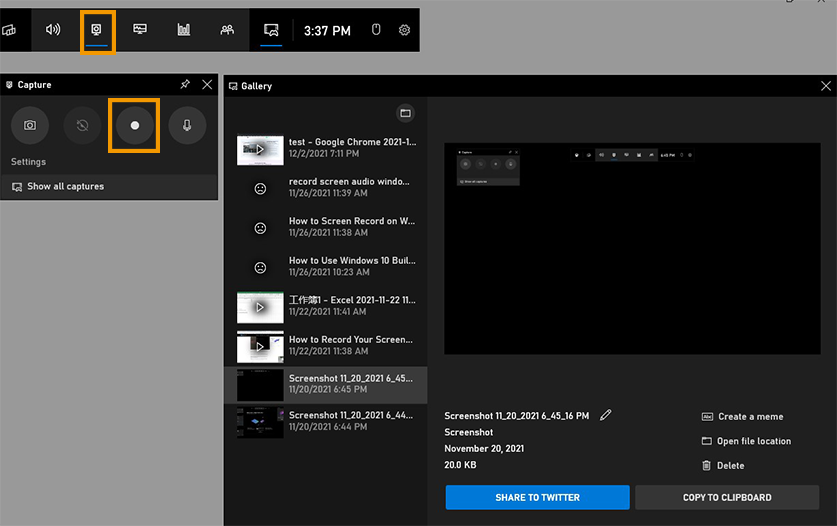
STEP 4 Start and stop the capturing with buttons or shortcuts
After the setup, you can start the recording and also stop the recording. But some shortcuts make the Game Bar easy; The following are default keyboard shortcuts for Windows 10 Game Bar; WIN + G to open the Game Bar, WIN+ ALT + R to start or stop the recording, WIN + ALT+ G to record the last 30 seconds of gaming.
Pros
Good features such as; duration of the record, the nice quality video of the recorded gameplay, nice quality of the Audio of the record.
Game Bar is very efficient as its duration lasts about four hours. The Game Bar can record gameplay for about four hours and it's free.
Game Bar is safe and legal.
Cons
It can slow down your PC gameplay. It might be interfering with other things in the PC which can cause slow down while playing the game.
if you want to record a gameplay that doesn't have a specific duration which might be more than four hours Game Bar might not be helpful.
It does not accept the whole desktop or file explorer.
Not all games embrace Game Bar especially new games.
More tips to for recording gameplay on PC: If you want to edit your recorded gaming sessions, UniConverter-a complete toolbox can help you be a better gaming video creator. Or, if you are searching for some ways to get the video game's background music, UniConverter can also help you record audio.
Bandicam
Bandicam is screen recording software that can record anything on the computer screen with high quality. Bandicam also allows users to record some parts of a PC. Bandicam is a highly recommended app for recording gameplay because it’s efficient and free. The app records and saves your file in different output/formats such as MP4, AVI, and other files.
It can record gameplay and save it in a smaller size without affecting the size compared to other game recording apps. There's no specific duration as it records as long as you have enough space on your PC.
Guidelines
Step 1 Install the Bandicam software
To use Bandicam, the first step in using Bandicam is to install or download the Bandicam application from its website: https://www.bandicam.com/downloads. The download is free as Bandicam is a free app.
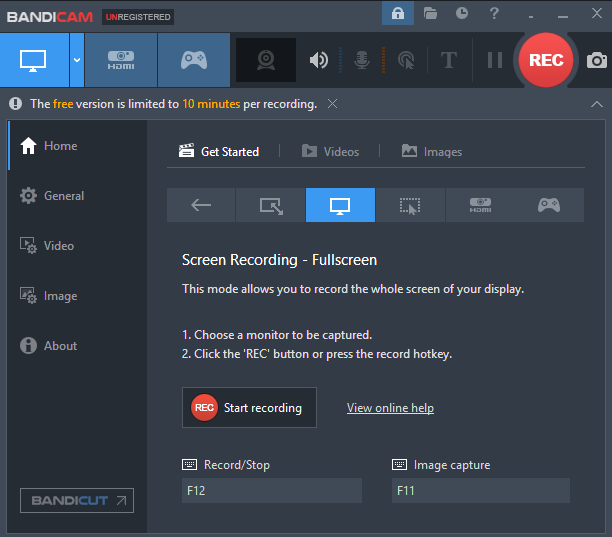
Step 2 Open Bandicam and select the 'Full screen' mode
After downloading and installing Bandicam, the next thing to do is to start using the app by opening the app, after opening the app, you will select mode, the mode to select is the Fullscreen mode.
Step 3 Select the Record button
After starting the app and selecting Full-screen mode, the next step is to click the record button or better still press the hotkey (F12) to start/stop the recording.
Step 4 Finish the recording>
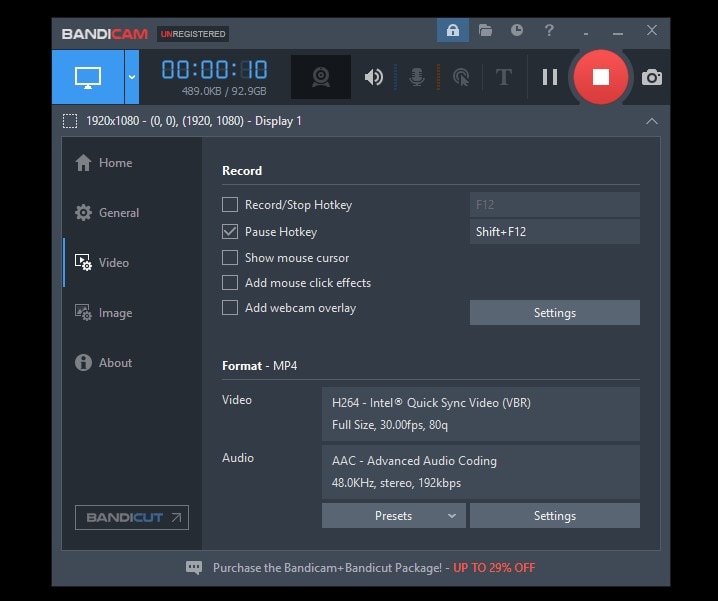
After selecting the record button and recording your gameplay, you will go back to Home then from there, you will select 'Video' this is where you will play, edit or upload the recorded videos. You can click the 'Open Output Folder' icon located at the top of the interface to access the video.

Pros
It's very efficient in Game streaming
It's free
It's easy to use
It records high-quality video
It is user friendly
Cons
It only works on Windows
It doesn't allow the inserting of text on the screen
The watermark can be annoying
It does not support Mac, Android, or Linux
OBS Studio
Open Broadcaster Software is also known as OBS Studio is a free software recording gameplay on pc that allows you to record and stream games from your PC. The OBS Studio can also be used to prepare your microphones for game streaming start your camera for game streaming.
OBS Studio is a totally free game recorder for pc, and it has many helpful features to give you quality streams. It also helps you to record your gameplay. It not only records, you can use OBS Studio to connect to any live streaming. OBS Studio has nice features that not all free software can do, for example, it streams with various platforms like Facebook Live, YouTube Live, Hitbox, Twitch, and more.
Guidelines
Step 1 Download and install OBS Studio
The first step in using Open Broadcaster Software is to get the app first and this can be done by downloading it. After downloading OBS Studio pc game recording software, the next thing is to install it.
Step 2 Open OBS Studio
After doing the easy part which is downloading and installing the OBS Studio, you will start the app. Then you will continue by clicking + from the Sources part after. After doing this you will then select Game Capture to get started with it.
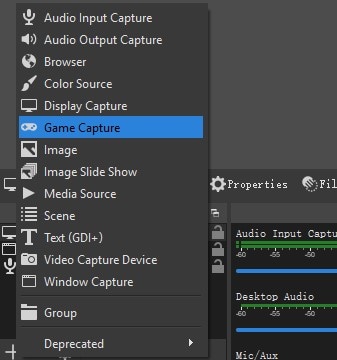
Step 3 Leave it labeled as Game Capture and select OK.
After selecting the Game Capture, the next thing is to still leave it labeled as Game Capture then select OK.
Step 4 Select the modes explained below and start record
Click the first mode, ‘Record any full-screen application.’
Select OK. ‘Game Capture’ now shows in the Sources list.
Select any game on Full Screen.
Move to OBS. The game will show in the window which means OBS recognizes it and is recording it.
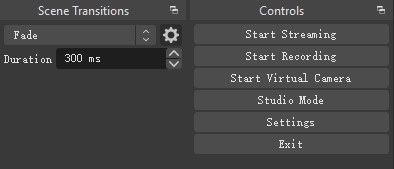
Now you can record your game by clicking 'Start recording'
Pros
It has a robust feature set
It is easy to use,
It’s free.
It records in high quality.
Cons
It does not work with Windows XP.
It does not support linking with an audio file as a source.
It is not user-friendly
It is time-consuming
Part 2: Guide for Recording Gameplay On PC Using Paid Game Recorders
To record gameplay, we can also use Paid Game Recorder which you have to pay to get. The following are a few selected Paid Game Recording Softwares for PC with their guidelines, pros, and limitations;
Action Game Recorder
Action game recorder is one of the best pc game recording software that is used to record games. It helps you to make quality game recordings. It has audio commentary which can be added to game recordings. It has nice features like; game streaming, game recording. It records games with the best quality and the lowest file size.
Guidelines
Step 1 Buy and Download the Action game recorder
The first step is to Buy and download the Action Game Recorder from their website after downloading it then you can start recording your games.
Step 2 Change recording mode to "Games and Applications".
After buying and downloading the Action game the next step is to change the recording mode to Games and Application to record the game you want to record.
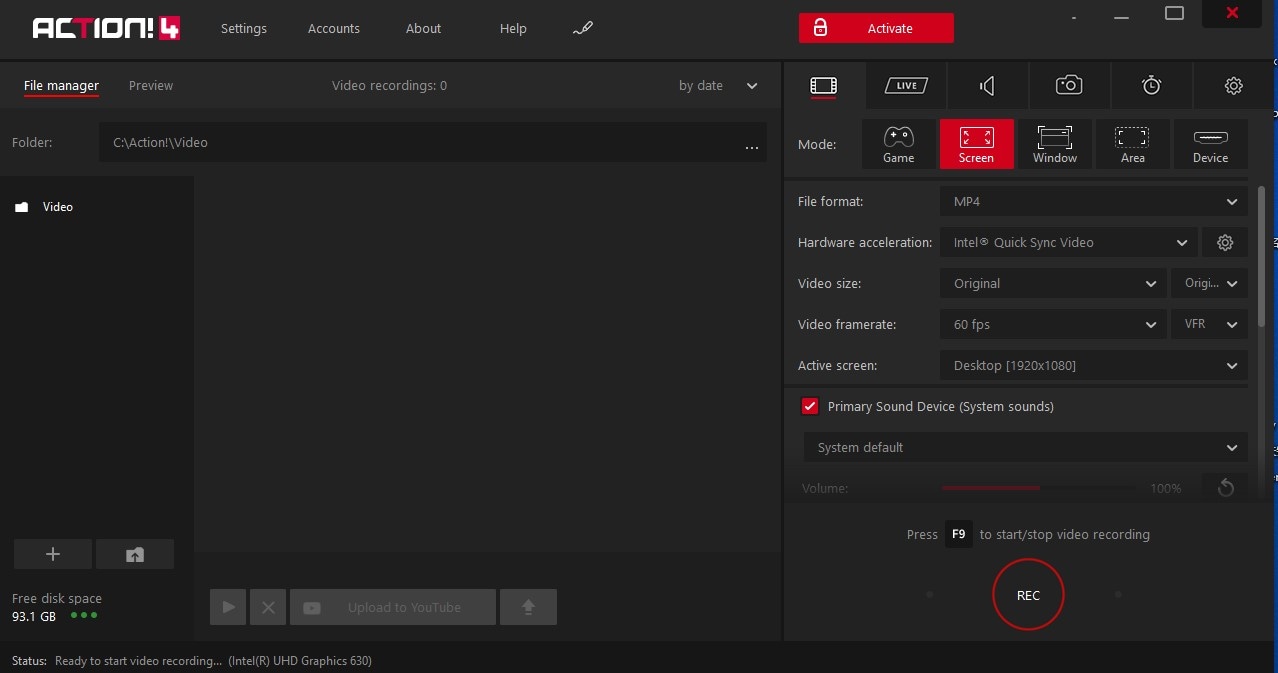
Step 3 Start the game and record
Action Game Recorder's HUD will show in the top right corner of the game showing the present game frame rate in blue color. This shows that the game is working and Action Game Recorder is connected and ready to capture the gameplay.
Click the F9 hotkey to begin capturing the game. HUD status changes showing that it's recording
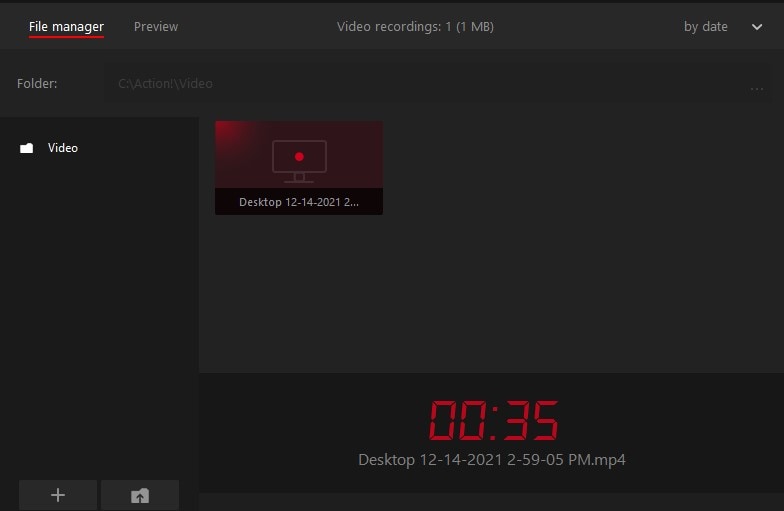
Step 4 End the recording
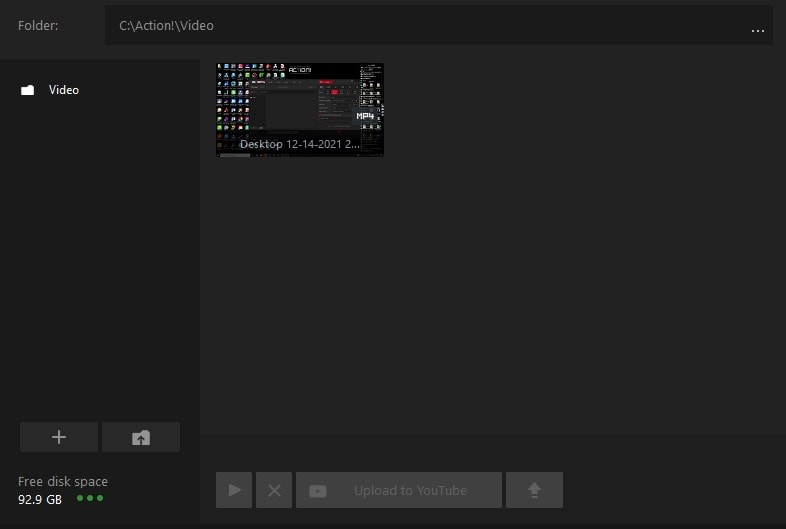
Select the File manager in the Action Game recorder's window and look for the list of video recordings.
Pros
It is not stressful to use
It records video in smaller size and good quality
Low CPU usage
It allows HD recording
It exports Videos Swiftly
Cons
It's not free.
It can't change the video bitrates within the app.
It can’t arrange the custom frame rate.
UniConverter:
The UniConverter is a game capture software for pc that can be used to record anything on the screen of your PC which also includes Games. It's not free, it is paid for. It's kind of expensive because you pay for it but its quality is worth the payment. The UniConverter supports all Windows and Mac, it boosts recording gameplay on them. UniConverter allows you to get your video in different formats. It has different features like; trimming of unneeded parts, inserting text, adding background music, adding color, etc.
Guidelines
Step 1 Launch UniConverter
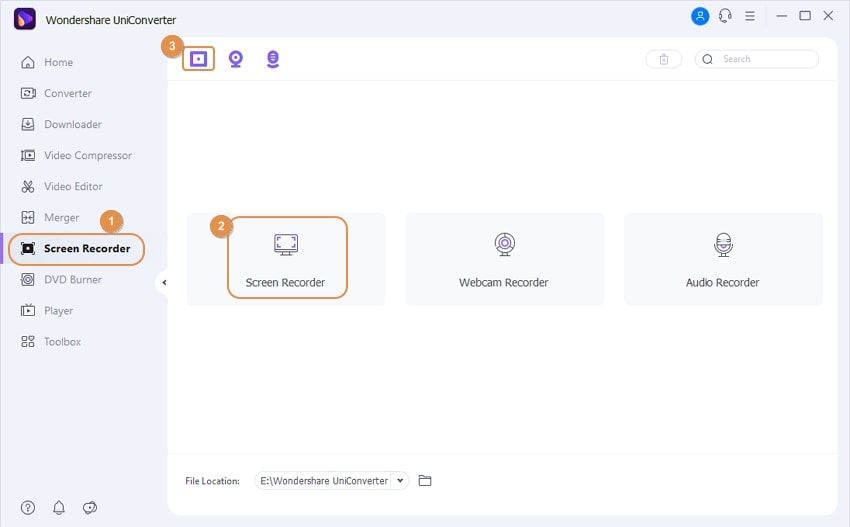
The first step is to buy and download the UniConverter app after doing this, Install it. After installing the UniConverter software, it will be able to record gameplay by selecting the 'Screen Recorder'.
Step 2 Select the Game you want to record and choose the settings
The second step in using UniConverter is to select the game you wish to record, and then use the cropper to choose the specific area of the game you wish to record. You can select the Fullscreen option or choose the area of the game you want to record manually by putting in the height and width.
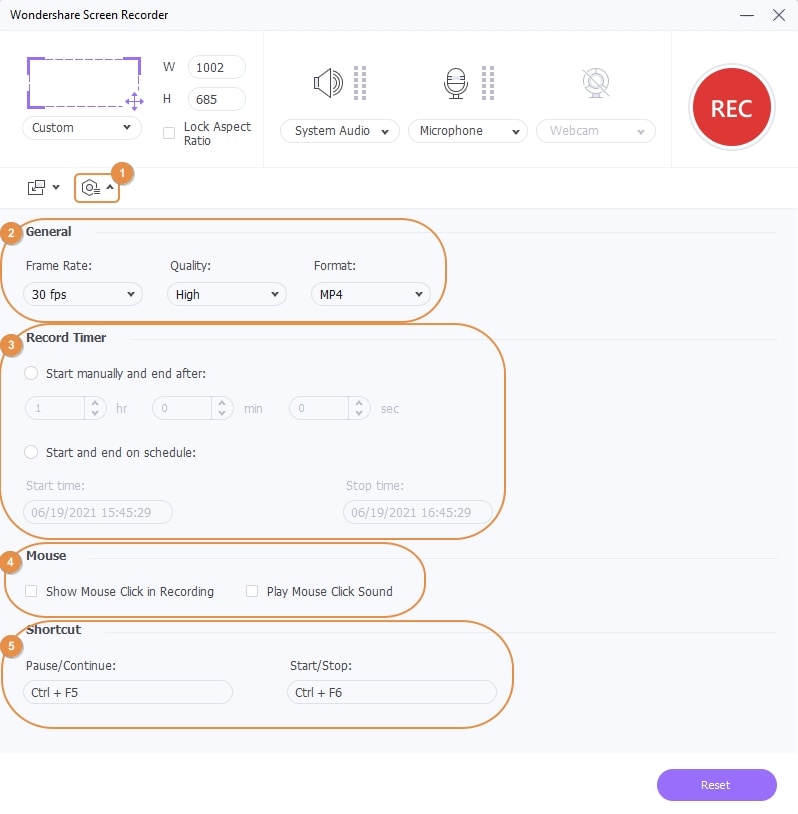
The third step is to select the audio source, to get the audio source, the internal microphone of the PC can be used, or better still, you can add an external microphone to the PC. But if you only need to record the Visual aspect of your gameplay, you can just off the Voice narration.
This feature allows you to picture yourself in the game recording. This is not compulsory but you might just like to insert your picture into the recording. To do this, you have to select your webcam and switch your resolution from the drop-down menu.
You can set up your recording by selecting the format of your recordings from the drop-down menu on the “General” icon. After doing this, close the settings panel and the setup is done.
Step 3 Begin Recording/ End Recording
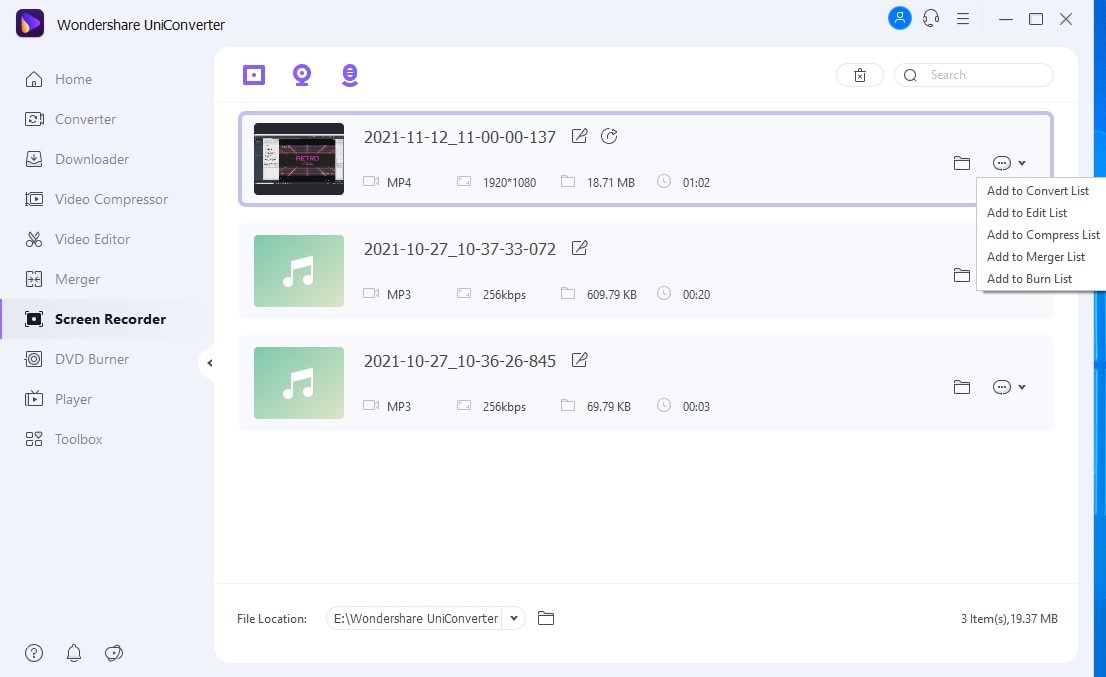
To record, just click on the REC icon to begin recording your gameplay. It will then start to record the display of the PC. To edit, you can choose the circle with an icon of the pencil to add text, add color, etc.
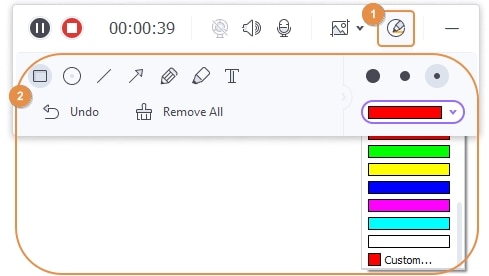
You can stop the recordings by selecting the stop button. To Re-check your gameplay record, select the open button to edit and finalize your recordings. The Edit option is located at the right side of the template. Thereafter you can share it to different platforms.
Pros
It is easy and stress-free.
It has a picture-in-picture feature.
It makes importing videos easier.
Recordings come out in different formats.
It has a real-time drawing feature.
Allows you to edit the video after recording.
Cons
It's not free
It is not available on Linux and mobile systems.
Gamecaster
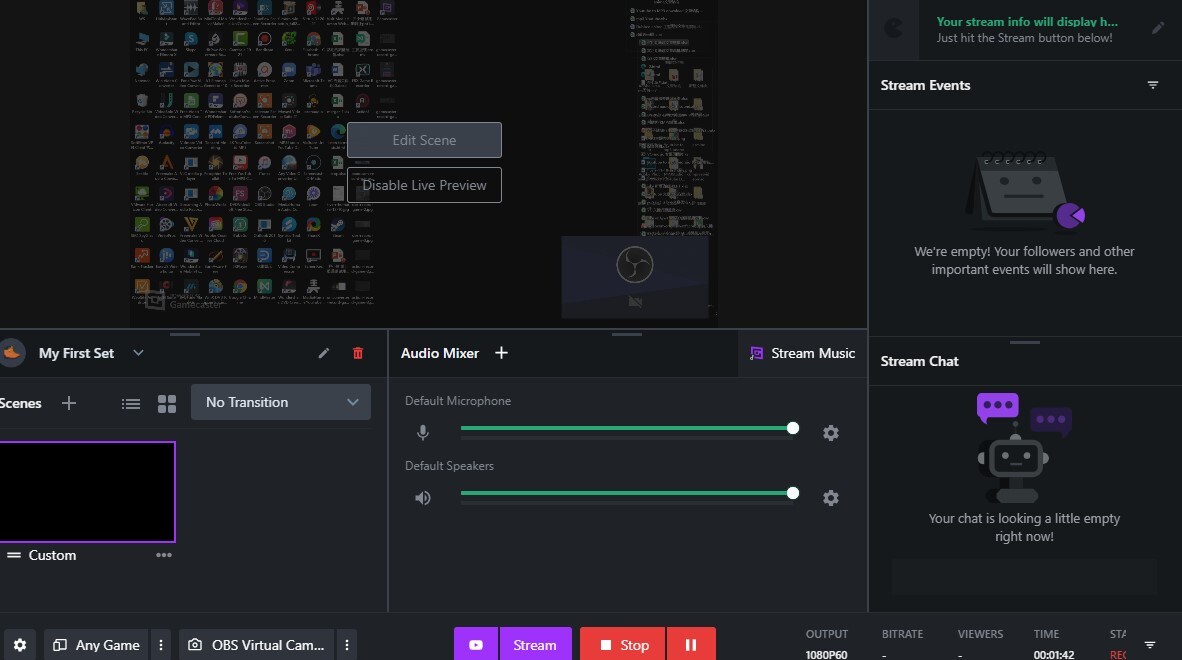
Gamecaster is also another game screen recorder for pc that helps gamers to record gameplay. It allows gamers to have the easiest and simplest way to record high-quality gameplay and game streaming.
Gamecaster makes it simple to manage recorded gameplays. It allows you to gather and edit gameplay recordings with an in-built editor. It also helps to Keep track of chat and events and engage with your audience. Gamecaster has the most recent NVIDIA and AMD optimizations to prevent lagging, game streaming.
Guidelines
Step 1 Sign in and link Gamecaster to streaming medium
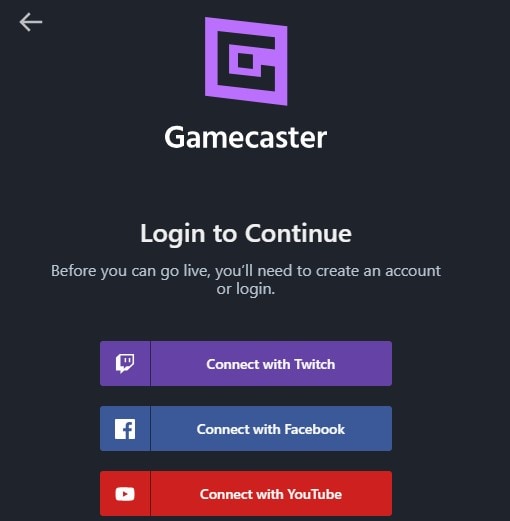
After getting the Gamecastee software and installing it, you will have to first load up Gamecaster, it will then ask you to sign in using an account on Facebook, YouTube, or Twitch. Certify and link Gamecaster to the streaming medium you plan to stream with.
Step 2 Setup your audio devices.
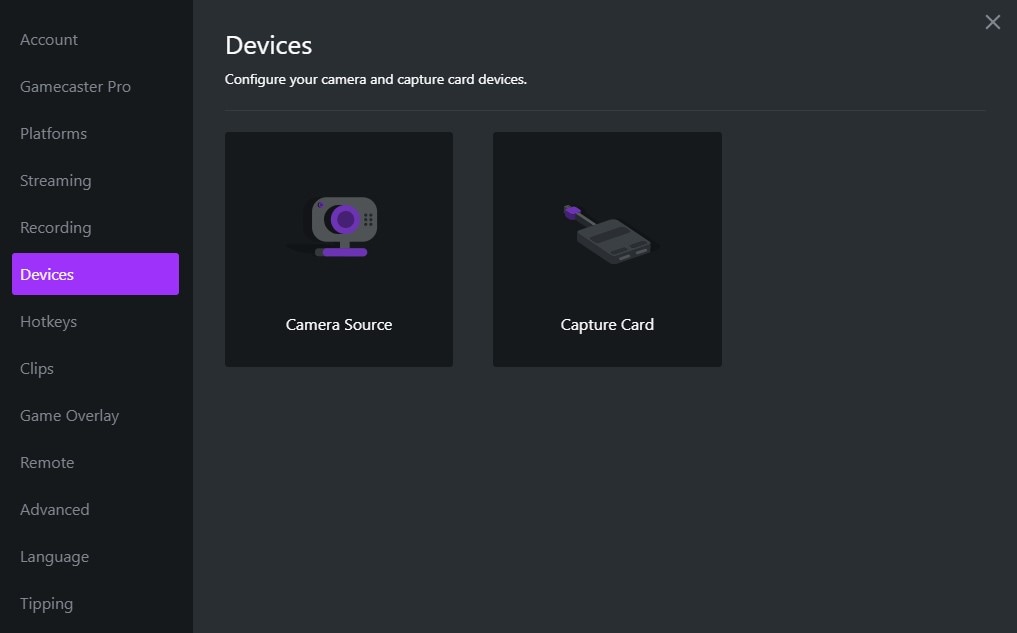
Secondly, you need to confirm that you can hear everything clearly and audibly before you begin the game record. To set up your Audio devices, Go to My account from there go to Settings then go to Devices and configure your sound system. Also, you need to set up your microphone to ensure that you are heard also.
Step 3 Get ready for your main scenes.
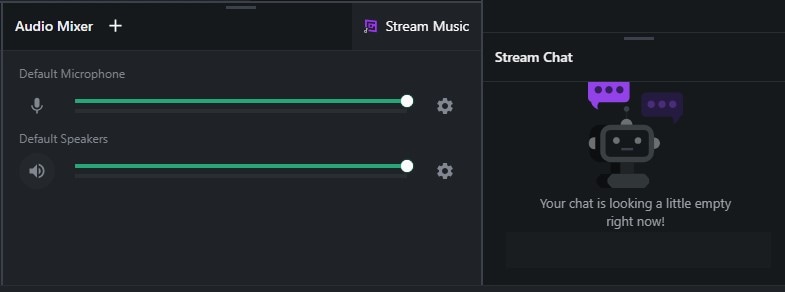
Normally, you begin with an empty scene with the full-screen main source that is created to record most games. You can begin to stream after this minimal configuration and put attention on your game. With this, editing the scene to add settings of your choice like a chat window, background music, etc
Step 4 Cross-check your Streaming and Recording settings.
When you configure your streaming and recording settings, it will allow you to begin streaming and capturing the game immediately. Custom settings can also be done to select advanced settings for the game stream.
Step 5 Final step
After completing all the previous 5 steps, all that is to be done is to click on the stream or record button in the main Gamecaster screen or the in-game HUD. Then you are good to go.
Pros
It's easy to use
It gives high-quality video
You can select a different format for your video
Asides from recording, it keeps track of chats and events
Cons
It's not free
Sign in is compulsory unlike other Game recorders
For Win 7 or later (64-bit)
For macOS 10.12 or later

