Record Screen on Mac with Audio-UniConverter
- Show a gaming session, make tutorial video with customized settings.
- Record screen, audio and webcam simultaneously.
- Help you record a screen while working on another screen.
- Useful record timer to help you set the start and stop time.
- Convert, compress, and edit the recorded videos.
Mostly, screen recording is used for making video tutorials, recording gaming, conducting virtual meetings, etc. Over the years, there have been a lot of uses for screen recording, so the apps need more features and functions. People do not just want to record video tutorials with nothing but their screen displaying. What if you have a webcam and want to record your reaction with each step you take on the screen? What if you need to record the audio as well. These questions have given birth to many software, apps, and online screen recorders that possess all these functions. You might think recording screen on Mac is tough, but with the right recorder, you might even enjoy the process. Here we list good Mac screen recorders with audio that will help you record screen activities.
In this article
Part 1. Record Screen on Mac with Audio Using Multifunctional Recorder- UniConverter 13
If you need very good software for screen recording on Mac with audio, UniConverter is our first recommendation. It is not just a simple Mac screen recorder with audio. It features editing tools as well. UniConverter will help you record a screen on Mac with audio easily. You get to customize screen size and select which area of the screen you want to record the picture-in-picture feature, choose recording formats and quality, and you can convert, record screen and sound at the same time.
How to Record Screen on Mac with Audio using UniConverter 13
Step 1Launch UniConverter's Screen Recorder
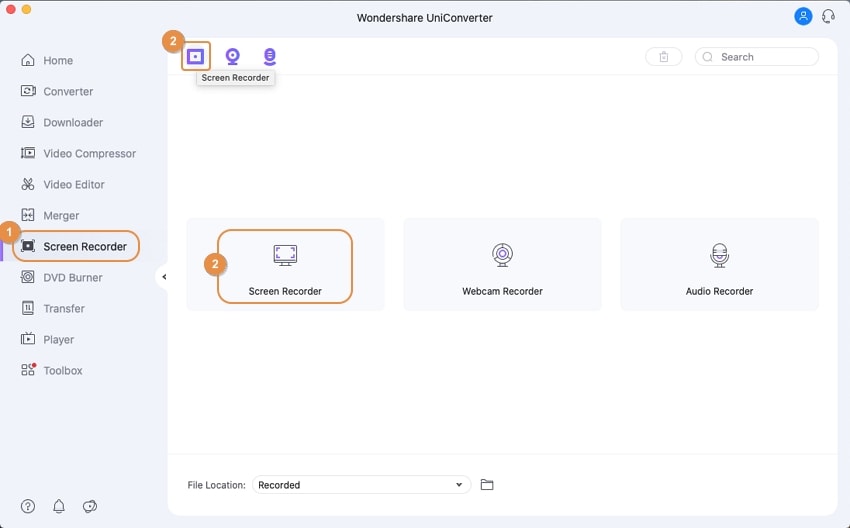
Once you open UniConverter 13, you can see the 'Screen Recorder' feature is in the left section. Click on it, the you can find the 'Screen Recorder' from 3 recording options UniConverter 13 provides: Screen Recorder, Webcam Recorder, Audio Recorder.
Step 2Choose the recording mode
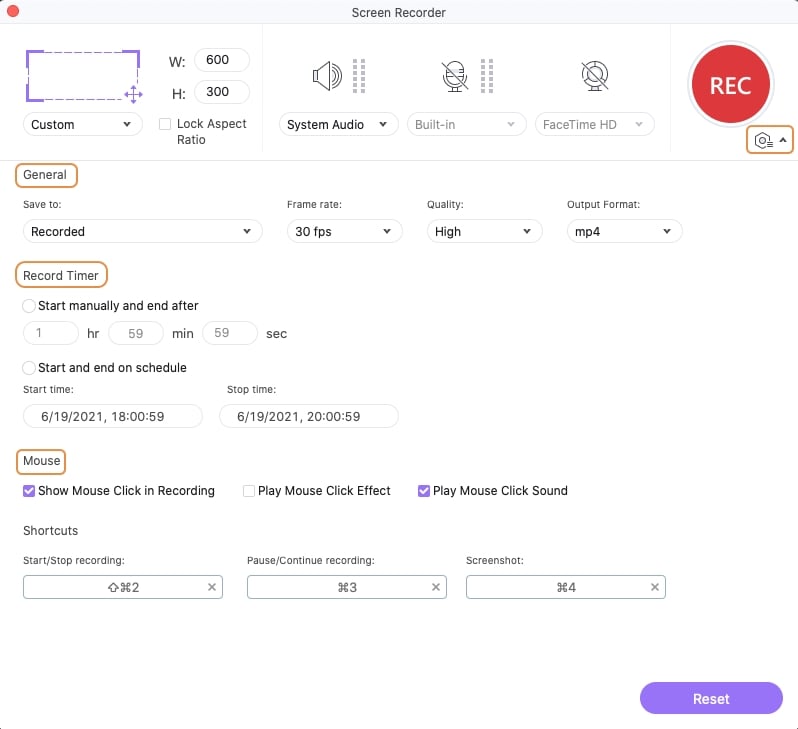
After choosing the 'Screen Recorder' option, you can choose the recording mode, audio recording, aspect ratio, webcam recording, the screen you want to record. On the settings drop-down menu, you can find more options like output quality and format, record timer, mouse recording, ect.
Step 3 Start Record
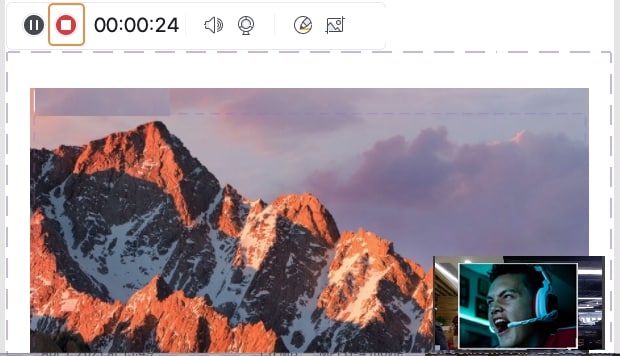
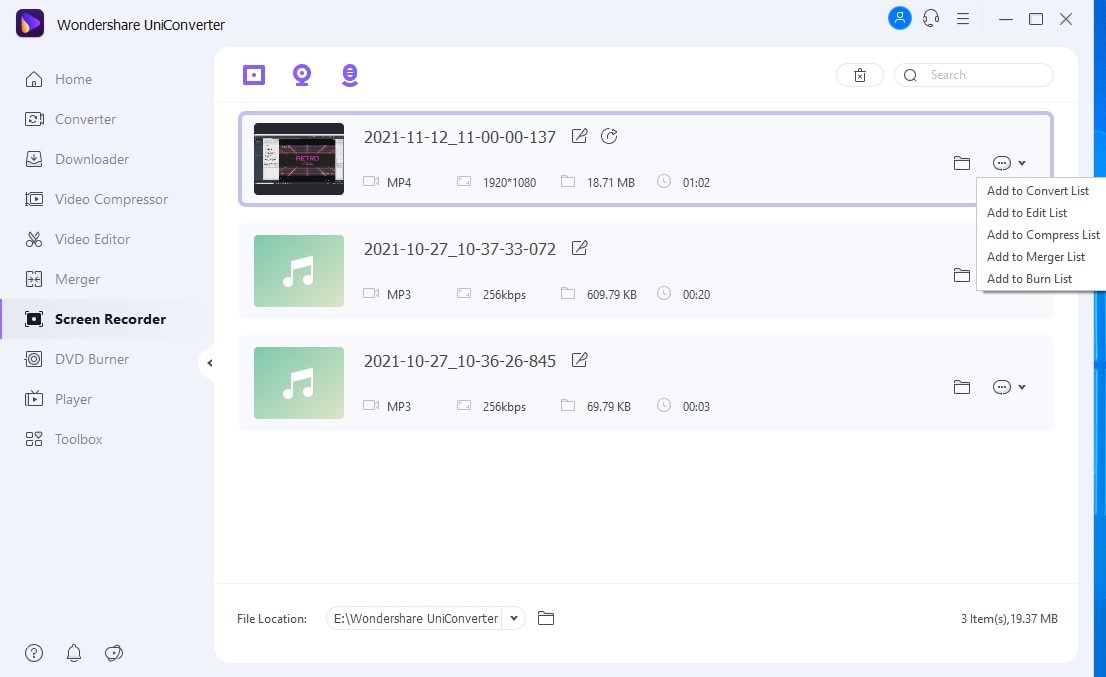
If you are done with the settings, you can click the 'Rec' button to start the screen record on Mac. You can choose the 'Pause' and the 'Stop' icon if you want to pause or end the record. After recording, the output video will appear automatically at the UniConverter's interface, from where you can find the file location.

If you want to convert, edit, merge, compress, or burn your videos, you can click the relative list on the left side of the template.
Pros
Can record mouse move and the mouse clicking sound
Supports the use of an external mic
Can choose the quality of output
Editing features
You can switch the screen to record
Cons
It is not available on the Linux system
It is not free
Part 2. Record Screen on Mac with Sound Using Built-in Recorder - QuickTime
Do you know how to record screen and audio on Mac and how to screen record with audio on Mac using built-in software QuickTime? QuickTime is a built-in app for the Apple system Mac. You can always find it in the application section, and it works as a media player for the system. However, QuickTime is a treasure of a media player as it can also perform other functions apart from playing videos or audios. The Apple company describes QuickTime as ‘a suite, an app, a group of apps, files and plug-ins’. And It functions as a video and audio player, VR tool, screen and audio recorder, simple video editing like trimming, splitting, etc. It can even mirror your iPhone or iPad screen. In short, it serves as a multifunctional tool for users of Apple devices.
How to Record Screen on Mac with Audio using QuickTime
Step 1Open the QuickTime app and Choose screen recording
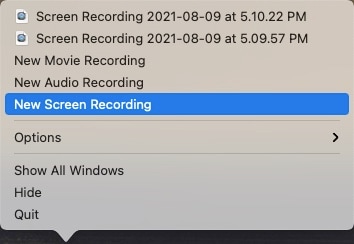
Launch the QuickTime software on Mac and click on File on the toolbar at the top of the interface or the QuickTime icon on the left-lower side. Scroll through the options and select 'New Screen Recording', which will open the screenshot tab,
Step 2Select screen record and adjust the record settings
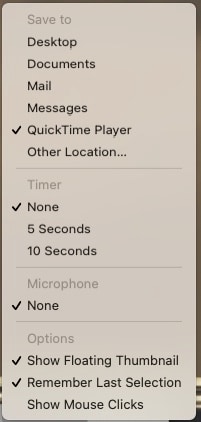
The Screenshot tab contains all tools used for screenshots and screen recordings. Click on ‘OPTIONS’ towards the far end of the tab to bring out the screen recording settings, where you set options such as selecting the area to screen record and the mic to use for screen recording. You can also activate the ‘show pointer’ option and the sound of the mouse click.
Step 3 Start Record
When you are done with the setting, click on ‘RECORD’ at the far end of the tab to begin the screen recording. To stop, you go to the menu and click on the stop recording tab.

Pros
It is a multifunctional tool
Compatible with all apple devices
Works as a converter
Cons
It can only do basic screen recording, no editing options
It doesn’t support dual-screen records, i.e. webcam and computer screen
Can only export video in MOV format
Part 3. Record Screen and Audio on Mac with Online Recorder-ScreenApp.io
Have you ever wondered how to screen record on Mac with the audio or screen record on Mac with sound without needing to download any app? A browser-based screen recorder for Mac. ScreenApp.io never fails to deliver that fast and crystal clear recording of your screen. As with all other online applications, it is completely browser-based. As such, it requires an internet connection to run smoothly. ScreenApp.io supports Chrome, Opera, and Firefox. It is a free, lightweight, web-based recorder that lets you record PC screens without additional data or plug-ins. Like other top screen recorder apps, ScreenApp.io gives you the freedom to choose which part of the screen you want to record. Although it doesn’t support recording webcam alone, it can use both screen recording and webcam recording, and it keeps the use of external mic to record voice. As of the time of writing this article, ScreenApp.io hasn’t been discovered to have a limit on the length of recording it can do.
How to Screen Record with Sound on Mac using ScreenApp.io
Step 1 Visit screenapp.io and sign in
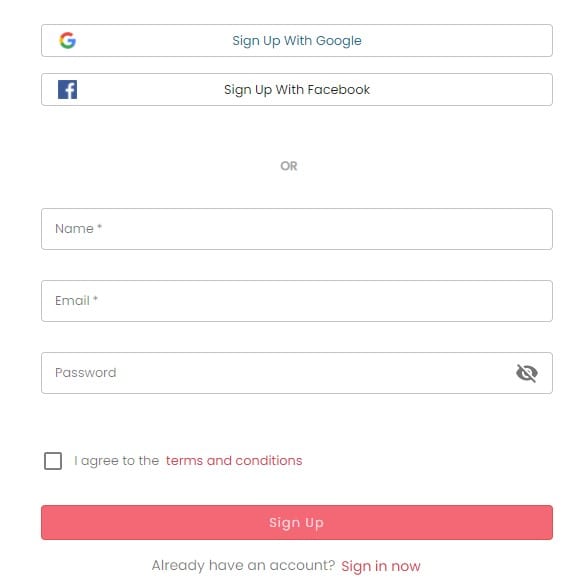
Input the website into any of the supported browsers (Chrome, Firefox, or Opera). At the top right side of the screen are the ‘sign in’ and ‘sign up’ options. You can’t use ScreenApp.io without signing. It is free and costs nothing to sign up. After signing in, you will be redirected to your dashboard, where all your recorded videos are stored.
Step 2 New Recording
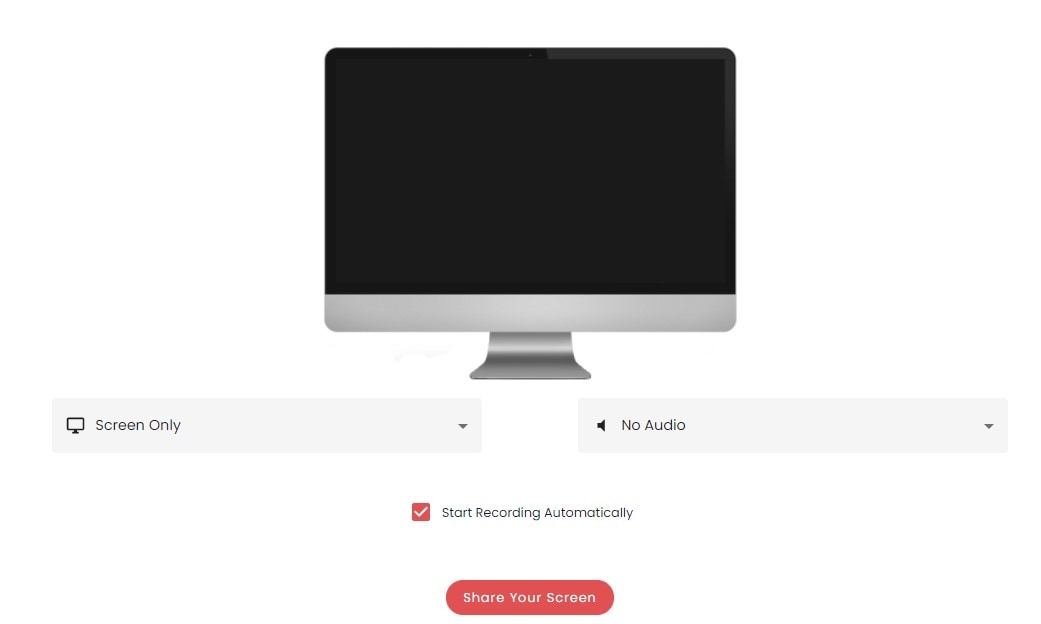
Click on New Recording, which is also at the top right corner of the screen. Beware, an ad might cover it. So if you can’t see it immediately, close the ad at the top of the screen. Clicking on New Recording will lead to another page where you adjust the settings for the screen recorder.
Step 3 Share Screen
After Adjusting the settings for the screen recorder, click on the Share your screen at the bottom part of the screen. The prerequisite for ScreenApp.io screen recording is that the screen you want to record must have been opened in the background before visiting the app. So, when you click on the Share screen, it displays all Windows that are opened on your system. You get to choose if you want to record the entire screen or the windows or a particular tab in the browser that you are in.
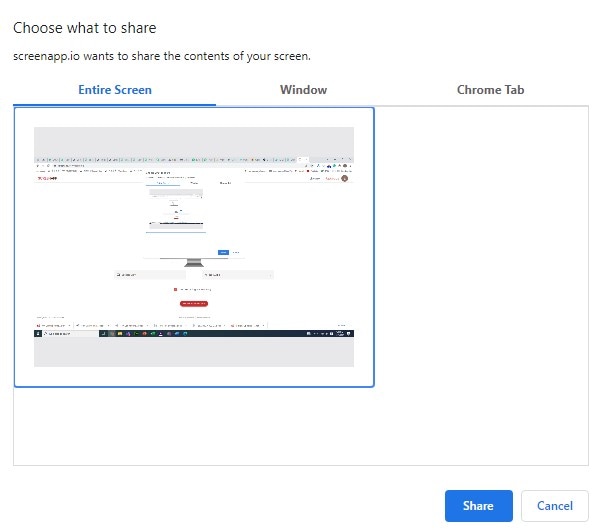
Step 4 Start Recording
Once you have selected the type of screen recording you want and the app you want to screen record, the app will appear on the model monitor on the ScreenApp.io page; that is how you know if the screen is indeed selected. Next, click on the red circle (Record button) to start recording. The screen begins recording, and you can go back to the screen you selected and do your video.
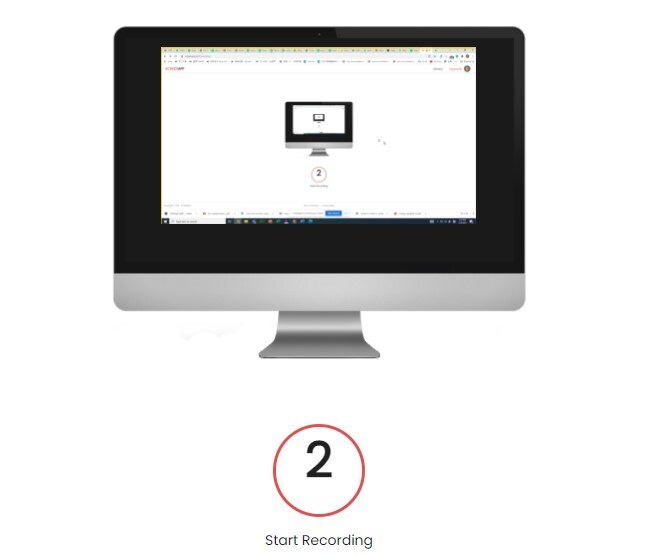
Step 5 Stop Recording and Save
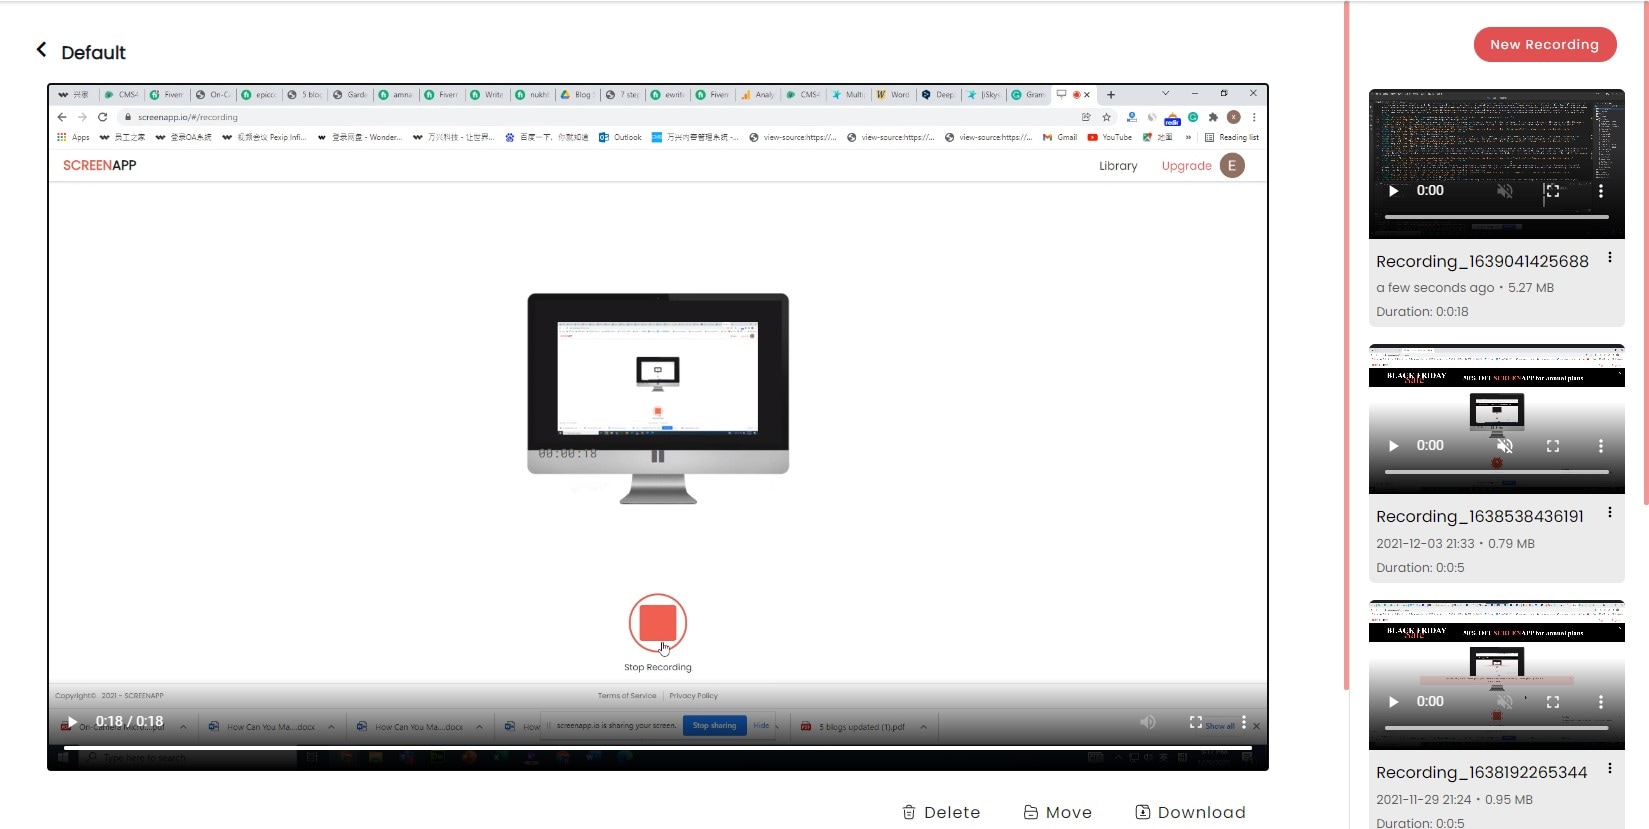
Once you are done, go back to the browser to stop the recording. As said earlier that ScreenApp.io has a dashboard that stores your recorded video. The output video will be held on the dashboard. You can watch, delete, move and download it there. By default, you downloaded video will go into the ‘Download’ folder on your system
Pros
Mac record screen and audio
Can record keyboard and mouse clicking sounds
Records in high quality
Cons
Exports only in WebM format
It sometimes downloads the recording files automatically
It has no editing function
Part 4. Good Tips to Help You Make Creative Screen Recording
1. Adjust the Screen Size to Avoid Recording Unwanted Things
While you are doing screen recording with sound on Mac, it is very important to note that you only need to cover the important parts. This reasoning is probably why most screen recorders will give you the option to share either the entire screen or only the windows, and some with higher functioning will provide you with the option of selecting the part to screen record by yourself
2. Add Background Music to Recordings to Make Video More Relaxing
Another very important tip when you record screen mac with sound is to add music to make your video more relaxing and attention-grabbing. There are exceptions to this tip, but for the most part, if you are making a ‘how-to-‘ video, the output recording should be fitted with relaxing music to keep your audience from getting bored while you are busy making the tutorial.
3. Adjust the Size of Content and Video Quality to Make Sure the Audiences Can See the Content Clearly
Mac has numerous screen consoles, but only some can record and maintain high-quality video. As such, you need to be careful about the final file size and quality, as this might impact what you do with the video next. Some screen recorders can only export the recorded video in one format, and other players may not support this format. When making a screen record, file size, video quality, and export format are other things to be considered. No sweat though, there are converters and compressors like UniConverter, Freemake, and MediaHuman that can convert the video to different formats and compress the size without reducing quality
4. Trim the Unwanted Parts after Recording
We do record a lot of unwanted parts when making a screen record. Probably something occurred, and your system popped up a notification while making the screen record. You do not want your viewers to think that is also part of the video, so you need to remove it. Screen recorder like Camtasia or UniConverter lets you record and trim screen recordings after you are done with the video.
Long story short, you do not only need a screen recorder. You need a screen recorder that can help you record the video and edit it to make it look perfect, and our recommendation is UniConverter. It has all the tools you would ever need to make your videos look professional and perfect. It is easy to use and doesn’t require any complicated steps.
For Win 7 or later (64-bit)
For macOS 10.12 or later

