Enhance Your Recording Experience-UniConverter
- Help you show a gaming session, make tutorial video with customized settings.
- Record screen, audio and webcam simultaneously.
- Help you record a screen while working on another screen.
- Useful record timer to help you set the start and stop time.
- Convert, compress, and edit the recorded videos.
There is no perfect video editor, all of them usually have one or more shortcomings. As far as screen recording is concerned, it has many uses. you can use it to record a Zoom meeting, create a video game walkthrough, reveal tricks and tips, and simply show gameplay. Teachers also use it for their lectures, to improve the quality of their lessons. Perhaps the most common use of the screen recorder function is to create tutorials and how-to videos. Many thoughts go into making a how-to video, and so do the preparations. Recording your screen with some run-of-the-mill screen recorder can make your video look subpar and unprofessional. As such, we have come up with the six best screen recorders on Mac for free.
Part 1. Details of 4 Best Free Screen Recorders for Mac
FonePaw
Available on both Mac and Windows, Fonepaw is a multifunctional video editing software that can perform many functions, one of it being a free screen recording software on mac. As a screen recorder, FonePaw can capture screen, audio, and webcam simultaneously. It can activate the picture-in-picture feature to get the most of your screen record. You can also make annotations to your videos in real-time. Well, it can be said to be one the best free mac screen recorder.
Steps to Record Screen with FonePaw
Step 1 Launch FonePaw and Select Video Recorder
Download and install the software if you are yet to do so, and on the main interface, there are three recording options available. Select the Video recorder, and a new dialog box pops up.

Step 2 Set the Screen recording options and Start Recording
On this screen, you get to select the part of the screen that you want to record, select the audio device you wish to use either external or system audio. The two options available for the screen area are: full and custom. Full meaning you record the entire screen and custom lets you select which part of the screen you want to record. Under Custom, you can choose a preset aspect ratio or create your own. Also, on this box, select if you will be using Webcam. Click on the record button when you are done. Click on the same button to stop the record.

Step 3 Preview, Edit, and Save
When you stop recording, a preview will be available for you to see the output of your video. On this screen, you can also do some editing before finally saving your video to your computer. If you are not satisfied with the output video, you can delete it and do it again.

Features
-
Voice reduction and enhancement features
-
Noise reduction function
-
Editing features
-
Video creation features
-
Simultaneous recording
-
Video resolution upscale
Pros
It has a playback option where you can close the current video and return to it later
Real-time editing, like adding annotations
Fonepaw has video and audio optimization features like noise cancellation and voice enhancement
Cons
It is not completely free
It has lots of features, but its editing features are limited
QuickTime
An original software from the Apple Company and a free screen recording software for mac. It is a built-in multimedia player for Apple devices and especially Mac computers. Apart from being just simple multiple players, QuickTime has some basic video editing features which save Mac users the stress of looking around for specialized apps. However, as stated, these functions are pretty basic, so they are just for casual uses but still, they can still function as a mac screen recorder with audio for free. You can stream videos online, play videos of almost any format, increase and decrease playback speed, limit conversion to and from different formats, merging and screen recording
How to Record Screen on Mac using QuickTime
Step 1 Launch the QuickTime software
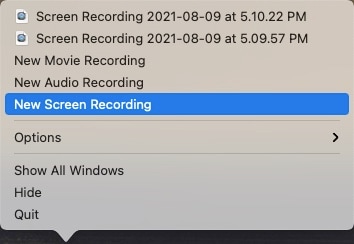
On the main screen of QuickTime software, click on File from the toolbar at the top of the screen. Select New Screen Recording, and a bar will pop up. It contains options for screenshot and screen recording and some tools that will help you with your screen recording.
Step 2 Start Recording
Placing your cursor on each option will reveal what they do. Locate the screen recorder; on the right side of the box, click on the icon to activate it. It doesn't start immediately but instead gives you options to set up your screen recording. You can also choose whether to show cursor movement or not. Click on Record at the far end of the bar when you are ready to start recording.

Step 3 Stop Recording and Save
When you are done recording, click on the stop icon on the bar and save it to your desired location.
Pros
Works across all Apple devices
It can convert videos and audio to a different format, although limited
As a media format, it supports lots of formats, both audio and video
Cons
The output quality of the recording is low
It doesn't support simultaneous recording of screen and webcam
You can only export your videos in MOV either when recording or merging
Icecream Screen Recorder
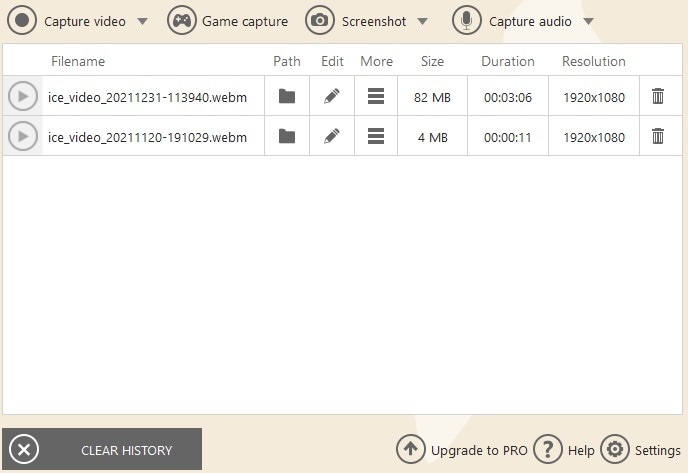
This screen recorder is said to be one of the best for gamers. We all know gamers who do a lot of screen recording; to show their viewers walkthroughs, gameplay, tips, and tricks and just to react to some new games. The Icecream free screen recording software for mac is a pretty simple free screen recorder for mac with audio that can be used to create some amazing videos and make them look professional. The PRO version allows you to export your videos to many formats, but the version only allows WEBM format.
Steps to Record Screen using Screenrec
Step 1 Launch Icecream Screen Recorder
Open this software. Then you can see four options displayed on the top of the interface: Capture Video, Game Capture, Screenshot, and Capture audio. Open the 'Capture Video' drop-down menu, and choose the recording mode.
Step 2 Adjust the settings
Then, a setting bar will pop up, from where you can set the webcam recording and the audio source.

Step 3 Click the Rec button to begin the recording.
You can click the Icecream icon again to activate the editing bar and click the 'Draw' icon to add some notes to your screen during the process.
Step 4 End the record and save the video
Click the 'Stop' button to finish the recording, the output video will be saved in your local file location.
Features
-
Live stream and live stream recording
-
Sharing options
-
Simultaneous recording (screen, audio, webcam)
-
It has some customizable functions and features
-
Can add watermark to videos
Pros
You get to choose which format your recorded video will be exported in
You can share your output video directly to the internet
You can record screen and webcam with audio
Cons
There are limitations in the free version, you can only export in one format, and you can't record more than 10 minutes
There are watermarks attached to exported videos if you haven't bought the PRO version
OBS Studio
Standing proudly as one of the best video editors is OBS studio. It is one of the best free screen recorders for Mac. It has lots of functions attached to its screen recording feature like sharing your screen during recording so others might be able to see what you are doing, adding transition effect when changing screens. There is also the option of adding shortcuts keys to make the recording process easier, you can customize these shortcut keys as well.
Step 1 Launch OBS Studio
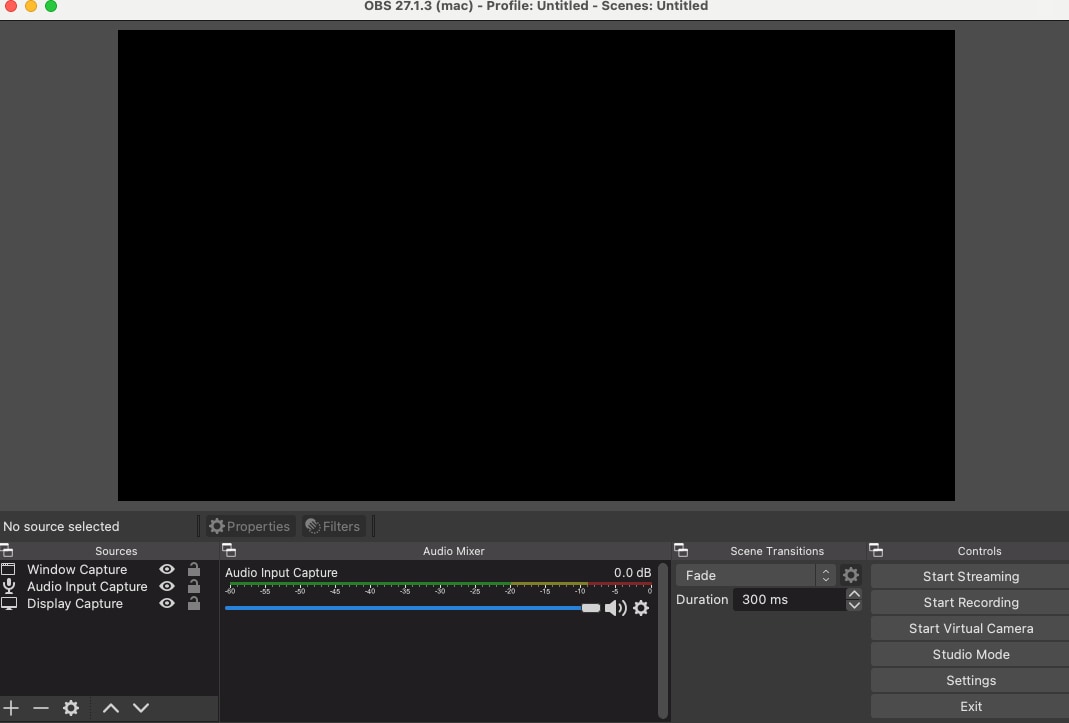
After Installing and opening OBS Studio, Move your eyes to the left-down corner of the interface, from where the sources are displayed: Display Capture, Window Capture, and Audio Input Capture. You can add the sources by clicking the '+' icon and choosing the other sources.
Step 2 Change the settings
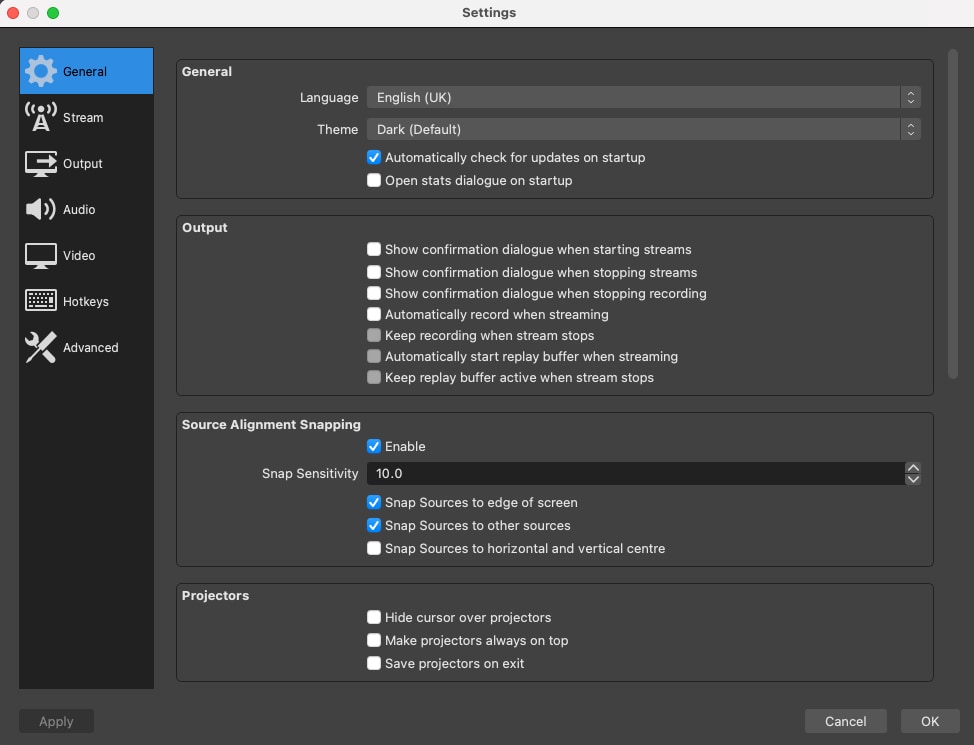
You can preset the settings by clicking the 'Settings' button, and you can choose the language, theme, and output format, etc.
Step 3 Start to record screen on Mac
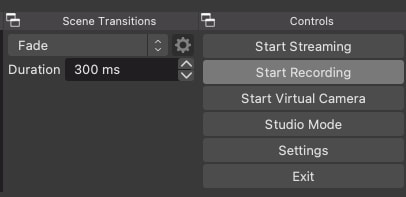
Click the 'Start Recording' option to begin the recording process.
Features
-
Shortcut customization
-
High-quality HD video output
-
Sharing options
-
Video Broadcasting/ Direct streaming
-
Video transition effects
-
Noise suppression and enhancement
Pros
It makes screen-switching easier with its option to arrange the screen in the order that you want to open them
The shortcut customization works towards making the process even easier
It has noise suppression and enhancement features
Cons
You can only use one transition effect for the whole video
It sometimes crashes, but this is especially on low-spec computers
Apart from crashing, it can also freeze occasionally
Part 2. Alternative Solutions When Free Screen Recorders Don't Work
Uniconverter is useful for a whole lot of reasons. It is a multipurpose app with over 50 tools and still counting. You can convert videos, compress them, merge them, burn to disc, add and remove the watermark, screen record, including simultaneous recording of webcam and audio. The functions of Uniconverter cannot be stated as is, there is just too much to count, and this doesn't affect its functionality and usability. Everything is all well-arranged. The interface is so neat you can easily locate any one of the functions. It is worth mentioning that each of these functions can rival even tools that were professionally made for it, so Uniconverter is not equal to other video editing software by a large margin.
Steps to Record Screen Using Uniconverter
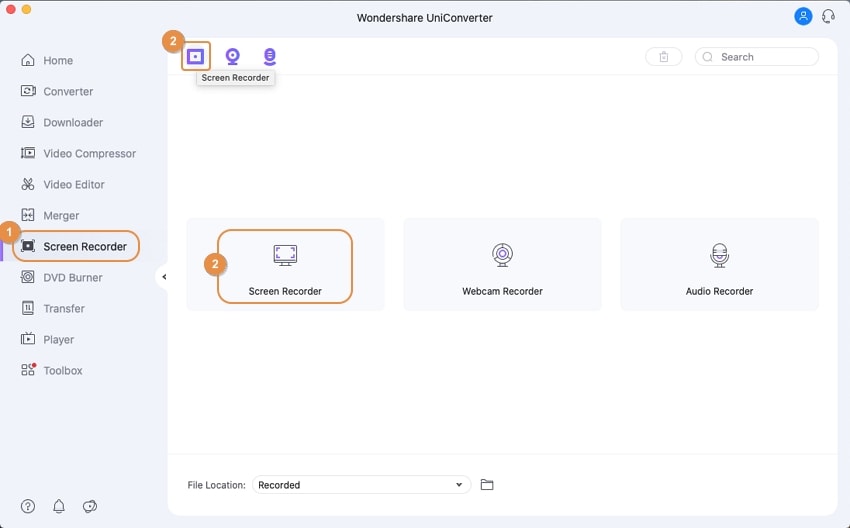
Step 1 Launch Uniconverter and Select Screen Recorder
On the software's main interface, look to the left, and you will see a list of tools, locate Screen Recorder, and click on it. You will be given three options; Screen recorder, Webcam recorder, Sound recorder.
Step 2 Set Region and Begin Recording
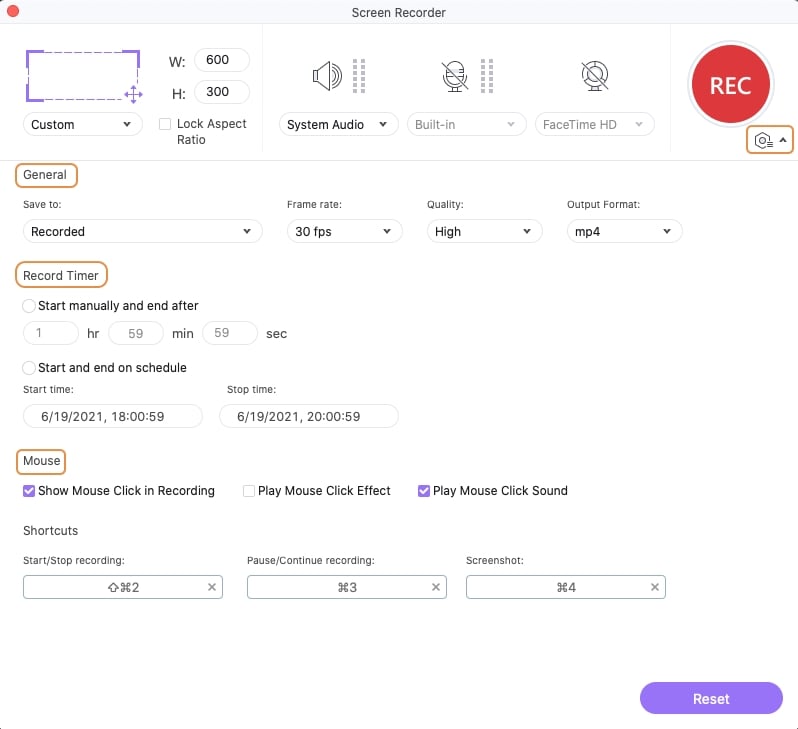
Clicking on Sound Recorder will pop up the recorder settings, here you can choose which part of the screen you want to record, whether the entire screen or you will like to set your custom area. You can also select which audio receiver to use, either an internal mic which your system audio or an external mic. Click on the red record button when you are done with the setting to start recording.
Step 3 Stop Recording and Save
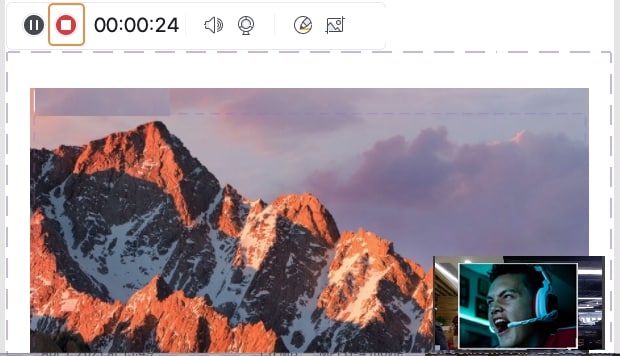
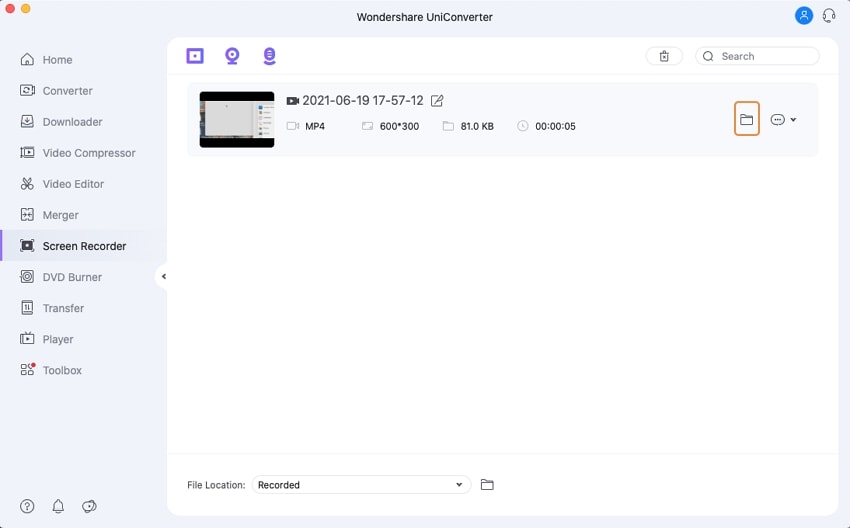
Go back to Uniconverter software and click on stop to end your recording when you are done. Your video will be processed and made available to you. You can choose to edit your video here before saving it. Your video will be saved to the Uniconverter folder in your Local disk, but you can change the destination by clicking on File located at the button on the screen
Wondershare UniConverter 13 - A Complete Meida Toolbox
5,481,435 people have downloaded it.
UniConverter supports many formats and handles conversion equally, ensuring that high quality is delisered at all times.
During the conversion process, you may add multiple files since the program does batch conversion of files.
You can use the editing suite that covers subtitle editing, watermark editing, etc to make your results creative masterpieces.
This software facilitates file transfer to devices like Android and iPhone among others once the conversion is complete.
UniConverter is also capable of handling video compression hence ensures you acquire the video sizes you desire.
Camtasia
Pricing:
$299.99 – Individual and Business
$214.71 – Education
$268.99 – Government and Non-Profit
Camtasia is more or less built for screen recording. Unlike some other screen recorders with multiple tools, Camtasia tools are purposely made for screen recording. It has a lot of templates that you can choose from. There are stock images and music that you can use to make your videos more professional. It also has the green screen background remover, and you can replace your background with another background; from your computer or the preset. It has some editing features, but they are limited to those useful for your screen recording like annotation, transition effect, etc.
How to Screen Record on Mac with Camtasia
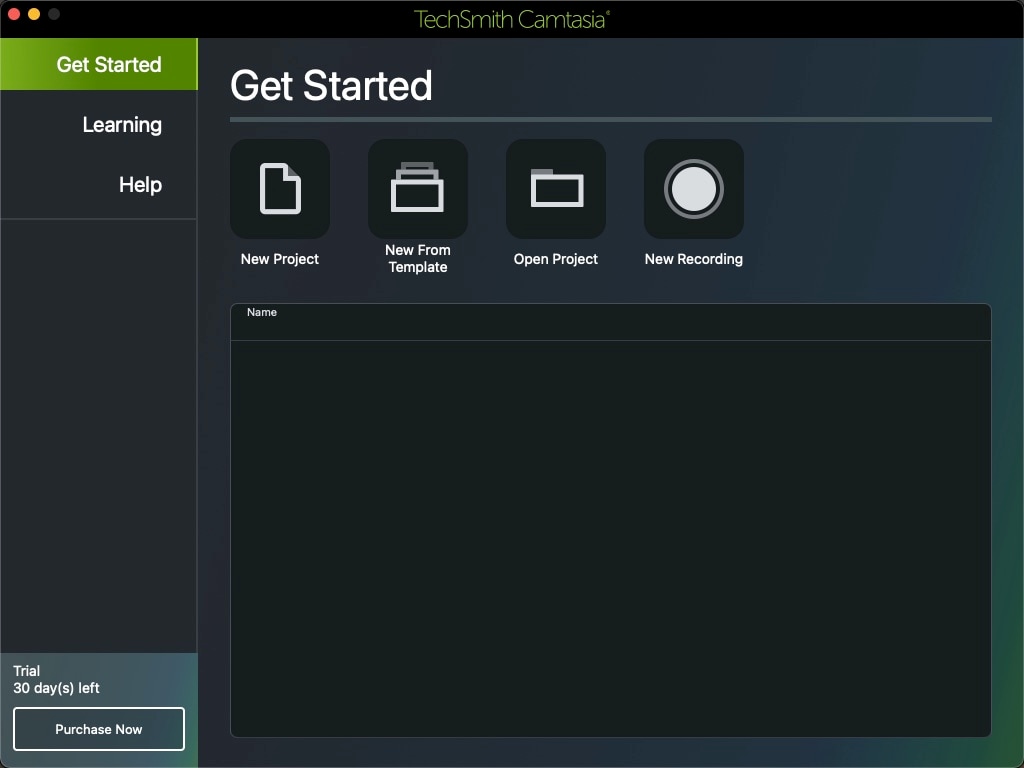
Step 1 Launch the software and Select Record
There is a record button on the right side of the main interface. Click on it to bring out the options for screen recording.
Step 2 Edit the Options
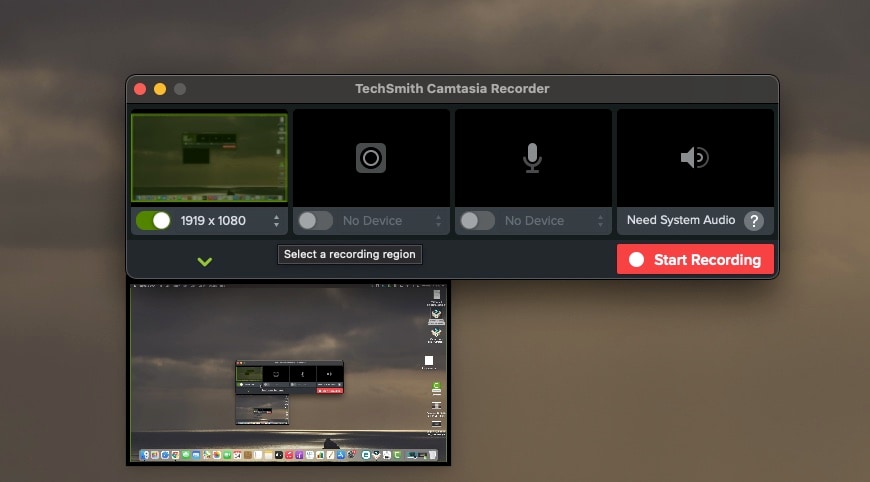
In these options, you are given a chance to change the area you want to record, but by default, Camtasia will record the entire screen. From the options available, click on 'select area to record', and you will be able to change the region to be recorded. Then you can check the boxes for other options like webcam, and the mic to be used whether external mic or system sound.
Step 3 Start Recording
Proceed to click on the record when you are done with your settings
Step 4 Stop Recording
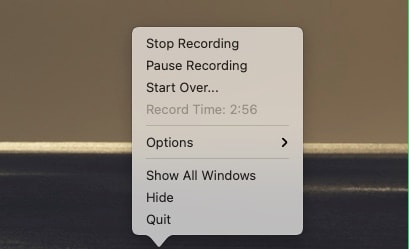
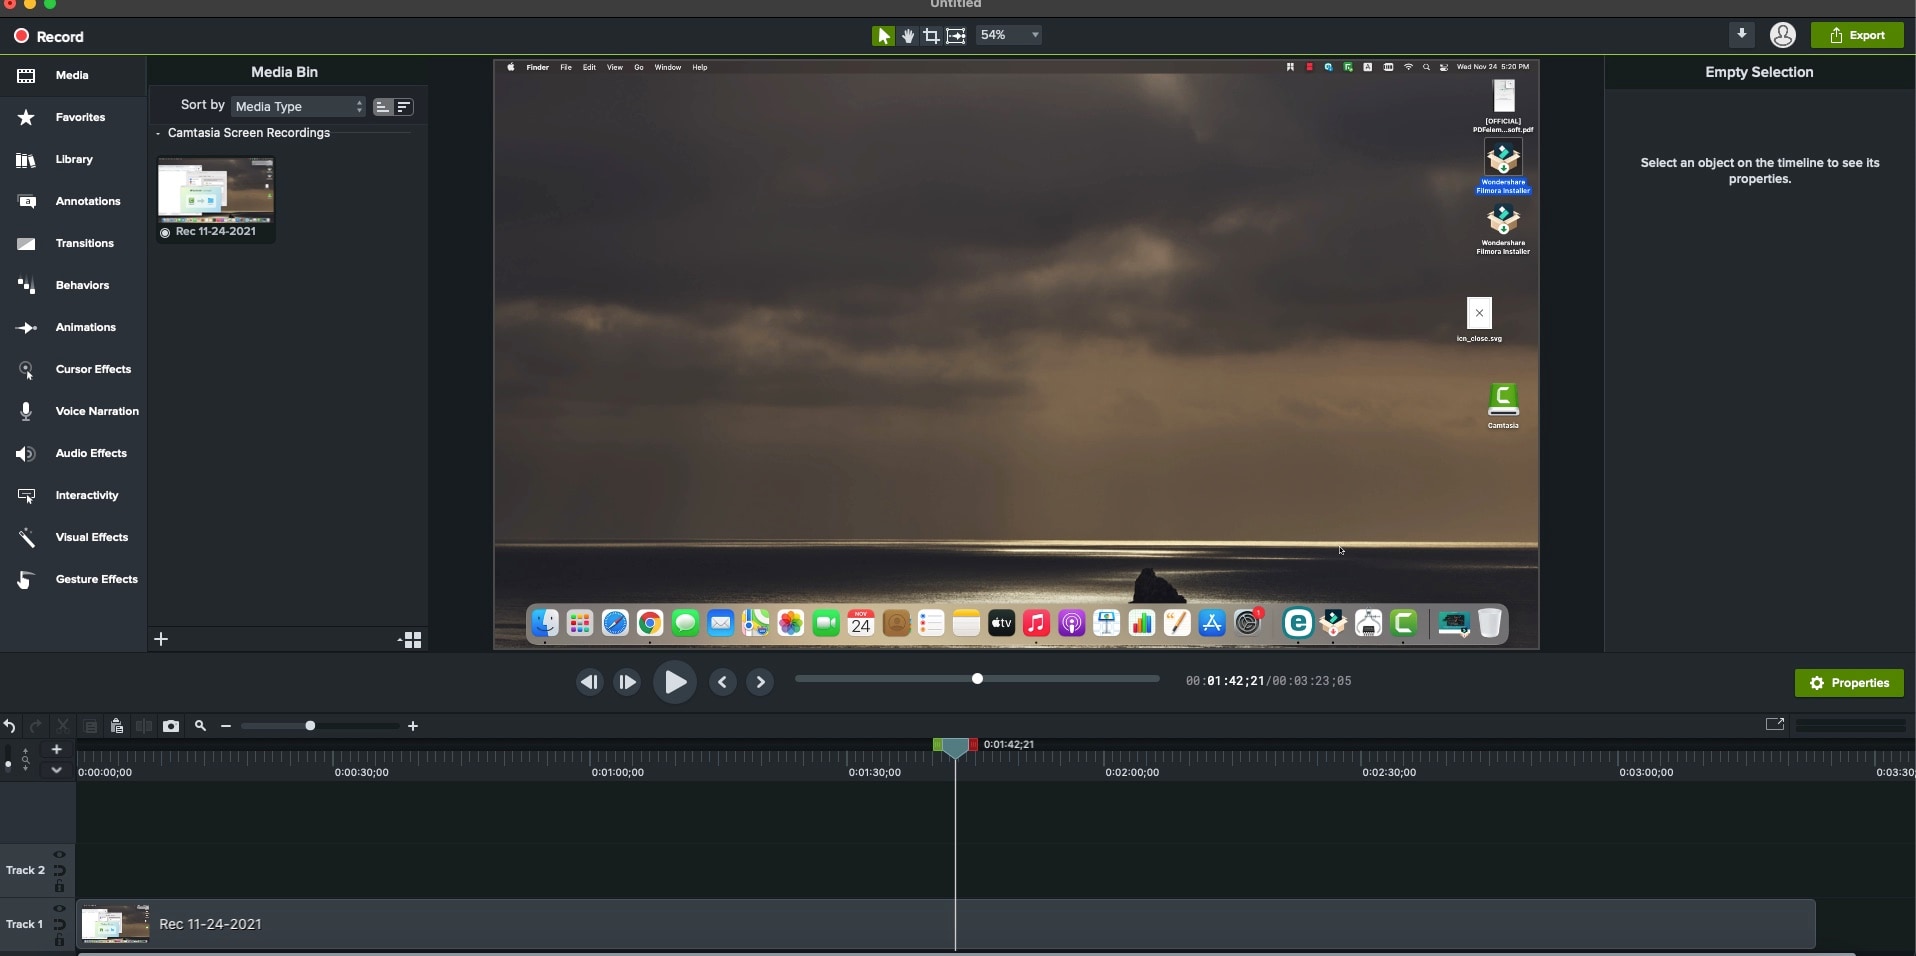
For Mac users, click on the Camtasia icon in the menu bar and then Stop recording. Now the video will be displayed on the Camtasia editing interface.
Or use shortcut ⌘ + ⌥+ 2 to stop recording and ⇧+ ⌘ + 2 to pause or continue recording
Pros
The app is pretty simple, and beginners can easily get its hang.
It has all the necessary tools to create a professional screen record.
There are preset templates ready for you to use. You can create your template and save it another time.
Cons
The time taken to launch the app and process your videos is too long.
Paying for PRO doesn't cover the updates. You still have to pay for those separately
There is no limit on the video size you can work on, but the app might crash as you work with larger-sized videos.
Conclusion
Here, we conclude our list of 6 free screen recorders on Mac that you can't miss, our top picks contain the ones with the best editing features like Uniconverter and Camtasia. You can't make your video look professional with just the simple screen recording. You need to add aspects of annotations, picture-in-picture, support external mic, transition effects, and so on. Camtasia is made especially for screen recording, so it contains some of the best features you would need. Uniconverter, on the other hand, is a multipurpose, multimedia tool. You can achieve a whole lot of stuff with it, from converting to compressing, to merging, to online video downloading, screen recording, burning discs, and even more.
For Win 7 or later (64-bit)
For macOS 10.12 or later

