Screen Recorder for Mac-UniConverter
- Show a gaming session, make tutorial video with customized settings.
- Record screen, audio and webcam simultaneously.
- Help you record a screen while working on another screen.
- Useful record timer to help you set the start and stop time.
- Convert, compress, and edit the recorded videos.
Screen recording on Mac is no joke, we do record screens on Mac for several reasons but the most prominent one would be to make tutorial videos. At school, the teacher might want to explain how a particular result came about and the steps to achieve it, screen recording can be used in this case to show the exact processes, you discovered something on the internet and there is no downloading link, you can either screenshot if it is an image or just screen record if it is a video. Sometimes, YouTube downloaders too may fail you, sometimes the video is just not up for downloading, you can record the screen and you will have the same video with no risk of the quality reducing in the process of conversion. Now, do you need a good screen recorder on Mac? We list 6 good screen recorders on Mac.
Part 1. 6 Helpful Macbook Screen Recorders You Can Choose
UniConverter 13
This software has proven time and time again that it deserved to be named one of the best screen recorders on Mac and video editing software of all time. UniConverter possesses many powerful video creating and editing tools, enough to make other apps and software crash but it works just fine and is still standing tall even among its competitors. Screen recording is just one of the many functions of UniConverter. With Uniconvert, you can convert your media file either audio or video to and from more than 1000+ formats, and the built-in player can play just about any video format, it also possesses a compression tool that allows you to reduce the size of the video without affecting much of its quality, you can download online videos from YouTube, Facebook, VEVO and lot more other video-hosting sites and all you just need is the link, you can also edit videos like adding effect, cropping and adding captions to it, it can merge multiple audio or video files into one and functions as a disc burner as well.
How to Record your Screen on Mac with UniConverter
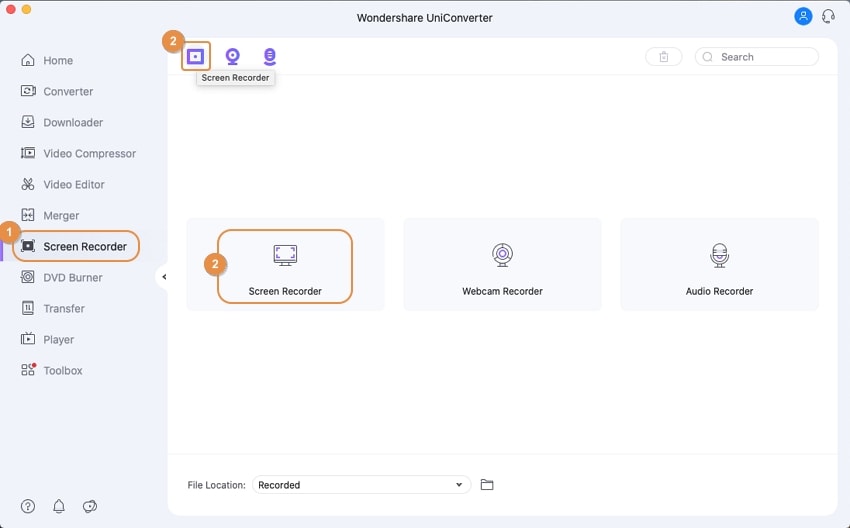
Step 1 Launch UniConverter and Click on Screen Recorder
Open the UniConverter app and select Screen Recorder from the list of tools on the left. On the next screen, select Screen Recorder and it will open the screen recorder tab in the background. There are two other options there; webcam recorder, audio recorder but those are for another time.
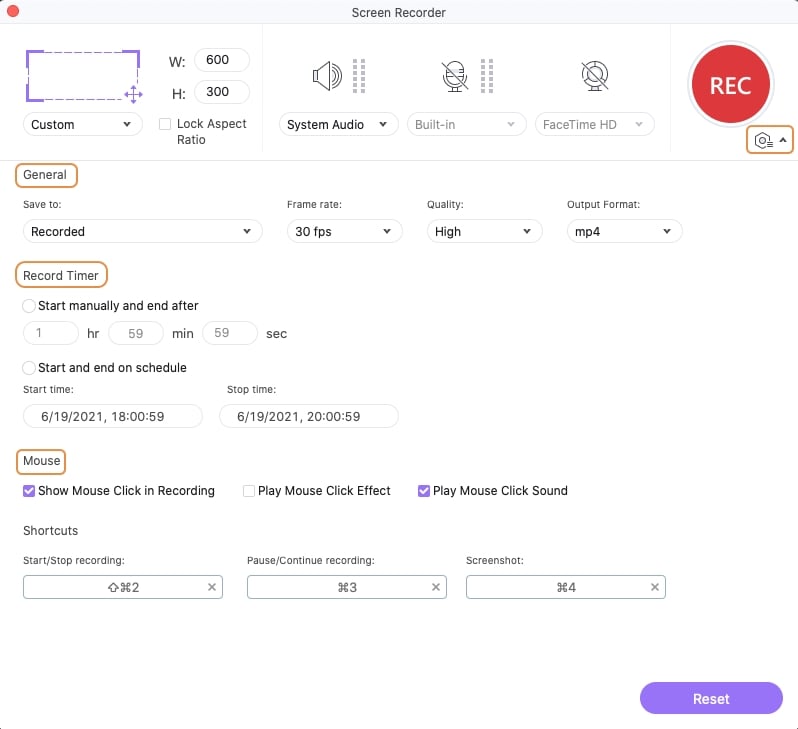
Step 2 Set the coverage and click on REC
A box draws across your screen, you can increase the size or decrease it to mark the part of your screen that you want to record. You can increase horizontally, vertically, or at the edges. You can select speakers as well if you have an external speaker connected, if not, then just leave the settings as they are. Click on the red circle with REC when you are done with the settings.
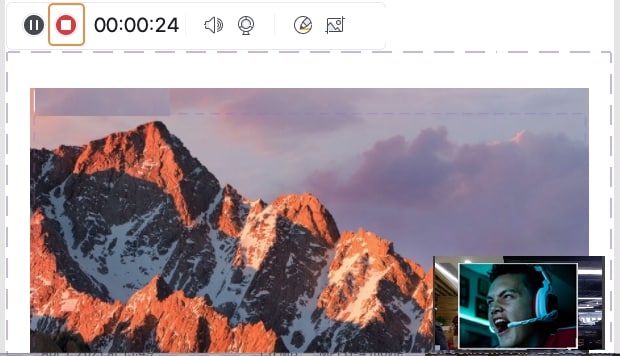
Step 3 Stop and Save
When you want to stop it, click on the UniConverter icon on your taskbar, and the record bar pops up. You can pause or stop recording.
Pros
Support conversion to multiple formats
Features lots of video editing tools
High-quality screen recording
Cons
It is not completely free
It is not available on Linux
Wondershare UniConverter 13 - A Complete Meida Toolbox
5,481,435 people have downloaded it.
UniConverter supports many formats and handles conversion equally, ensuring that high quality is delisered at all times.
During the conversion process, you may add multiple files since the program does batch conversion of files.
You can use the editing suite that covers subtitle editing, watermark editing, etc to make your results creative masterpieces.
This software facilitates file transfer to devices like Android and iPhone among others once the conversion is complete.
UniConverter is also capable of handling video compression hence ensures you acquire the video sizes you desire.
Snagit
Snagit is also a top-notch screen recording tool made by the same company that created Camtasia, so of course, you can expect great things from the software. Snagit gives a lot of editing room for your screen recording on Mac. You can choose to record the whole desktop with the toolbars and everything or you can say to record only the current window; it will exclude the whole taskbar and probably the toolbar as well if it is not necessary or you can use the scrolling screen where you record a part of the screen for a while and then move to another part again, in the video, it will appear as though you are scrolling even though are just moving. Snagit allows you to take a screenshot while recording. You can record with your webcam and use an external mic with Snagit. It also has some video editing functions like trimming and gif. Making.

How to Record your Screen on Mac with Snagit
Step 1. Open Snagit and Set Video Options. From the capture tab, click on Video. From the box that pops up, select Region/Windows/Fullscreen in the ‘selection’ tab at the top of the interface. Right in front of it, you get some other options like record system audio, record microphone, capture cursor.
Step 2. Choose Audio Output. The audio output refers to which mic you want to record, an external mic, or system sounds. Check any one of the tabs you want to use and you can use both if you so, please.
Step 3. Begin Screen Recording. When you are done, click on the big red button and the timer will countdown before starting the recording. Only the part you selected in Step 1 will be recorded.
Step 4. Stop, Trim and Save. Click on the blue stop button on the top window to end recording and save. However, if you still need to trim the video then you can do so by selecting the part you want to be deleted and clicking ‘cut’. Then save and enjoy.
Pros
Can add annotations, effects, callouts, etc.
Can record screen and Webcam at the same time
Can trim videos and remove unwanted areas
Cons
It is not free
FonePaw
Fonepaw is a multifunctional tool that can capture and record your device screen and use the webcam simultaneously. It is not just any run-of-the-mill, it is an amazing screen recording app for Mac and is perfect for creating gaming videos or tutorials and all these reaction videos that are trending these days. Record screen in the free trial without watermark nor any limitation that affects your recording process. It can record for a long time and utilizes either microphone and system sounds or both. It is available on both Windows and Mac devices. It supports real-time drawing on the video and it comes out as a complete edited video. You can add annotations and customizations to the video, export your video in any of the popular formats and it also has the mouse tracking option.
How to Record Screen on Mac with FonePaw

Step 1. Launch FonePaw and Select Video Recorder. Open the FonePaw software. On the main interface, there are three recording options. Click on the Video recorder and a new window pops up.
Step 2. Set the Screen recording options and Start Recording. On the left corner, there is an option to select which part of the screen you want to record. You can choose either full or custom. Full meaning the whole screen and custom select just a part of the screen. Under ‘Custom’ there are a few other options and those are the fixed region where there are few sizes presets and selecting anyone will create a square of the size and you can place on the screen yourself, the second option is to draw the square yourself. Set if the audio is either microphone or system speaker. Select if you will be using Webcam or not. Next, click on the orange REC button to begin recording.
Step 3. Preview, Edit, and Save. When you are done recording, the next screen is for previewing, editing, and selecting save location. There are four icons in front of the screen record you just made. The first which is a play icon is for previewing the screen record you just made, the second icon is a pencil which means editing, the third icon is a folder that lets you select where to save the video, the fourth icon is a trash can which allows you to delete the video.
Pros
Can close recording and return to it late.
Edit recorded video in real-time.
Mic optimization and Noise cancellation options.
Cons
It is not completely free.
It has a limited video editing function.
QuickTime
QuickTime has been people’s favorite for quite some time now, especially Mac users. It has everything they need to run multimedia files effectively. It serves as a video and audio player and it supports popular formats like MP4, MP4, MOV, FLAC, AAC, FLV, AVI, and lots more others. However, QuickTime is not just a player, does who know the true capabilities of this app might have come in contact with its recording functions as well. It can function as a screen recording software for Mac and can record audio as well. Although it can’t do both simultaneously.

How to Record Screen on Your Mac using QuickTime
Step 1. Launch the QuickTime software. First, you launch the software. From the toolbar choose file and select New Recording. Selecting ‘New Recording’ will open a screenshot box and you will see some screen recording tools that will help you with editing.
Step 2. Start Recording. Click on the Screen Recorder icon to activate the Screen recording function. You can click on ‘Options’ to adjust some Screen recording settings like the area to record on the screen, activate the option to show pointer in the screen during recording, or to no show pointer. Click on Record at the far end of the bar when you are ready to start recording.
Step 3. Stop Recording and Save. To stop recording, you only need to click on the stop recording icon; it is the circle with a square in it. You can now save to any location of your choice
Pros
Works on all Apple devices
Works as a media converter
Supports lots of media formats
Cons
Video recording quality is low
It doesn’t support Webcam recording
Export recorded video in MOV format only
Loom
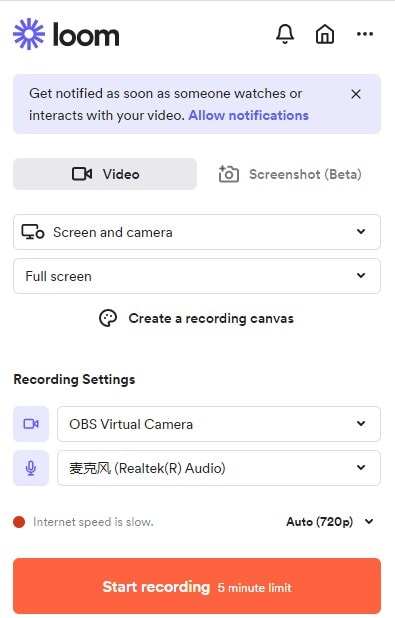
Loom is software for the Mac system that does incredible work as a Macbook screen recorder and Macbook pro screen recorder. It captures your screen and delivers the result to you in high quality. The size of the app is pretty decent and its functions are straightforward. You don’t need an overly complicated lesson to be able to use Loom, just a few easy clicks and you will start recording your screen. It is perfect for a sales pitch and other business organizations as you can switch between screen and cam or screen + cam. It is made to be convenient for users. It can also send your video as a link.
How to Record Screen with Loom on Mac
Step 1. Launch the software and Sign in. To start screen recording on Loom, You need to log in or create an account if you don’t have one yet. The free version is a low-level functional screen video recorder Mac but Loom Pro has all the features you can ever want.
Step 2. Set the recording options. On the main interface, you have two options at the top of the screen, ‘Video’ and ‘Screenshot’. Click on Video to see the settings for the video recording. Select which part of the screen you want to record; full screen, window, or custom-sized. If there is a camera connected, you can select it in the ‘Select Camera’ tab and you need to select the audio as well which is always either your system audio or an external mic.
Step 3. Start Recording. Click on the start recording tab at the bottom of the screen.
Step 4. Stop Recording and Save. There is a Loom recorder taskbar, usually sticking somewhere around on the screen. To stop recording. Just click on the ‘stop’ icon and the video will be saved automatically. Also, you can use the toolbar to pause recording.
Pros
It is a well-built screen video recorder for Mac.
Supports simultaneous Screen and Webcam recorder.
Frequent updates.
Cons
Requires an internet connection to run
Does not support editing in real-time
Capty.io
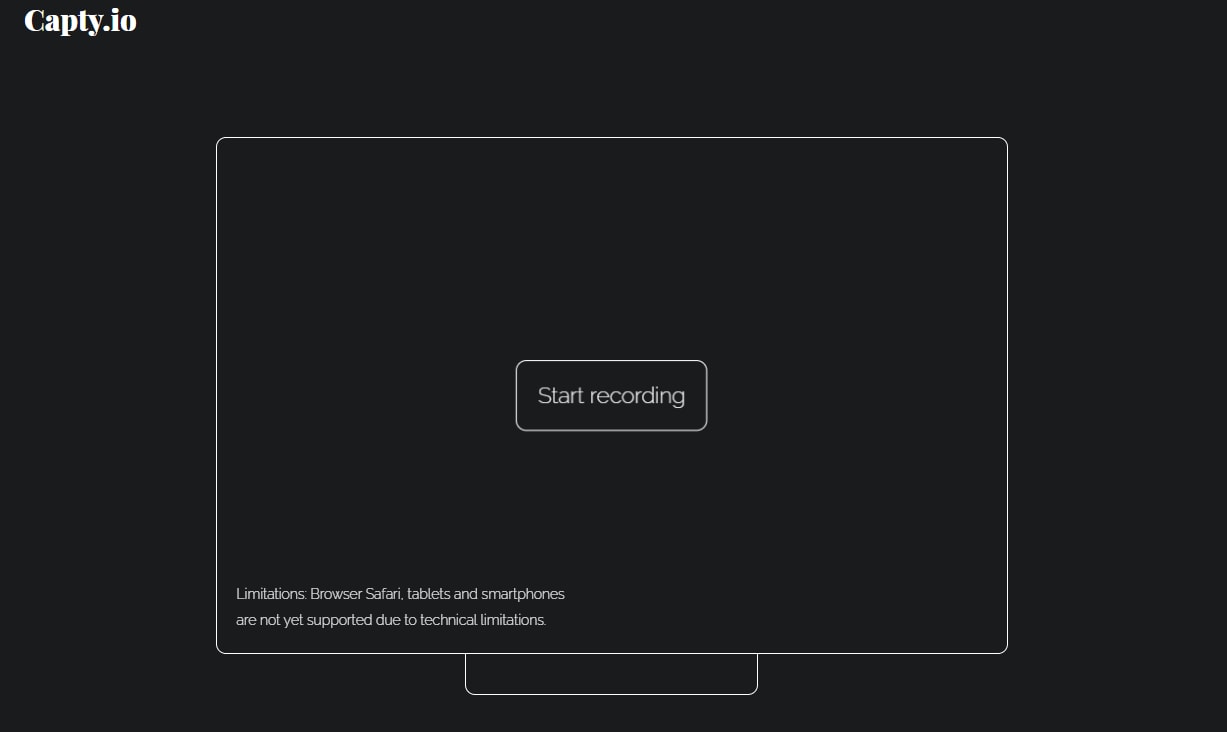
Capty.io is a one-of-a-kind screen recorder. It helps you to record your screen and save them to their website database, there is an option to download it but if you just want to send it to people, then Capty.io can convert your video to links for sharing. Anyone who wants to watch the video recording will be directed to the Capty.io website to watch the video. Unfortunately, Capty.io has a limitation on the browsers that can use it, it does not work on Smartphones, or tablets and the Safari browser is not supported.
How do you Screen Record on a Mac Using Capty.io
Step1. Use either Chrome, Edge, Opera, or Firefox to open the site. Visit www.capty.io using any of the browsers mentioned above. Unfortunately, smartphones and tablets are not supported, nor is the Safari browser
Step 2. Click on the animated ‘Screen Recording’. On the main interface, there is a monitor with a pulsing ‘Screen recording’. Click on it and a new box pops up asking for permission to record the screen. Give your consent and your recording starts.
Step 3. Stop Recording and Save/Send. Click on the ‘Stop’ button at the bottom left part of the screen to stop recording. Capty.io saves the video on their database for at most 7 days before deleting it. In the meantime, you can choose to download the video on your phone for long-term storage or you can send the link to a friend and they can come and watch the video on the city website.
Pros
An online tool as such no need to download
It is safe
No ads
Cons
Smartphones, tablets, and the Safari browser are not supported
Requires a stable internet connection lest your recording breaks midway
Part 2. Comparison between Mac Screen Recorders
Screen Recorders |
Main Features |
Pricing(May have been changed now) |
Video Editing |
| UniConverter 13 | Converting, Compressing, Video Editing, Screen, Webcam and Audio recording, Disc Burner, Video downloader, Media Player, Audio and Video Merger. | Win: Annual Plan: $39.99 2-Years Plan: $55.99 Perpetual plan: $69.99 Mac: Annual Plan: $49.99 Perpetual plan: $79.99 | Full editing. |
| Snagit | Screenshots and Screen Recording. | Individual: $62.99/lifetime Business: $62.99 Education: $37.99/lifetime Government & NGOs: $53.99 | Limited. |
| FonePaw | Screen recorder and screenshot editing. | Screen recorder: $27.96 Screen recorder + Video converter ultimate: $53.94 | Full editing. |
| QuickTime | Media player. | Free | None. |
| Loom | Screen recorder and screenshots. | Starters: Free Business: $8/year Enterprise: contact sales | Limited. |
| Capty.io | Screen recorder and sharing. | Free | None. |
For Win 7 or later (64-bit)
For macOS 10.12 or later

