Voice Recorder-UniConverter
- Help you record audio at your home and convert, compress your recorded files.
- Record the online music and listen to it offline.
- Transfer your recorded audio to your Android or iPhone devices.
- Record the meeting voice to save the important information.
- Additional features include video converting, downloading, editing, and others.
Who are those that use the voice recorder, and why is it important? Good question. Sound recorder is an integral part of creating. Video creators and editors, music and sound mix creators, artists, especially voice-over artists and animation creators, lecturers, and students, none is exempted even secretaries of top organizations use sound recording apps. Proper recording apps use certain AIs and mechanisms to capture and store sounds and voices for playback later. However, these voice recorder differs from each other, and their capacity and powers are also different. Are you looking for the best voice recorders? Here we list the voice recording apps and some professional devices.
Part1. 6 Easy-to-Use Voice Recorders for Windows/Mac Users
UniConverter 13
UniConverter is a top competitor in the media editing area, and generally, it is on the list of best audio recording apps. It has multiple tools that you do not need to download any other editing app except specifics. Its ability can be said to be on the super-level. Multiple functionality, simple and beautiful user interface and amazing user experience shape the UniConverter app. Its functions include conversion, compression, online video downloading, subtitle creator and adder, sound, webcam and screen recorder, audio/video merger, video editor, and a built-in player. The customer service is top-notch, and it is constantly being updated as well.
Steps in Recording Audio with UniConverter
Step 1 Launch UniConverter and Click on Screen Recorder
After launching UniConverter, from the list of tools on the left, select Screen Recording, a new window appears, and you will be given three options. Screen Recorder, Webcam Recorder, or Audio Recorder. Each of the names already explains what each function does
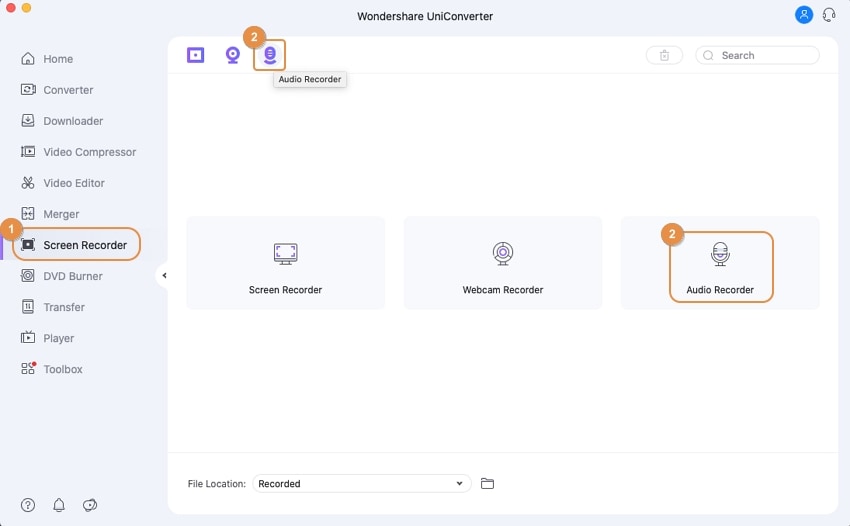
Step 2 Select Audio Recorder and select recorder
Click on Audio Recorder, and the recorder interface comes up. UniConverter automatically detects if an external mic is connected and lists it as part of the options when selecting your audio voice recorder. Even if you have a headset connected, UniConverter can record from your headset or earpiece.
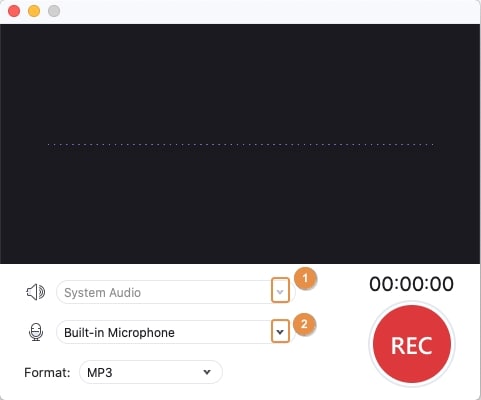
Step 3 Click Rec.
After selecting the recorder, click on the Rec. button to start recording. When you are done, click on the same button again to stop. From here, you can do any editing on the audio.
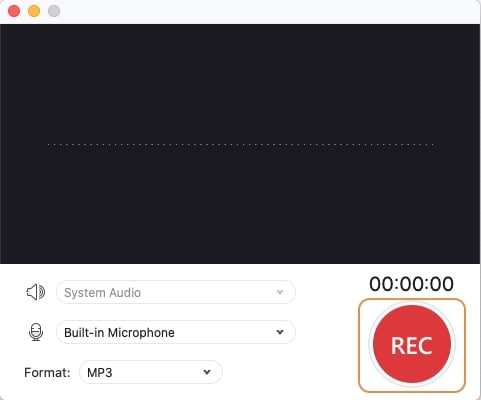
Optional: Editing the audio
When you finish recording, the files come up on the UniConverter interface. Click on the message bubble icon to get a list of editing options. You would usually get three which are Converter, Video Editor, or Merge. Use the converter to convert mp3 to video or other mp3 formats. Use a video editor to crop/trim the audio, add effects and add a cover photo. Use merger to join the audio with some other audio(s)
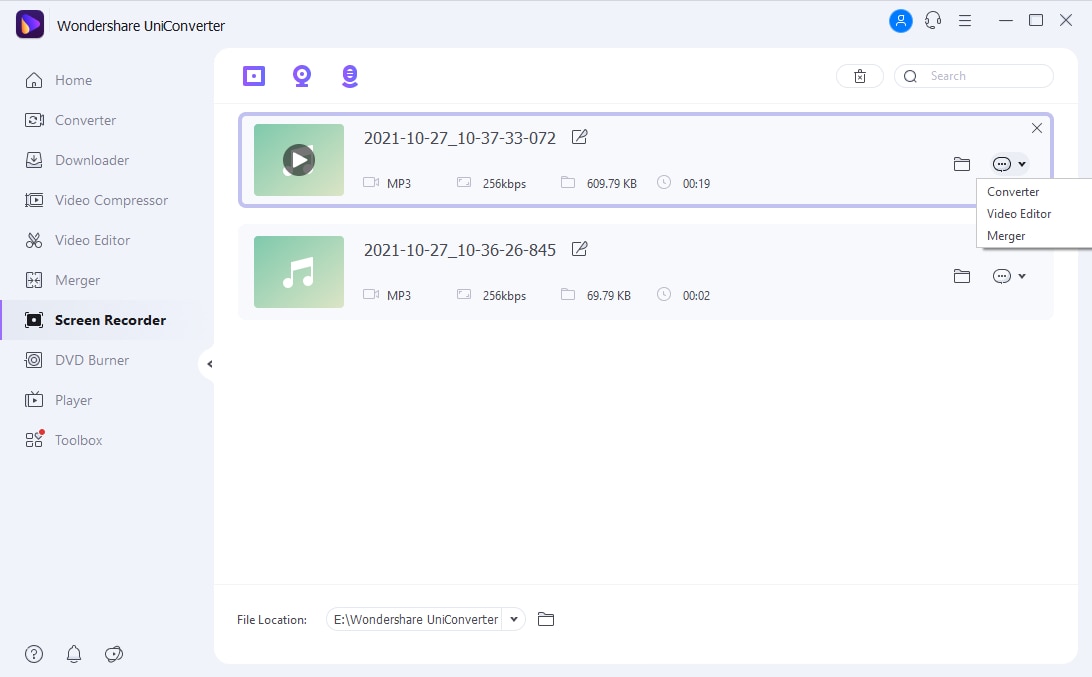
Pros:
It has a lot of features and is still easy to use
A perform batch conversions and compressions
It contains lots of video editing options
Customer care is always available
Free trial but with some limitations
Cons:
Not available for Linux platform
Although inexpensive for the features they offer, UniConverter is still a paid app.
Wondershare UniConverter 13 - A Complete Meida Toolbox
5,481,435 people have downloaded it.
UniConverter supports many formats and handles conversion equally, ensuring that high quality is delisered at all times.
During the conversion process, you may add multiple files since the program does batch conversion of files.
You can use the editing suite that covers subtitle editing, watermark editing, etc to make your results creative masterpieces.
This software facilitates file transfer to devices like Android and iPhone among others once the conversion is complete.
UniConverter is also capable of handling video compression hence ensures you acquire the video sizes you desire.
Built-in Voice Recorder on Windows
Part of the basic features Windows 10 offer to its users is the voice recorder which is an easy voice recorder app for recording events such as conversations, podcast, lectures, interviews, and any other audio moment we don’t want to miss, be it for evidence purpose or for keeping memories. Perhaps there are many software applications with mouthwatering features, but Window 10 recorder software is simple to use with features that help record, trim, and share audio files.
The voice recorder is already installed on Windows 10, but a user will have it reinstall (manually) if it’s not found on the system.
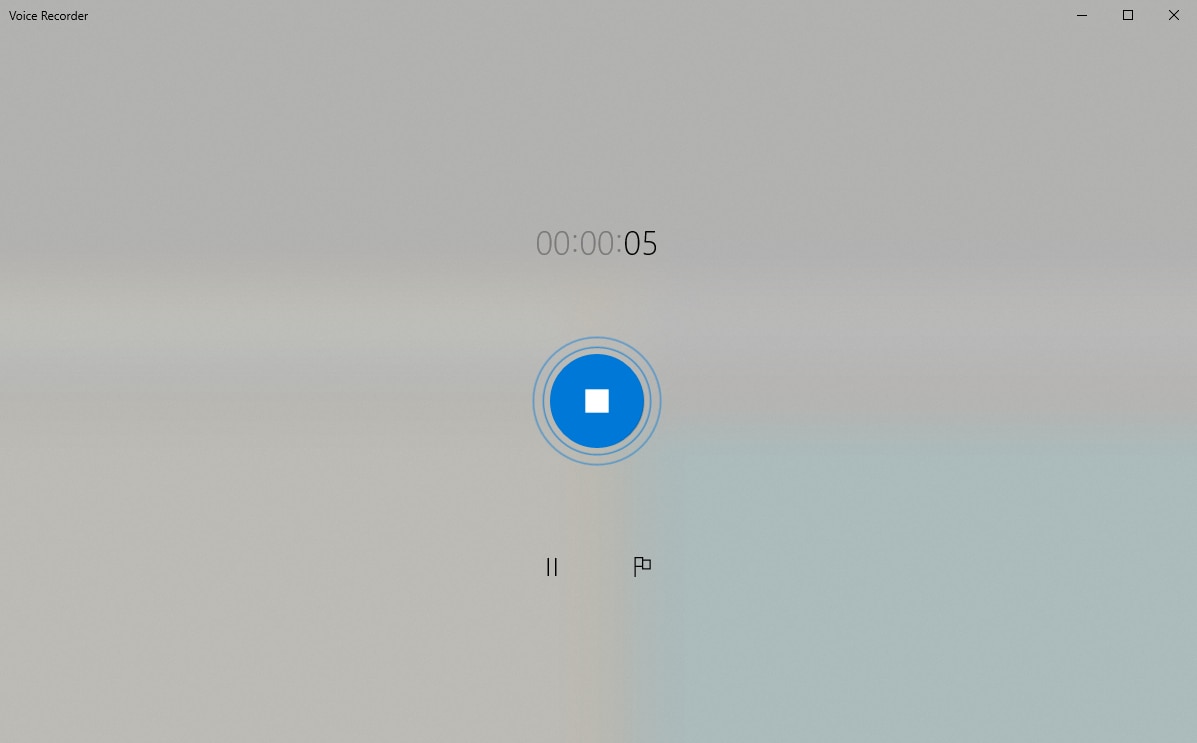
Steps in recording with Window 10 voice recorder
To make use of the voice recorder, you will have to make sure the microphone is connected to the system; then you proceed to follow these steps:
Step 1: Click on “start”.
Step 2: Make use of the search box by searching for Voice recorder or open your app list and locate voice recorder; click on the icon to open the app (give the voice recorder to access your microphone).
Step 3: Click on the record button in the middle of the screen. During recording, you can click on the flag button to add a marker to your recordings if necessary.
Step 4: When you’re done recording, click on the pause button to stop recording.
Step 5: Immediately, you pause the recording and click the stop button to end the voice recording.
Note: your recording will be saved automatically immediately you click on the stop button. Your file will be saved in .m4a format, and lastly, you can find your file inside the document folder labeled “sound recordings”.
Pros
It is free and easy to make use of
It does not require any coding or ambiguous knowledge before you can operate.
It does not have a watermark
It records sound utterly as you hear it
Cons
The software cannot convert audio files
QuickTime Player
QuickTime is a built-in media player that performs various functions such as editing a movie; such as re-arranging video clips, rotating video files, splitting movie clips into two or more and it allows you to maneuver each clip. QuickTime player also records your Mac screen; in a situation whereby you need to explain or show a friend of yours how to do something on a Mac, you can record the entire screen or record a portion of it. Other features include capturing of iPhone or iPod touch screen; you’re allowed to screen-record what you’re seeing on your device and save it later as a clip or different format on your Mac. QuickTime Player can be used to record a conversation between people, record lectures, or presentations.
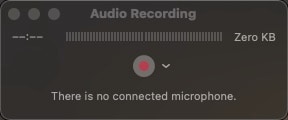
Steps in recording with QuickTime Player
This software allows you to use the system microphone or any external microphone to record. Below is a step-by-step guide on how to record internal audio Mac with QuickTime.
Step1. Launch the QuickTime Player on your Mac, select file > New audio recording
Step2. Click the Options on the drop-down menu, then select the following recording options;
Step3. Microphone: if the microphone available is more than one, you have to select the microphone you’re using to record
Step4. Quality: you can choose the recording quality of your choice but note that the higher the quality of the recording, the more amount of storage it will consume.
Step5. Adjust the volume of your recording
Step6. Click on the start button to record; you can option-click the record button to pause the recording, click the same button to resume your recording, and click on the “stop” button when you’re done with your recording.
Step7. Save your recording; name the file of the recording, choose the folder where you want to save the file.
Key features
-
It can operate on different computer operating system
-
It can be used to deliver synchronized graphics
-
It can be used to share your file
-
It helps record your computer screen
Pros:
It allows users to do an easy recording
It is compatible with any other apple product
The software does not require any knowledge
It works fine with iTunes
Cons:
It has no playback for any file formats
There is a need to do some settings manually before recording
Compatibility issues.
Audacity
Audacity is a free multi-track audio editor and recorder for Windows, Mac, GNU/Linux, and other operating systems. The software allows its users to record live audio through the use of a microphone or digitize recording from any other media, it also allows the import and export of sound files by exporting your recordings into different formats, its extra feature ‘The Beat Analyzer’ allows users to change the speed and pitch of their music. Audacity’s built-in tools can perform functions of a voice recorder and also a voice recorder editor even without a super feature like the sound-activated recorder, it is still one of the best professional voice recorders out there.
Audacity can also be used to edit with cut, copy, paste and delete and most especially the unlimited sequential undo and redo.
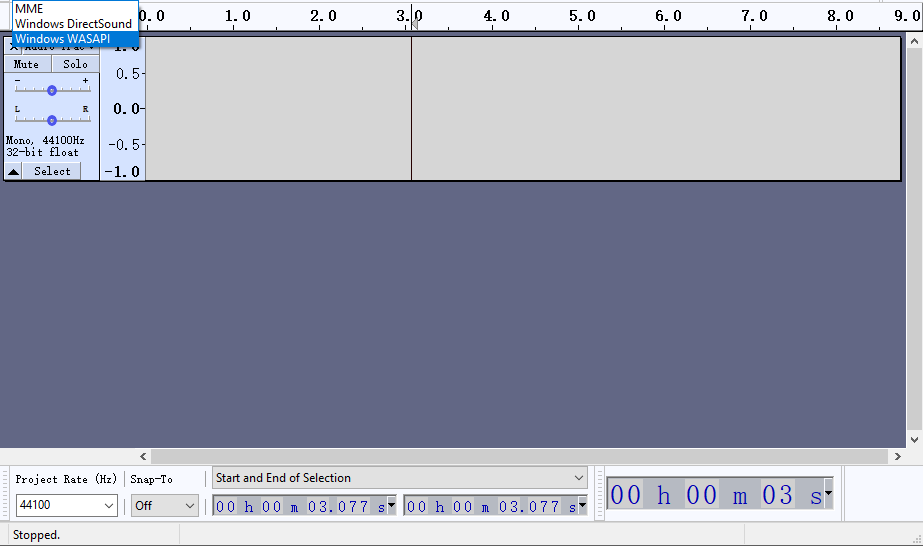
Steps in Recording with Audacity
Step1. Launch Audacity software, under the drop-down menu options, click on Audio Host> Windows WASAPI
Step2. In the recording options, choose your computer’s default speakers
Step3. Create a new track then begin to record
Key features
-
It can change the pitch of sound when recording
-
It helps to edit multiple audio formats
-
It is useful in converting files to mp3
Pros:
It has a user-friendly interface which makes it easy to use
It is one of the best free recording software
Audacity can record with the aid of your device microphone
It has the background noise removal feature
Cons:
The UI in Audacity is complicated
There is a break anytime you open the software
Some of the features require the need of third-party apps
Telbee
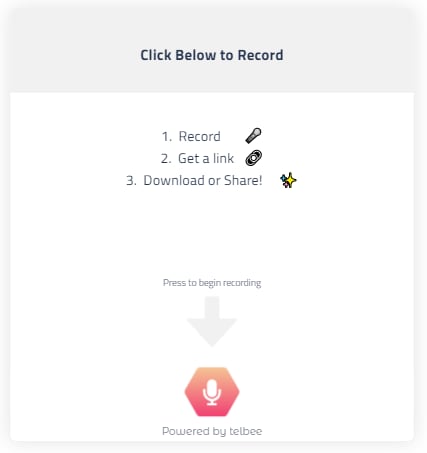
Telbee is an ace recording tool that helps to add a voice message to social media platforms, podcasts, email, and many more which helps to build a strong relationship with your customers. It helps to get the review of your customer the way wants to express their emotions about your product in terms of sending it as mail. There are a lot of emotions that cannot be written, but when customers are allowed to use voice messaging tools, they will be able to explain what they’re facing on a product (good or bad). A lot of companies use Telbee to communicate with their members (customers) regularly, and it had helped get more customers and increase sales.
STEPS:
Step 1. Visit the website: www.telbee.io and create an account with the team, you can make use of a keyboard shortcut to start recording (ctrl + shift+ 9 and then press the enter key to start recording).
Step 2. During recording, you can pause and resume the record as long as you like. Click “finish” when you’re done. You can listen to your recording and make a new one if you’re not satisfied with the previous recording. When you’re ready, click on “get sharing link” which will be pasted to your clipboard automatically.
Step 3. Give your message a title for your audience to have the idea of what they’re about to hear
Step 4. Copy and paste your voice link to any of your social platforms, website, emails, newsletter, and other platforms. You can permit your audience to comment on your message.
Key features
-
It makes communication to be more convenient for business
-
It helps businesses and entities to grow faster and rapidly
-
It is a web-based platform
-
Easy linking
-
It helps to create and customize voice recorders
Pros:
it creates a smooth and effective interaction between two or more people
the company customer care service can converse any time of the day
it is easy to send a message
Cons:
it is easy to make mistakes when sharing personal details
Google Recorder
Google Recorder is a superb software that records audio, transforms your audio file into text, edits, and shares your recordings into notes. It’s easy to use once you have a Google pixel device to operate it. Google recorder is one of the best voice recorder applications with high quality; you can add location information for your recording. The most vital feature of it all is the “search feature” which helps to find a statement in a recording.
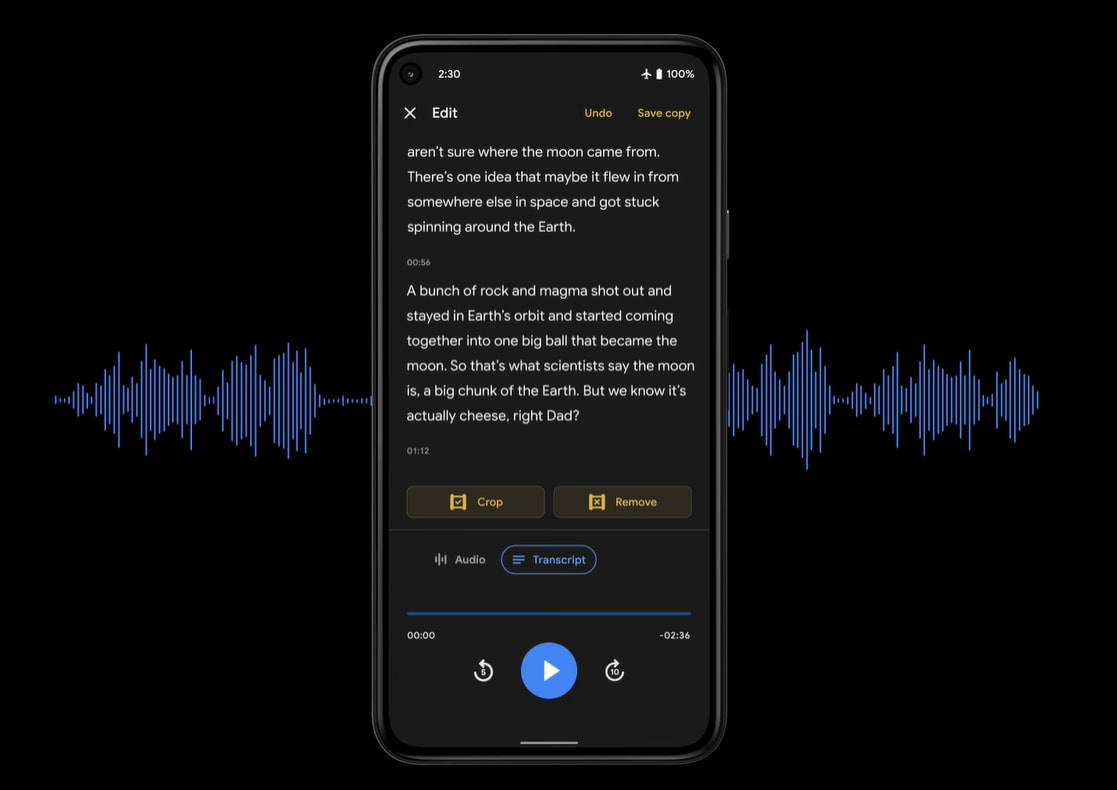
Steps in Recording with Google Recorder
Step1. open the recorder app
Step2. tap on the record button, you can pause and resume your recording as you wish
Step3. when you’re done recording, click the pause before you stop the recording
Step4. Save your recording, in case there was an issue or mistake while recording you can delete the file and restart again.
Step5. Save your recording by adding a title to your file.
Key features
-
It’s free and simple to use
-
Google recorder has a user-friendly interface
-
It backup your file to Google drive
Pros:
It helps you transcribe your recordings to text
It doesn’t require any payment before you can access any of the features
It can hare the transcription to a colleague for group work or presentation
Cons:
You can’t crop, trim, or export
You can’t interact with your recordings
It’s being limited to pixel phones
Part2. Digital Audio recorders for Professionals
Digital voice recorder provides a great sound with sensitivity regulation that supports external audio services. They come in different sizes and quantities without speaking less about the storage, allow to record interrogations, seminars, business meetings, and interviews, gathering of information or evidence in a crime scene, and a lot more. They work well as professional voice recorders, studio voice recorders, and sound wave recorders. The digital voice recorder is designed to pick any form of sound within the vicinity, they are more versatile and also reliable.
Sony PCM D100
Sony has always been one to create amazing gadgets and technologies and the Sony PCM D100 is no exception. Created to generate the maximum quality audio and deliver it in high-quality as well, it captures sounds well for a sound wave recorder and is not a noise recorder. For different reasons, multiple companies and corporations are with Sony on this fantastic audio voice recorder
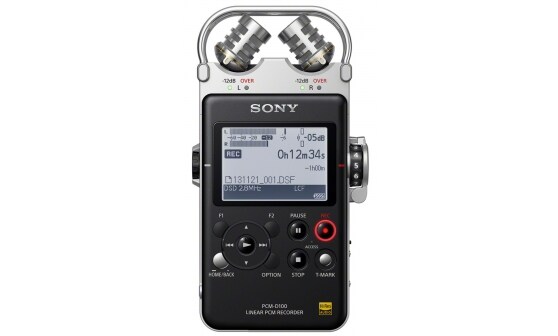
image souce: https://pro.sony/
Key Features
-
Powerful recording input
-
Compatibility with DSD
-
Microphone range adjustment
-
32GB of built-in flash
-
Playback features
Price
From $1,715.20
Olympus VN-7200 Digital Voice Recorder
One of the few music recorders is a voice-activated recorder but it is still above other voice-activated voice recorders. This particular professional voice recorder is a combination of the simple analog system and the detailed feedback of the digital system. It can help you create the ideal voice recording and the limit for recording in the hundreds of hours makes it perfect as a studio voice recorder
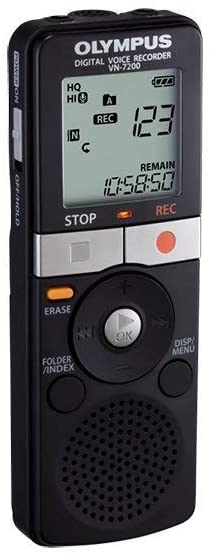
image souce: https://www.amazon.com/
Key Features
-
Voice activation features
-
Control playback speed
-
3 different recording modes
-
1, 000+ hours recording time
Price
$149
Sony ICDUX560BLK Digital Voice Recorder
Another Sony product is on the list, and that is because it is worth being there. More like a smart voice recorder because you can record lessons, lectures, meetings, broadcasts, podcasts, etc. With specific optimization settings for every situation you are recording. The digital is not for show; you can access your library in style with the beautiful user interface.
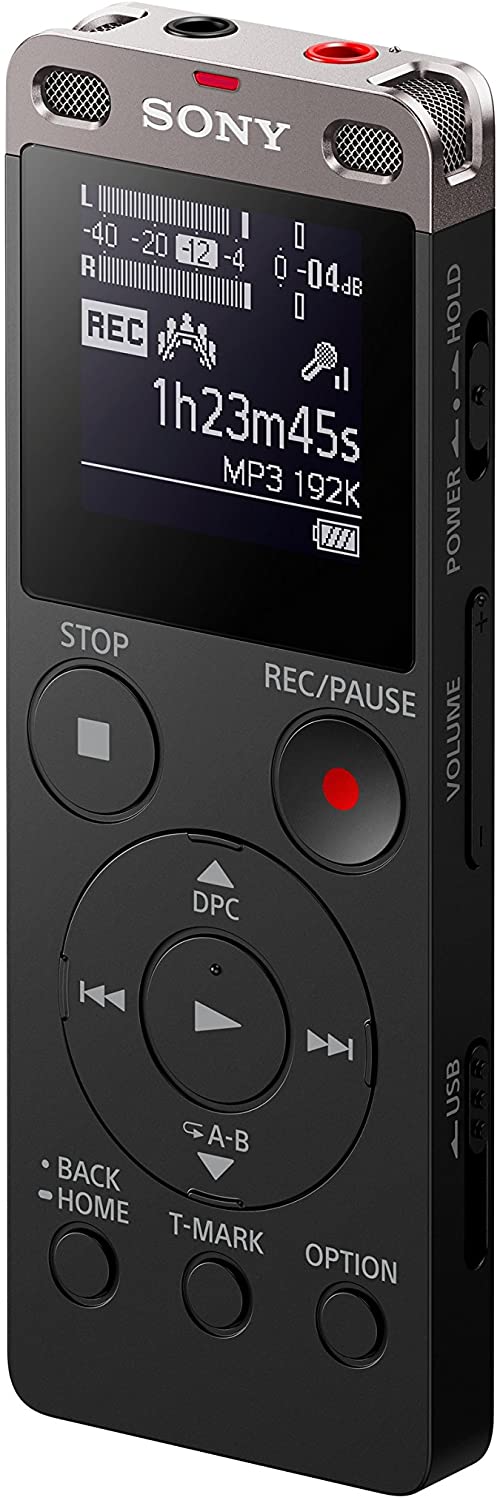
image souce: https://www.amazon.com/
Key Features
-
Mp3 and LPCM recording formats
-
Highly sensitive built-in mic for optimized recordings
-
4GB built-in storage
-
Connect to PC with the USB port
-
3 different recording modes
Price
$167
Conclusion
To conclude our long list, we will like to recommend to you the one tool that is both for fun and professionals; UniConverter. Professionals and freelancers prefer UniConverter for its versatility, it encompasses a lot of converting app that you can simply finish all your video and audio editing in one place; convert, compress, edit video, add effects, subtitles, download video online, transfer media between devices, merge audios, etc while keeping your job professionally. The price is not too high either for the services it offers, we can say it is fair. No hidden charges
For Win 7 or later (64-bit)
For macOS 10.12 or later

