
Record Audio on Mac-UniConverter
- Help you record audio at your home and convert, compress your recorded files.
- Record the online music and listen to it offline.
- Record the meeting voice to save the important information.
- Transfer your recorded audio to your Android or iPhone devices.
- Additional features include video converting, downloading, editing, and others.
A digital and electronic recreation of voices, moments, and feelings could be considered the best way to hold on to memories. Audio recording could be the key to the room of remembrance. As a computer user, you can record audio on a Mac or Windows PC as a means of accessing past events and experiences. If you’re a journalist, reporter, police detective, musician, student, or a professional, in no time you enhance your research, professional, investigational, production, and academics work using a voice recorder to record sound on a Mac PC with no difficulty.
Most people do the most by asking this question: is audio recording illegal? Recording other people’s content without their consent or knowledge could be tagged as an illegal engagement depending on what you intend to do with the recorded audio – if it’s not for the aforementioned reasons, then it might be considered as infringement of copyright which is punishable by the law if the owner of the copyright swings into action.
Part 1. How to Record Audio on Mac with UniConverter 13?
Recording audio on MacBook with a software like the Uniconverter 13 can be joy bringing. The Uniconverter 13 is a product of Wondershare with full-featured and exclusive media editing tools that offers the best quality in term of editing and production of a media file. The Wondershare’s product is packed with sophisticated tools like a Converter, Downloader, Compressor, Merger, Video Editor, Screen Recorder, DVD Burner, Media player, and Toolbox that houses a CD Burner, meme maker, GIF maker, and more. With the Uniconverter 13, you are allowed to record MP3 on Mac operating system with so much ease and comfort, edit the recorded audio, change the format of the audio, and more.
If you’re reading this article and you’re a Mac user. I don’t want you to lose faith if you’re having problems recording MP3 audio or voice notes on your MacBook, because I’m here to teach and help you know how to use your MacBook to record audio files using the integrated Uniconverter 13.
If you’re ready to take the lead, then take the steps below and keep all your problems away.
STEP1
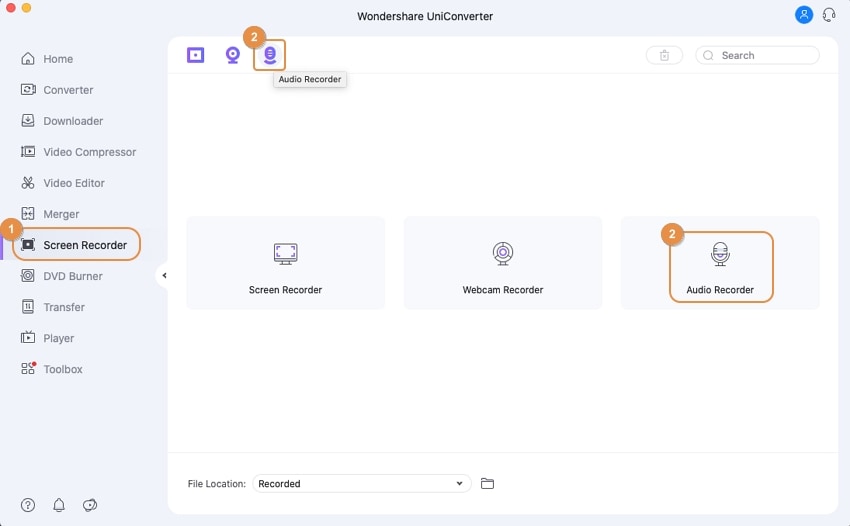
First of all, all you need to do is download and install the Uniconverter 13 on your Macbook. Once you’ve installed it, Launch the Uniconverter 13 and scroll to the Screen Recorder option on the left side of the software’s display, and click the option. You’ll notice that the screen recorder opens showing three options ( Screen Recorder, Webcam Recorder, and Audio Recorder), select Audio Recorder since it’s an audio we want to record.
STEP2
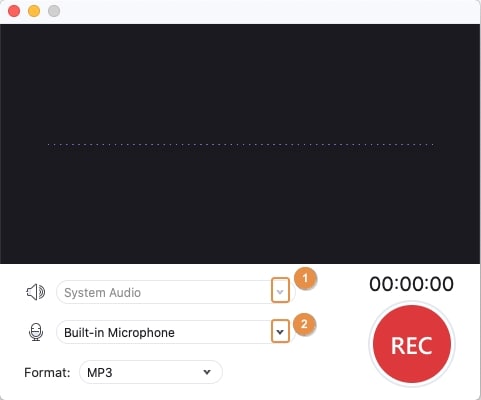
Once you click on the audio recorder, a new window pops up displaying system audio, microphone, format, and a big REC button. The newly appeared window is called the Audio Recorder window or interface. If you wish to record audio from your computer, use the system audio dropdown option to set your speaker or output audio, and the microphone dropdown option to set your input audio i.e if you wish to record your voice, then the format dropdown option to choose the format you want to record the audio.
STEP3
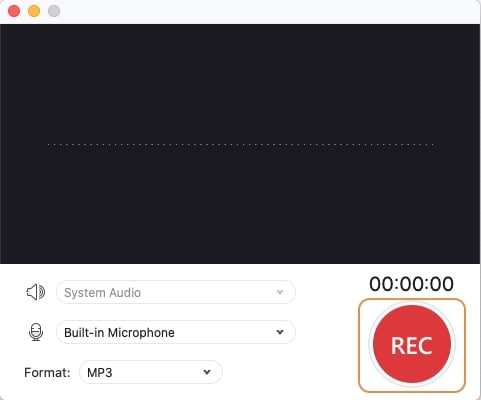
After setting all necessary parameters, go straight to click the big red REC button to start your recording. Immediately you click on the REC button you’ll notice that the button changes into a STOPButton which you can use to end the recording whenever you’re done.
Note: After recording your audio file, the Uniconverter 13 offers you a chance to edit the recorded audio in its converter tab.
Wondershare UniConverter 13 - A Complete Meida Toolbox
5,481,435 people have downloaded it.
UniConverter supports many formats and handles conversion equally, ensuring that high quality is delisered at all times.
During the conversion process, you may add multiple files since the program does batch conversion of files.
You can use the editing suite that covers subtitle editing, watermark editing, etc to make your results creative masterpieces.
This software facilitates file transfer to devices like Android and iPhone among others once the conversion is complete.
UniConverter is also capable of handling video compression hence ensures you acquire the video sizes you desire.
Part 2. How to Record Audio on Mac Using Other Tools?
QuickTime Player
QuickTime player is a media player made for Mac operating systems. The functional media player gives you the chance to play media files such as video and audio files, edit, trim, and rotate the media files as desired. With QuickTime Player, you are allowed as a user to record audio on MacBook using the macOS compatible player as an audio recorder for Mac.
If you want to know how to record using QuickTime Player, here are steps to put you through the recording process.
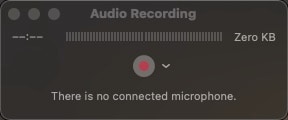
STEP1 Launch the macOS-compatible QuickTime Player from your computer. Once the player is opened, go to File, then select “New Audio Recording”.
STEP2 Afterward, the audio recording window appears on your PC’s screen. From the displayed window on the screen, click the dropdown option beside the Rec button to set your microphone and the output quality of the audio you want to record.
Note: you can use the volume control bar you’ll see at the bottom of the audio recording window to adjust the volume of your audio recordings.
STEP3 Now, click the record button to begin the recording, and stop to end the recording. Once you’re done recording, click File, then choose save – to name and save the recorded audio.
Pros
QuickTime Player allows users to share recorded audio files
You can split a video into multiple clips
QuickTime Player offers its users a screen recording option
Cons
The QuickTime Player does not support Windows operating system
QuickTime Player will allow you to record only if you’re a subscriber
The subscription plan for QuickTime Player is quite expensive
Voice Memos
Voice Memos is another pleasing MacBook voice recorder that delivers audio recording in its best quality. The audio recorder offers MacBook users the opportunity to record sound on Mac, copy, edit, share, duplicate their recorded sound. Sometimes we might not like the audio we’ve recorded, Voice Memos provides you an option to delete the unwanted file right after recording and also from your list of recordings. Another amazing feature this software has is – it supports both iOS and macOS devices. If you find Voice Memos interesting, you can use the step below to learn how to record.
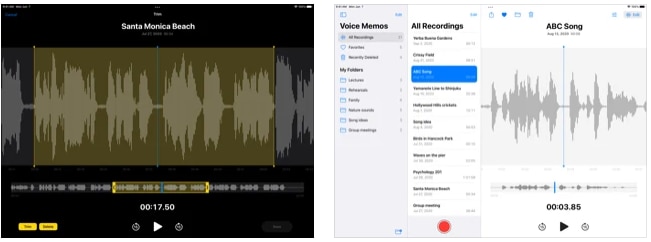
image souce: https://apps.apple.com/
STEP1 Launch Voice Memos on your Mac PC. As its interface opens, you’ll see an instruction at the right compartment of the interface saying “Click the Record button to start Voice Memo”. Follow the instruction and click the red Record button at the bottom left of the recording interface.
STEP2 Once you click the Record button the recording process starts. As the recording begins you can use the pause button to pause the recording, the resume button to continue recording.
STEP3 If you want to stop recording, click the pause button. To trim the recorded audio click the Crop icon at the top right corner of the interface. Once you have finished, click Done to save.
Pros
The audio recorder for mac is free
You can share recorded files via email, SMS, WhatsApp, telegram, and more.
Voice Memos has a noise reduction filter you can utilize when editing your recordings
Cons
It doesn’t support Windows or Android devices
You can’t change the speed and pitch of a recording
It doesn’t support multi-tracking and you can’t record playing audio files from your PC
GarageBand
GarageBand is a complete audio production workstation that is fully at the recommendation of musicians and producers. The Mac OS-compatible software gives a user access to record audio on Mac and iOS devices. Aside from the fact that you can use the software as a voice recorder on mac, it offers a chance for external plugins like a microphone, piano, guitar, and more, built-in instruments, and a digital electric beat pad. If you’re a musician and you wish to record, here are steps you can use to record sound using GarageBand
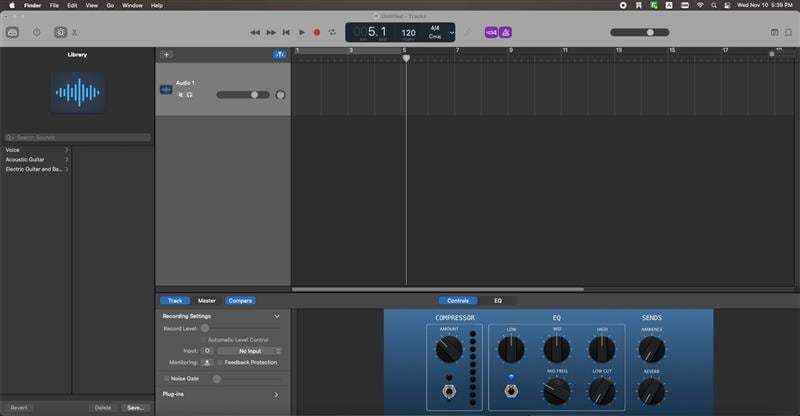
STEP1 Launch the GarageBand software on your PC and choose the Audio header you wish to record in. You can import any beat from your library if you have any to record on.
STEP2 Once you’ve enabled the audio header you want to record in, ensure that you bring the playhead indicator to the point you wish to start recording.
STEP3 Now click the Record button and Stop button you’ll find at the top of the GarageBand window’s interface to start and end the recording respectively.
Pros
GarageBand offers a variety of digital mixing instruments
It supports multi-tracking
It supports Windows and Android devices too.
Cons
You’ll be restricted to using its basic tools if you’re not a subscriber i.e you can’t explore its exclusive features and tools
The size of the app is extremely big
It requires steep learning for every of its user
Audacity
Audacity is a full-functional software that mainly functions as an audio editing and recreating toolbox. With audacity, you can record audio on MacBook PC, edit audio files in different available formats like MP3, MP2, AIFF, WAV, and more, set the speed and pitch of recorded audio files. You can record audio on Mac following these steps;
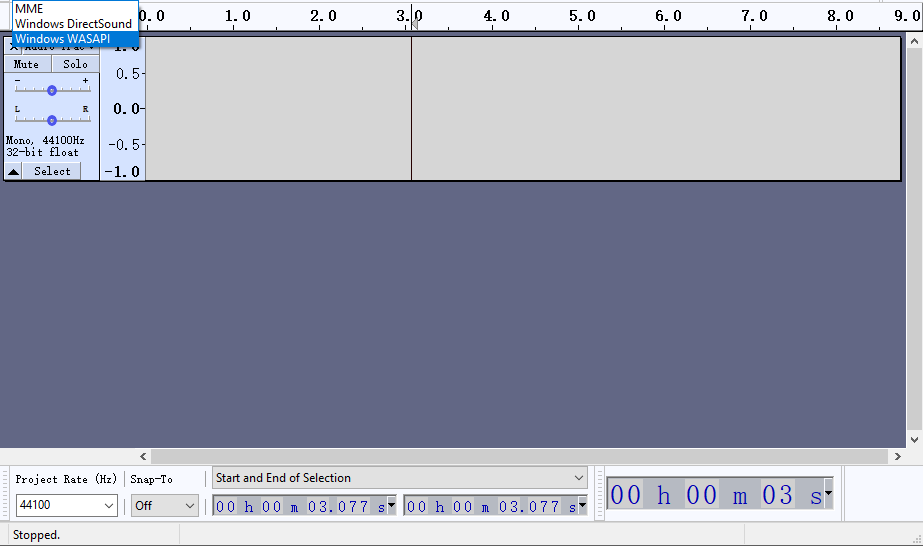
STEP1 Download and install Audacity on your MacBook PC.
STEP2 Once the installation is done, Launch the Audacity software from your computer to display its interface so that you can start recording
STEP3 After the interface of the software has opened, from the top center to the top left of the interface you’ll see the record, next and previous, stop, play, and pause buttons. To start and end recording, Click the Record and Stop buttons respectively.
Pros
Audacity supports both Mac and Windows operating system
The MacBook voice recorder supports multi-tracking
You can cut, split and merge audio files
Cons
You’ll need to install plugins to enjoy the software
Audacity has limited editing features
The software is usually prone to viruses
Conclusion
Without a doubt, all the listed MacBook voice recorders in this article are good and can be recommended depending on the qualities and features you’re looking up to. You may have a voice recorder on your Mac PC but If you’re looking for a software that records, converts, compresses, edits, burn audio and video files in different known and unknown formats, then the Uniconverter 13 is nothing but all you deserve.
For Win 7 or later (64-bit)
For macOS 10.12 or later
