UniConverter - Compress video for iPhone just 3 easy steps
UniConverter Version 13 provides powerful compressing features with easily customizable settings. Free try compress video just 30 secs and 3 easy steps
The high-quality iPhone camera allows capturing impressive images as well as videos. These high-quality videos at the time have issues while uploading them to a site, social media platform, or sharing them over mail due to their large size. File compression can help to reduce the size, but iPhone does not have any built-in feature that can help you compress the videos. Thus, for reducing the videos on your iPhone you need to install an app that can help get the task done. Learn about these apps and other tools for compressing videos on an iPhone.
Note: If you want to learn more about compress video/audio files, you can read this artice: Everything you want to know about compress video.
In this article
Part 1. Recommended app for compressing video – Compress Videos & Resize Video
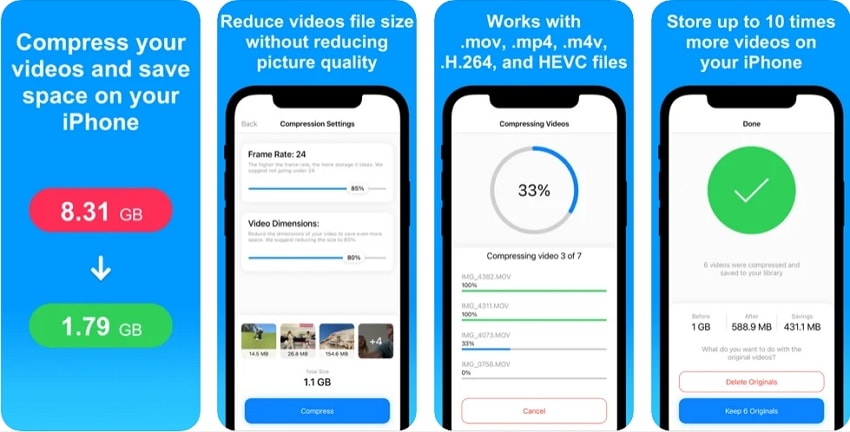
One of the popular apps that can be used for compressing videos on an iPhone is Compress Videos & Resize Video. Developed by New Marketing Lab, Inc, this is a free app with IAP. The app comes with an intelligent compression engine that helps to reduce the video file size by up to 90% and even more without much affecting the quality. The app comes with two setting options. Widely used formats like MPEG-4, MP4, MOV, M4V, and others are supported by the app. The app also has a Pro paid version where batch processing is supported and there are no ads.
Part 2. Steps to compress video using Compress Videos & Resize Video
The steps for compressing videos using Compress Videos & Resize Video are simple and quick and are enlisted below.
Steps on how to compress a video on iPhone:
- Step 1: Download, install and open the app from -- https://apps.apple.com/us/app/compress-videos-resize-video/id1473857051#?platform=iphone
- Step 2: Add the video from your device or the iCloud library that needs to be processed.
- Step 3: Click on the Next button and move to the Compression Settings window.
- Step 4: Choose the Frame Rate and the Video Dimension settings by moving the slider.
- Step 5: Finally, tap on the Compress button to start compress video iPhone.
Part 3. Batch video compression using Wondershare UniConverter
The iPhone apps can help to compress the videos but they have a limitation to the number of files that can be processed plus the features are limited. So, if you are looking for batch processing, Wondershare UniConverter is one of the best tools. This Windows and Mac-based software allows you to compress multiple files at a time and also transfer them to your iPhone.
Additionally, the software also supports video conversion, download, editing, DVD burning, and other functions. The videos are compressed by changing their size, bit rate, resolution, and the also format.
Features of the software:
- Allows compressing videos in almost all popular formats
- Batch processing supported to compress multiple files at a time
- Option to preview the files
- Lossless quality compression at a super-fast speed
- Edit the frame rate, resolution, size, and format to compress the video
- Transfer compressed videos to an array of devices including iPhone
- Windows and Mac support
Steps to compress videos and transfer to an iPhone
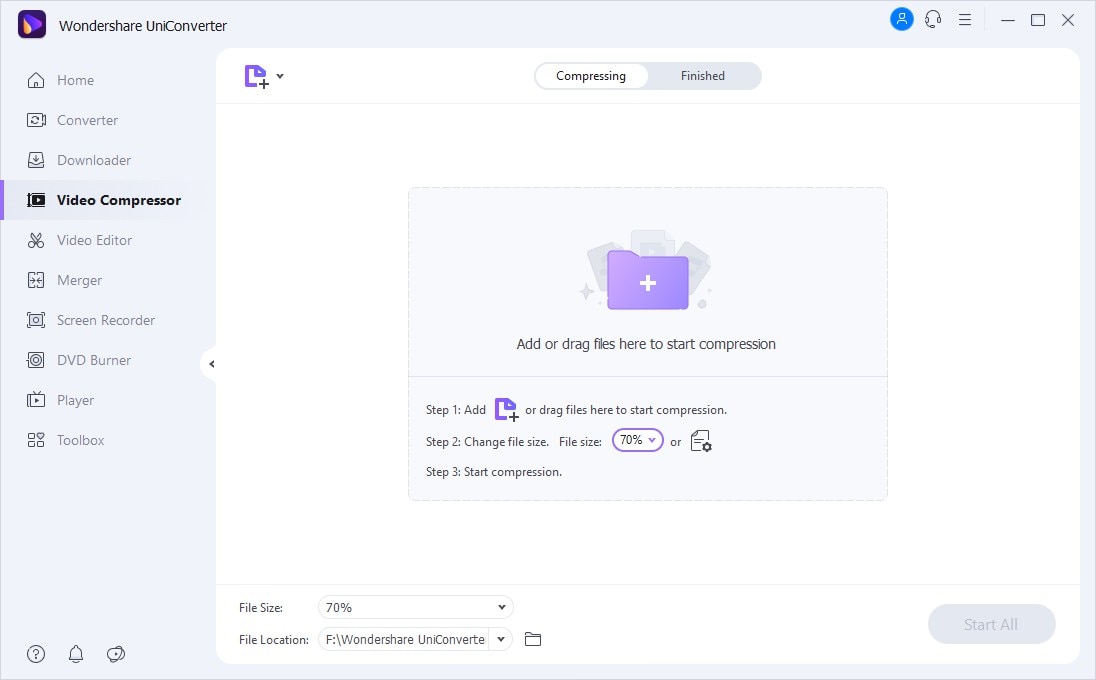
Step 1Launch Wondershare Video Compressor and add videos
Open the software and click on the Video Compressor from the main interface. Click on the Add Files icon or the + sign to browse and import the local videos to be processed.
Step 2Choose compression settings
After the video is added, click on the settings icon, and from the video compression settings window, choose the file size, resolution, bit rate, and also format to reduce the file size.
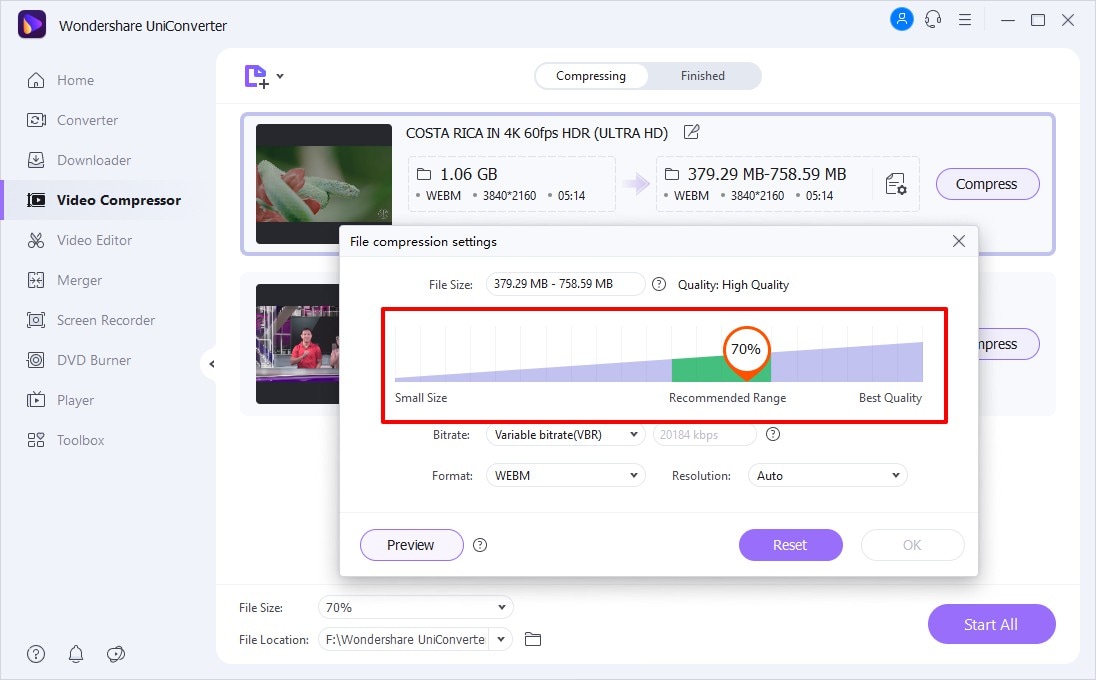
The preview button can be used to check the file and clicking on the OK button will save the changes
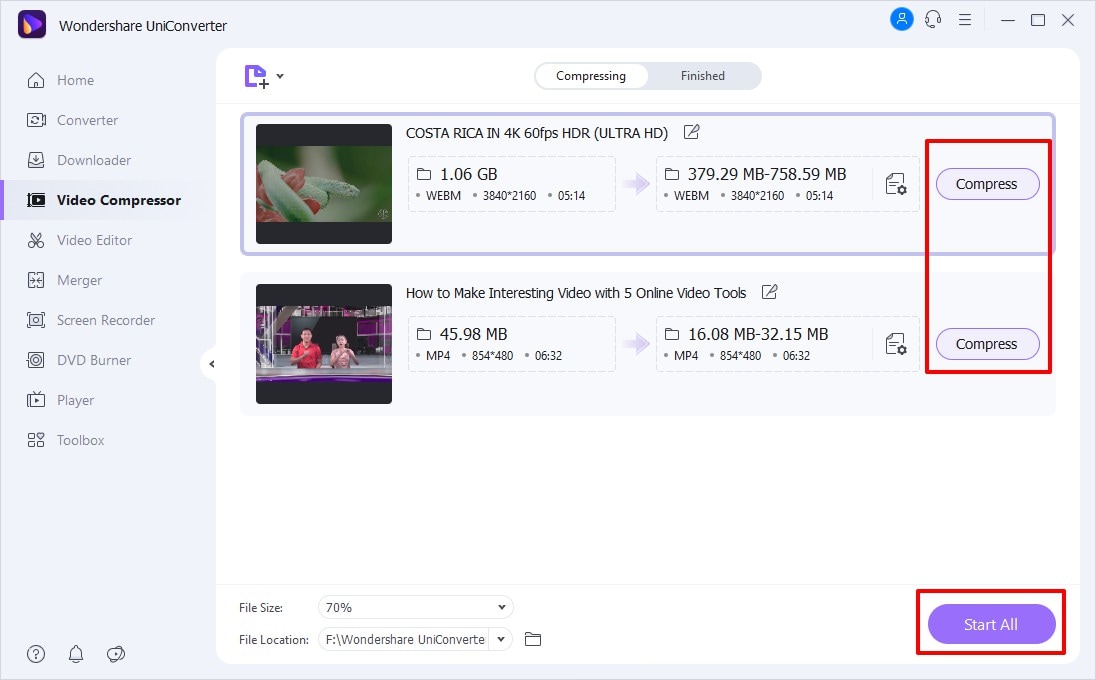
Step 3Start Compression
The File Location tab can be used to choose the folder to save the compressed videos on your system. Finally, click on the Start All button to start the compression.
Step 4Transfer compressed videos to an iPhone
On your software interface choose Toolbox > Transfer. Connect your iPhone to your PC using a USB cable. The connected device will appear at the software interface. Next, browse and add the compressed files to the interface by clicking on the Add Files icon. Multiple files can be added here.
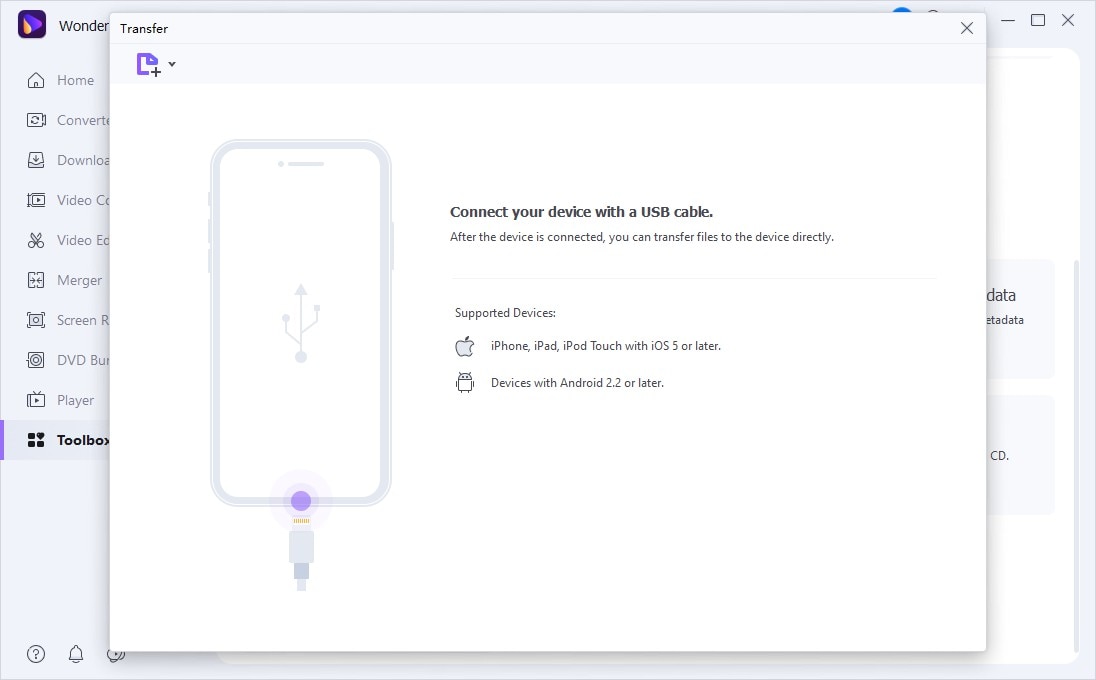
Finally, click on the Transfer All button to start transferring the compressed files to the connected iPhone device.
Part 4. How to compress video on your iPhone by adjusting video recording settings
The videos on an iPhone can also be compressed by adjusting the video recording settings of the phone. The steps for the same are listed below.
- On your iPhone, open the Settings app
- Click on the tab of Camera and then tap on the Record Video option
- Multiple options for default video recording will appear here with their fps and quality. Choose the setting that will record your videos in a smaller size.
These steps will reduce video size iPhone while recording also.
Summary:
iPhone apps can be used when compression of a few files is required. For batch processing install Wondershare UniConverter on your system, compress the files and then transfer them to your iPhone.

