Record audio from YouTube-UniConverter
- Record the YouTube music playlist and listen to it offline.
- Record the YouTube Videos and convert them to MP3 or other audio format.
- Transfer your recorded audio to your Android or iPhone devices.
- Edit YouTube music with different options.
- Additional features include video converting, downloading, compressing, and others.
The reason why we record audio from YouTube comes with a lot of reasons – we record audio from YouTube probably because we love audio from a video, love the melody and lyrics of music, consider the quality of a video, and other reasons. As we intend to capture audio from YouTube, we also desire to use a YouTube MP3 recorder that’ll deliver the best sound or audio quality. If your patience is strong enough, as you read through every line of this article, you’ll learn and gain experience on how to record audio from YouTube using the best software. Although some people record audio from YouTube for their selfish reasons, putting the copyright of the owner at risk, if you’re in line with such motives, then you must be ready to face the law because it’s illegal. If you’re pure at heart and your intentions are clean, this article is ready to give light to your path.
Part1. How to Record Audio from YouTube with UniConverter 13?
There is something I’d love you to keep in mind – If you’re ready to record sound from YouTube, there’s a universal, diverse, and integrated software that offers nothing but the best quality when it concerns media works – The Uniconverter 13. As always said, the Uniconverter is intuitive and professional software with the best media tools which include a converter, downloader, compressor, video editor, merger, screen recorder, media player, DVD burner, toolbox, and more, that allows users to record audio from YouTube with a Mac or Windows PC. I know you’d love to use integrated software with an easy-to-use interface like the Uniconverter 13 to get the best delivery. Just carefully follow the steps below to guide you on how to record audio from YouTube.
STEP1
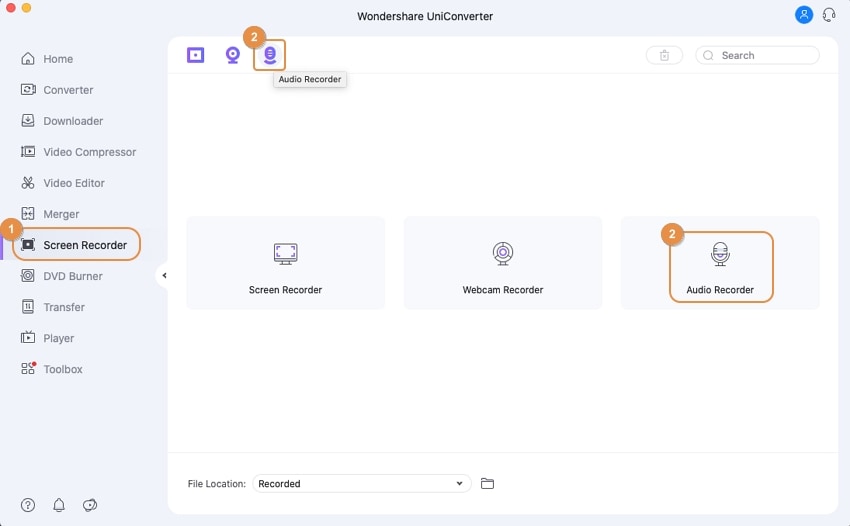
The first step to take if you don’t have the software installed on your PC is – download and install the Uniconverter13 on your Mac or Windows PC. Launch the software and click on the ScreenRecorder option at the left side of the software’s interface, then select Audio Recorder.
STEP2
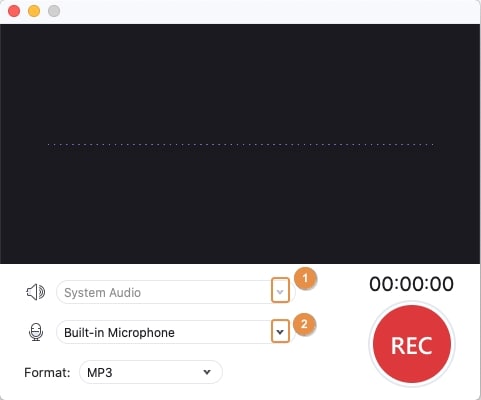
Once you click the Audio Recorder option, a new window pops. From the newly popped window, set the Speaker, Microphone, and Format from each respective dropdown option as shown in the image below.
STEP3
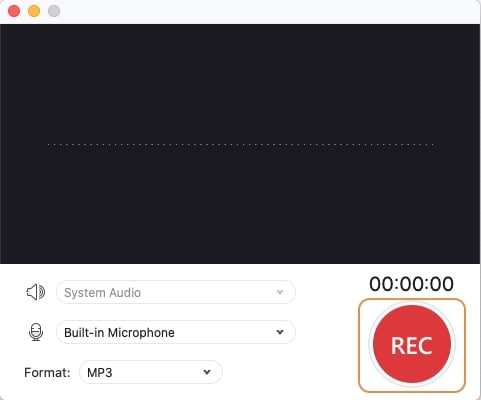
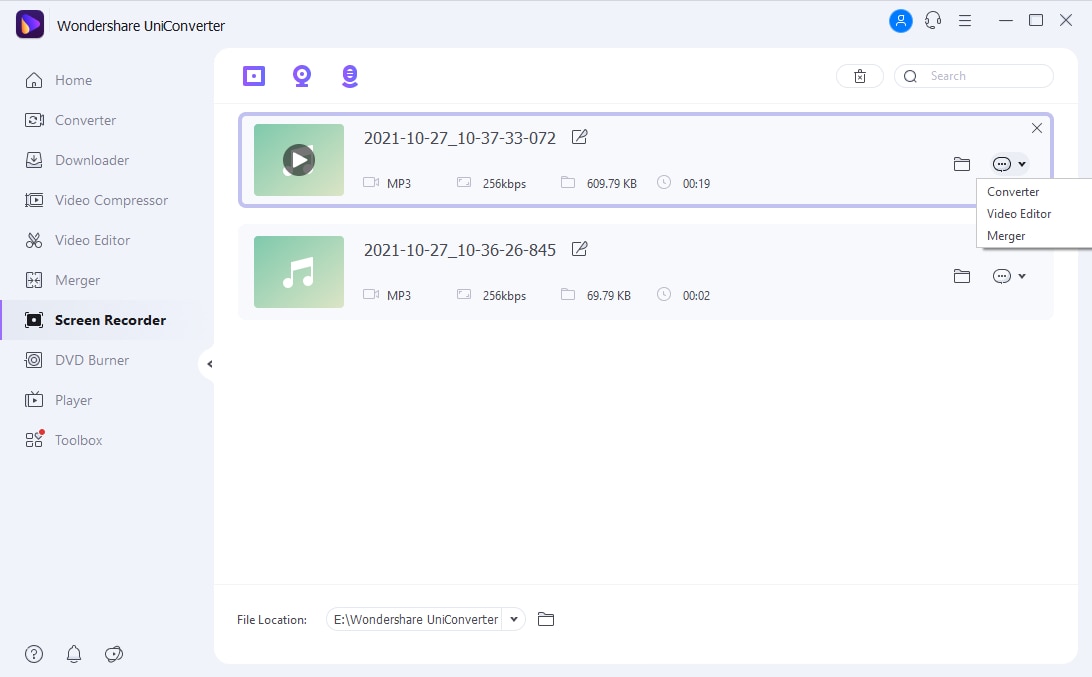
Once the sound you want to record starts playing, click on the REC button to start recording and click the button again once you’re done. Afterward, you’ll see the recorded file displayed on the interface.
NOTE: In case you don’t know, the Wondershare Uniconverter offers you a chance to edit your recorded audio in no time, all you need to do is – Right-click on the appeared audio strip and select Converter. Now go down to the Converter tab, from the audio strip select the Video Editor below the audio thumbnail, and adjust whatever parameter you wish to set. Once you’re done setting the parameters, choose the desired outputformat following the direction of the image below, and click the Start All button to begin the conversion.
Wondershare UniConverter 13 - A Complete Meida Toolbox
5,481,435 people have downloaded it.
UniConverter supports many formats and handles conversion equally, ensuring that high quality is delisered at all times.
During the conversion process, you may add multiple files since the program does batch conversion of files.
You can use the editing suite that covers subtitle editing, watermark editing, etc to make your results creative masterpieces.
This software facilitates file transfer to devices like Android and iPhone among others once the conversion is complete.
UniConverter is also capable of handling video compression hence ensures you acquire the video sizes you desire.
Part2. How to Record Audio from YouTube with Other Tools on Your Mac/Windows?
Audacity
Audacity is a functional tool that plays an important role when it comes to recording, converting sound format, burning cd, editing, cutting, trimming, and merging sound files, changing sound pitch, and many more. Audacity as a multi-tasking tool that it is, can function as recording software. If you’re willing to record sound from YouTube you can use audacity following the steps below to achieve your goal.
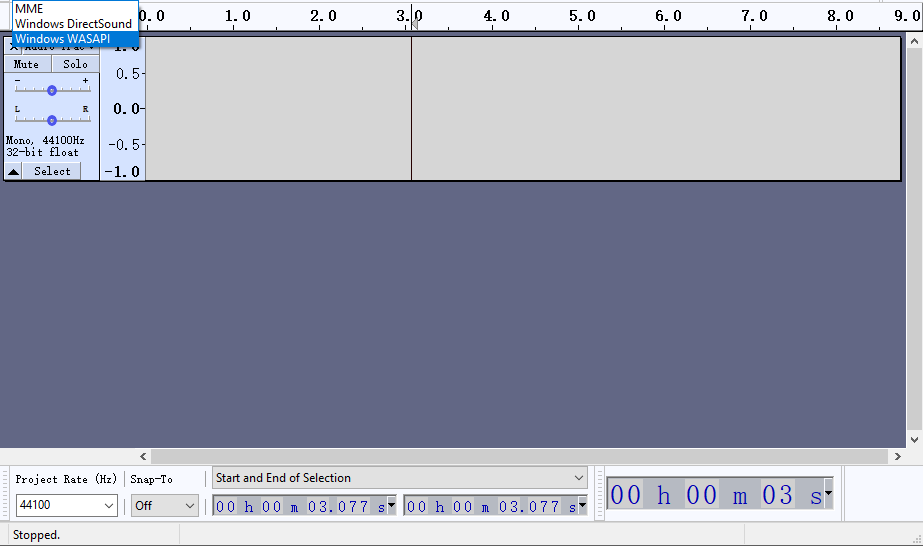
STEP1 As known, you’ll have to download and install Audacity on your PC, Launch the software after installing it on your PC. From the menu bar click Edit and select preference from the displayed menu
STEP2 After clicking preference, select Stereo Mix from a tab you’ll find below the recording device. Just in case this feature is not available, go to Control Panel > Hardware and sound > Sound > Recording. Once you’re in the recording interface right-click and select Show Disabled Devices from the displayed menu for the Stereo mix to appear. After that, right-click on the stereo mix to enable it, and OK to save the setting
STEP3 If after selecting the stereo mix, click the Record Button once the YouTube audio or video starts playing, and stop when you’re done recording, then export it.
Pros
Audacity is free to use
The software supports multiple audio formats
It supports multiple operating systems
Cons
Limited mixing features in the software
Audacity requires plug-ins to boost its functionality
It doesn’t support macOS
VLC
VLC media player is a universally compatible software with exceptional features that makes playing and streaming of media files easily accessible in different available formats. The media player gives users the chance to loop each part of a video or audio, use a protective equalizer to normalize sounds, and many more. Even as a media player that it is, VLC grants you as a user to record audio from youtube for free. If you’d love to capture audio from YouTube using VLC media player, here are steps to guide you on how to do that
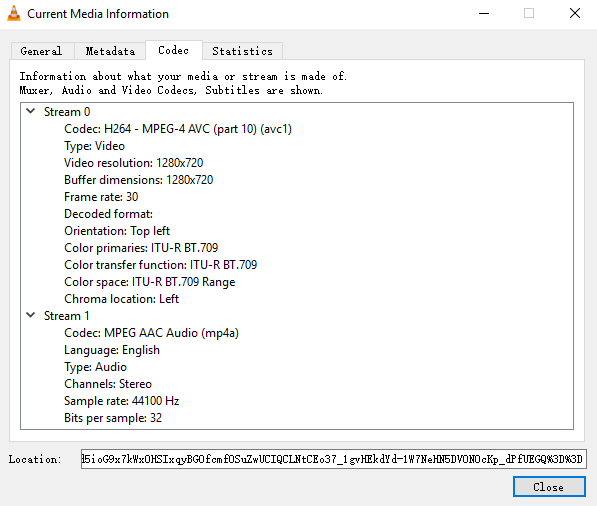
STEP1 Before opening the VLC media player ensure that you’ve copied the URL of the audio you wish to record from YouTube. Now open the VLC player from your PC whether you’re a MacBook or Windows user. Afterward, click “media” at the top left corner of your VLC player’s interface, select Open Network Stream, and Paste the URL to the Network URL domain, then click on the Play button below.
STEP2 Immediately the video starts playing, go to tools from the menu bar, select codecInformation and copy the address you’ll see below in the Location box from the newly displayed window. Afterward, stop the video
STEP3 Just as you’ve done in step1, you’ll clickmedia >open network stream, but this time, you’ll paste the newly copied address, then click the dropdown option beside the play button, select convert. Afterward, from the newly displayed window select any format of your choice (Audio-mp3) using the profiledropdown option, click browse to select a path for the file ( file location). Finally, click start and have the recording to yourself in few minutes.
Pros
The VLC media player allow free conversion of audio/video files
It is compatible with most devices, whether it’s macOS, windows, android, or iOS devices
It can read and play media files of any format
Cons
It requires a detailed description if you wish to record audio from Youtube which is a bit complicated
The player doesn’t allow you as a user to personalize the software’s interface
It sometimes malfunctions when you attempt to play a video.
Streaming Audio Recorder
Streaming Audio Recorder is another software developed by Microsoft Corporation that enrolls its users with the benefit of recording audio from YouTube or other online streaming platforms where there are millions of uploaded media files at your disposal. Apowersoft Streaming Audio Recorder offers you as a user its built-in search engine tool to explore and discover ultimate sounds and have them all to yourself. If you wish to use a YouTube mp3 recorder like Streaming Audio Recorder to record sound from YouTube, here are steps to enable and enhance the process.
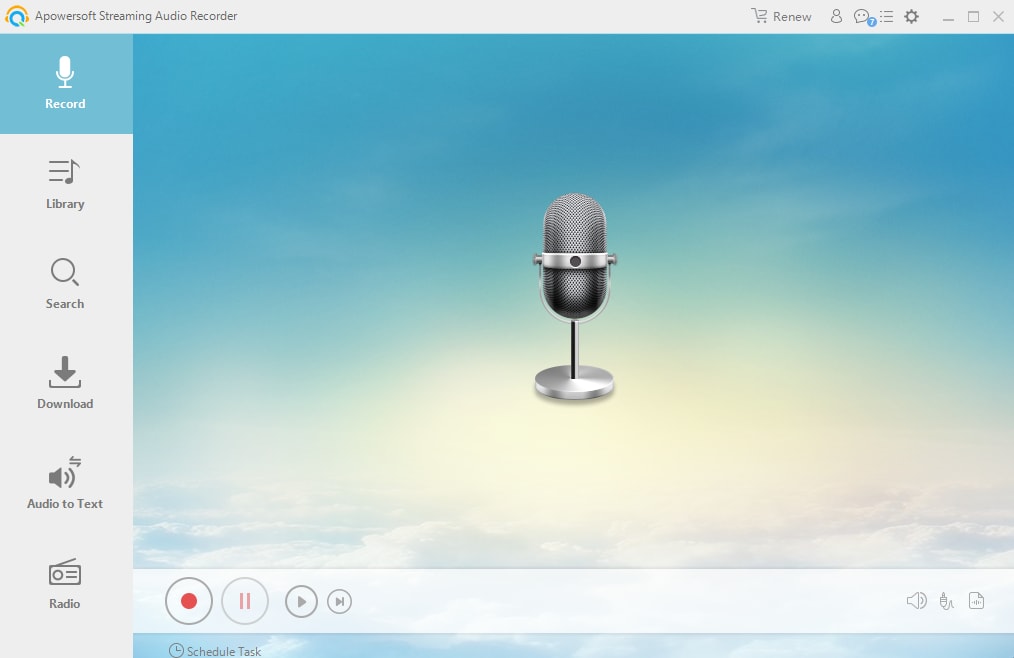
STEP1 Firstly, download and install the ApowersoftStreaming Audio Recorder on your PC. Afterward, launch the software, at the top right side of the software’s window select the Gear icon, then choose Settings. From the appeared window choose the input audio source as System sound.
STEP2 Now you can minimize the YouTube mp3 recorder, then Go to YouTube to play the audio or video you want to record. Once the media file starts playing, go back to the Streaming Audio Recorder interface and click the Red Recordbutton.
STEP3 Once the YouTube video or audio stops playing, click the Red Stop button to automatically save the audio you’ve recorded.
Pros
The software has an understandable interface
It supports multiple formats
Apowersoft Streaming Audio Recorder permits CD burning
Cons
The app is not free at all
The easy to use software requires sound card installation for its operation
File transfer is not made easy when using this software
iMusic
iMusic is another pleasing software if you decide to record audio from YouTube using a mac. The intuitive software permits you as a user to transfer songs and other media files from your iTunes library to your iOS device, Android OS, or PC. The software also allows you to manage your media files through its integrated system. If you’re willing to record sound from youtube using iMusic, follow the step subsequently;
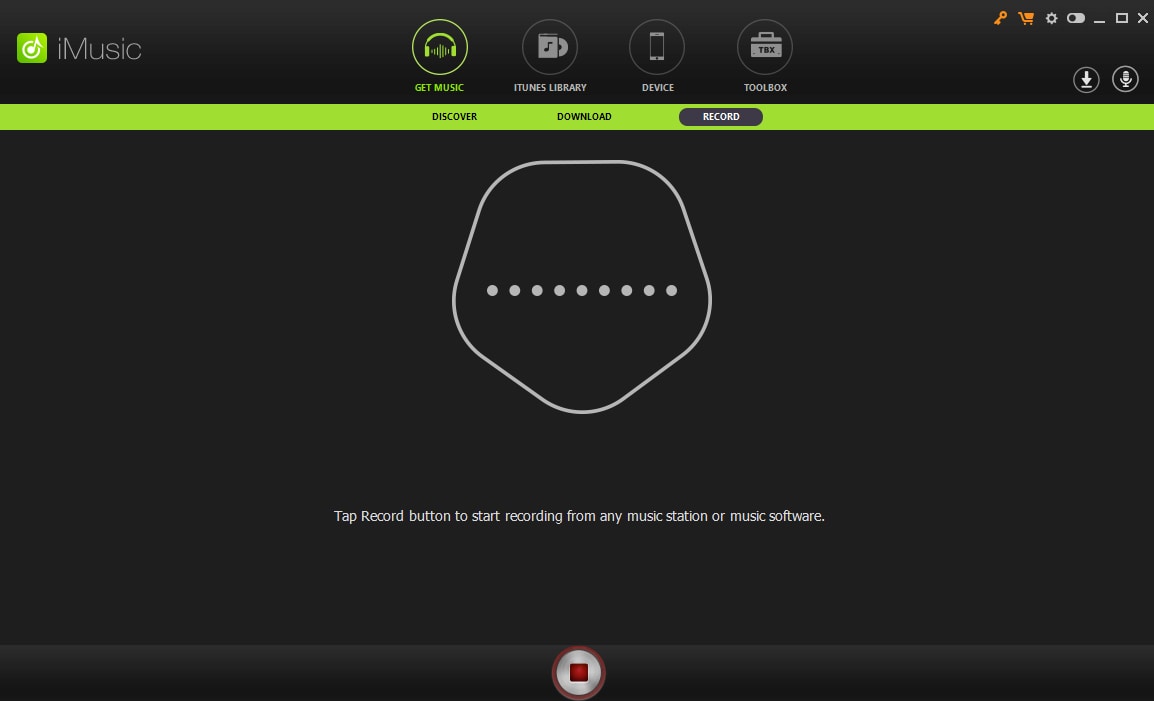
STEP1 Just in case you don’t have the software installed on your PC, download and install iMusic on your PC. Afterward, Launch the iMusic and selectGETMUSIC from the top menu of the interface, select the Record tab you’ll see below the top menu.
STEP2 After that, Play the music you wish to record from YouTube, then go back to the iMusic interface where you’ll notice that the recording process automatically kicks off.
STEP3 After that, if you’re satisfied with the length of the recording, click the stopbutton. Your software allows you to access the recorded audio from its library.
Pros
It is an easy to use software
It allows you to manage your music playlist
It automated system of conversion
Cons
It can’t be recommended for professionals
No noise filtering tool
Low output quality
For Win 7 or later (64-bit)
For macOS 10.12 or later

