Record audio-UniConverter
- Help you record audio at your home studio and convert, compress your recorded files.
- Record the online music and listen to it offline.
- Transfer your recorded audio to your Android or iPhone devices.
- Record the meeting voice to save the important information.
- Additional features include video converting, downloading, editing, and others.
Recording audio from computer may not seem like something most people will do like the smartphone is there, so why would you want to record audio from computer, right? Right. It doesn't hurt, however, to have a recorder to record sound from computer. You might be in an online lecture, or you are probably watching a video online. Suddenly, the speaker starts to drop important stuff; going for your phone might waste time. You will waste even more time unlocking and searching for the recorder, but you can quickly access a desktop audio recorder on your system.
Another point is that most records are usually in WAV or AAC, but there are levels to these formats as well. The audio quality you would get from your system would be better than that of your phone. The point is, having a reliable recorder on your system can save you when you are in dire need of it. Lucky for you, we have compiled a list of the best recorders for systems, both for professional, easy, quick, and basic audio records.
In this article
Part1. Try TechSmith Camtasia-for Professional Audio Records
Camtasia is a professional tool for creating, recording, and merging audio and videos. Professionals are usually using it for creating video tutorials. Available on both Windows and Mac systems, Camtasia is generally updated and upgraded, with new features and bug fixes every time. There are mainly two components to Camtasia. The first is the system audio recorder, which allows you to record sound from computer. The second component is the Editor, which will enable users to edit videos and audio. All in all, Camtasia is an excellent software for desktop audio recorder. In conclusion, Camtasia is for professionals; new users may find it challenging to navigate.
Steps in Recording Audio with Camtasia
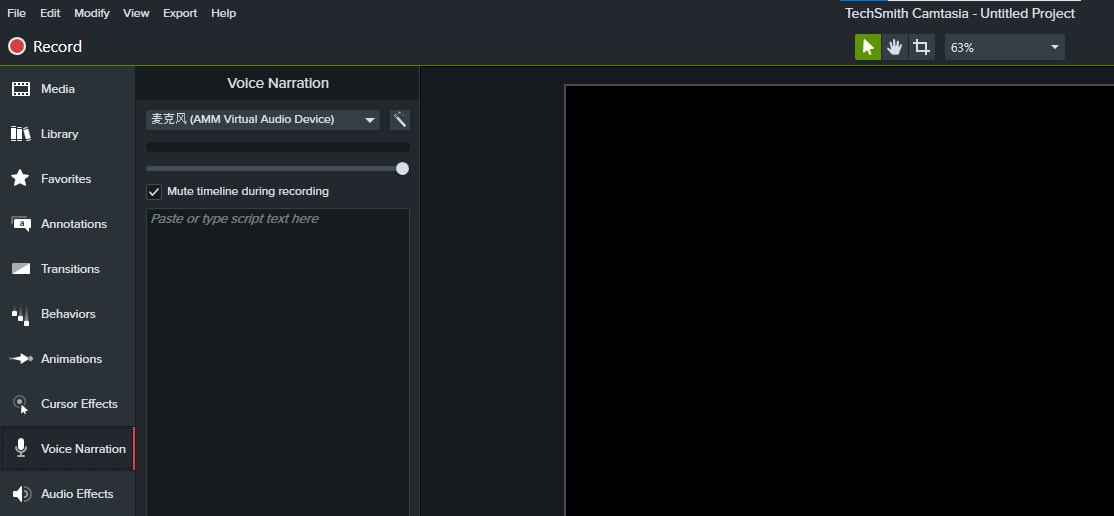
Step 1 Click on Voice Narration
After opening the software, on the left side of the screen is a list of functions in Camtasia. Choose voice narration
Step 2 Select Recorder
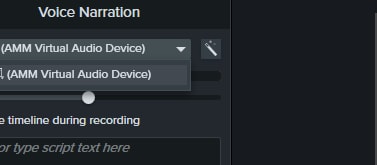
After clicking on the Voice Narration, a box pops up where you can select a recorder. A constant option is your system's built-in soundcard. You can use this or if you have an external recorder or mic. Users can select any option to record system audio.
Step 3 Select the sensitivity level
This might not seem like an important step, but we assure you that is it. You can choose the automatic, where Camtasia automatically chooses a sensitivity level to record audio from the computer, or you can manually adjust it. Note, however, that if you set the level too high, your system might start picking up irrelevant background sounds, and if you set it too low, depending on your voice pitch, your system might not even pick up your voice.

Step 4 Click Start Voice Recording
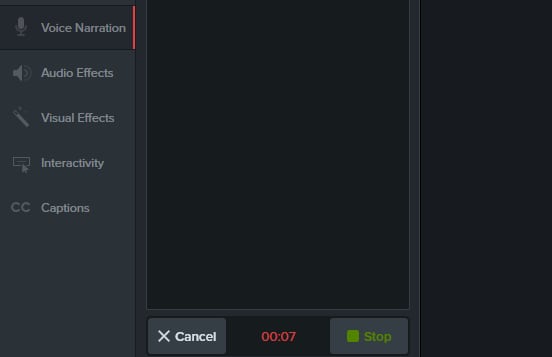
When you are ready, click on start voice recording to start recording sound from computer. Click on stop recording to end the sound recorder. Camtasia saves your file to its folder.
You can edit the audio by opening it via Camtasia.
Pros
Camtasia is a powerful recording tool with lots of functions
Has built-in effects, animations, voice narrations, and lots more to make jobs more accessible and effective
Import and export functions
Cons
The rotation function is not interactive. Instead, you adjust rotation from a pop-up dialog box.
It cannot record from a DV camera.
A lot of functions that might be confusing for new users
Part2. Try UniConverter 13-for Easy Record Audio from Computer and Edit Audio.
UniConverter is like what? One of the best audio and video editing tools out there. The fact that it has many features and functions doesn't mean that even novices can't use it. It is available on both Windows and Mac systems. The new UniConverter 13 comes with fantastic new features as well; you should try this software out. Converting, compressing, online downloader, video editor, sound recorder, audio merger are some of the functions of UniConverter. UniConverter sound recorder function is sharp. It picks up recording from either your system's speaker or an external one, meaning it can record audio from a computer speaker or utilize an external mic to record sound from a computer.
Steps in Recording Audio with UniConverter
Step 1 Launch UniConverter and Click on Screen Recorder
After launching UniConverter, from the list of tools on the left, select Screen Recording, a new window appears, and you will be given three options. Screen Recorder, Webcam Recorder, or Audio Recorder. Each of the names already explains what each function does.
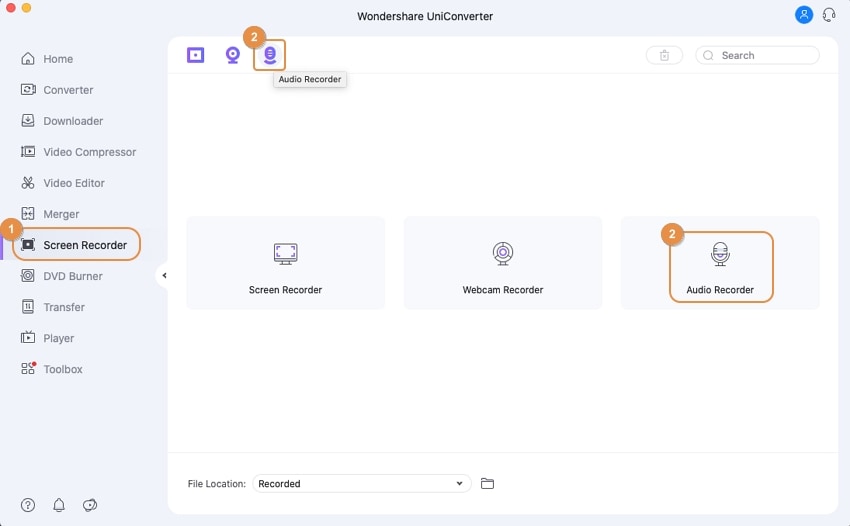
Step 2 Select Audio Recorder and select recorder
Click on Audio Recorder, and the recorder interface comes up. UniConverter automatically detects if an external mic is connected and will list it as part of the options when selecting your recorder. Even if you have a headset connected, UniConverter can record from your headset or earpiece.
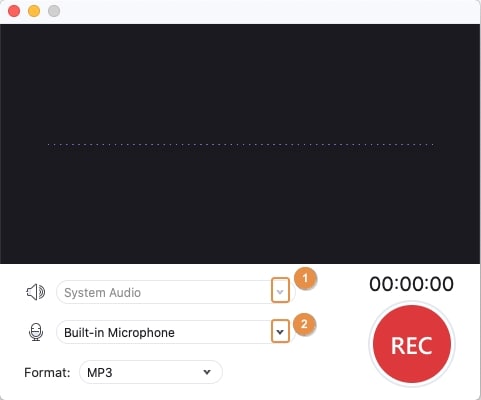
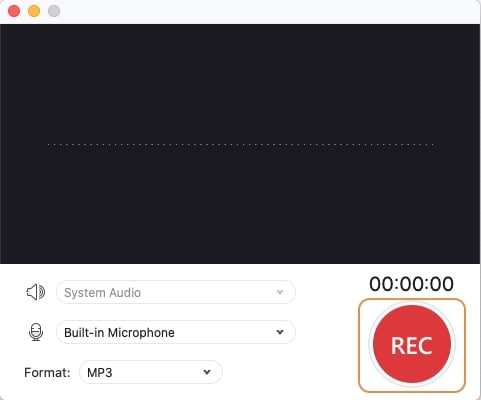
Step 3 Click Rec
After selecting the recorder, click on the Rec. button to start recording. When you are done, click on the same button again to stop. From here, you can do any editing on the audio.
Optional: Editing the audio
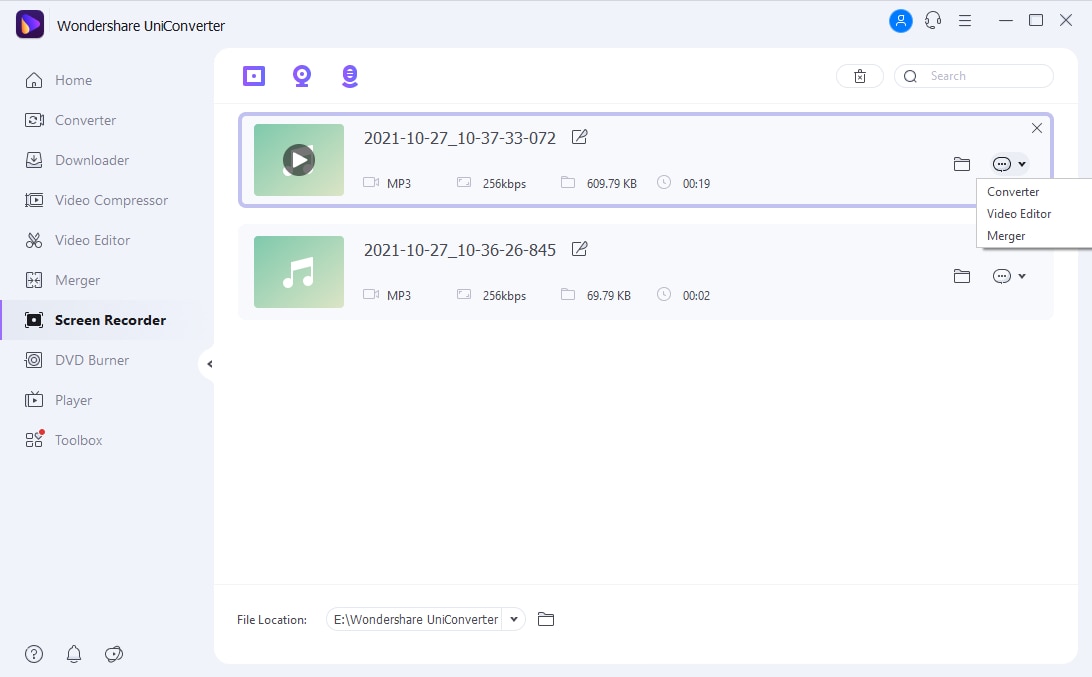
When you finish recording, the files come up on the UniConverter interface. Click on the message bubble icon to get a list of editing options. You would usually get three which are Converter, Video Editor, or Merge. Use the converter to convert mp3 to video or other mp3 formats. Use the video editor to crop/trim the audio, add effects and add a cover photo. Use merger to join the audio with some other audio(s)
Pros:
It has a lot of features and is still easy to use
Can perform batch conversions and compressions
It contains lots of video editing options
Customer care is always available
Free trial but with some limitations
Cons:
Not available for Linux platform
Although inexpensive for the features they offer, UniConverter is still a paid app.
Wondershare UniConverter 13 - A Complete Meida Toolbox
5,481,435 people have downloaded it.
UniConverter supports many formats and handles conversion equally, ensuring that high quality is delisered at all times.
During the conversion process, you may add multiple files since the program does batch conversion of files.
You can use the editing suite that covers subtitle editing, watermark editing, etc to make your results creative masterpieces.
This software facilitates file transfer to devices like Android and iPhone among others once the conversion is complete.
UniConverter is also capable of handling video compression hence ensures you acquire the video sizes you desire.
Part3. Use Apowersoft Online Audio Recorder-for Quick Record Audio from Computer
This software is another mighty name in the audio and video editing area. Apowersoft is best known for its strong audio and video processing power. Here as well, we have their audio recorder. This free and online audio recorder allows you to record audio from a computer in high quality from your system soundcard, microphone, or any external mic. You can use it to add voice narrations to video clips and record voice narrations from other videos. It is an excellent and well-balanced desktop audio recorder.
Steps to Record Audio with Apowersoft Online Audio Recorder
Step 1 Launch and Start Record
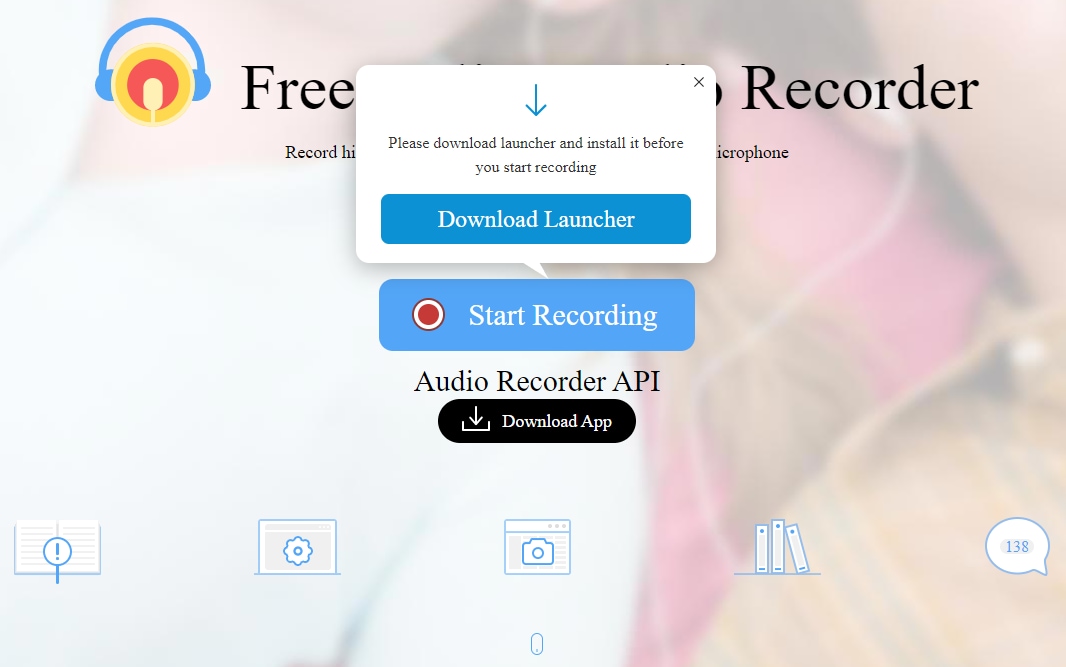
Launch the app and click on Start Recording; a window pops up, which allows you to choose the source from which to record the audio. Either from your system's soundcard or an external mic.
Step 2 Control Audio
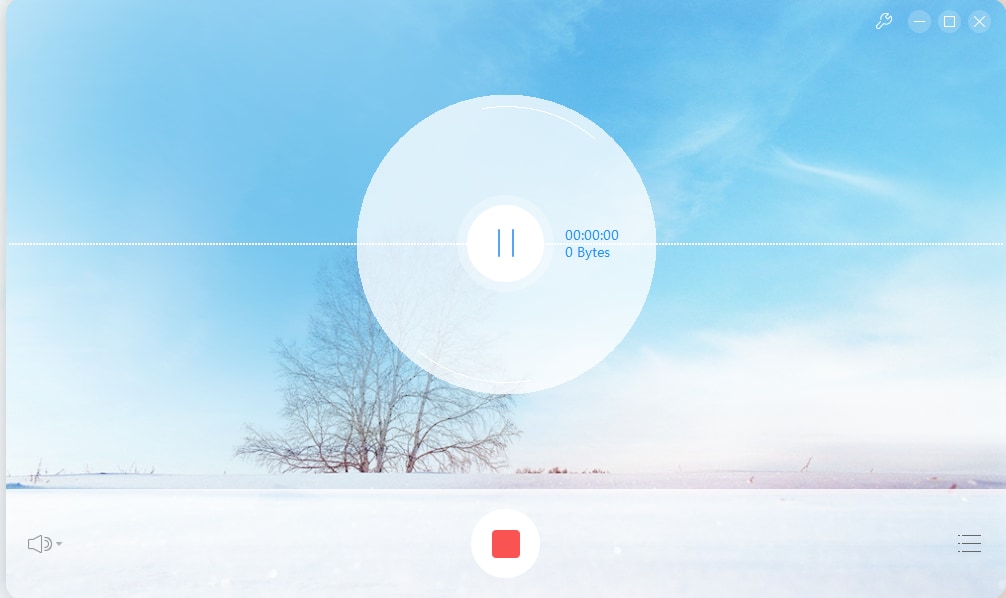
Choose when to pause or stop. For example, there might be a short break in the audio you are recording, and you don't want to end the recording yet; you can click on pause to momentarily stop recording.
Step 3 End and Save
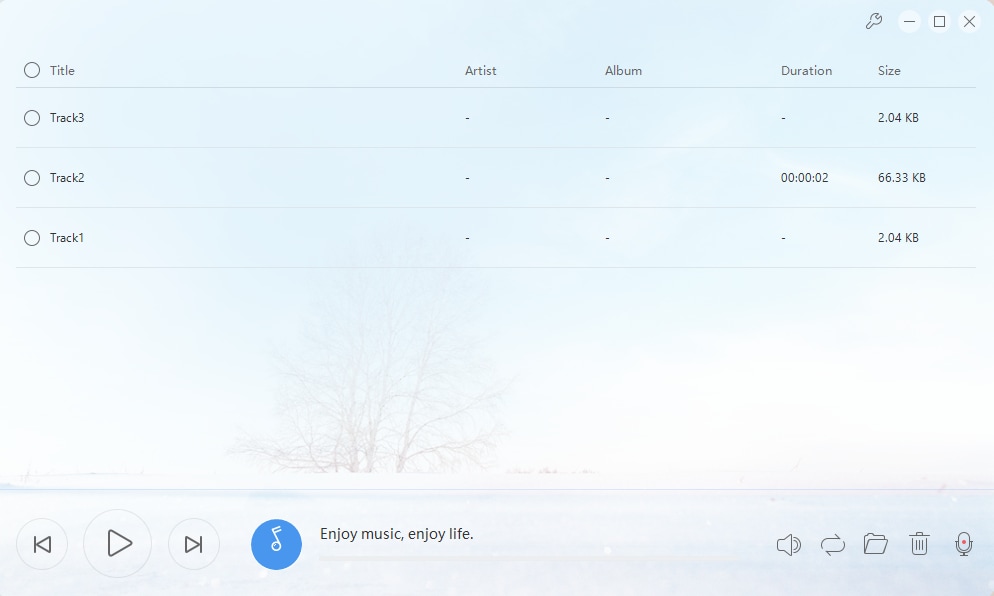
Click on Stop when you are done recording, and the recorded file will automatically be saved to the Apowersoft folder.
Pros
High-quality audio recorder
Can pause audio recording momentarily
It has a very long recording time limit
Cons
No editing options
Limited functions, primarily only for recording
Requires a very stable internet connection
Part4. Use QuickTime Player-for Basic Audio Records from Computer
QuickTime shouldn't be news, especially to Mac users. It is a built-in media player that can also perform a bunch of other functions. Do you want to edit a movie? QuickTime lets you make simple editing options like trimming videos. Split the film into short clips and edit each one. Do you want to record your screen or record system audio mac? Through a very simple process, you can still easily record your Mac screen with a QuickTime player, either the entire screen or just some part. Do you want to capture and view your iPad, iPhone, and iPod screen on your Mac? With QuickTime, you can link Apple devices with your system and your system with an Apple TV. However, since this is just supposed to be a media player, these functions can be complicated to achieve. Below is a step-by-step guide on how to record internal audio Mac with QuickTime.
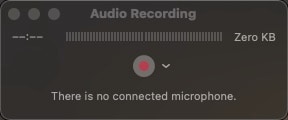
Steps to Record Audio with QuickTime on Mac
Step 1: Open QuickTime, and from the menu bar, click on Choose File then New Audio Recording.
Step 2: Besides the Record button is an arrow that brings a dropdown box. From the box, you can select the microphone to use and choose the quality of your recording. The line at the bottom is where you adjust the volume.
Step 3: Click the Record button to start recording computer audio on mac and click the Stop button to stop your recording.
Step 4: Select the destination folder for your recording.
Pros
Built-in for Mac users
Works well with iTunes
The interface is simple enough to navigate
Cons
Complex procedures
Compatibility issues
Conclusion:
Through scrutiny, we have listed some of the best audio recorders for computers such that it makes it hard to choose which one is best. However, judging from their functions, features, and ease of use, we have concluded that UniConverter takes the top spot. While some recorders on the list beat it in some areas, they lack one or two of the criteria we mentioned above. On the other hand, UniConverter has the features, and they function as they are supposed to. It is also effortless to use that new user will have no problem with it even on their first try. So yes, UniConverter wins as one of the best on the list.
Tips to record audio: If you want to record system audio or external sound with your Android devices, you can see the four easy ways to do it >>>
For Win 7 or later (64-bit)
For macOS 10.12 or later

