How to Add / Remove Watermarks from Video on Mac with Ease
Looking for a watermark remover isn’t the problem at all as there are thousands of developed software that could perform the task, but using an intuitive and exclusively made software that would let you add an image or text as a watermark, or remove watermark from a video easily could be the problem. That’s why we’re introducing the Wondershare Uniconverter to help with all your worries using its finest tools whether you’re a Mac or Windows user. You can utilize the guide below If you’d love to use this software.
Part 1. How to Add Watermarks for Videos on Mac
First of all, ensure that the Wondershare Uniconverter is installed on your MacBook. Launch the software, then go to the left side of the interface to click Toolbox and Select Watermark Editor to open the watermark editing interface. Afterward, click the Add Files icon you’ll see at the top left corner of the Editor’s interface to import the video to be watermarked.

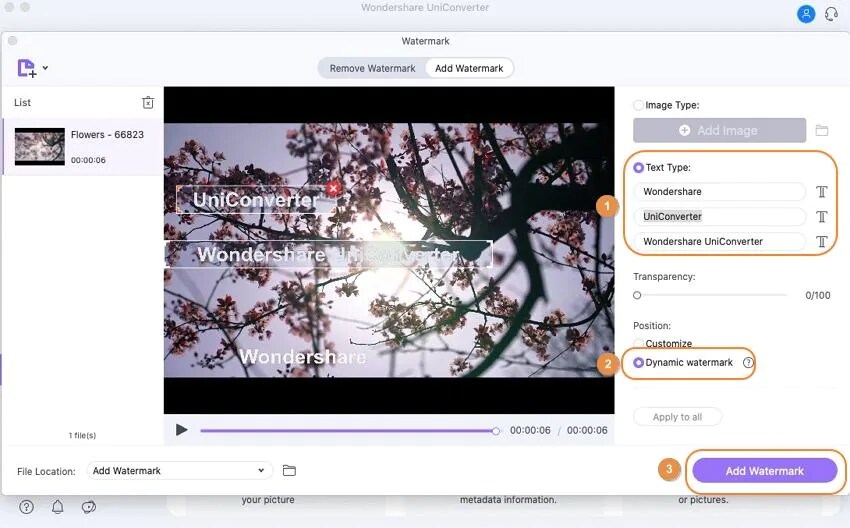
If you’d like to add text as a watermark to your imported video, then all you need to do is - from the right side of the editor’s interface click on Text Type, input your text into any of the three available text boxes that’s if you’re not interested in using the three, click the T icon beside the text box you used - to change Font, Size, make the text Bold, use Italics, and Underline the text, then click the Confirm button from the small text editing menu.
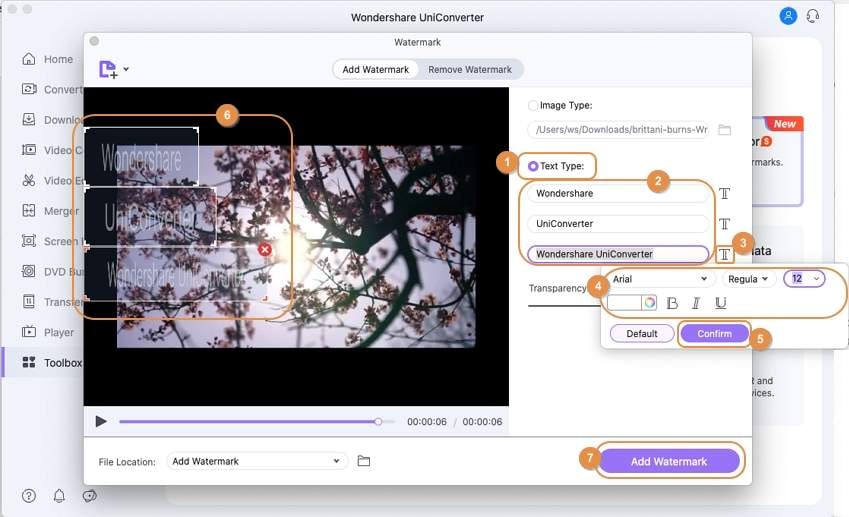
If you’d like to make the text watermark dynamic (Customized), then click on the Dynamic Watermark option. Finally, click the Add Watermark button to export your watermarked video.
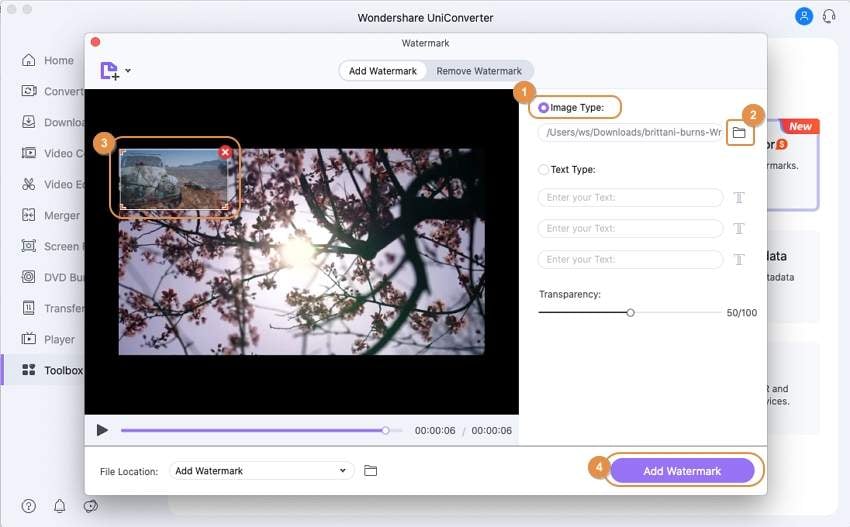
If it’s an image you want to use as a watermark on your video, click on the Image Type option at the right side of the editor’s interface. Click on the Folder icon beneath the Image Type option to import the image to be used as a watermark. Once the image is imported, drag the selected edges of the watermark to adjust its size and position, then click the Add Watermark button to have your watermarked video.
Note: both the text and image watermarking supports the dynamic watermark feature of the Wondershare Uniconverter 13.
Part 2. Steps on how to remove watermark from the video on Mac:
Launch Wondershare UniConverter 13. Once it opens, click the Toolbox from the left side of the interface and select Watermark Editor.
From the top left corner of the editor’s interface, click the Add Files icon to import your video.
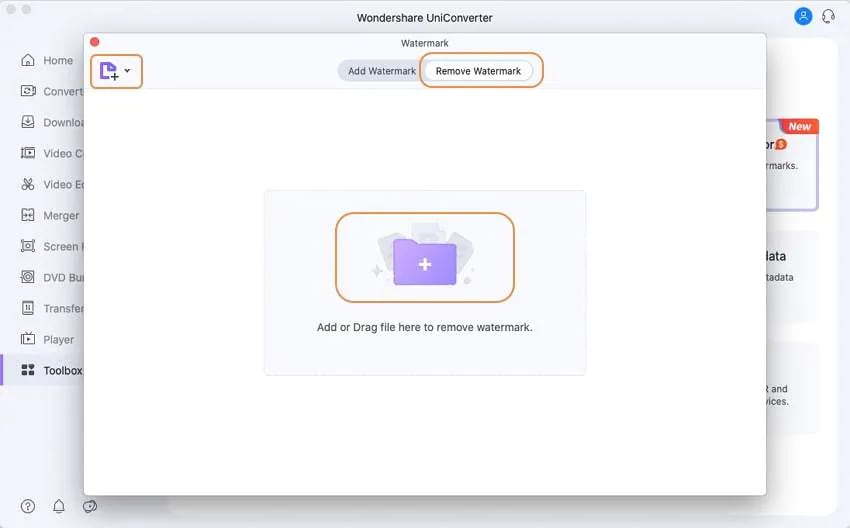
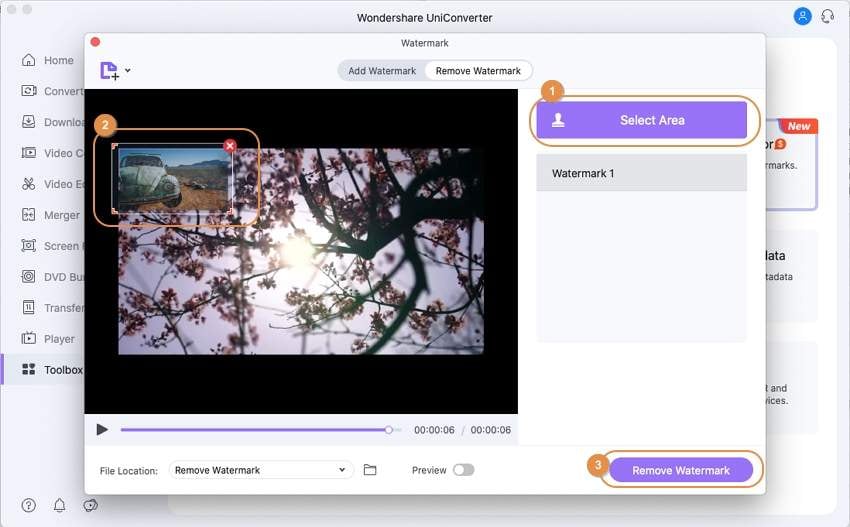
Once the video is imported, click on the Remove Watermark tab you’ll see at the top of the interface, then click on the Select Area button at the right side and drag the mouse on the watermarked area in the video, and ensure the selection box contains all parts of the watermark. Afterward, click the Remove Watermark button to eliminate the watermark from the video.
User Guide
-
Get Started Easily
-
Convert Video
-
Edit Video
-
Compress Video
-
Recorder
-
Downloader
-
Burn DVD
-
Merge
-
Convert Audio
-
Toolbox