How to Compress Video on Mac without Sacrificing Quality?
Uniconverter for Mac compresses video files in a variety of formats, allowing them to be smaller. For the process, you can include both local and external files. The software supports both single and multiple file compression in high-quality output files. So, you won't have to worry about running out of storage space because the software can now compress your data.
How To Compress Video On Mac Without Losing Quality. Uniconverter (Mac) User Guide:
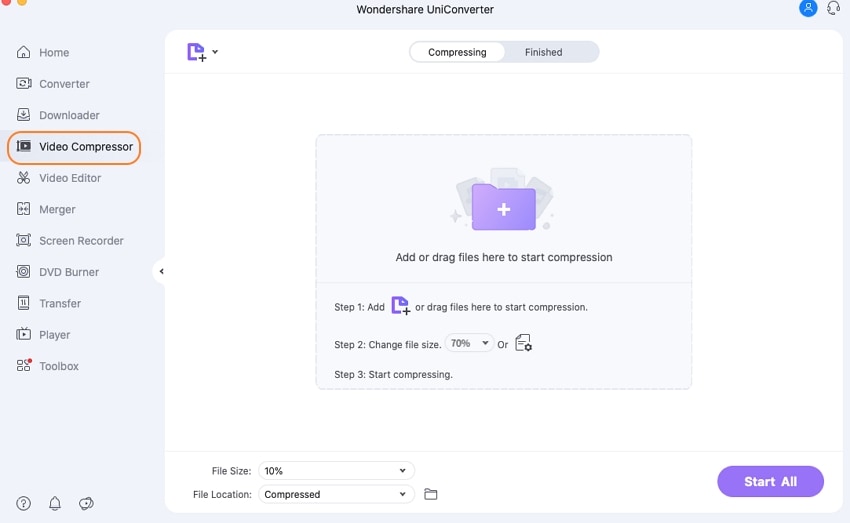
On your Mac, download, install, and launch the Uniconverter software. The primary features are provided on the left-hand side of the interface, from which you must select the Video Compressor.
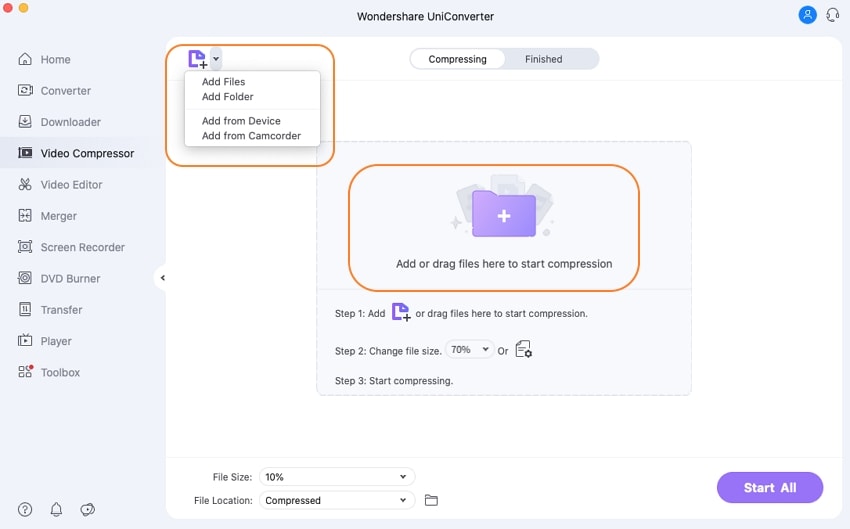
To browse and load local files on your system, click the + or the button. You can select to add videos from the linked devices or the camcorder by expanding the drop-down menu. You can also simply drag and drop the files into the interface.
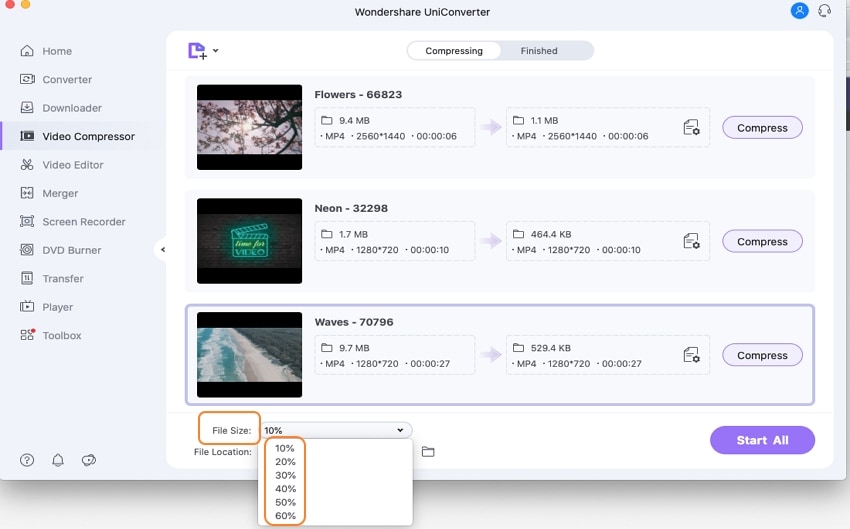
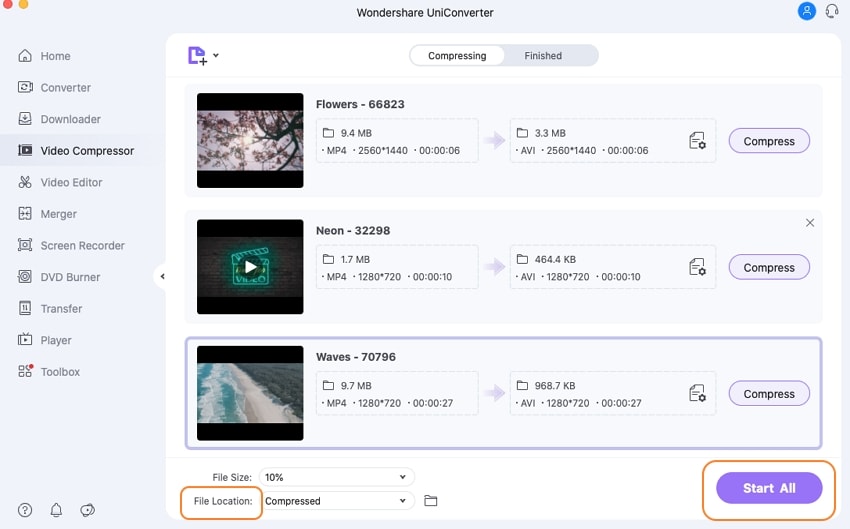
The interface displays the newly added files with a thumbnail image and file metadata. Choose it from the Reduce File Size drop-down options at the top-right corner if you want to compress all the new files by reducing them to a percentage of the original file size.
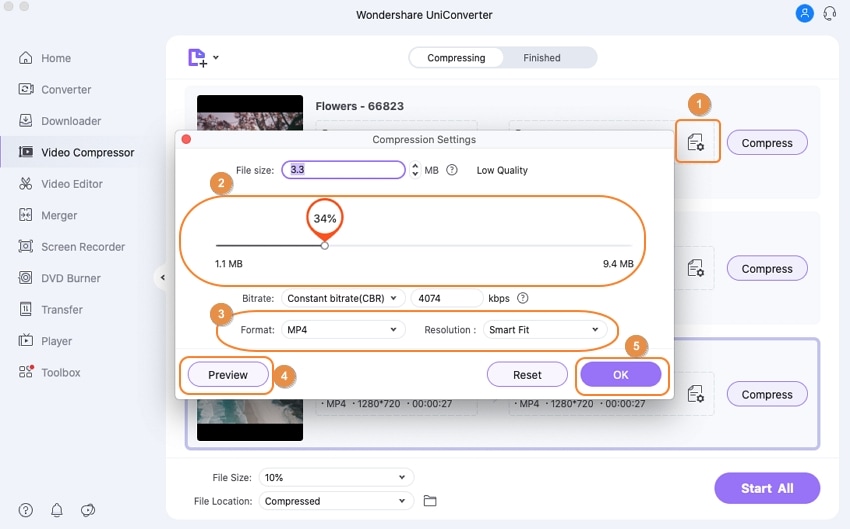
You can also customize the size and other characteristics for each person. To do so, click the settings icon next to the file information, which will reveal the Compression Settings window. There is a slider next to the File size: tab that allows you to pick the desired file size in MB. You can select the required resolution and format from their respective sections as you choose the size, quality, and BitRate modifications. To check out the video, click the Preview button. The settings will be confirmed by clicking the OK button.
The File Location: tab allows you to explore and select a location on your system to save compressed files. Finally, click the Start All button in the bottom-right corner to begin compressing all of the files you've added.
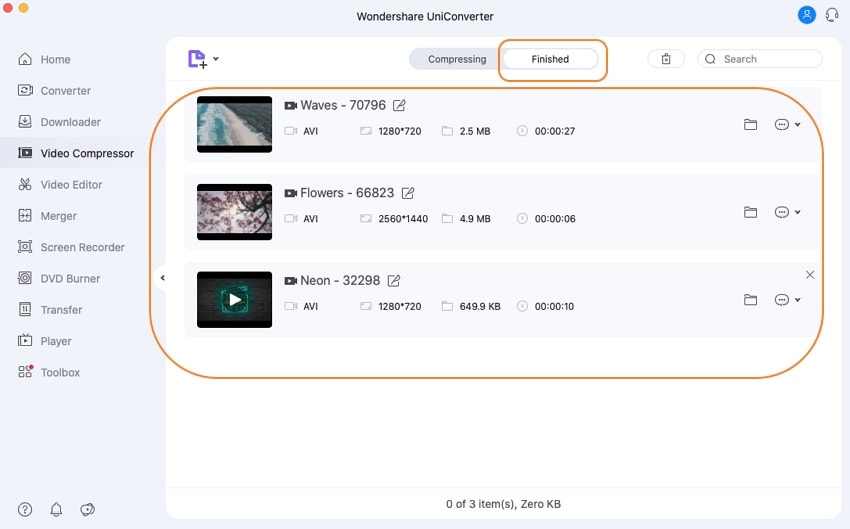
The From the Finished tab, look at the compressed videos on the interface.
User Guide
-
Get Started Easily
-
Convert Video
-
Edit Video
-
Compress Video
-
Recorder
-
Downloader
-
Burn DVD
-
Merge
-
Convert Audio
-
Toolbox