How to Merge Videos into One on Mac
If you have two or more movies that need to be merged into one so that you can watch the entire movie in one sitting, Uniconverter can help. In just a few simple steps, you may merge many short clips to produce a single, full-length movie on your Mac PC using UniConverter's "Merger" feature. Here they are:
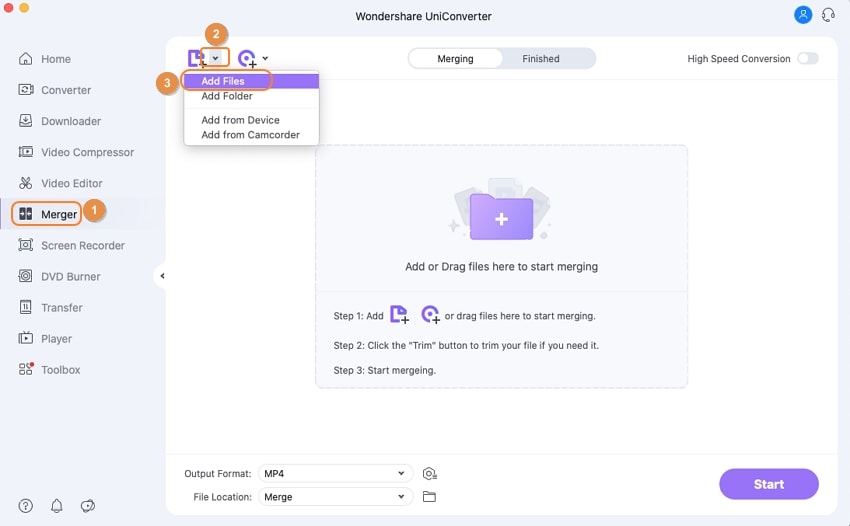
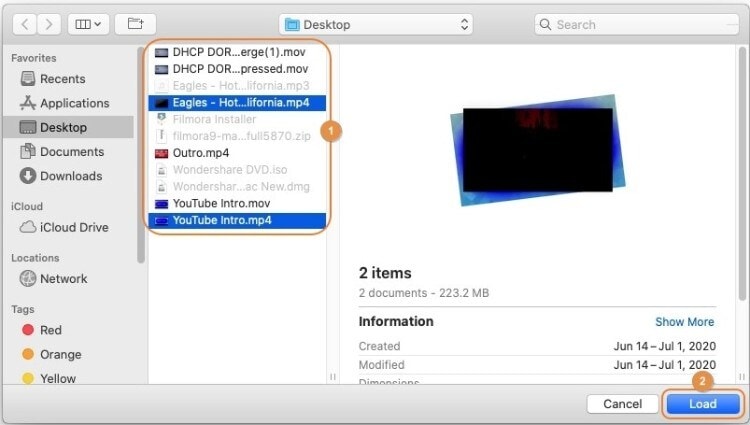
On your Mac, open Uniconverter and select the Merger category from the left pane. From the upper-right section of the main window, click the drop-down button next to the Add Files icon, and then click Add Files (or any of the other available options in the menu as needed). In the new box that appears, locate and choose the films you want to import, then click Load in the bottom-right corner. Note that if the clips are in separate directories, you may have to repeat the process to add them all.
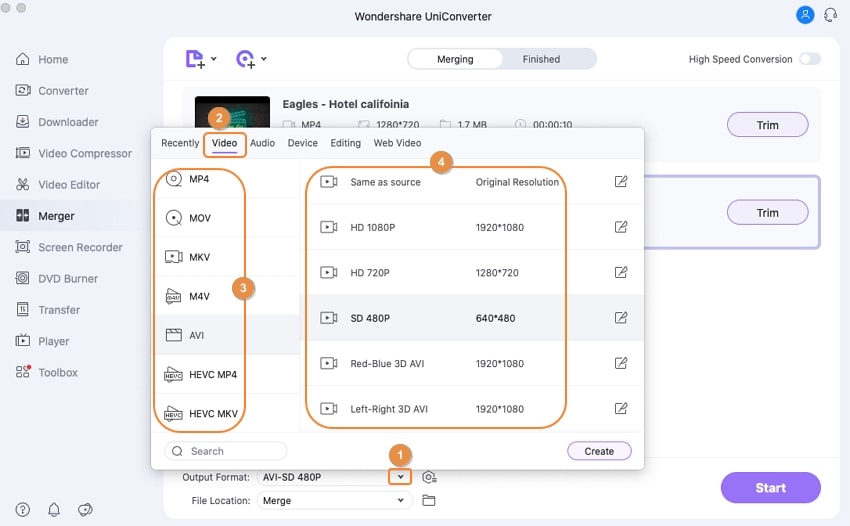
Go to the Video tab, select your favorite format from the list on the left, and click an acceptable resolution from the right pane to open the Output Format option at the bottom of the main window.
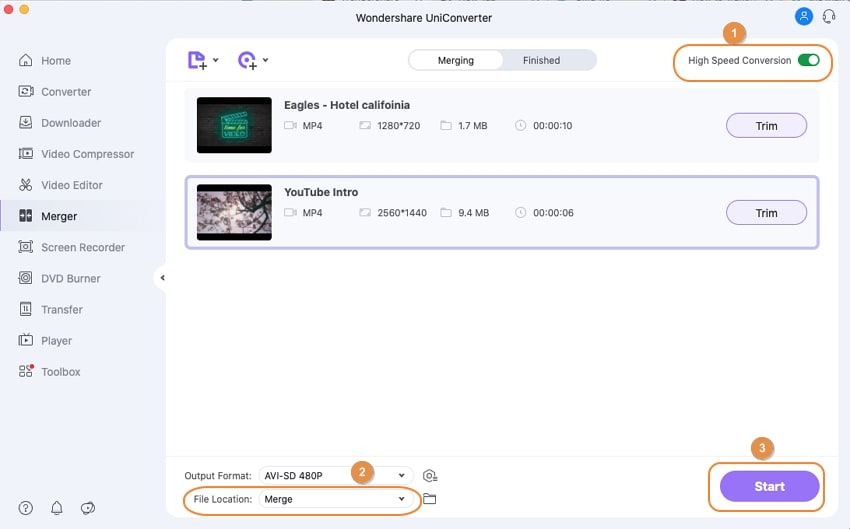
To merge all the clips you imported, make sure the High-Speed Merge switch in the top-right corner is turned on, select an output folder from the File Location field at the bottom, and click Start.
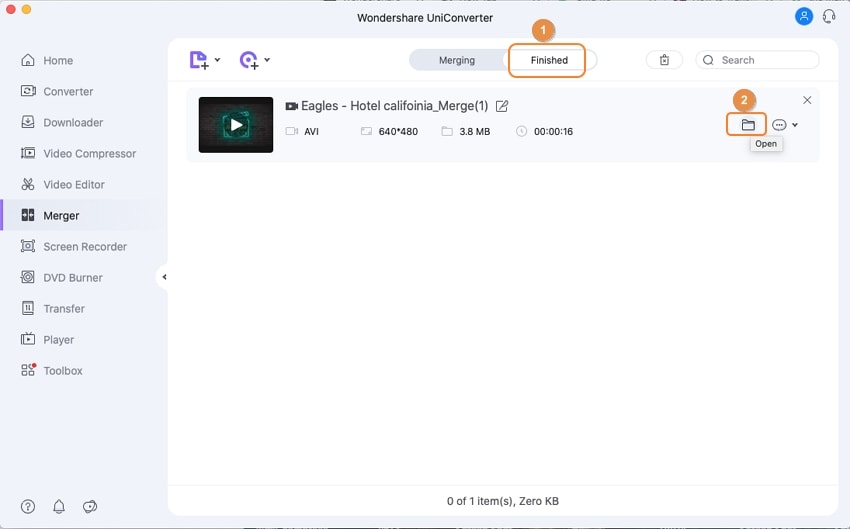
From the top of the screen, select the Finished tab. To get to the output folder and retrieve the produced file, click Open from the right side of the video in the list.
User Guide
-
Get Started Easily
-
Convert Video
-
Edit Video
-
Compress Video
-
Recorder
-
Downloader
-
Burn DVD
-
Merge
-
Convert Audio
-
Toolbox