How to Auto-Trim Video Clips on Mac with One Click
Trimming a video is one of the most frequent tasks during editing. However, trimming a video manually could be stressful when editing multiple parts of a video, this is more of a reason why we're acquainting the Wondeshare Uniconverter 13 as it possesses an auto trimmer that automatically detects and highlight video parts with irregular audio volume and delete them depending on your selected volume preset for the video. Undeniably, It is lovely that everyone loves to ease their stress. So If you'd love to use the Intuitive Uniconverter 13 Smart trim feature, the detailed guide below would be of great help.
Steps on how to smart trim videos on Mac:
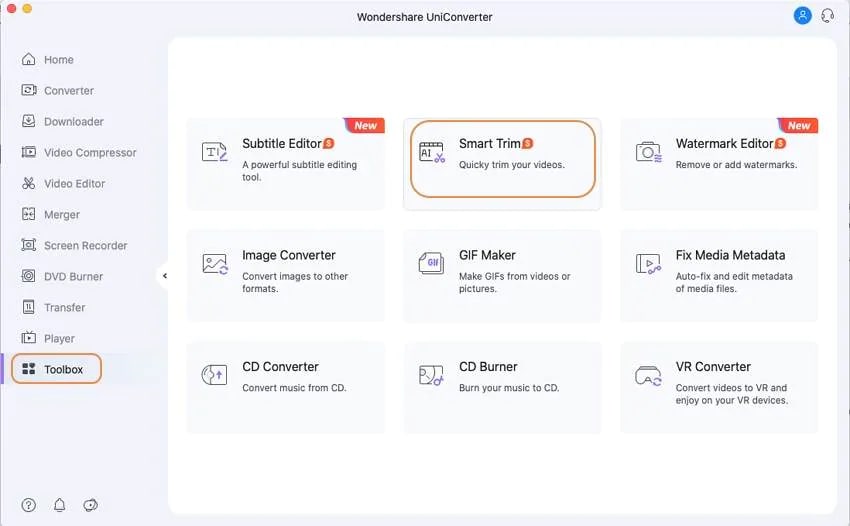
Firstly, download and install Wondershare Uniconverter 13. Launch it and click the Toolbox option from the listed tools at the left side of the main interface and select Smart Trimmer. Use the Add Files icon at the left corner of the newly displayed interface to import the video to be trimmed.
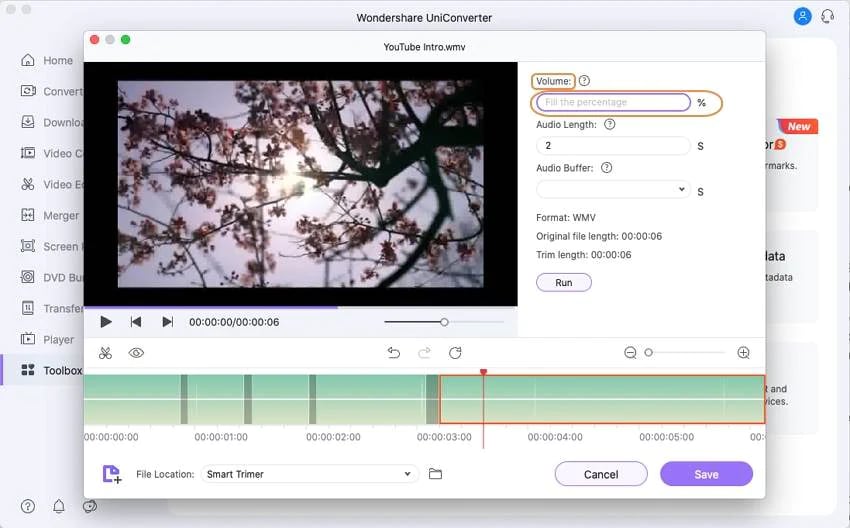
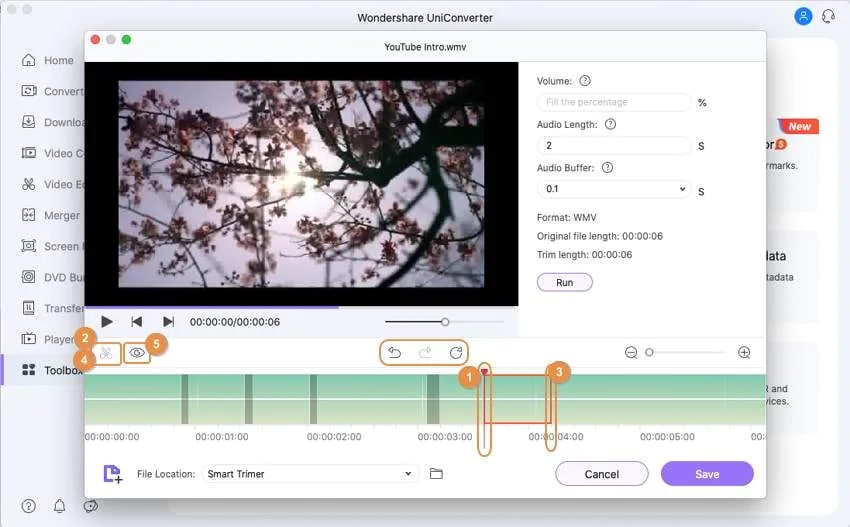
Immediately the video appears on the interface, parts of the video with no sound for at least two seconds are recognized and highlighted by default. Now, from the right side of the interface click on Volume > select a volume percentage between 0% - 30% to allow the smart trimmer to detect parts lower than the selected volume percent.
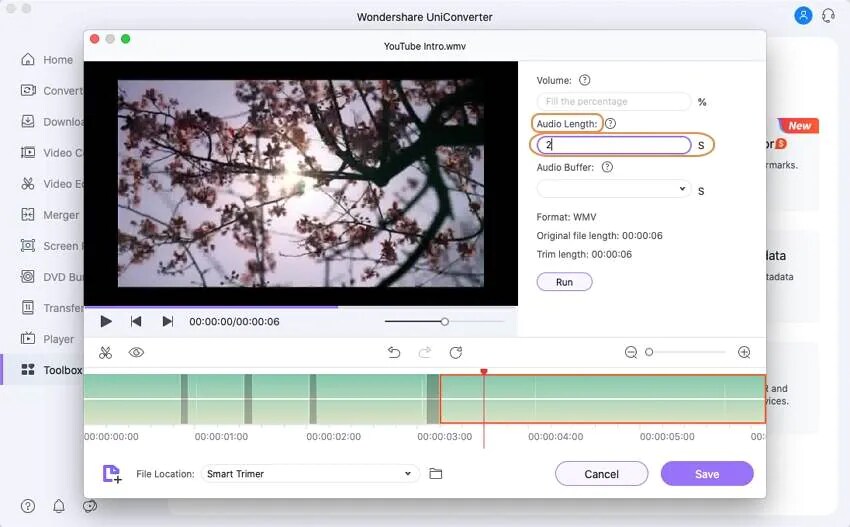
Afterward, click on the Audio Length and select between 1s - 20s to permit the smart trimmer to detect parts that have no audio in correspondence with the selected audio length.
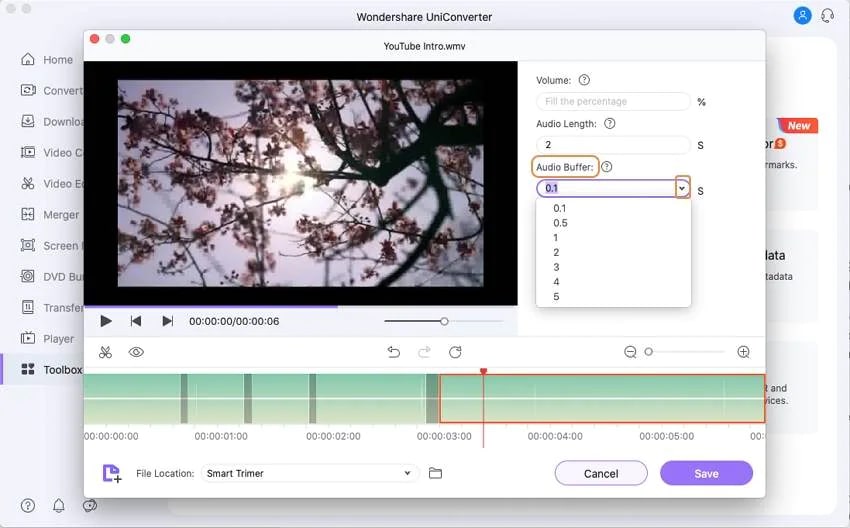
Next is the Audio Buffer. Select a preset between 0.1s - 5s to allow the Wondershare Uniconverter 13 to extend the selected audio length by the selected audio buffer duration to recognize and avoid losing part with special audio or sound. Once you're done with all of the presets, just click the Run button below the audio buffer option to let the smart trimmer start performing.
Just in case you’re not satisfied with the output of the smart trimmer, you can use the Scissor icon you’ll see at the left side of the editing timeline to trim and cut manually, and the Closed Eye icon beside the scissor icon to delete the manually-selected parts of the video. After every necessary adjustment and trimming, you can now click on the Save button you'll find at the down right side of the interface to save the trimmed video.
User Guide
-
Get Started Easily
-
Convert Video
-
Edit Video
-
Compress Video
-
Recorder
-
Downloader
-
Burn DVD
-
Merge
-
Convert Audio
-
Toolbox