Best Mac Image Converter for Converting Image Formats and Resizing Pictures
Uniconverter for Mac (formerly Wondershare Video Converter Ultimate for Mac) is a superb picture converter for Mac in addition to video and music. Your photos can be converted to JPG, PNG, BMP, TIFF, KTX, ASTC, TAG, and a variety of other formats with Uniconverter for Mac. On a Mac, you can resize an image without sacrificing quality. It allows you to batch convert a single image or numerous image files. Following the methods below, you'll be able to simply convert and resize photographs on your Mac.
Learn how to convert image formats and resize images on a Mac by watching videos.
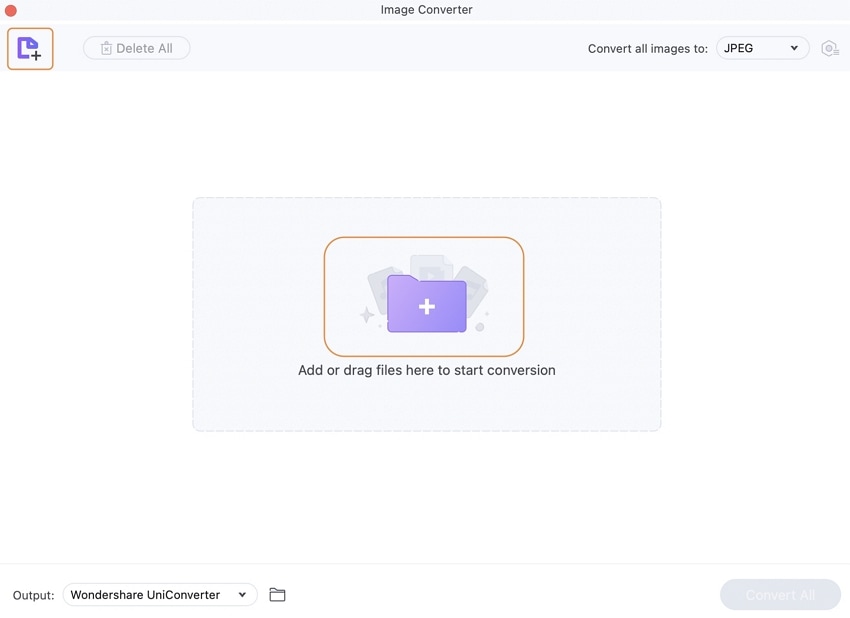
On your Mac, download, install, and run the Wondershare software. The supported functions are displayed on the left side of the main interface. Select the Image Converter option from the Toolbox.

A new Image Converter pop-up window will appear, from which you may browse and load image files on your Mac by clicking the + Add Images button. At the same time, many images can be inserted. Alternatively, you may add the photos by clicking on the Plus sign.
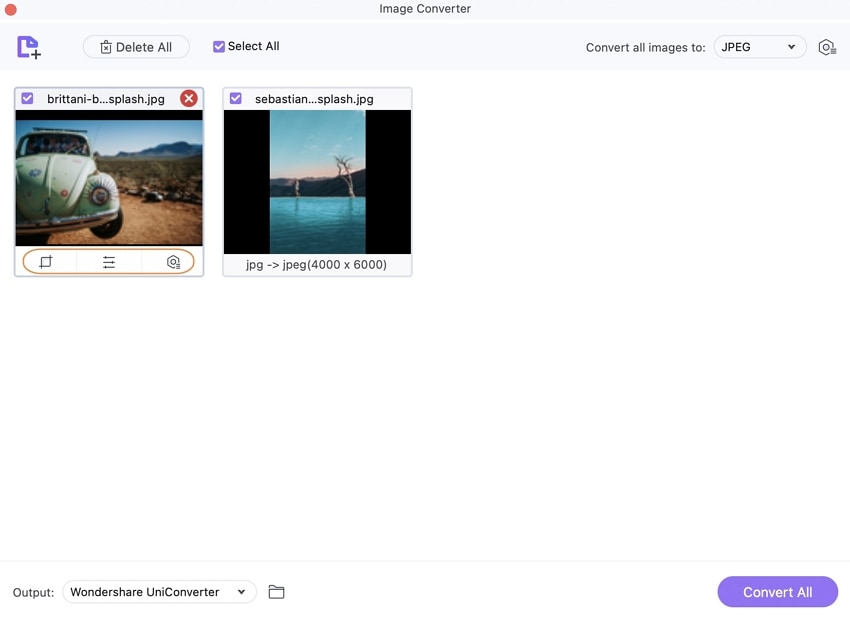
A thumbnail image of the newly added image appears on the interface. Crop, Effect, and Settings icons can be found beneath the image.
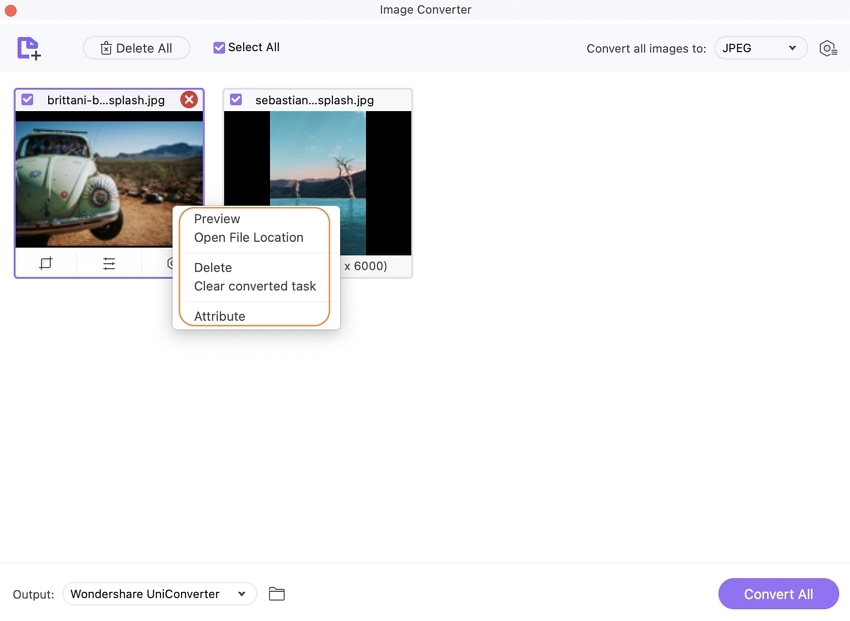
Preview, Open File Location, Delete, Clear Converted Task, and Attribute are all available when you right-click on the image.
Crop: Select the first Crop icon to open a new Image Edit window.
By clicking on the icons in the Rotation section, you can rotate the image anti-clockwise, clockwise, Flip Horizontal, and Flip Vertical. The additional picture is shown in the original window, while the image with the alterations is shown in the Output Preview window.
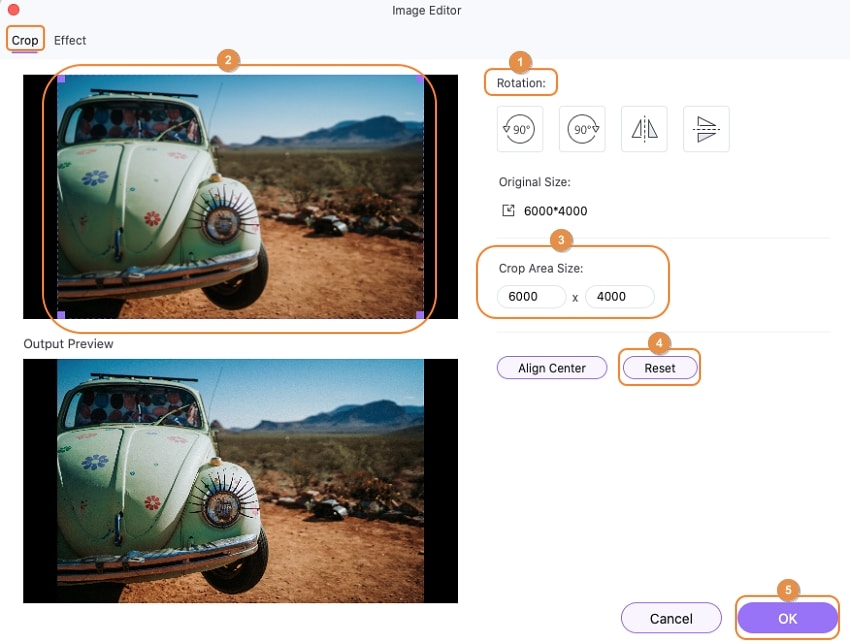
Crop the image by adjusting the image size and moving the corners in the Original Preview window. You can also select the cropped area by moving the + sign in the center. Alternatively, you can specify the size of the crop area.
The original image settings will be restored if you click the Reset button, and all changes will be saved if you click the OK button.
Effect: Select the Effect symbol to bring up a new window.
From the pop-up box, select the Effect tab. Move the sliders at the corresponding parameters to adjust the image's Brightness, Contrast, and Saturation. To confirm the changes, click OK, and then Reset to return to the default settings.

To open the Quality Setting window, click on the Settings icon.
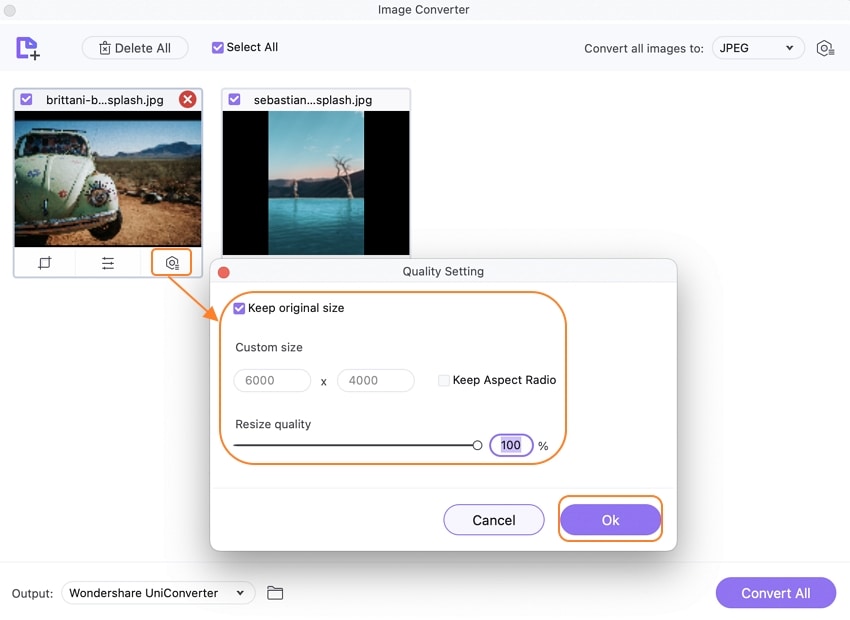
Resize the image to fit the width and height requirements. There's also the option to keep the aspect ratio. To batch resize photos, go to the top-right corner of the screen and click the Settings icon.
Choose the photographs you wish to convert the format for next. To select all of the photographs added, click the Select All box. Open the drop-down icon in the top-right area of the Convert all pictures to tab and choose the required format from the possibilities.
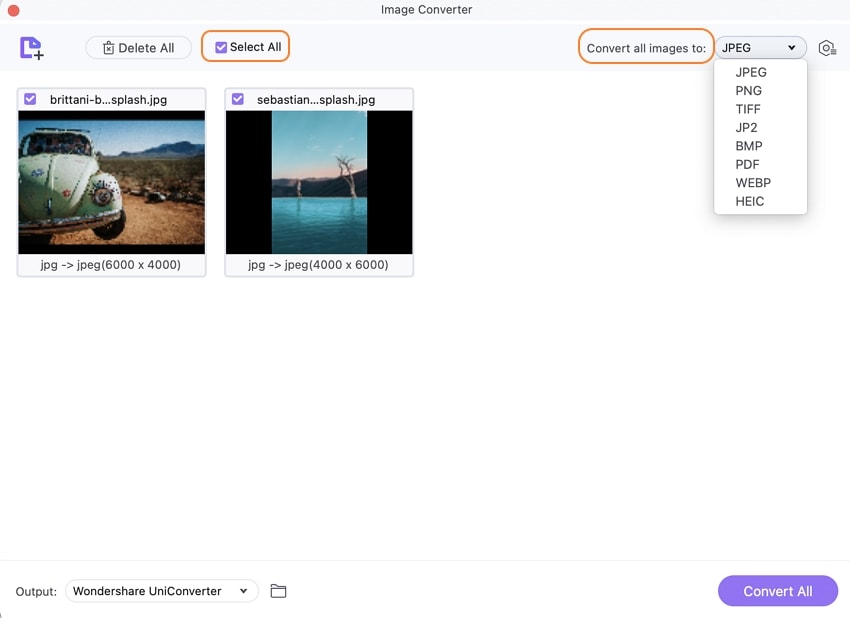
Choose a Mac location to save the modified pictures from the Output tab. Finally, click the Convert All button to quickly and easily convert the additional photographs to the desired image format.

User Guide
-
Get Started Easily
-
Convert Video
-
Edit Video
-
Compress Video
-
Recorder
-
Downloader
-
Burn DVD
-
Merge
-
Convert Audio
-
Toolbox