How to Easily Trim and Cut Videos on a Mac
You can simply trim and cut videos on your Mac with Uniconverter for Mac. You can get rid of the sections you don't want and combine the rest into one. A video file can also be divided into multiple portions for playback and sharing. On Mac, a real-time preview will make it easier to modify the video. Take a look at the steps in detail below.
The Uniconverter (Mac) User Guide explains how to edit video on a Mac.
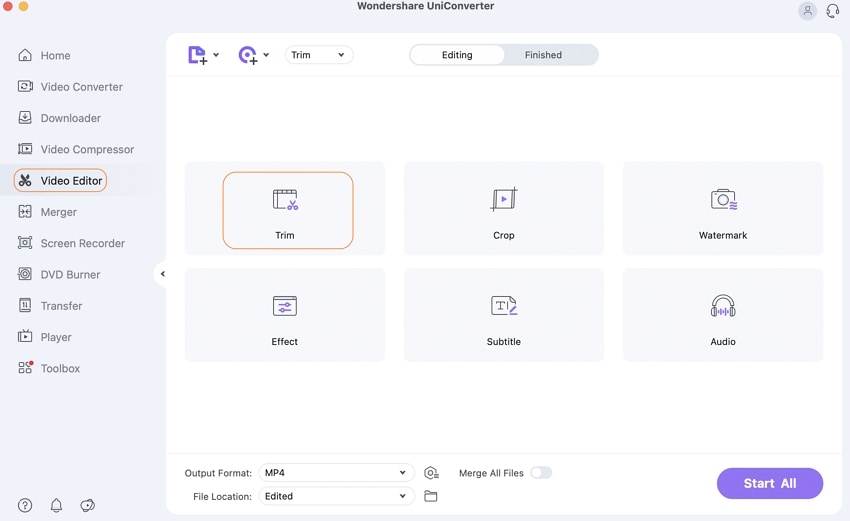
On your Mac, download, install, and run the Uniconverter software. Click the Trim section on the Video Editor tab to browse and load the desired videos into the interface.

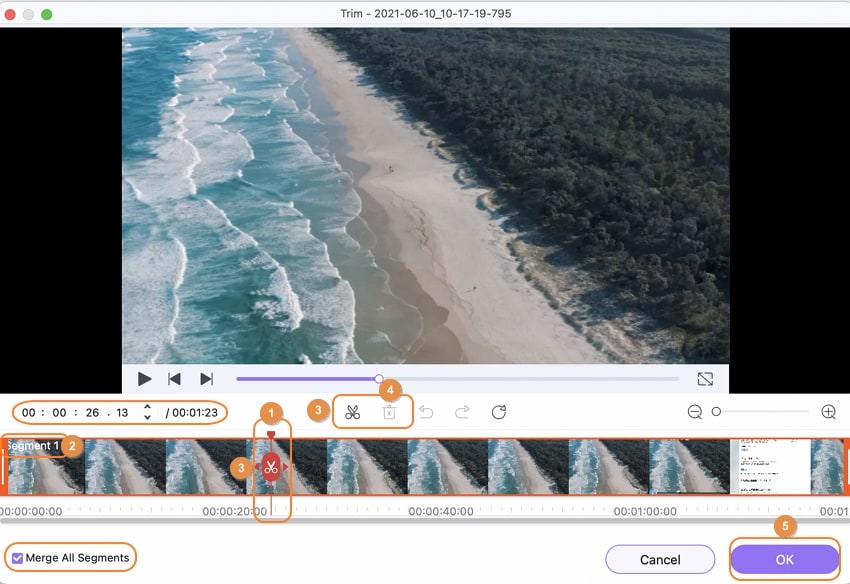
A new Trimming setting window will emerge when you click the Scissor icon or the Trim button. The movie can then be edited and chopped in many ways as needed.
To select the video segment that has to be trimmed, move the slider on the trim window. You can also define the beginning and end times of the video segment to be reduced. After that, click the Scissor button to change the selected part into a Segment. You can produce several segments of your video clip using these methods. For the segments, you want to remove from your video, click the Delete option.
Click the Merge all files box to combine the remaining segments into a single file. Otherwise, the parts will appear as individual segment movies on the main interface. To save your changes, click the OK button.

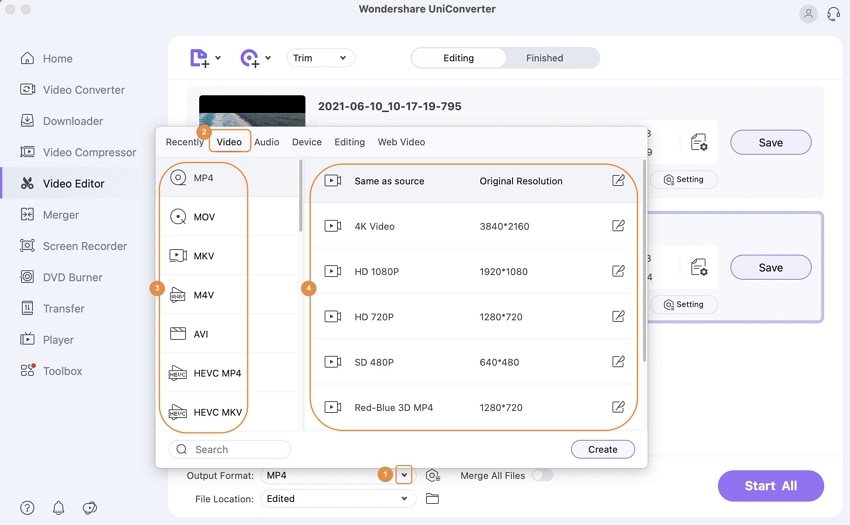
Open the Output Format: tab's drop-down menu to choose the output format for the trimmed videos. From the Video tab, select an output format.

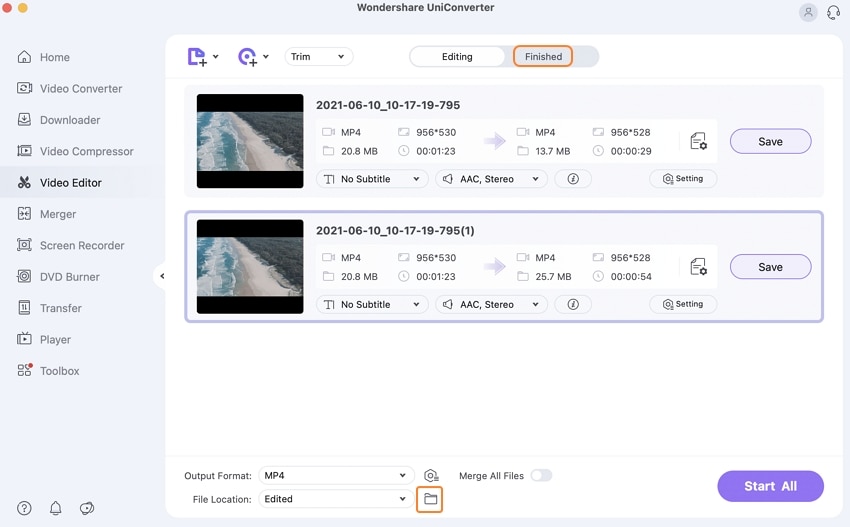
Finally, pressing the Start All button causes the altered videos to be saved to your Mac. It's simple to find the edited videos on the Finished tab or the File Location: tab.

User Guide
-
Get Started Easily
-
Convert Video
-
Edit Video
-
Compress Video
-
Recorder
-
Downloader
-
Burn DVD
-
Merge
-
Convert Audio
-
Toolbox