- Resize videos to a smaller size for uploading to Vimeo easily.
- Preview the compressed video before starting compressing.
- Support 1,000+ video formats for Vimeo compression and conversion with less quality loss.
- 30X faster compression speed than other common compressors.
- Transfer compressed videos to iPhone/Android/iPad devices easily via a USB cable.
- Compress video in batch.
The Easiest Guide on How to Compress Video on Windows 10
by Brian Fisher •
You have to record your homework and send it to your professor before the deadline in this pandemic where online learning has become a new norm. Or else, you must have some larger video that is lengthy and also large because of its HD quality. Or maybe, you have any other reason that you want your video size to be small.
Whatever the reason is, it is now made easy to compress videos on Windows 10. You can easily shorten the size using tools on Windows 10 that we’ll tell today in this post.
If you don’t have any of the above reasons to compress the videos, let us give you one. You will save space in your storage by compressing the large-sized videos.
Wondering how to reduce video file size on Windows 10? The process is as easy as eating a pie. Without further ado, let's take a plunge into this guide and tell you how this can be done!
- Part 1. How to Compress MP4 video with the Windows 10 built-in Video Editor app?
- Part 2. How to Reduce Video File Size on Windows 10 with the Best Compressor-Uniconverter?
- Part 3. How to Compress Video File Size on Windows 10 with Other Compressors?
- Part 4. How to Compress MP4 video with VLC?
Part 1. How to Compress MP4 video with the Windows 10 built-in Video Editor app?
The MP4 files on your Windows system can be compressed for free using the built-in video editing app called Video Editor. The app is simple to use and allows to compress MP4 Windows 10 by changing the video quality.
Steps to compress video Windows 10
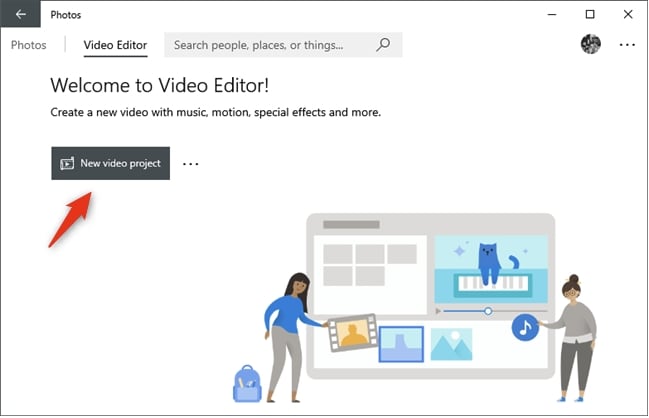
Step 1. On your Windows system, launch the Video Editor app and then click on the “New video project” button.
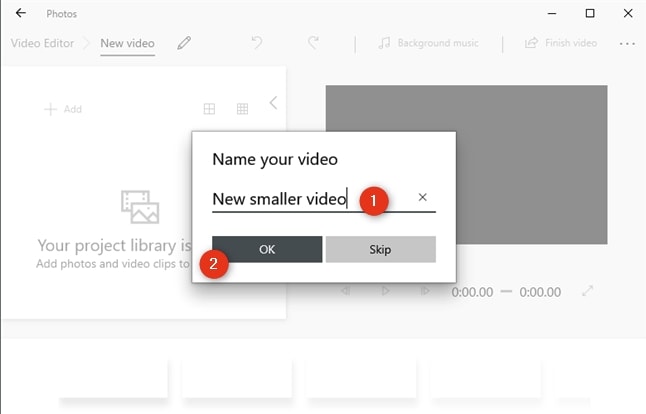
Step 2. Choose a name for the compressed video that you wish to create and tap on the OK button.
Step 3. Next, drag and drop the MP4 video to the app interface. You can even browse the file by clicking on the Add button.
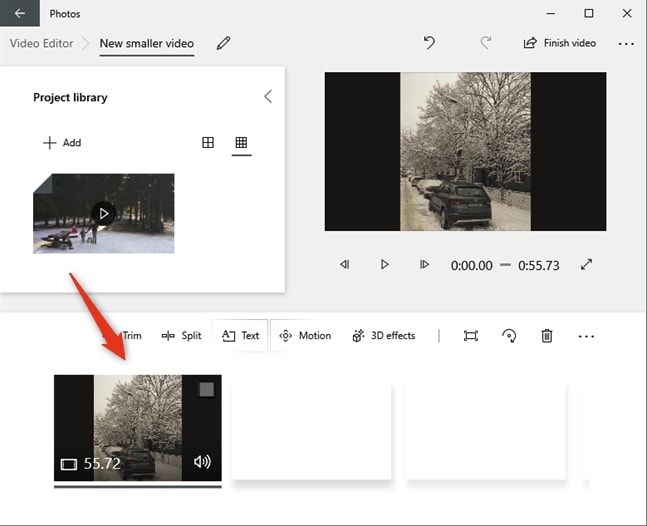
Step 4. Next, drag and move the video from the Project library to the storyboard at the bottom of the interface.
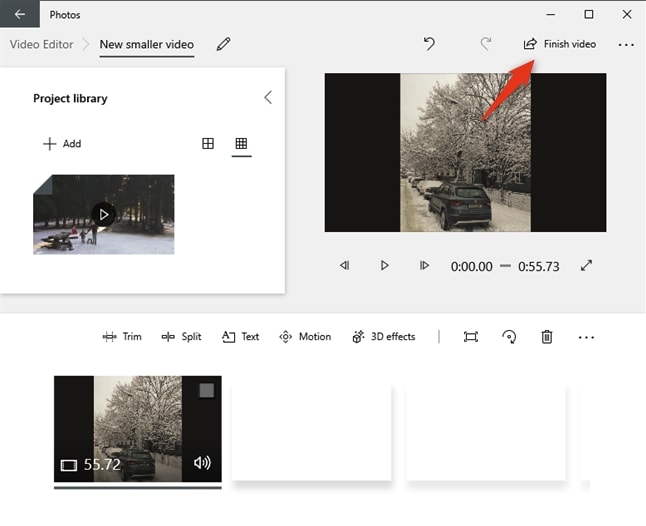
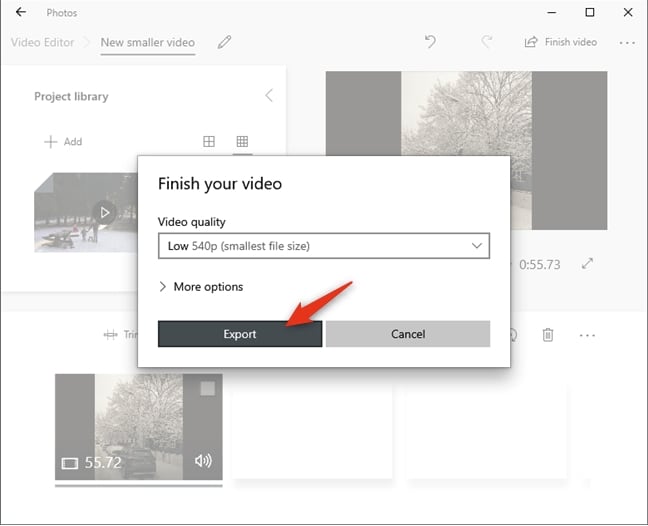
Step 5. Tap on the Finish video button on the upper-right corner and a pop-up dialogue box will open asking you about the Video quality. Choose the desired option from the drop-down menu.
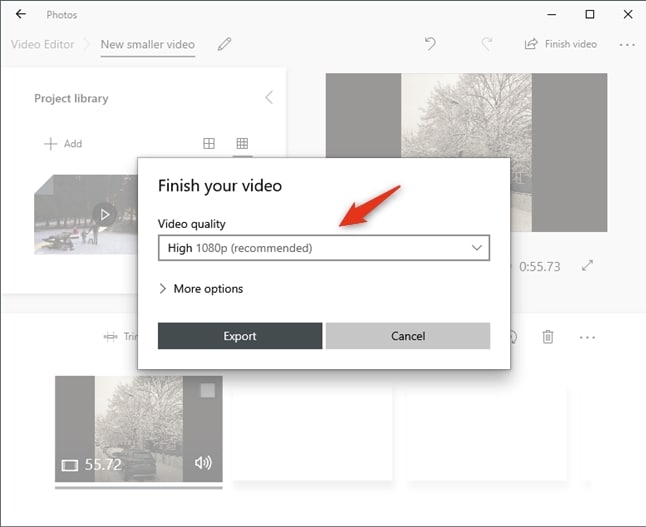
Step 6. Next, click on the Export button and select the target folder. The app will start processing and compressing your MP4 video which will be saved to the selected folder after the process is complete.
Part 2. How to Reduce Video File Size on Windows 10 with the Best Compressor-Uniconverter?
Uniconverter - a software that not only assists you to convert videos to audios from more than 1000 different sites at the momentum of 30X but it has many other purposes as well. So if you’re looking to compress your large videos, Univonverter ought to be your go-to software. Using this software, you can easily compress videos.
The software is known to compress your audio and video files. Additionally, it can also hold numerous other processes as well such as burning DVDs, downloading or recording videos, compressing and editing audio and videos, making GIFs, and much more.
Employing this software, you can perform all of these mentioned functions and others easily without any hustle. What’s more? All of these functions take place in perfect quality having no crashes or redraw problems.
It is the only tool that can make your life convenient and wonderful by solving all of your video size problems. Knowing all of its qualities and functionalities, we consider this software a one-stop shop where you’ll get antidotes to all of your problems.
- Support the input of any video and audio file format.
- Enables you to merge several audio and media files to a single file.
- Support batch upload, download, compression and conversion of files.
- Built with video editing controls like split, trim, crop, brightness, rotate, volume, pitch, and others.
- It allows you to download videos from over 10000 sharing sites such as Spotify, YouTube, Hulu, Metacafe, and much more (4K supported).
- Burns DVDs and Blu-rays with customized templates.
- Its toolkit houses a GIF maker, a metadata editor, a VR converter, and a screen recorder.
- Supports Mac and Windows platforms, with each having a free trial version.
How to compress video with UniConverter on Windows 10[4 Easy Steps!]
Step 1. Launch Uniconverter
Before launching Uniconverter on your Windows 10, You need to download Uniconverter from official website before using it, it dosen't take much time to download.
Step 2. Upload video files
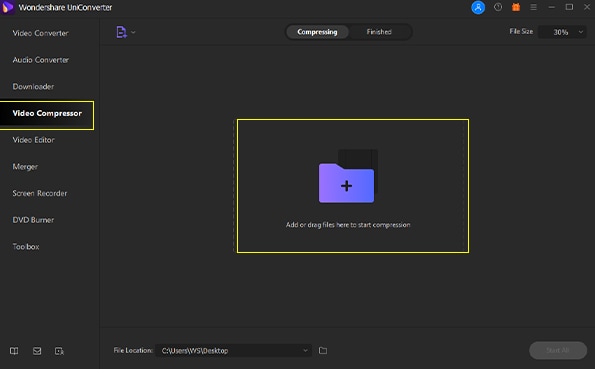
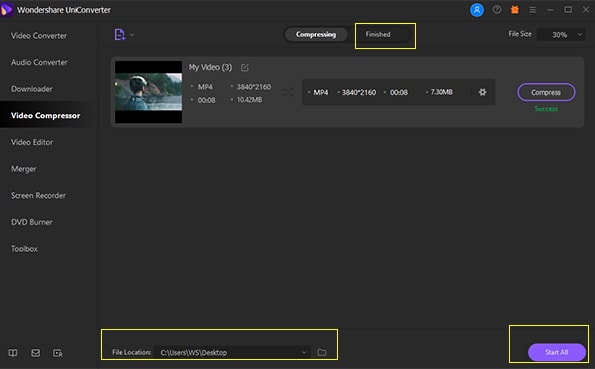
Once you have openned Uniconverter, you will ses a list at the left side, choose video compressor, and then add video on Uniconverter using the “Add files” option or drag and drop function.
Step 3. Set Output format
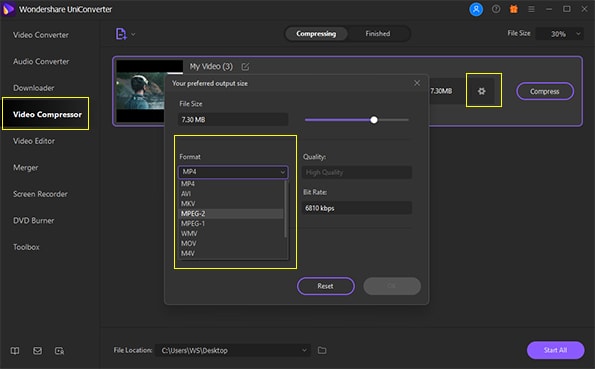
Click the "Settings" button and choose the file size you want by moving the slider. Uniconverter also allows you to preview the compressed video before the compression. Once you are satisfied with the previewed videos, click "OK" to finish the settings.
Step 4. Start compressing
Now, click "Start All" or "Compress" to start compressing, after compression, you can manage the files from the “Finished” tab.
Part 3. How to Compress Video File Size on Windows 10 with other Compressors?
There are many compressors present out there. Let us present you with a few of them so that it gets easy for you to choose one. Following is the list of them with their steps of compression.
1. Filehorse
Filehorse is a software that can easily compress your videos. The quality remains good and the file gets compressed. This compressor is entirely free and you don’t need to spend on it. You can easily install it and run it on your system without any issues.
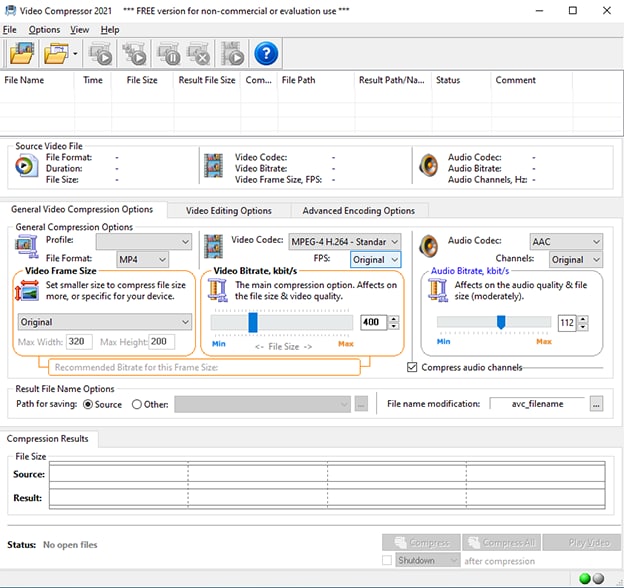
Supported System: Filehorse supports Windows, MAC, and the latest web operating system.
Steps to compress video using Filehorse on Windows 10
- Click "File" and then "Open" to add the file you want to compress.
- Adjust Bitrate of the output video.
- Click "Compress" to start video compression.
Pros:
- It is easy for a new user to use Filehorse.
- It can compress video with fast speed.
Cons:
- It dosen't allow you to preview the compressed video.
- The output video is not high-quality.
- You have to pay for its advanced features.
2. Any Video Converter
Any Video Converter is an app named for this video converter application because it notifies you precisely what the function of the software is – converting the video file. However, the software has more functions than that. It can compress your videos as well. Let us tell you the steps to compress videos on Windows 10 using this app.
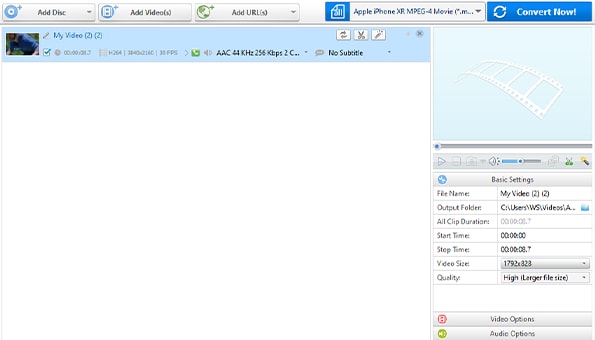
Supported System: It supports Windows and macOS.
Steps to compress video using Any Video Converter on Windows 10
- Click "Add or Drag file(s)" at the center of page to upload video to compress.
- Adjust Bitrate of the output video.
- Click "Compress" to start video compression.
Pros:
- Supports a variety of formats.
- Enables to add effects.
- Support batch compression.
Cons:
- There are only a few compression options for you to choose from.
- Ask to buy a premium account.
3. VLC Media Player
The VLC media player is another free and outstanding media player that is intended for favoring numerous file formats without downloading any further or additional factors. Among all the formats, it also allows you to compress your videos. Following are the steps.
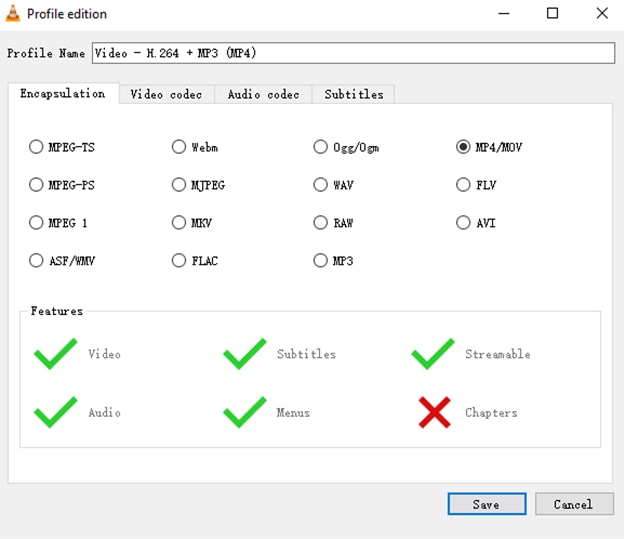
Supported System: It supports both Windows, MAC, and Linux.
Steps to compress video using VLC on Windows 10
- Launch VLC and then click "Media".
- Now click "Save/Convert", add video file you want to compress.
- Click"Convert/Save" to choose the output format, beside the "Output format" option, you can see the "Profile Edition" button, click it and adjust video bitrate.
- Click "Save" and then choose the file destination. Now you can start the video compression.
Pros:
- You can create and connect the video stream.
- Settings can be set according to your preference.
Cons:
- Tags can’t be used.
- The program interface is not easy.
4. Apowersoft
Apowersoft is a software that carries all formats and helps to perform all functions easily. You can compress your videos into your desired size using this app. Plus, you can ship a broad range of output formats.
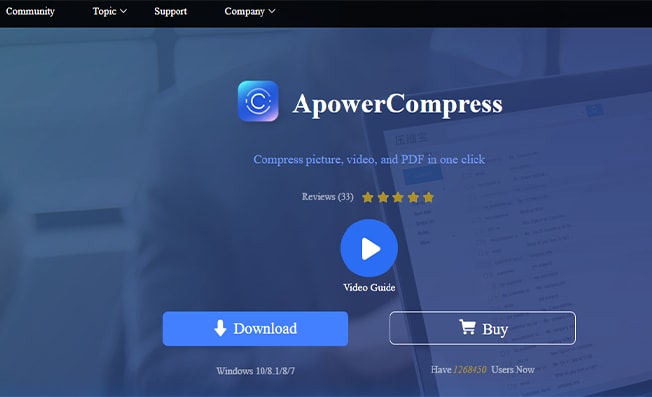
Supported System: Supports both Windows and MAC.
Steps to compress video using Filehorse on Windows 10
- Launch the software.
- Select the video.
- Choose the format and start compression.
Pros:
- Compress file without losing quality.
- Simple and easy to use.
- Built-in editor.
Cons:
- Resource Hungry.
5. Shotcut
Shotcut is a free video editor. This software assists wide formats, provides transport options and an intuitive interface. Having such qualities, this video editor compresses video efficiently.

Supported System: Shotcut supports Windows and MAC both.
Steps to compress video using Filehorse on Windows 10
- Download and install Shotcut.
- Select your video file.
- Adjuast compression settings.
- Export the video.
Pros:
- Free to use.
- No watermark.
Cons:
- Lack of customer support.
6. VideoSolo
VideoSolo is an influential and easy software that assists you to perform your functions handily. It is not only credible but also very ideal for almost any kind of function: compression or conversion considering that it aids over 200 media formats.
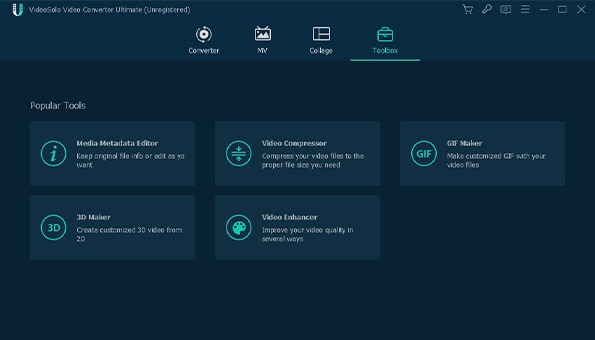
Supported System: Videosolo supports Windows.
Steps to compress video using Filehorse on Windows 10
- Launch Videosolo and choose "Video Compressor".
- Add video that needs to be resized and choose the output size.
- Click "Compress" to start video compression.
Pros:
- Safe video compressor on Windows 10.
- Easy to use.
Cons:
- It enables to to compress just 5 files during free trial.
7. Cloudpresso
Cloudpresso is an online website that helps to compress images, videos, document files, and APK files for completely free. The website has a download capability of up to 1GB.
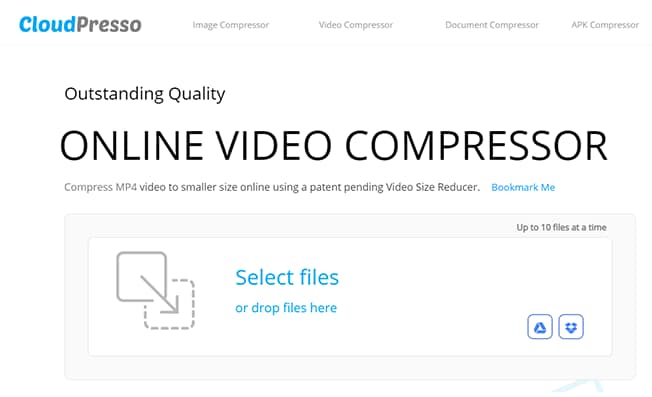
Steps to compress video using Cloudpresso on Windows 10
- Visit the website of Cloudpresso.
- Click on the video compressor.
- Choose the video that you want to compress and start video compression.
Pros:
- Easy to use.
- You can upload video from Google Drive.
Cons:
- It takes long time to download compressed video on Cloudpresso.
- The output video is not high-quality.
- You have to pay for its advanced features.
8. Clipchamp
Clipchamp is an online video compressor that is employed by the majority of people to compress their large files into small ones. This online tool has several features such as formats, resolution, and much more. You can also customize the settings to compress your videos. You can compress multiple files on this tool quickly.

Steps to compress video using Filehorse on Windows 10
- Visit the browser and login with your account.
- Choose the video file.
- Select the preset settings.
- Click “Start” to compress.
Pros:
- No limitation on file size.
- Comes with preset options.
- Supports built-in integrations.
Cons:
- Users need to log in with the account.
- Limited output options.
- You can not compress files for absolutely free.
9. Clideo
Clideo is another online tool that can source files from your PC, Dropbox, Google Drive, and compress them. This online browser is also excellent. Let us tell you the steps to compress the video.
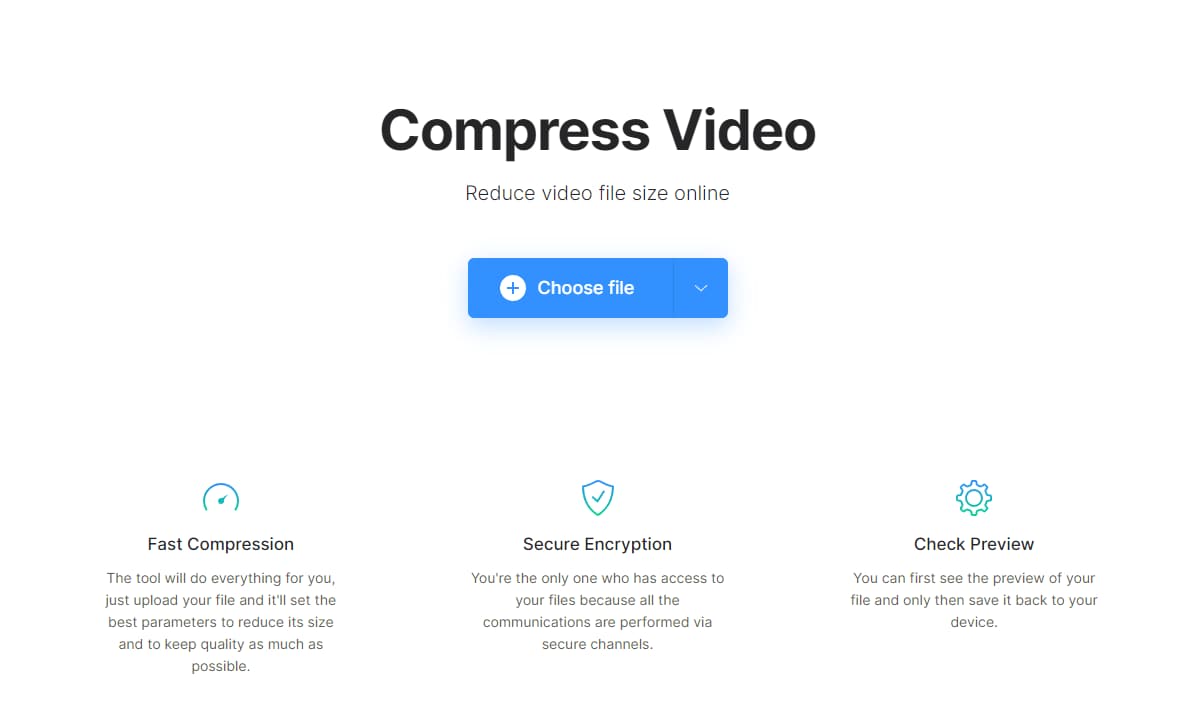
Steps to compress video using Clideo on Windows 10
- Visit the website.
- Choose the video to be compressed.
- Choose the format and to start compression.
Pros:
- Enables you to edit the output video.
- Keeps your file secure.
Cons:
- Adds watermark.
- Ask for subscription.
10. FreeConvert
FreeConvert is another online compressor that is employed to compress the video files on Windows 10 into small sizes. It is primarily employed to convert pdf to word, convert documents, images, and much more.
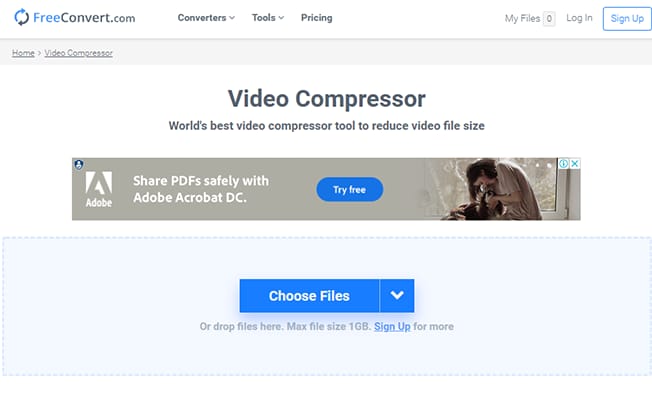
Steps to compress video using Filehorse on Windows 10
- Visit the website using your browser.
- Add your video by clicking "Choose Files".
- Select the format and compress.
Pros:
- It is free.
- It allows you to upload your video to be compressed from device, Dropbox and Google Drive.
Cons:
- Has limited options to resize the videos cause there are no ouput sizes provided.
Part 4. How to Compress MP4 video with VLC?
VLC is a free and open-source video playback program that also supports an array of additional features including MP4 compression. The video files using the tool can be compressed by changing the file codec, sample rate, bit rate, and other parameters. Thus VLC works as a decent video compressor Windows 10 tool.
Steps to reduce MP4 size Windows 10
Step 1. Launch VLC Media Player and choose Media > Convert/Save…
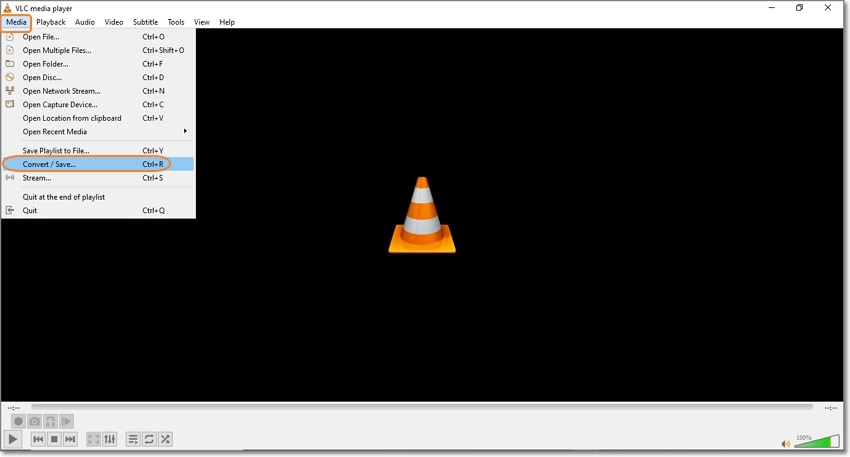
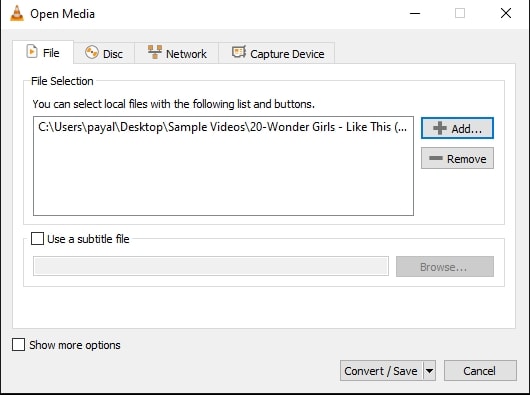
Step 2. At the Open Media dialog box, click on the Add button to browse and add the MP4 files.
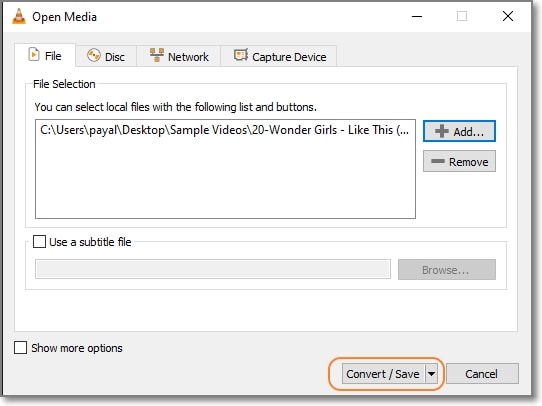
Step 3. After the files are added, click on the Convert/Save button in the lower-right corner.
Step 4. A Convert settings window will now open. Here choose the desired target format from the profile section drop-down menu.
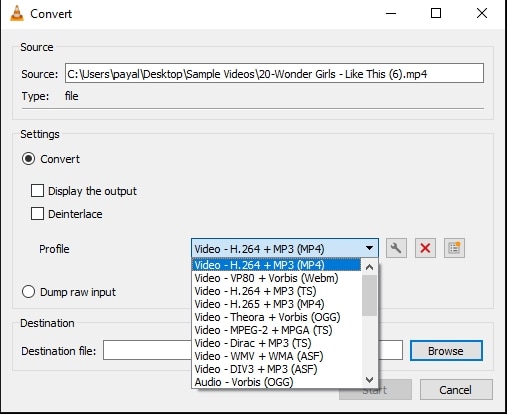
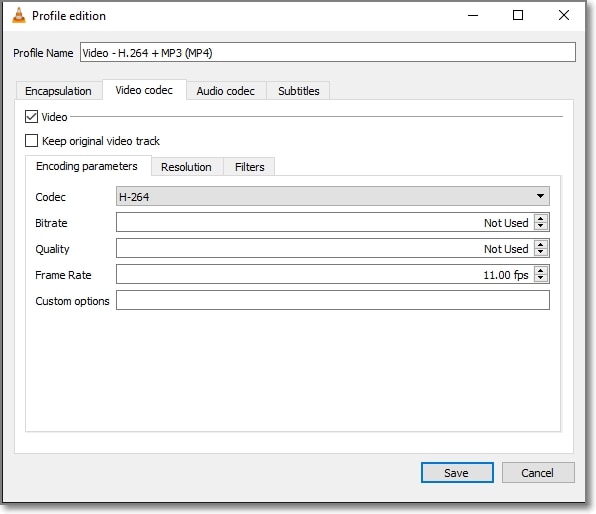
Step 5. Click on the wrench icon to open a Profile edition window. Here, under the Video codec tab change the resolution, and the encoding parameters like bitrate-sample-rate, codec and more to compress the added file. Click on the Save button when done.
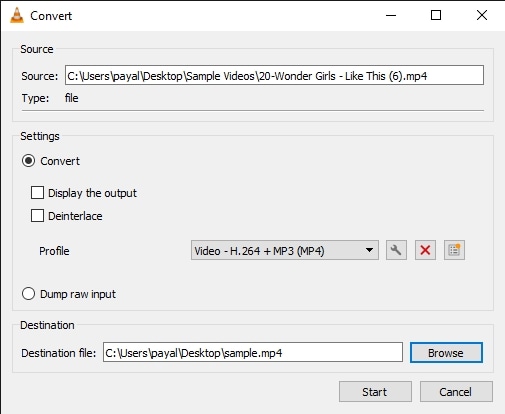
Step 6. Choose the desktop folder to save the compressed file at the Destination tab. Finally, click on the Start button to start file compression.
We have mentioned the top video compressors above. You can choose any of them. However, we recommend Uniconverter. It is the best choice you can ever make. The reason this software is best is that it provides you with an easy experience and comprehensive functions at a reasonable price. Also, it is safe and reliable. Have Uniconverter on your Windows, you won't be regret.

Brian Fisher
chief Editor