Enhance Your Recording Experience-UniConverter
- Help you show a gaming session, make tutorial video with webcam recording.
- Record screen, audio and webcam simultaneously.
- Help you record a screen while working on another screen.
- Record webcam with the original quality.
- Convert, compress, and edit the recorded videos.
Recording webcams is gradually becoming one of the most valuable video editing tools. It is vital for our work, especially for the lectures and presentations. Just look at it, you can record your screen while also recording the webcam. This lets the viewers see you and your reaction, which gives the video more impact. Whether at work, for official video creating, or just for casual video recording, being able to record webcam is one of the features for top video editors, so you can't just select anyone you see. This article highlight 4 ways to help you, each of the following methods has its pros and cons.
Method 1. Record Webcam Efficiently with Uniconverter
Uniconverter is a multipurpose video editing that can perform many functions ranging from conversion to compression, video downloading, video and audio player, watermark remover and adder, subtitle creator and editor, etc. Moreover, Uniconverter is not just able to record webcam. It can record screen with camera and audio simultaneously. Coupled with the fact that it supports more than 1000 formats and you can select the quality, it is a better choice for people who want to record webcam with high original quality.
Steps to Record Webcam with Uniconverter
Step 1 Launch Uniconverter and Open Recorder tab
Once you have launched Uniconverter, by default, you will be on the home screen, which hosts a series of video editing tools by recommendation. Look to the left side of the screen, and from the list, select Screen Recorder.
Step 2 Select Webcam Recording
Once the screen changes, you will have three options: a Screen recorder that allows you to record your screen, an audio recorder that will enable you to record with an external or internal audio device, and webcam capture, which allows you to record yourself with an external camera.
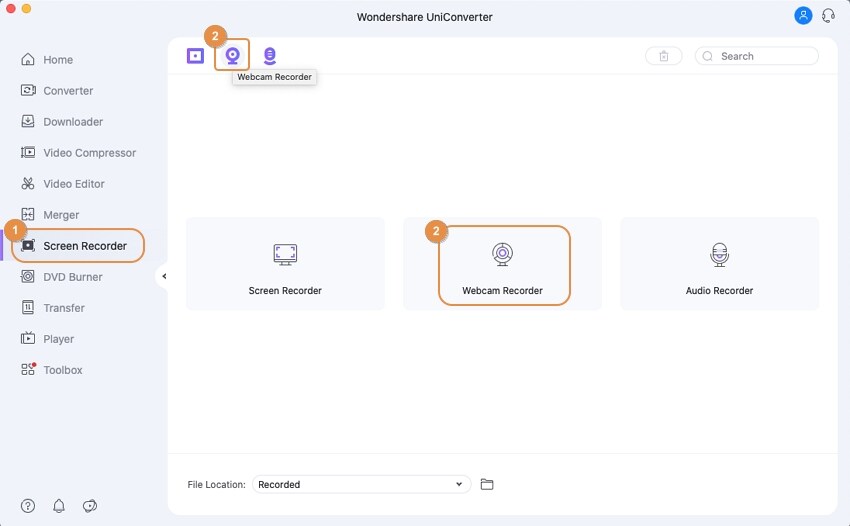
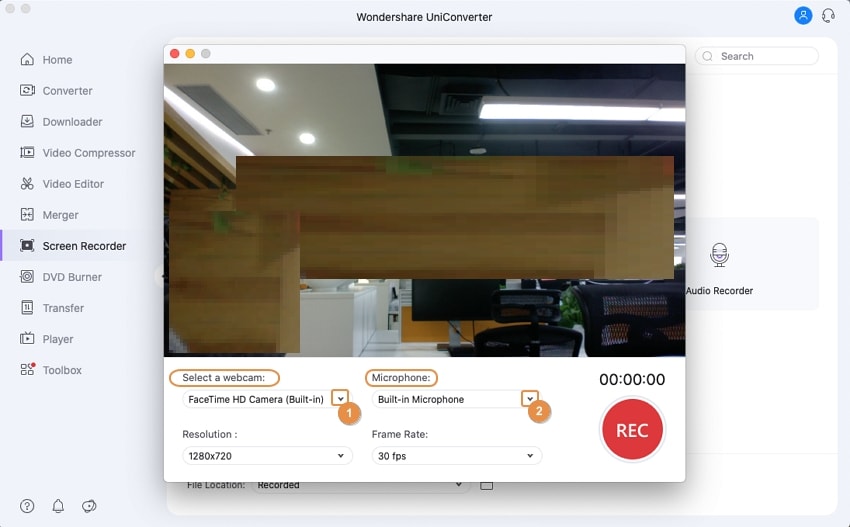
Click on Webcam to start. A new window pops up with all the possible options and settings for the webcam. Uniconverter automatically detects any external webcam connected. There is the option of selecting the audio channel whether you have an external audio device connected or you want to use the system audio. Uniconverter also has advanced options like selecting resolution and the recording format.
Step 3 Record
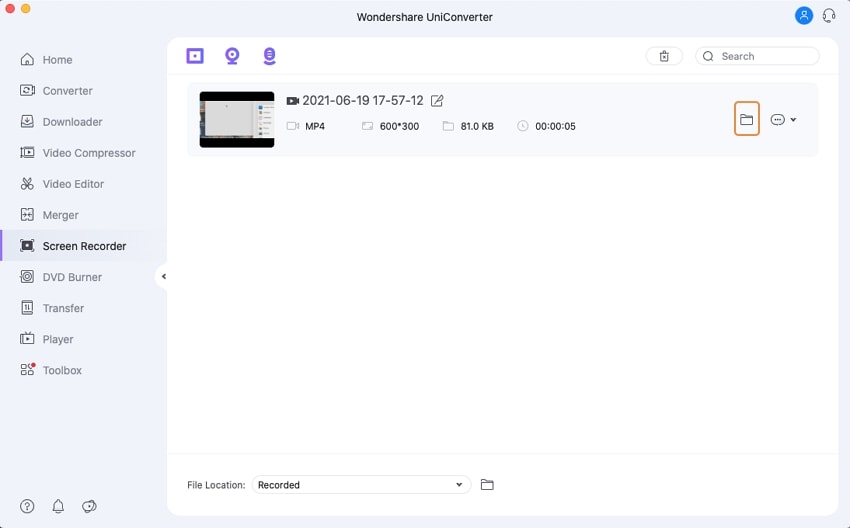
Click on the red REC button to start recording. When you are done recording, head back to the Uniconverter and click on Stop for the finish. Your recorded file will be processed and sent to the Finished tab in Uniconverter.
Pros
It features a picture-in-picture feature used mainly by game records to help you record screen and camera at the same time games, and by lecturers and tutors for online courses.
It has the option of a virtual webcam
Record webcam, screen, and audio simultaneously
You can convert your recorded video to the number of formats supported by Uniconverter, meaning that you can convert to almost all formats.
Smart video trimmer to help you trim the unwanted parts
Cons
This software can not share the video directly on social media platforms
For free users, there is a limit You are only allowed to use webcam video capture for 1-minute at most
Wondershare UniConverter 13 - A Complete Meida Toolbox
5,481,435 people have downloaded it.
UniConverter supports many formats and handles conversion equally, ensuring that high quality is delisered at all times.
Record webcams, gameplay, video calls, audio, and microphones at will.
You can use the editing suite that covers subtitle editing, watermark editing, etc to make your results creative masterpieces.
This software facilitates file transfer to devices like Android and iPhone among others once the conversion is complete.
UniConverter is also capable of handling video compression hence ensures you acquire the video sizes you desire.
Method 2. Do Webcam Capture Using HitPaw Screen Recorder
If we say Uniconverter's strong point is the supported format and high-quality export, then HitPaw would beat it in terms of content. It is not just about simple recording, you get to add stickers and GIFs to your video during the record and in real-time. With its built-in templates, HitPaw is the best option for cam show recording, especially if you want to make your video content look more stunning and engaging. The stickers let you add images and create annotations, making your video more interactive. The templates make sure that even new users get to create enticing and engaging content.
Steps to Record Webcam with HitPaw Screen Recorder
Step 1 Launch HitPaw and Select your option
Download, install and launch the HitPaw software. There are four options: Screen, Game, Lecture, and Device. Each of these features has its uses. For example; a Screen recorder only records activities on your screen, while the Device option can let you record your cameras.
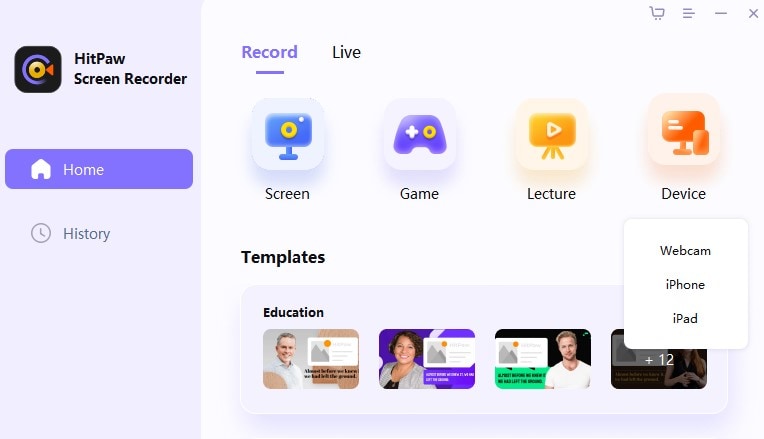
Step 2 Select Webcam
When you have selected the Device option and then the Webcam feature, a new tab at the top of the interface will allow you to choose the camera source, the resolution, and frames per second. Once an external camera or a virtual camera has been connected, HitPaw automatically detects it and adds it to the 'webcam' list so that you can select it. Then proceed to select your desired resolution and FPS, but these are advanced settings that you should probably leave at default.
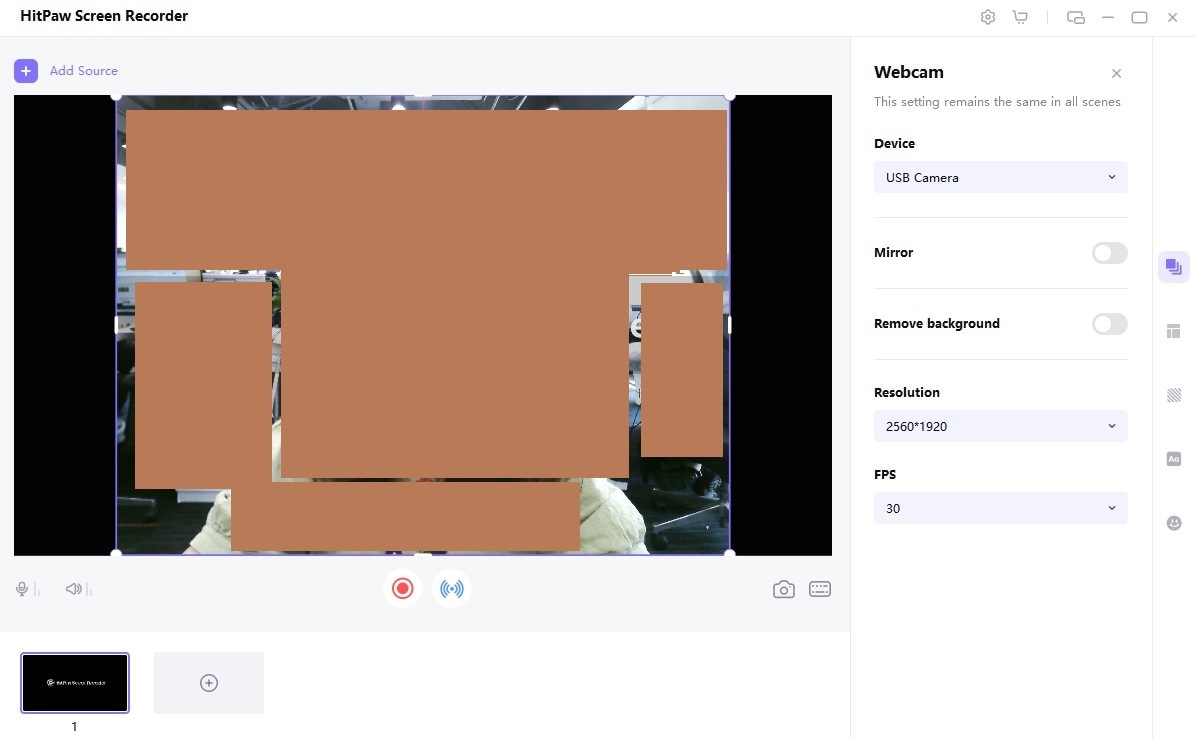
Step 3 Record
Then click on the red circle icon, which signifies 'record' to start your webcam filming. Use the stop button to end your recording when you are done, and use the open output folder option in the right panel to check your video and the destination folder.
Pros
This software can cast your Apple phone screens on the interface, i.e., iPhone, iPad.
It can record and broadcast live screen
It has a series of handy editing features, like the background remover and the annotation
Picture-in-picture feature
Cons
The output format is limited to just MP4
The exported result will be watermarked if you are a trial user
Method 3. Do Cam Show Recording with Bandicam
If we are talking simple and basic ways to record webcam, with no extravagant features, no use for conversion to different formats, and no use for the stock templates just pure simple webcam recording, and if you like your video with just an ordinary quality and export format, Bandicam will fit your need, as it doesn't hold too many advanced features and has you would have guessed is entirely free, unlike the previously mentioned webcam recorders.
Steps to Record Webcam with Bandicam
Step 1 Launch Bandicam and Select Recording area
Open the Bandicam app, and on the main interface, click on the monitor icon at the top left corner, it is the first icon from the list of tools at the top of the software interface. From the list generated, select which record area option you want, whether to select a record area of your own, select a rectangle on a screen, full screen, or record around the mouse. Each of these options also has further options that you can explore on your own.
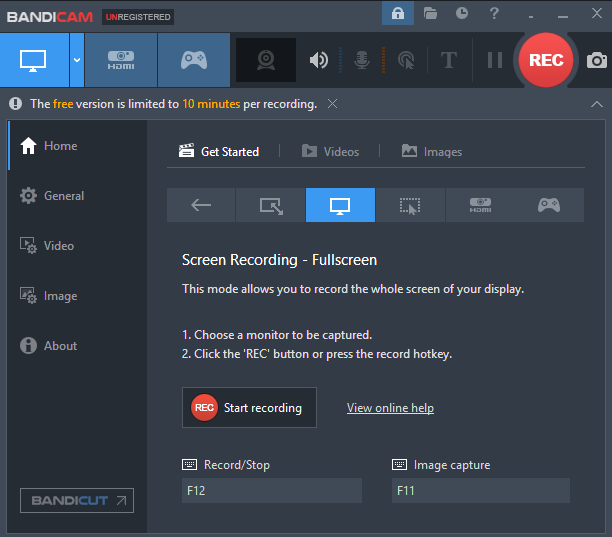
Step 2 Select Webcam
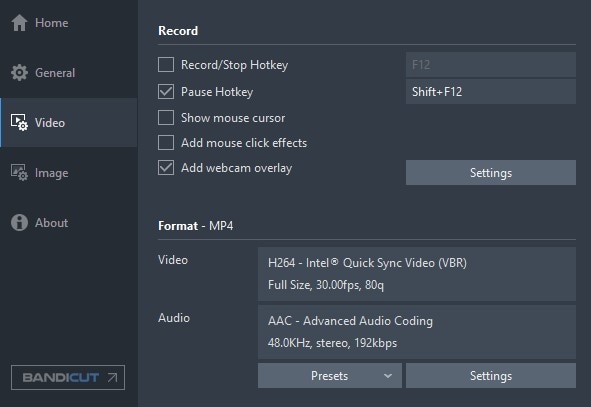
The next step is to click on the webcam icon. This will generate a new window box detailing the webcam settings. Check the 'webcam overlay…' to make a picture-in-picture, but if you just want the webcam recording, then remove the checks. Go under settings and select the webcam source and format. If you are using picture-in-picture, then click on the advanced tab for more webcam editing options like the placement of your webcam. Don't forget to tick the Add webcam overlay option user the Video section if you want to record screen and camera at the same time.
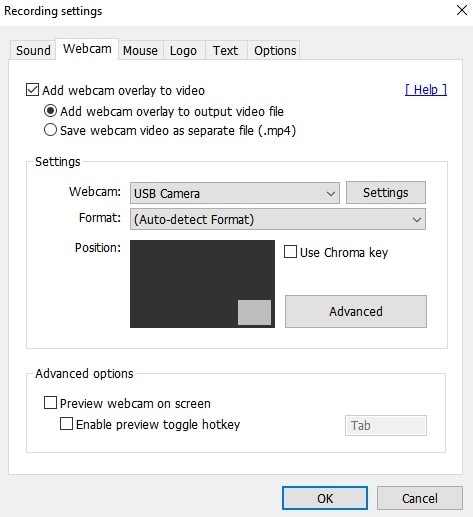
Step 3 Other options
You have the chance to set other options like the mouse effects, click sounds, mouse highlights, etc., logo, which allows you to add an image overlay on your video. This is equivalent to adding a watermark, sound options, and texts.
Step 4 Record
When you are done with the overall settings, click on the Rec. button at the top of the screen to begin recording webcam. When you are done, just go back to Bandicam and click on Stop. Then, go back to general and browse the output folder to see where your video is saved. You can choose to change the export location as well.
Pros
Can take snapshots when recording webcam, customized recording mode, many quality, formats, codec options are available.
Cons
You can not viwe the
No editing features
For Win 7 or later (64-bit)
For macOS 10.12 or later
Method 4. How to Do Webcam Video Capture with DemoCreator
Another tool from Wondershare, Demo Creator, as a webcam video capture and webcam recorder, is almost as powerful as other standard webcam recording software. This does not come as a surprise that Wondershare has been known for creating norm-defying applications. One feature that stands out for the recorded webcam on Demo Creators is that you can edit your background while leaving your image intact for example, you can mirror the background, use a stock image as background or remove background from an image. This feature has got people fascinated, and more and more people are trying to remove background from videos in real-time. This can be very useful for purposes like online course recorders.
Steps to Record Webcam with Democreator
Step 1 Open Democreator and Start New Recording
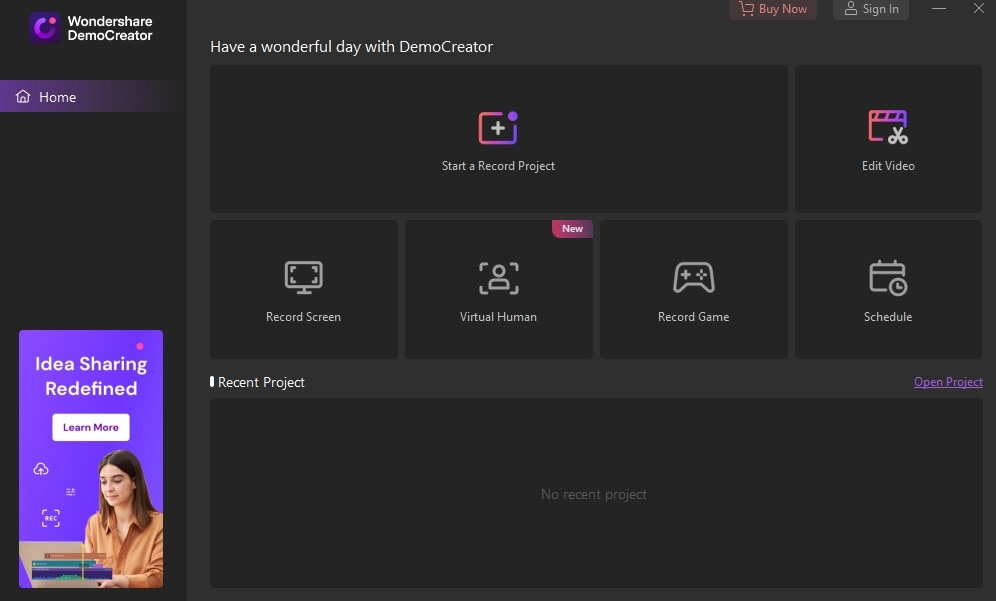
A dialog box will pop up when you launch the Democreator software, with 6 options, Start a record project, Edit video, Record screen, Virtual Human, Record game, and Schedual. Click on Start a record project, and the recording box will be launched.
Step 2 Select Webcam and Recording device
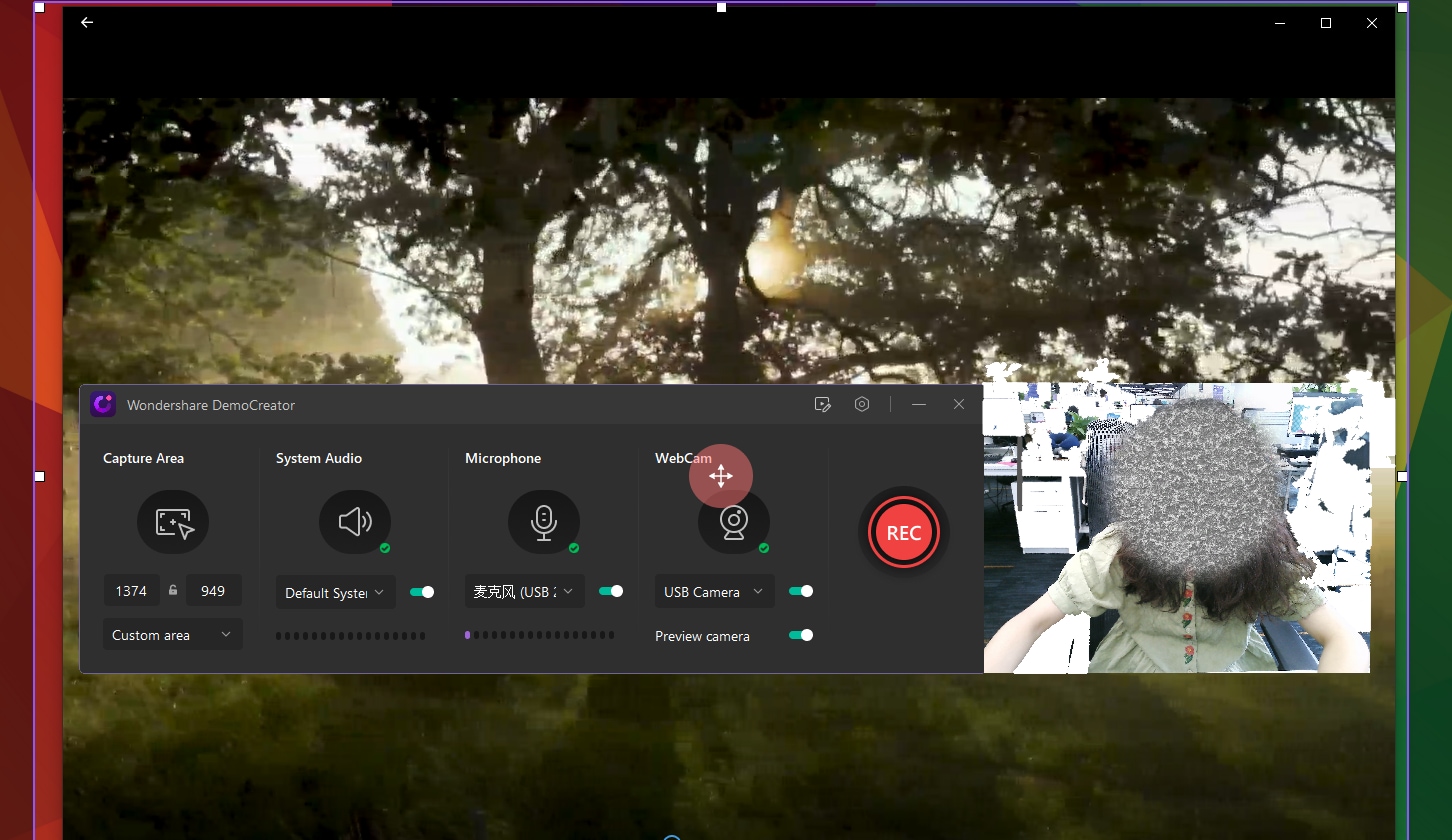
In the new tab, you can select the webcam device, the audio device, the FPS, recording area, camera overlay, i.e., picture-in-picture, and screen drawing, i.e., annotation.
Step 3 Record
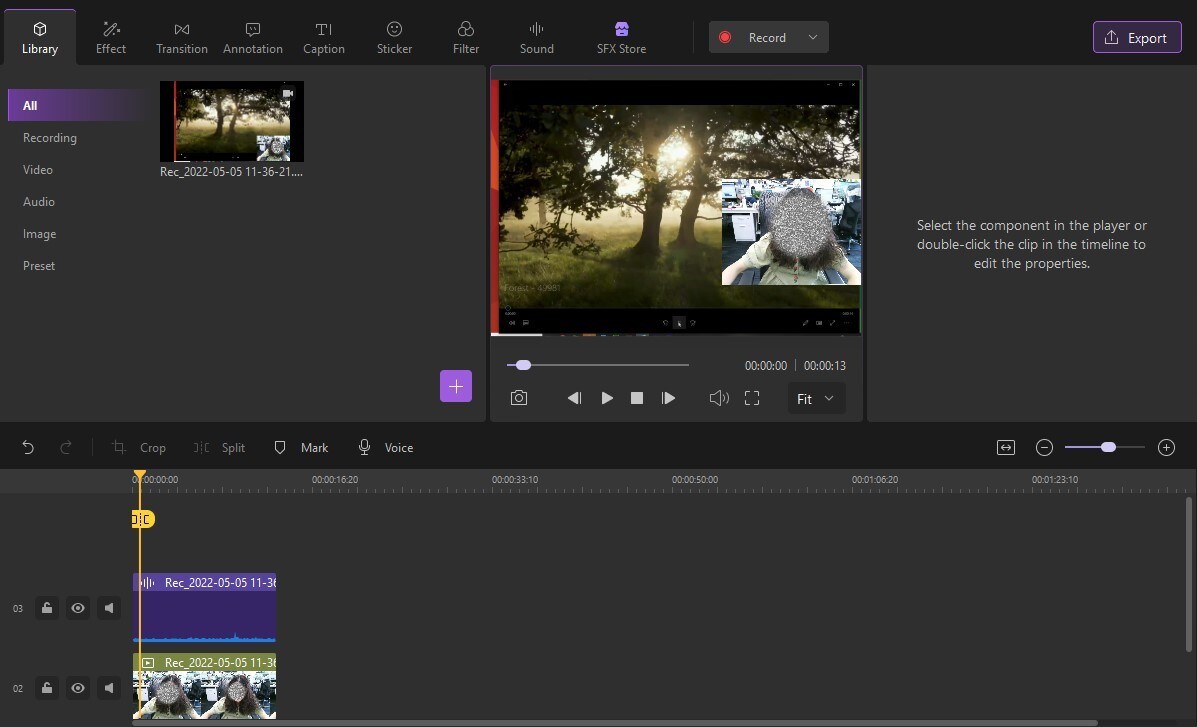
Click on the red circle button to begin webcam video capture recording. Click on it again to stop and end the cam capture. Next, the editing interface will pop up. Edit your recording and click Export to save the file.
Pros
Democreator is home to a bunch of useful editing features, mainly for screen recording
It can record screen and camera at the same time with the picture-in-picture feature
It can edit the background view in real-time
Cons
Sometimes, there might be a lag between the person's movement and the response when using the virtual human feature.
It is not free
For Win 7 or later (64-bit)
For macOS 10.12 or later
Q&As about Webcam Show Record
Q1. Can I record the webcam online?
The answer is YES. You can record webcam using online tools like; online recorders like Capty.io, Clipchamp, ScreenApp.io, Loom, and Cam recorder can help you. Most of them have pretty decent features, some of which can rival other top webcam capture and recorder software but keep in mind, they are still online tools, and there is a limited number of things you can cram into that little space, so they generally perform lower than standard software.
Q2. How to record screen with a camera by Windows or Mac Built-in Recorders
Using the Windows Camera built-in app as an example;
Step 1. Connect your device
Connect your Webcam capture device and make sure that the system has recognized it. Next, head to your computer settings and locate Devices and Cameras to make sure that it has been properly installed.
Step 2. Open the Camera App
Next, open your camera, and if all is in place, it should open with your webcam, If it doesn't, then try looking for camera reverse option that switch between the computer camera and the webcam.
Step 3. Start Recording
Click on the record button, and it will start cam capture.
For Win 7 or later (64-bit)
For macOS 10.12 or later

