How to Compress MP4 on Mac (MacBook, iMac, iMac Pro, etc)
by Brian Fisher Proven solutions
The need to compress MP4 on Mac arises due to a number of situations like saving storage space, easy sharing and transferring of files over mail and social media, and others. A host of desktop and browser tools are available to get the task done in a quick and professional manner. Know more about how to reduce MP4 file size on Mac in detail in the following parts of the article.
Part 1. Quick Way to Compress MP4 on Mac (Newly macOS 10.14 Supported)
Looking for a reliable compression tool for your Mac system? UniConverter is just apt as this excellent desktop software once installed facilitates unlimited file compression and that too without losing the original file quality. You can resize a single, multiple, and even an entire folder as the program supports batch processing. The file parameters like frame rate, bit rate, quality, and resolution can be edited to compress the added files. In addition to MP4, a wide range of other formats is also supported by the tool for compression. Transfer of files to a mobile phone and other devices is also facilitated the post-compression process. See more features:
UniConverter 13
- Support to over 1000 formats and devices for conversion.
- Batch processing at super-fast speed (30X faster).
- Lossless quality conversion.
- Built-in editor with features like crop, cut, add effects, and more.
- Video download from more than 10000 sites like YouTube, Vimeo, and more.
- Additional features like auto-trimmer, watermark editor, subtitle editor, video recording, transfer, DVD burning, image conversion, compression, and more.
- Support to all latest Windows and Mac version (including latest Mac version).
Step-by-step Guide to Compress MP4 on Mac
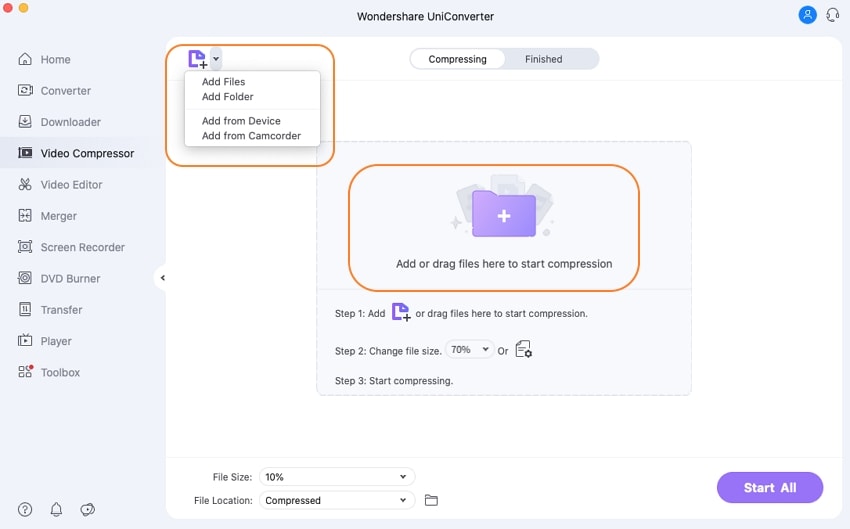
Import MP4 video
Run the UniConverter software on your PC. Select Video Compressor option. A pop-up window will appear where clicking on Add Files sign will allow you to add the MP4 file to the interface.
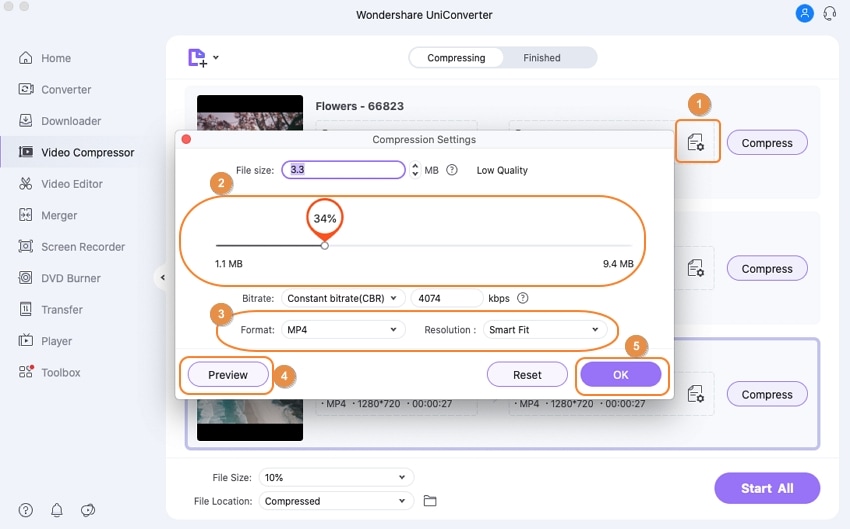
Select compression settings
The added MP4 file with its size and other details will appear. Click Settings icon Move the slider at the interface to select the compression percentage and the file parameters will change accordingly. Alternatively, you can also edit the parameters manually as needed.
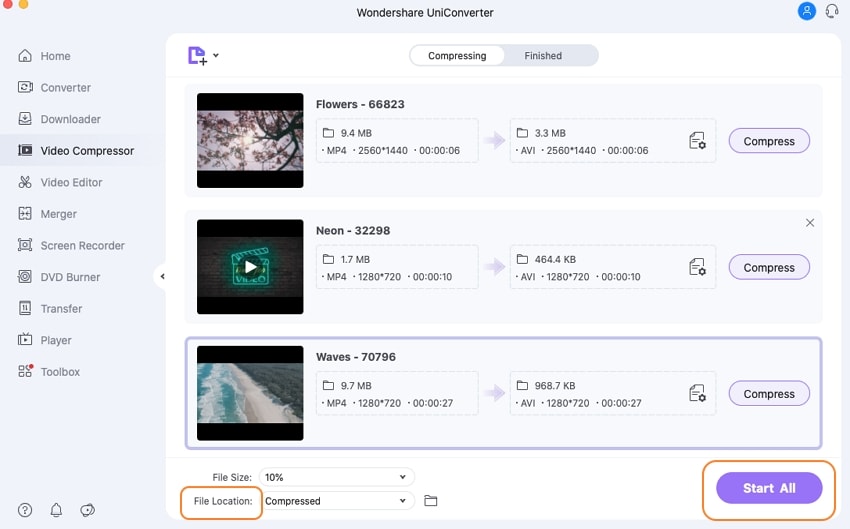
Preview and compress MP4 on Mac
Click on the Preview button to check the file. At File Location , choose Mac location where you want to save the processed file. Finally, click on the Compress or Start All button. You will get your compressed MP4 on Mac in no time.
Part 2. How to Compress MP4 using iMovie
iMovie is popularly used video editing software by Apple that supports a wide range of functions. If you want to compress and resize your MP4 videos on Mac without installing any third party software, iMovie is a good option. The program supports video compression in a simple, quick and free manner.
Guide to compress MP4 on Mac using iMovie
Step 1: Launch the iMovie app on your Mac system and add the desired MP4 file for the compression process.
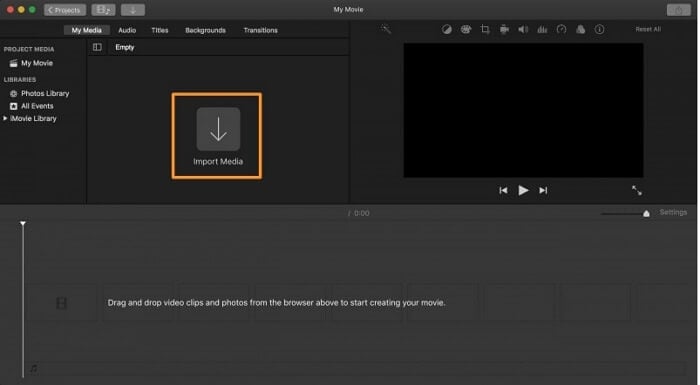
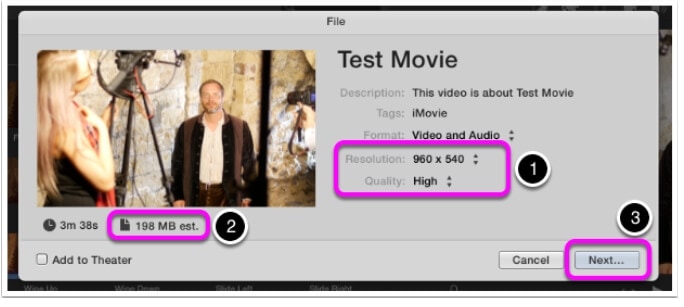
Step 2: Once the file is added to the interface, the details regarding the description, tags, format, resolution, and quality will appear. Change the resolution and quality of the added file using the arrows next to them so as to compress the file. Click on the Next button.
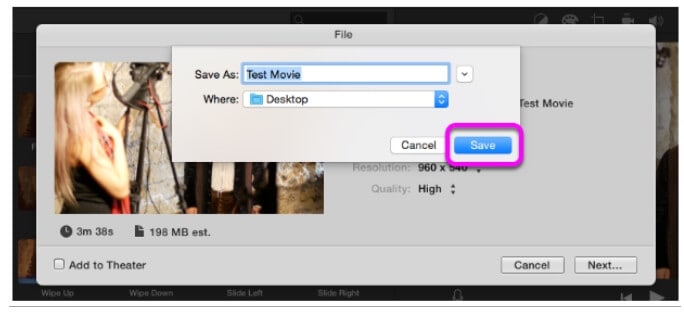
Step 3: Choose the name you want to give to the processed file and also the location on Mac where you want to save it. Click on the Save button that will start compressing and saving your files to the desired location.
Part 3. How to Compress MP4 using QuickTime
QuickTime is the default multimedia Mac player that supports playing videos in an array of formats. The app in addition to video playback it supports other features as well including video compression of the supported file formats. Thus using QuickTime Pro version of the app you can resize MP4 video in a hassle-free manner with decent quality. Learn 3 easy way to compress mp3 video files.
Guide to compress MP4 on Mac using QuickTime Pro
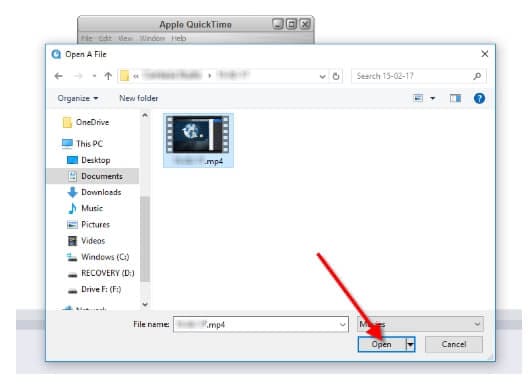
Step 1: Launch the QuickTime Pro app on your Mac system. From the File tab, click on Open File option to choose MP4 video to be compressed.
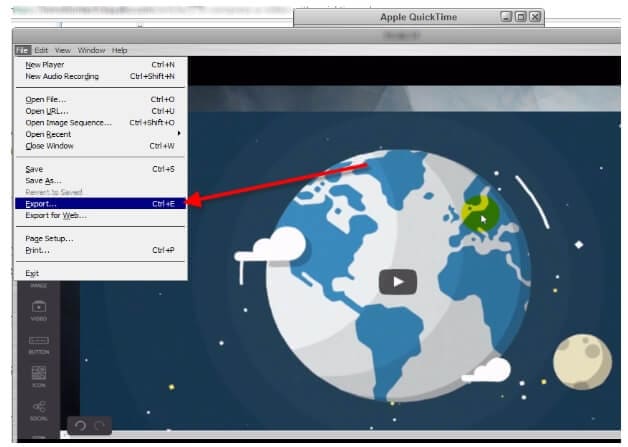
Step 2: Next, click on File > Export. A new window will open from where select Movie to QuickTime Movie at the Export tab, and then click on the Options button.
Step 3: At the Video section, click on the Settings button and a new window will open. At the Compression Type select from the given options. Here you can also change the frame rate, data rate, and quality of the file from respective sections.
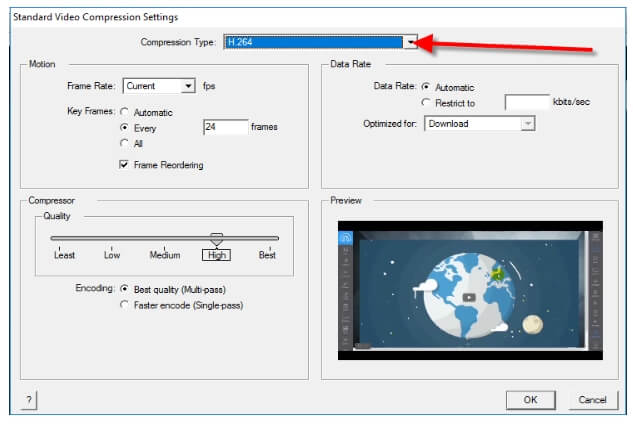
Step 4: Video dimensions and frame size can be changed from the Size tab.
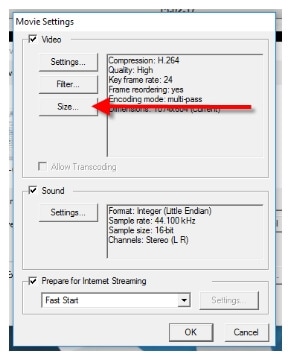
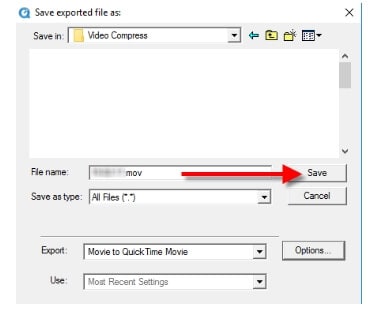
Step 5: Once all settings are done click on the OK button to confirm. Finally, click on the Save button to start compressing your added files.
Your MP4 files on Mac can be compressed using any one of the above methods. If you do not want to compromise on your file quality, wants compression for multiple files, and looking for additional features, UniConverter is the software to use. Free download it below.
Compress Video
- 1. Compress Video & Audio
-
- 1.1 Compress MP4
- 1.2 Compress WAV
- 1.3 Compress 4K to 1080P
- 1.4 Compress 4K to 720P
- 1.5 Compress with Final Cut
- 1.6 Compress WMV
- 1.7 Compress MOV
- 1.8 Compress MPEG
- 1.9 Compress AVI
- 1.10 Compress VOB
- 1.11 Compress FLV
- 1.12 Video Compressor Software
- 1.13 Compress audio
- 1.14 Compress MP3
- 1.15 Compress FLAC
- 1.16 Compress AVI to MP4
- 1.17 Compress MOV to MP4
- 1.18 Compress audio for WhatsApp
- 1.19 Reduce MP4 size
- 1.20 Resize video
- 1.21 Make video smaller
- 2. Compress Video for Web


Brian Fisher
chief Editor