by Brian Fisher • • Proven solutions
Importing AVCHD files to Mac can be frustrating particularly when you are using the wrong program. First, before importing the files, you have to ensure that the file format is compatible with the software that you are trying to use. You can import your files directly using a compatible tool, or you can first convert the AVCHD file to a more supported file type using a video converter. Converting your files makes it easier and you don’t have to keep wasting much time looking for a compatible program. You can read this article and learn on how to convert and import AVCHD files.
- Part 1. Import AVCHD to Mac in the Easiest Way
- Part 2. Guide on Import AVCHD to Mac using Final Cut Pro
Part 1. Import AVCHD to Mac in the Easiest Way
The best way to import your AVCHD files is by converting them to a format supported by Mac using UniConverter. The UniConverter for Mac is a full-featured video converter that can rip DVD, burn video to DVD, edit and convert any audio and video with excellent output quality, and at an incredibly high speed. The converter can also serve as a video editor offering many ways to customize your videos. UniConverter can convert your AVCHD files in batch to other different file formats that can be played on your Mac computer or Windows PC.
Get UniConverter - AVCHD Video Converter
- Convert between 150+ video formats and support extraction of audios from videos and saves them as AAC, AC3, m4a, MKA, mp2, MP3, etc.
- Download or record online videos from any online video sharing sites like Vimeo, Vevo, Netflix, YouTube, etc.
- Edit your AVCHD or other video files on Mac, with features like crop, apply effects, set output parameters, rotate, snapshot, add watermark, etc.
- Convert videos and other file directly to formats supported by iPhone, iPod, iPad, etc. and Transfer to mobile devices with USB cable.
- Compatible for macOS 10.7 Lion to 10.15 Catalina and Windows 10/8/7/Vista/XP, etc.
Steps for Converting AVCHD to Mac Supported Format and then Import to Mac
Step 1: Import the AVCHD Files to the AVCHD Converter
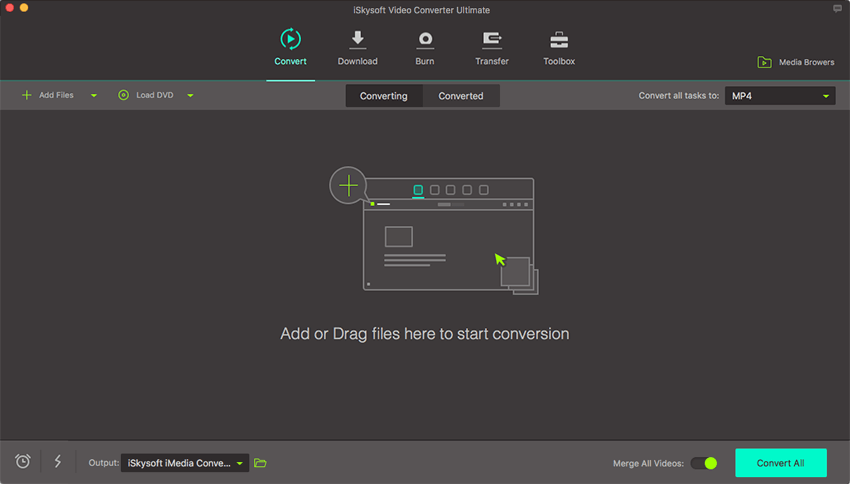
Plug the camcorder on your Mac and all the data will be shown on the software’s main screen. You can drag and drop the files from the camcorder to the AVCHD converter. Alternatively, you can click the “Add Files” button and browse through your computer folders to locate the AVCHD file you want to convert. You can also click the drop down icon to load your AVCHD videos files from your camcorder.
Step 2: Choose a Mac Supported Format
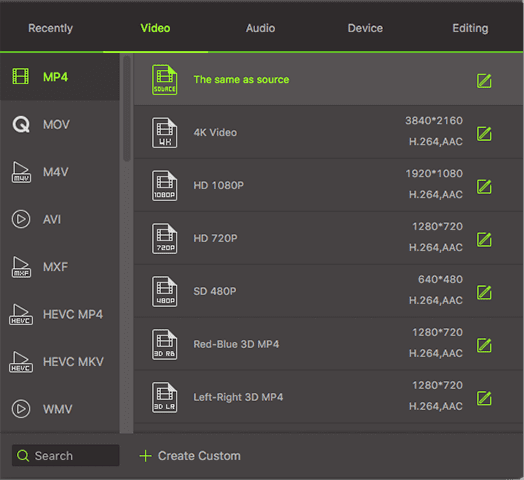
Go to the output format and under the format tray click “Videos” from there you can pick a video format supported by Mac such as MOV, WMV, MP4 etc. you can also choose the output format depending on the device type in "Device" tab.
Step 3: Convert AVCHD and Import AVCHD to your Mac
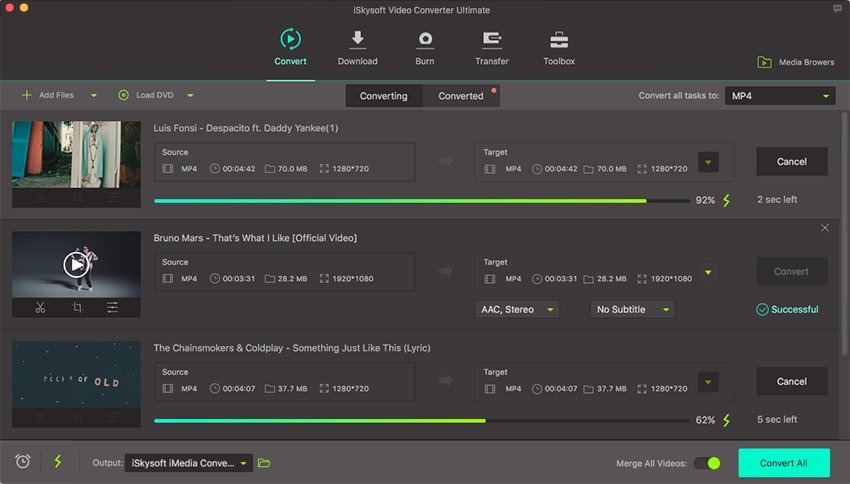
Choose a folder on your computer to save the converted file by selecting "Preferences" - "Location". Then click the Convert button to convert AVCHD to the selected format. Now you can open the converted AVCHD video file on your Mac.
Part 2. Import AVCHD to Mac using Final Cut Pro
If you want to import AVCHD to your Mac without installing a third-party AVCHD converter, these steps show how you can import AVCHD files to Mac using the Final cut Pro.
Step 1: Launch your Final Cut Pro on Mac and connect your camera to Mac.
You should connect the camera containing the AVHD files to Mac using a USB cable and keep it on.
Step 2: Import videos from Camera to Final Cut Pro.
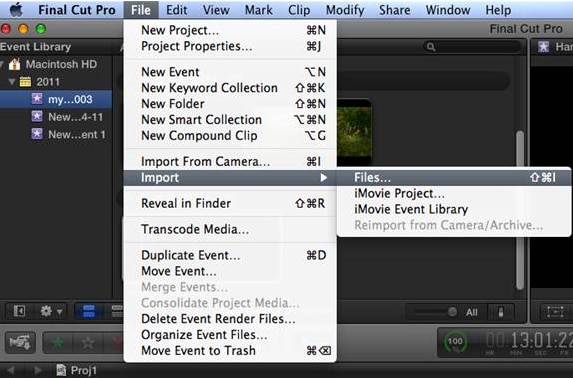
To import the videos, just click the File menu and then click the “Import” button and then choose “Media”. An import window will pop up for you to import your AVHD videos. The Final Cut Pro supports options such as “Import from Camera”, “iMovie Project” and “iMovie Event library”. Select “Import from Camera”. Then find your camera on the top left side of the window. Hit the command and choose the files you want to import.
Step 3: Create a new event for the imported file or add them to an existing event.
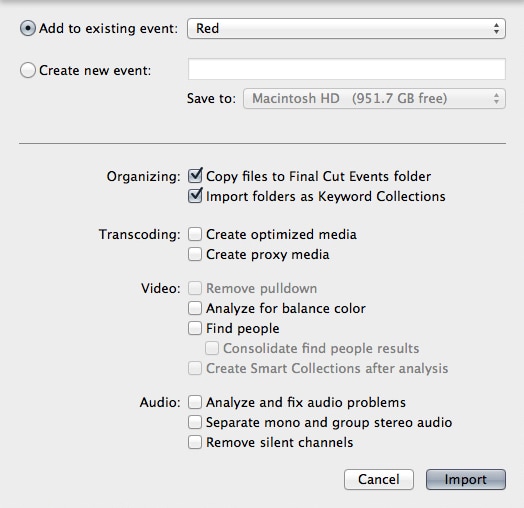
After selecting all the files you need, hit return and choose “Create new event” or “Add to existing event”. You will be offered several options to optimize the video, such as remove silent channels, and many others. Check the options according to your need and then choose the location that you want to save the files in your Mac Computer. Then click the “Import” button to import your files to Mac.
The Limitation for Importing AVCHD Files using iMovie and Final Cut Pro
#1. iMovie does not support importing of some relevant video file formats. For instance, not all varieties of MP4 are supported by iMovie due to its incompatibility. The issue is quite annoying since MP4 is one of the popular video formats.
#2. The storage quality of iMovie is quite limited, and it leads to difficulty if you have large projects. You will need to have an external hard drive.
#3. In the final cut pro, you have to save the film in a certain format or type otherwise the images will be messed up.
#4. With more professional options available, the interface and operation inevitability of Final cut pro becomes much complicated.
In order to avoid the mentioned limitations, you could always use iSkysoft iMedia Converte Deluxe for Mac and Windows to easily convert AVCHD videos to Mac or Windows supported format and play on any media player!

Brian Fisher
chief Editor