by Brian Fisher • • Proven solutions
- 'How do I shorten a video on my iPhone?'
Video is a great expression that words unfailingly can’t justify. Although, one loves to capture videos or stash some good educational or entertaining video, but the paucity of storage may pose to be an issue to iPhone users. That doesn’t mean you should not have the videos you enjoy, there are some other useful ways that can simply get you through. One such is shortening a video or trimming it. And then, you won’t have to worry anymore. Excited how it all works? Simply, make use of this article to understand the science of how to shorten a video on iPhone.
Part 1. Best Way to Shorten a Video for iPhone
If you are en route of a simple, reliable and effective means of shortening iPhone video in a desirable means, UniConverter is what you need. It works excellently in converting, compressing, downloading files in a very simple manner. You can use it to shorten video on iPhone efficently. It manages to work down with Windows as well as Mac systems.
- It is used to shorten video, crop or rotate, as well as enhance media by adding in watermarks, subtitles and special line of effects.
- Helps you shorten video and transfer video to iPhone easily.
- Convert video in more than 150 format at 90X faster speed.
- No worries about the quality after conversion, as this powerful tool preserve the original quality of video.
- Can easily burn blu-ray discs, DVD by making use of the available free templates.
- Download online videos from a variety of channels such as Facebook, YouTube, Vimeo, VEVO and 1000+ sites.
- Record online video or desktop screen flexibly.
How to Shorten Videos from iPhone with UniConverter:
Step 1. Add video to iSkysoft video shortner
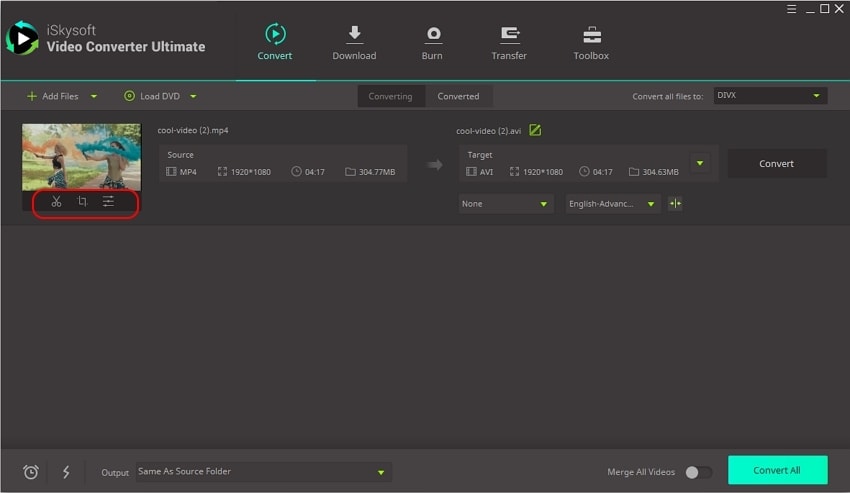
Connect your iPhone to the computer that has iSkysoft UniConverter installed. Click drop-down option beside + Add Files. Now opt for the video file that you wish to shorten up from iPhone. Then below the video thumbnail, choose the first editing icon (scissor).
Tips: If the target video is on your computer, you can import them by dragging and dropping to iSkysoft video shortener.
Step 2. Shorten video for iPhone
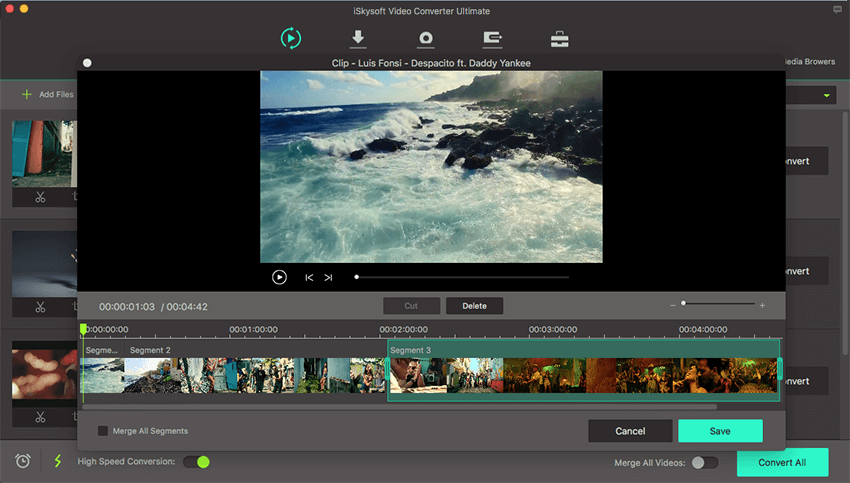
Now, drag the bar to where you want to cut. When it's done, click on the Save button. You can also do other edits, like crop video, or add watermark, subtitle and more to your video.
Step 3: Select Output Format for iPhone
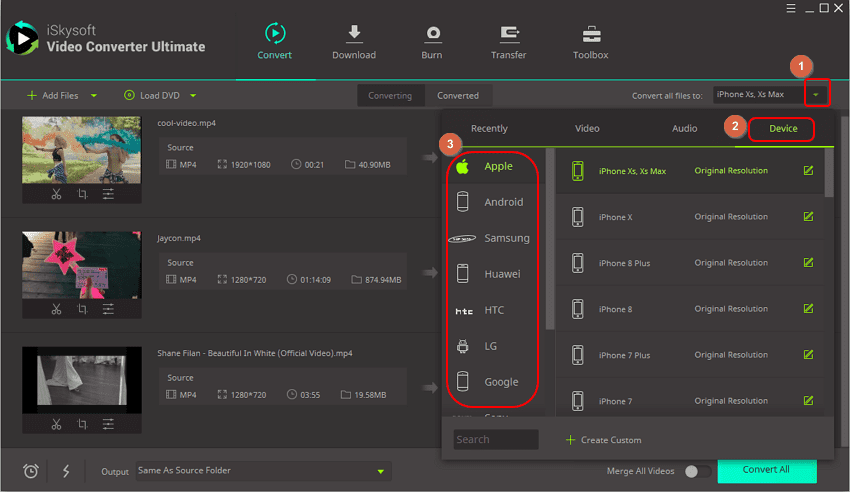
After doing the needful editions, tap on Convert all files to drop down menu and then click on the preferred iPhone model surfacing under the Device tab.
(Optional) Compress the size of the video file
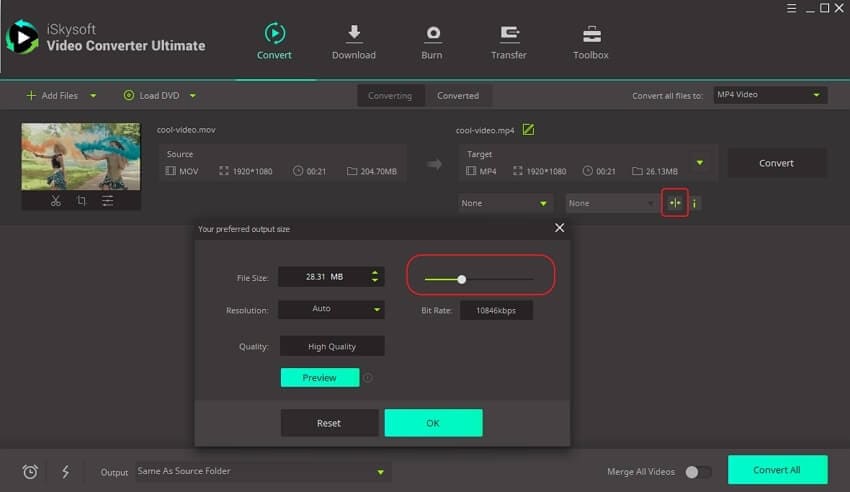
In order to compress video file size, you need to tap on Compress icon available under the Target section. From the new window, set the file size, resolution, bitrate and quality as per your convenience. Hit OK button to confirm the actions.
Step 4: Convert and transfer the shortened video iPhone
When everything is done, click on the Convert All button to export the shortened video. Later, you can find your video in Converted tab. Right click on it and choose Add to transfer list. Now switch to Transfer tab from the top menu, click Transfer to move the shortened video to your connected iPhone.
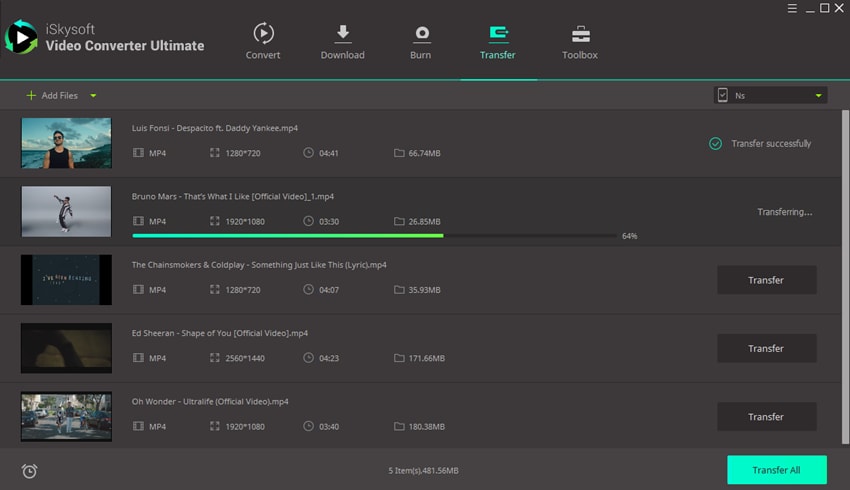
Part 2. Other 3 Ways to Shorten Video on iPhone
#1. Shorten Video on iPhone using iMovie
Rating: 3.9 stars out of 5
When it comes to editing video on iOS devices, Apple’s iMovie is the most sought after option. Not just the interface of the app looks quite overwhelming but also the powerful features offered by iMovie is as close to a high end video editor of desktop-class. Here’s how to shorten a video on iPhone using iMovie:
Step 1: Launch the iMovie app on your iPhone and hit on “Create Project” followed by selecting the type of editing i.e. “Movie”. Now opt for the desired video that you want to shorten and hit “Create Movie”.
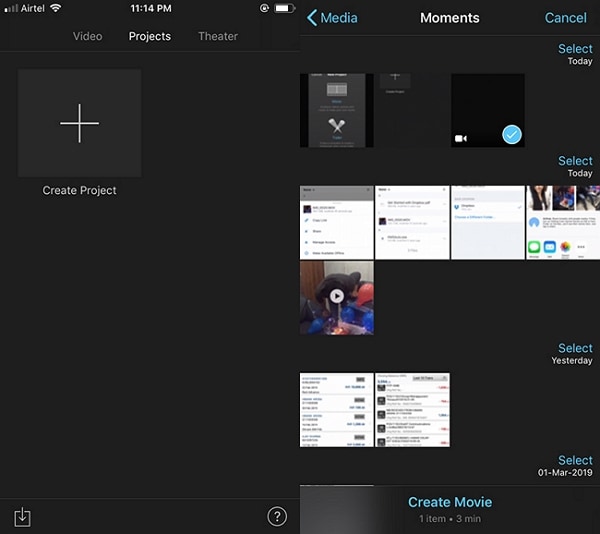
Step 2: Your video will now be loaded to the timeline. Set the initial position of the video and hit on “Split” button at the bottom. Then choose the segment you wish to remove by hitting the “Delete” button afterwards. Repeat this same step for the final position of your video too.
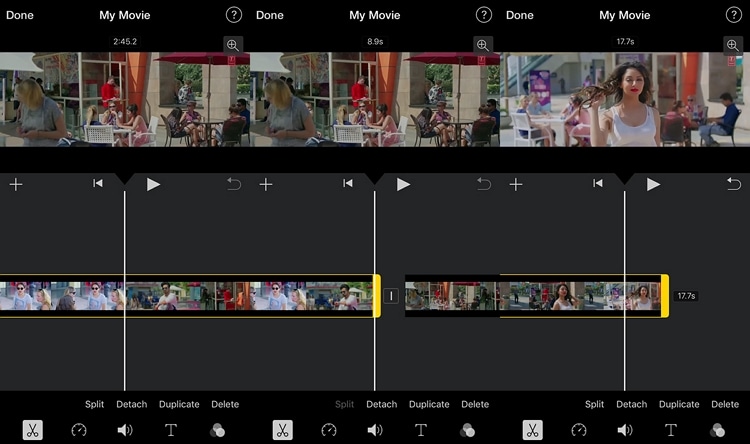
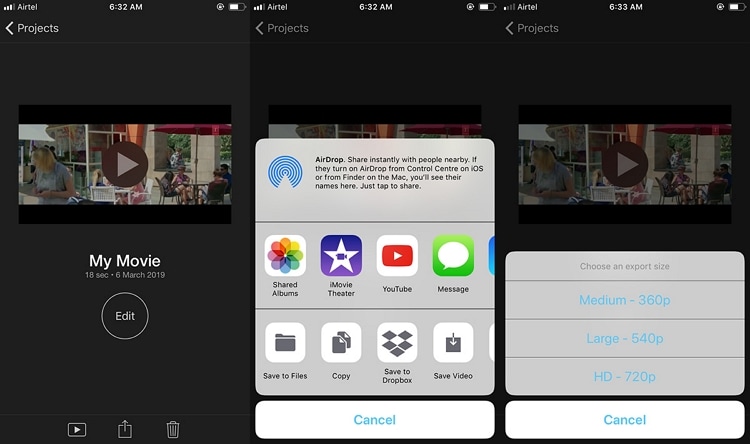
Step 3: Once done, you’ll have the shorten video with you. Hit “Done” on top-left followed by “Share” icon. Now, opt for the “Save Video” option from the pop up window and then select the preferred output quality.
#2. How to Shorten Video on iPhone using Quik (formerly Replay)
Rating: 4.9 stars out of 5
Quik is an extremely good fan following over the iTunes store and that’s quite apparent due to its stunning video editing features. You not only can trim or cut down videos with this app but also can make use of various editing features like to alter the speed of your video, add your own music, add captions/text to your video and many other different effects. Let’s understand how to shorten a video on iPhone using Quik:
Step 1: Launch the Quik app on your device and then hit the “+” icon to import the desired video file. Once, you’ve selected the video, hit “Add” on the top-right to add it to the timeline.
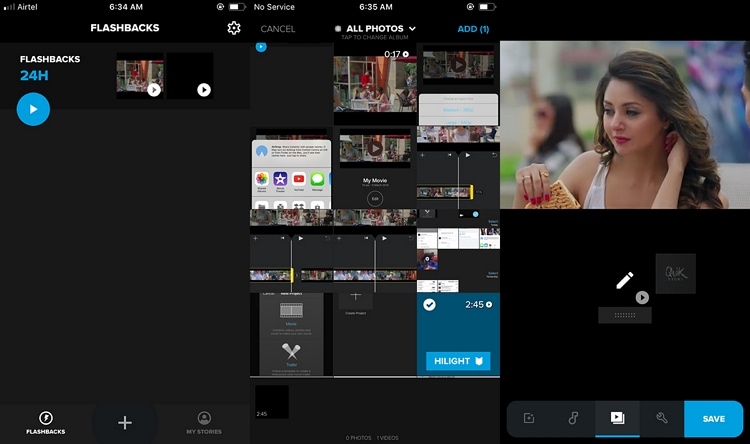
Step 2: Next, hit on the “Video” tab available at the navigation panel below and hit the “Pencil” icon to edit the video.
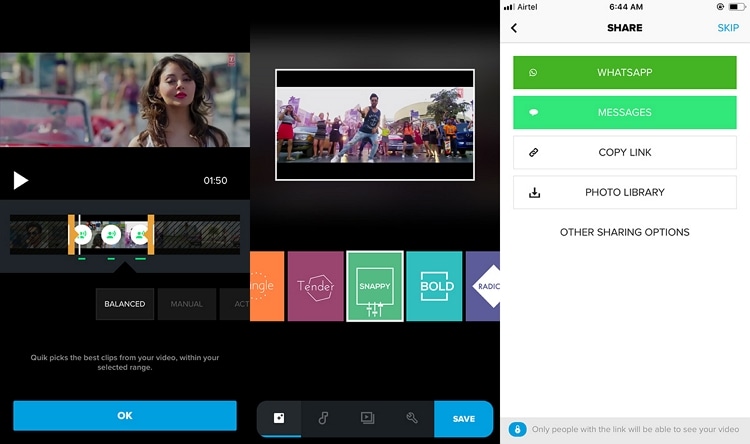
Step 3: Now, set the initial and the final position of the video that you want to reserve. Once you’re satisfied with the selection, hit on the “OK” button to confirm your actions.
Step 4: Lastly, hit on the “Save” button and select “Photo Library” option to save the shortened video to your Camera Roll.
#3. How to Shorten iPhone Video using Cute Cut
Rating: 4.0 stars out of 5
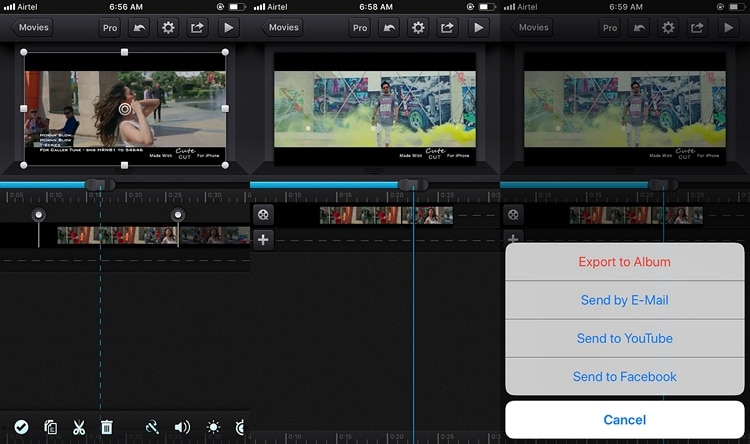
A yet another pro video editing app for iOS devices is Cute Cut. With this mighty tool you can easily trim down your videos and can also perform various other editing actions like cropping, adding text, increasing decreasing the brightness of the video or cutting the video into different piece and et al. Let’s now unveil the step by step tutorial on how to shorten iPhone video using CuteCut:
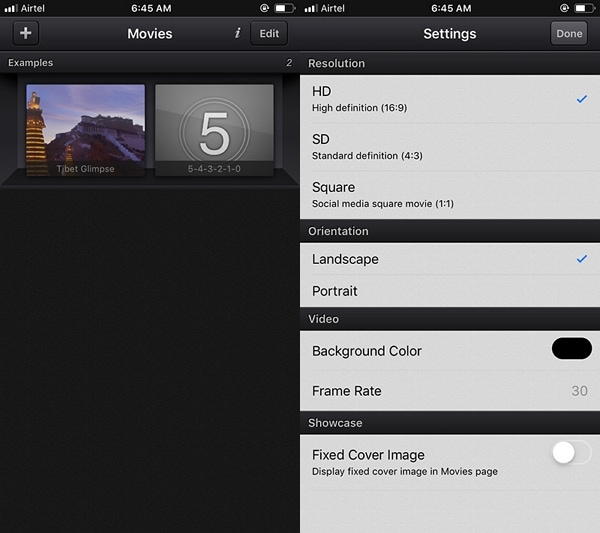
Step 1: Boot up the Cute Cut app on your iPhone and then push the “+” icon on the top-left followed by hitting on “Create” after giving a name to your movie project. Then, you need to set the desired settings for the video or simply hit “Done”.
Step 2: Once, you are on the editing dashboard, you need to import your video to the timeline. Hit the “+” icon on the timeline, followed by “Video” – the type of media you want to import – and then locate the preferred video. Hit “Choose” afterwards.
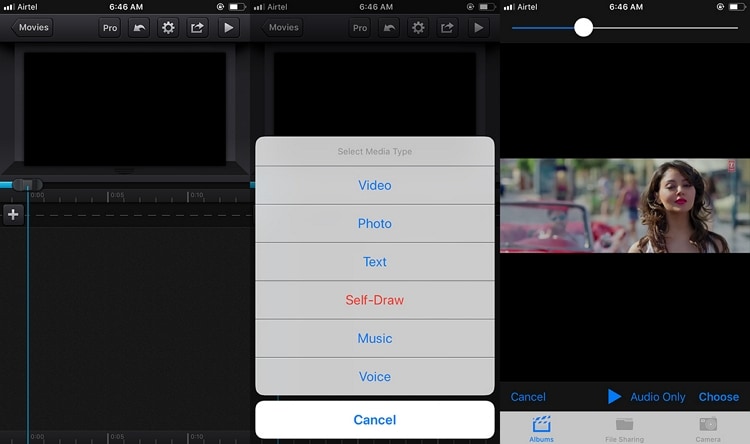
Step 3: Next, you’re required to set the initial and final position of the segment that you wish to preserve. Hit the “Tick” icon at the bottom when you’re satisfied with your selection. You can also preview the trimmed video by tapping the “Play” button on top right.
Step 4: Lastly, hit on the “Export” button at the top and opt for “Export to Album” followed by opting for the desired output quality for the video. You’re all sorted now.

Brian Fisher
chief Editor