by Brian Fisher • • Proven solutions
So you wish to share video online but the size of the video restricts you bad! Busted but you won’t be any longer. It is a well-acknowledged fact that the smaller videos are quite manageable, easy to use and doesn’t carve an elephant size space over your videos. But, don’t you worry, your favorite video can be that too! Compressing tools can sort out the issue for you. Hence, unveil the best video compressor for Mac system right below!
- Part 1. Best Video Compressor for MacBook, MacBook Air/Pro, iMac
- Part 2. Free Video Compressor on Mac
- Part 3. How to Compress a Video on Mac with Handbrake
- Tips: Video Size Limits for YouTube, Facebook, Email, Vimeo on Mac
Part 1. Best Video Compressor for MacBook, MacBook Air/Pro, iMac
Your search for the best video compressor in the market ends with UniConverter, a perfectly designed software to cater all your need of compressing. It leverages users to speedily compress video on Mac with ease. Without putting in much effort, this is the best no-brainer software for the novices who intend to compress video.
Get the Best Video Compressor for Mac:
- Compress video or audio on any device running macOS, including MacBook, MacBook Air/Pro, iMac and more.
- Compatible with macOS 10.7 Lion to newest macOS 10.14 Mojave.
- Reduce video size on Mac by changing video resolution, size, bitrate, quality, etc.
- It supports compressing video on Mac in any format, like MP4, MOV, AVI, MKV, VOB, MPEG, etc.
- Has an in-built editor useful in rotating, cropping and enhancing media with great effects!
- Gives access to a wide range of templates and burns video to DVD easily.
How to Compress Video on Mac with UniConverter
Step 1. Add video to iSkysoft video compressor for Mac
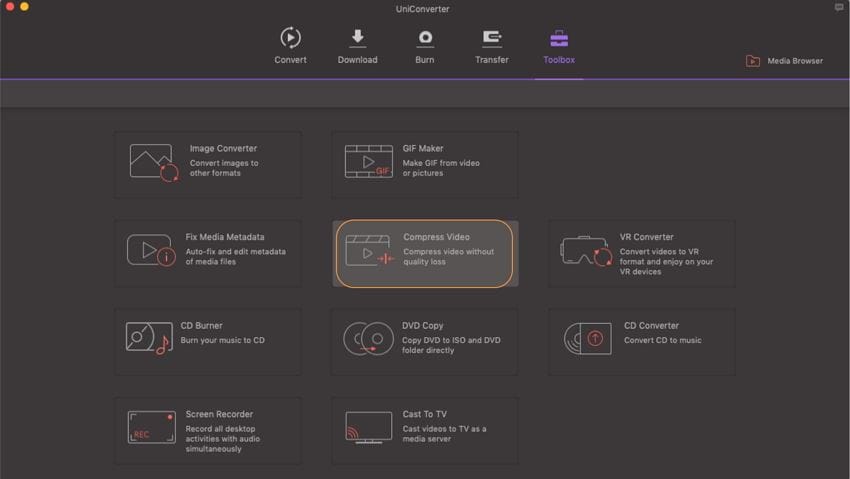
Download and install UniConverter on your Mac system. Run the program, click on Toolbox tab and choose Video Compress option. Then from the popup window, click the + icon to add the video that you want to compress.
Step 2. Compress video on Mac
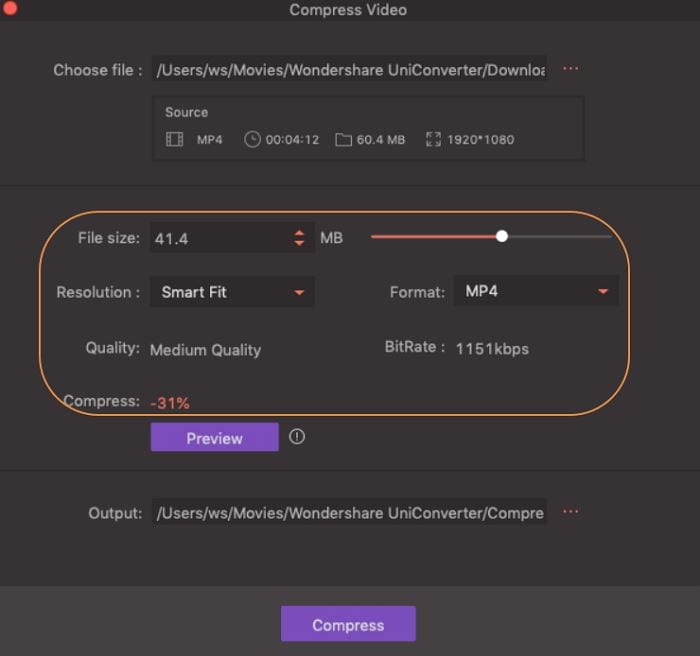
After adding videos, you can see a new window like this. By dragging the bar, the video parameters will change accordingly. You can change the video file size, format, resolution, quality, bit rate here.
Step 3. Export video
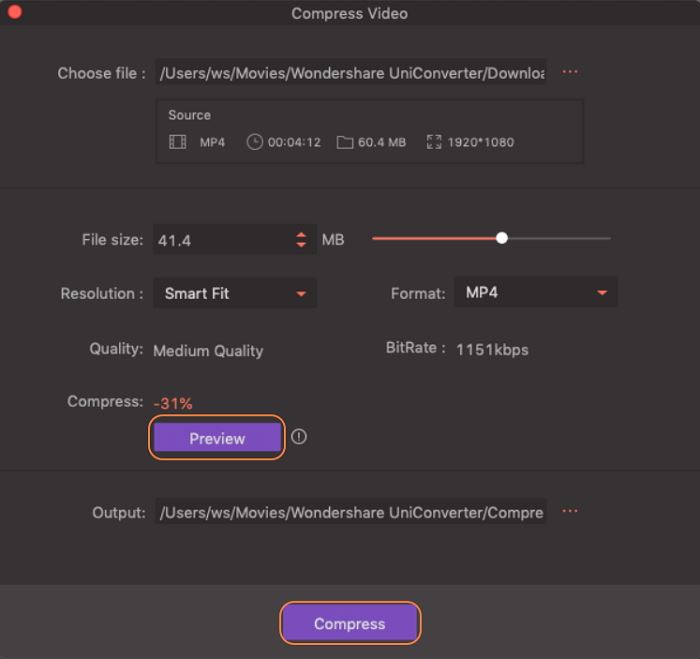
You can even click the Preview button to view the video for 20 seconds. Click the Compress button finially. iSkysoft video compressor Mac will compressing the video according to your settings and save on your Mac.
Part 2. Free Video Compressor on Mac
1. iMovie
The Apple compatible iMobie is a great option to start with. By using this applications, users enjoy the liberty of compressing video free, dash in suitable edits according to one’s needs. Moreover, it can easily edit 4K videos very easily.
Pros:
- Has an inbuilt 14 trailer templates useful for creating Hollywood style trailers.
- Save and share the output in 4 K quality.
Cons:
- Cannot import any third party file format.
- Does not stretch compatibility with the Android phones.
2. QuickTime Player
The ever famous QuickTime Player is a well sorted option for compressing the Video in your Mac systems. It’s simple and intuitive option that can manage creating and editing the output video too.
Pros:
- Can easily convert image in a couple of different formats.
- Also users have the power of cropping and resizing videos.
Cons:
- No availability of the support system generally for the formats like AVI, FLV etc.
- Users might have to install extra codes to playback videos and audios.
3. Any Video Editor and Converter
Any UniConverter is a well-to-do editor or converter capable enough to compress a range of video files easily. It stretches compatibility with a wide range of file formats like DIVX, DV, DVR-MS, F4F, MPEG, MP4 etc.
Pros:
- Can swiftly work with the Windows 10, 8, 7, Vista or XP.
- Ability of downloading online videos easily.
Cons:
- Program takes time to process conversion.
- Cannot process large sized files.
- Occurrence of software between setup.
4. HandBrake Video Editor
Being a simple and intuitive editor, Handbrake is certainly a software users can make great use of. Handbrake isthe open source video transcoder.
Pros:
- Useful in ripping DVD easily.
- Conversion processes speedily.
Cons:
- Program keeps on crashing sometimes.
- No provision for audio conversion.
- Very limited file formats are supported.
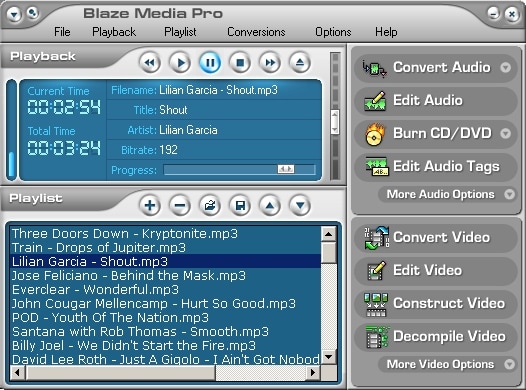
5. BlazeMedia Pro
For simply compressing video file on your Mac, you can look up to BlazeMedia Pro. It allows users to switch between different formats, decode and make editions in the output video you intend to fetch. What’s unique about this software is that it obtain track’s title, artists, and album’s information for fetching auto-saving feature.
Pros:
- Simple interface.
- Helpful in burning CDs and DVDs easily.
Cons:
- The interface is not appealing.
- Not very friendly with the advanced file formats.
- Need of upgrading to the Pro version which is paid.
Part 3. How to Compress a Video on Mac with Handbrake
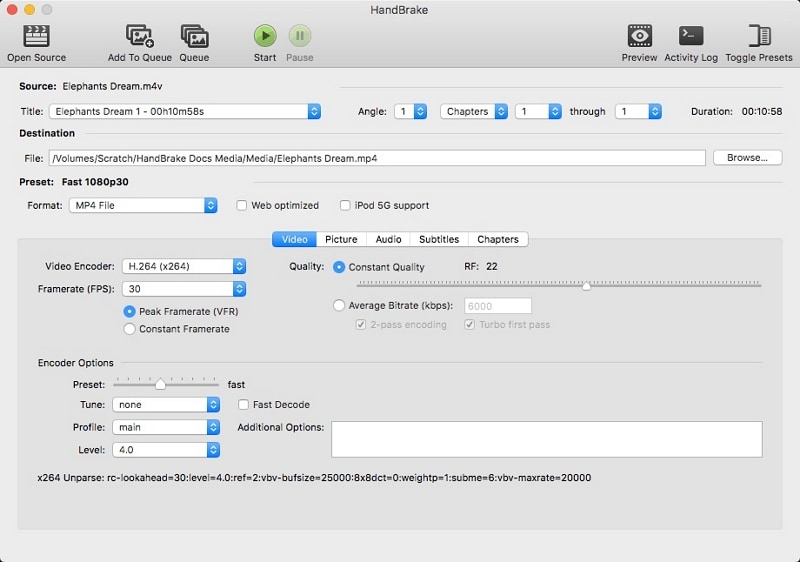
Handbrake video editing tool serves to be a great option for compressing videos for Mac free. By using this system, one gets the leverage of converting down several kinds of multimedia files, burn the DVD smoothly. In addition to this, it has pathways for creating titles for the output, executing batch scanning, previewing videos and filtering, etc.
Here is the comprehensive guide on how to compress a video on Mac using Handbrake
Step 1: First of all, launch Handbrake video compressor on your system. Tap on ‘Source’ button located right at the top-right corner of the program. Look out to insert the video files you wish to compress.
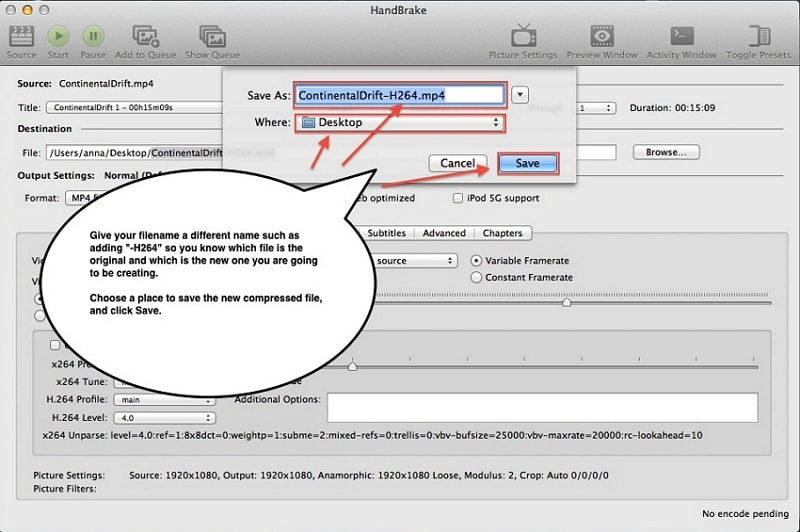
Step 2: Once the fie gets added, select ’ Browse’ option under ‘Destination’ tab. Ensure to choose output filename as well as the location where you wish to save the file followed by ‘Save’ button to consent actions.
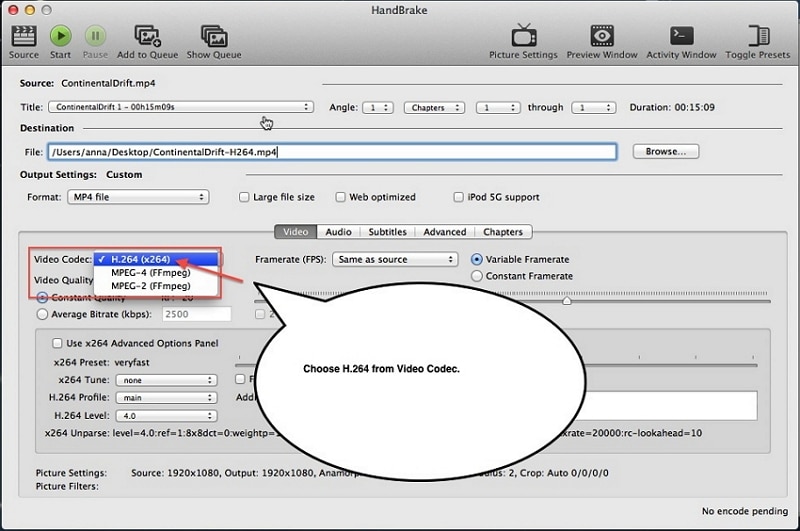
Step 3: For customizing the output Settings, opt for the format of the output file. After that, tap on the selected video codec available from the enlisted options. Then, press the ‘High Profile preset’ under the Presets Drawer or open it from the menu bar and proceed with Window>Presets. Also, opt for the Frame Rate, average bitrate and other parameters from the Presets option.
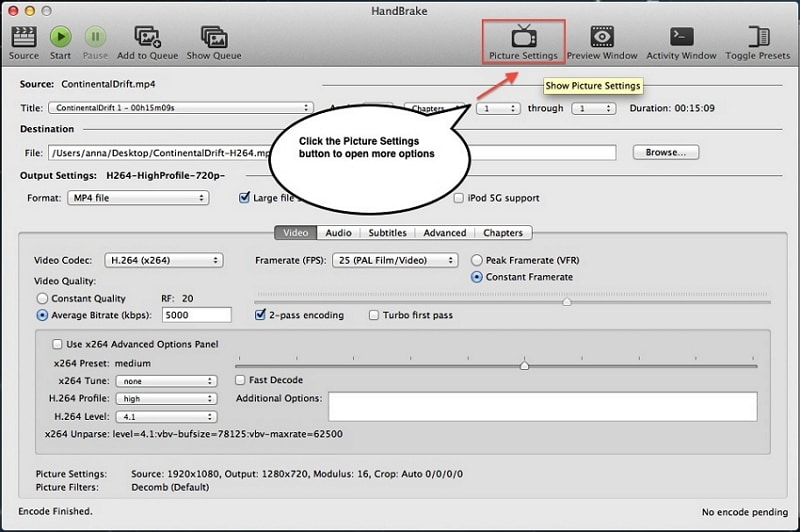
Step 4: In case you wish to change resolution for the frame size of the video, tap on ‘Picture Settings’ that will lead you to a new dialog box.
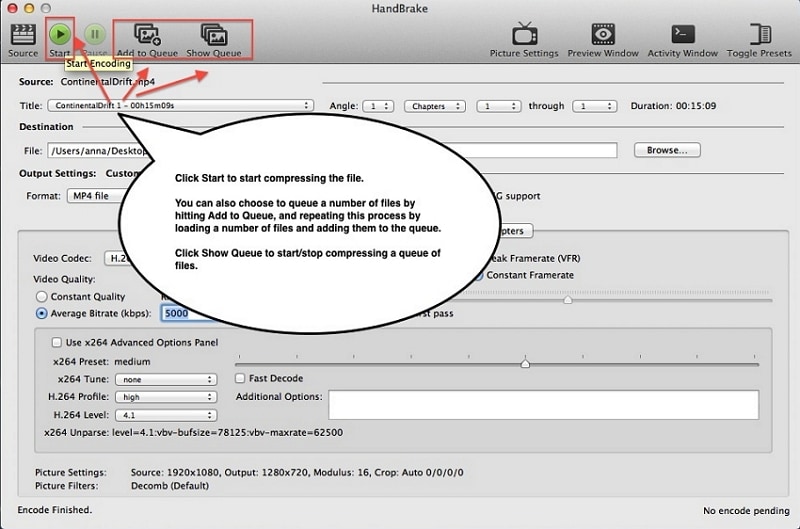
Step 5: Once you’ve made settings done according to your convenience, tap on ‘Start’ button located at the top menu bar. This will fire up the video compression process. Wait for the indication or notification for the process completion.
Tips: Video Size Limits for YouTube, Facebook, Email, Vimeo on Mac
While playing the video file on your Mac, there is a kind of restriction in the file for YouTube, Facebook, Email or Vimeo. So, one must be well versed with the technical requirements of the various platforms. Hence, one can seek to compress videos accordingly. So follow the thread below.
Facebook:
1. File Size: 4GB maximum.
2. Duration of video: Strictly not more than 120 minutes.
3. Supported File Formats: Formats like 3GP, 3GPP, 3G2, WMV, AVI Video, MPEG Video such as DAT, Flash Video- FLV, MPEG4- MP4 etc. MP4 is a much preferred format.
YouTube:
1. File Size: up to 128GB is compatible.
2. Duration of video: Allows 15 minutes long video. For those who wish to upload longer duration videos are required to go through some verifications of Google Account.
3. Supported File formats: Several common video file formats like MOV, FLV, MPEG4, MP4, ProRes, MPEGPS, AVI, WMV, 3GPP, WebM, DNxHR, CineForm, (h265) are recommended.
Vimeo:
1. File Size: MOV, MPEG4, AVI, WMV, FLV, 3GPP etc.
2. Duration of Video: Depending upon the Plans subscription. The Basic members can upload around 500MB per week. The Plus members can enjoy the limit for 5GB per week. For getting as high as 20 GB per week limit, the PRO members are recommended.
3. Supported File Formats: Vimeo supports all kinds of video formats including 3GPP, AVI, WMV, MOV, MPEG4 and many more.
Email:
1. File Size: It supports 20 – 25MB as the standard size. However, if you are using some other mail platform, the size can be extended up to 5GB.
2. Supported File Formats: WebM, .MPEG4, .3GPP, .MOV, .AVI, .MPEGPS, .WMV, .FLV, .ogg

Brian Fisher
chief Editor