
The need for compressing audio files arises when they are large in number and becomes difficult to store, share or upload on the web. Multiple audio compression tools are available that helps in reducing the size without much affecting the quality. So, if you too have been searching one of these tools to compress audio file , you are reading on the right page. The article below will help you to know about the popular programs in the category.
UniConverter - Best Video/Audio Compressor for Mac/Windows
5,481,435 people have downloaded it.
Compress 1,000+ video and audio formats.
Elevate your compression experience with exclusive settings.
Compress multiple files in batches.
Preview your video before and after compression.
Compress high-quality videos up to 8K and lower resolutions.
Check out the 3 different ways below using which the audio files can be compressed on your Mac OS and Windows systems.
3 ways to compress the audio on macOS / Windows
Method 1: Wondershare UniConverter
This is a versatile software that helps you compress your audio files by changing the format and the parameters. The compression of the files can be done in batches and can be achieved without quality loss. Supporting almost all audio formats, Wondershare comes with an array of other features as well including conversion, download, editing, DVD burning, and much more.
Steps for compressing audio file using Wondershare UniConverter
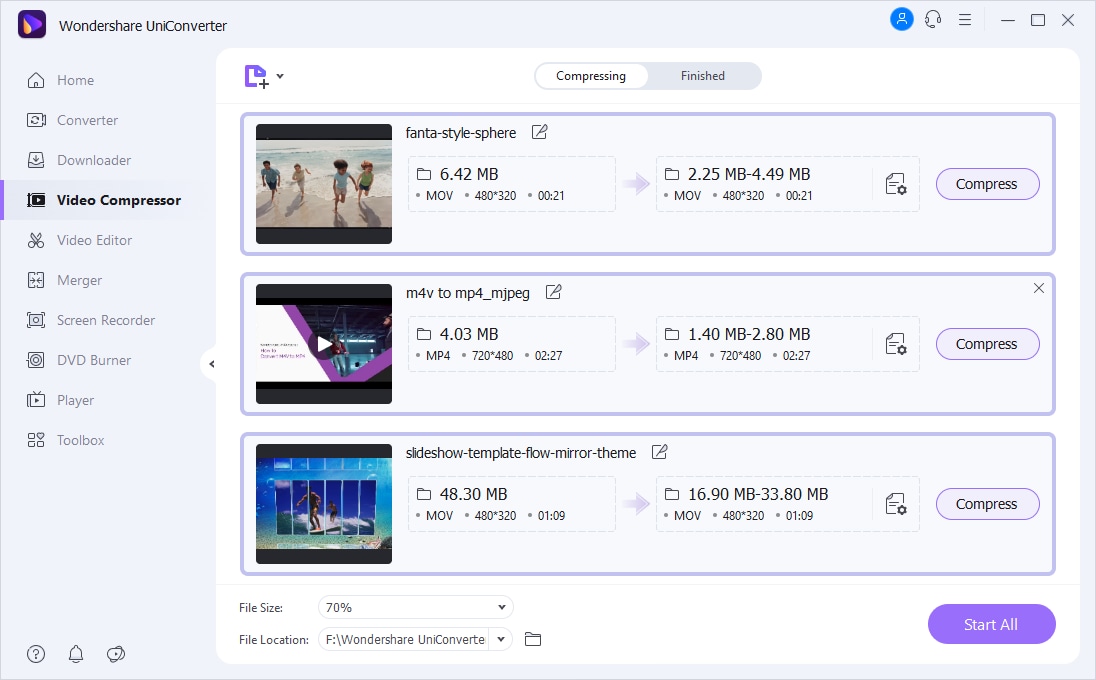
Step 1Launch Wondershare UniConverter and add audio files
Open the software and from the main interface click on the Converter tab from the main interface. Click on the Add Files icon or the + sign at the center to browse and import the audio files to be compressed. You can also drag and drop the files to the interface and add multiple files for batch processing.
Step 2Choose settings for compressing the file
After the audio files are added to the interface, open the Output Format tab at the bottom-left corner and choose the desired target format and the quality that will help in reducing the file size. To further customize the parameters, click on the pen icon and a pop-up window will open. Here choose the bit rate, encoder, channel, and sample rate. Choose the settings that will reduce the file size. Click on the Create button after the settings are selected and this will create a new customized format for all the added files.
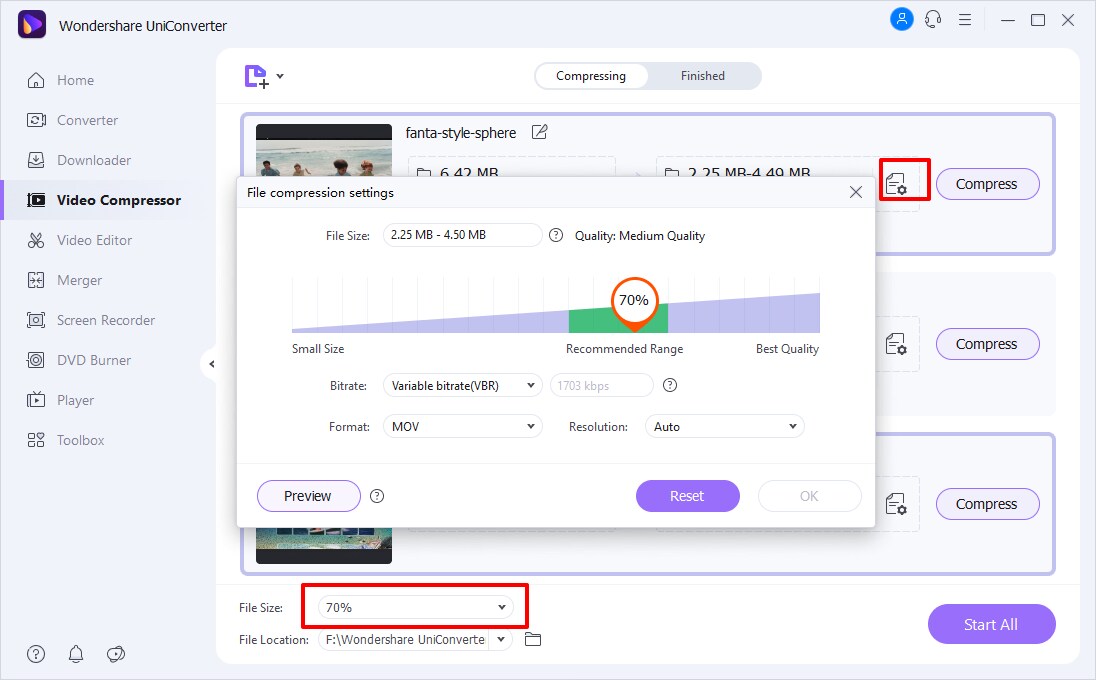
Note: To set customized size for each file individually, click on the settings icon next to the file and choose the file parameters.
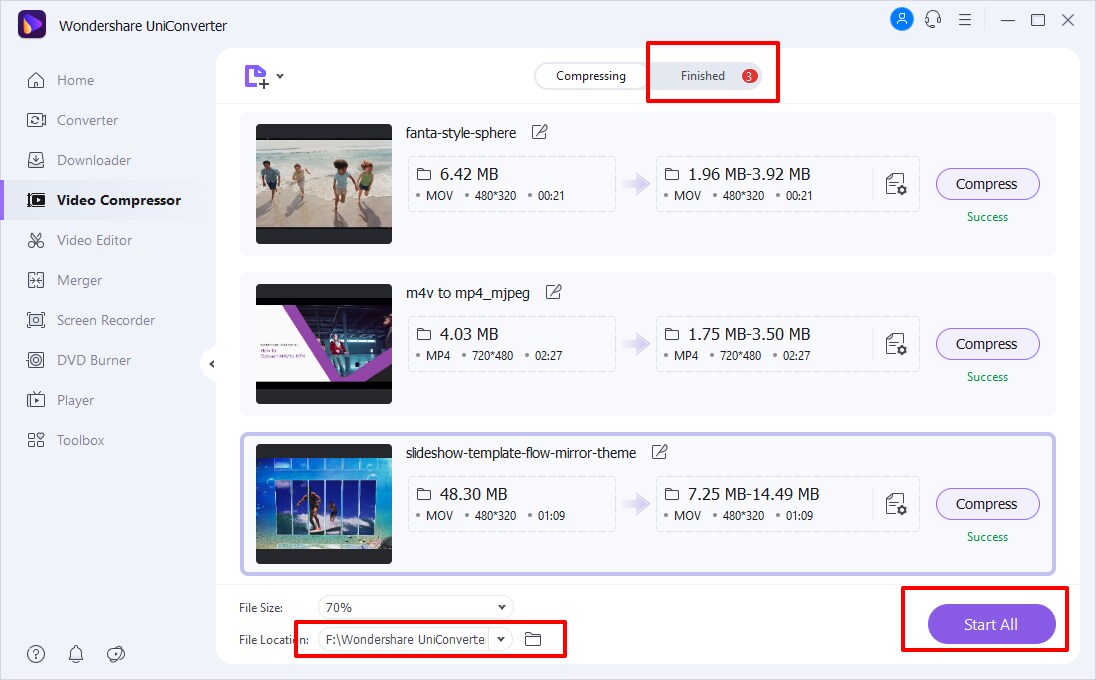
Step 3Start audio compression
Finally, click on the Start All button to start the file compression process. The processed files will save to the folder selected at the File Location tab while on the software interface, it will be available at the Finished tab.
Method 2: Online UniConverter
To compress your audio files without installing any third-party software, Online UniConverter works as the best choice as the tool works from your browser interface. The audio files can be added from your local system, Google Drive and Dropbox. For cloud storage files, you need to free sign-up with the tool. The files can be compressed by changing their quality and choose the target format that is smaller in size. The tool is free to use and the processed files can be added to the interface or can be saved to the cloud storage.

Steps on how to compress audio files using Online UniConverter.
- Step 1. Open https://www.media.io/audio-compressor.htmland click on the Choose Files button to add the audio file to be processed.
- Step 2. Open the Quality drop-down list and choose the target file quality to reduce the size. Also, select the desired target format from the supported ones.
- Step 3. Click on the COMPRESS button to start the file processing. The compressed file will be available for local download and the option for saving to cloud storage is also there.
Method 3: Using VLC to compress audio files
VLC is a popular and widely used media player that is free to use and offers multi-platform support. In addition to playing media files in an array of formats, the player supports a wide range of additional features as well and the list also includes audio compression. So, if you already have VLC installed on your system, you can compress your audio files in key formats without any need for other tools or programs.
Steps on how to compress an audio file using VLC.
- Launch the VLC Media player on your system and open the Media > Convert/Save option.
- An Open Media pop-up window will open from where click on the Add button to browse and open the audio file to be compressed.
- Next, click on the Convert/Save button at the bottom.
- A new pop-up window will open again and here at the Profile section open the drop-down menu and select the desired target audio format.
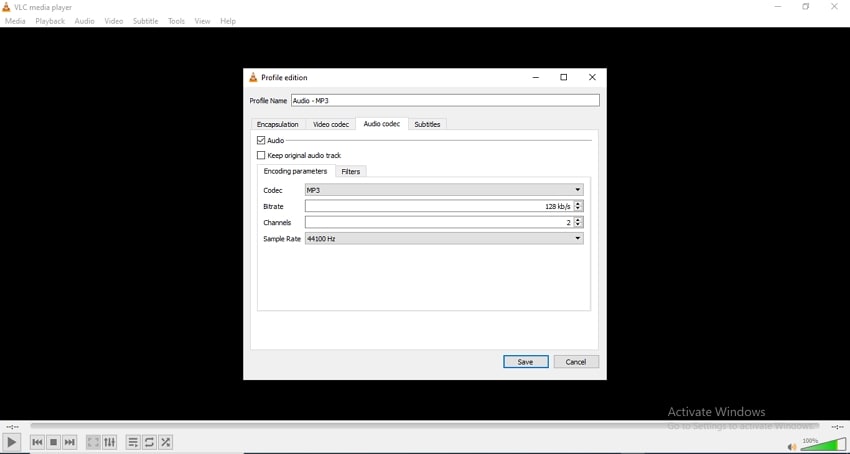
- Click on the edit icon next to the selected format and a Profile edition window will open. Here select the Audio codec tab and then choose the codec, bitrate, channel, and sample rate from the Encoding parameters section so as to reduce the file size. Click on Save to confirm the selected options.
- Coming back to the Convert window, click on the Browse button next to the Destination file: option to select the system location to save the processed file.
- Clicking on the Start button will finally start the process to reduce audio file size.
Conclusion
Above we have listed 3 methods to compress your audio files. The online tool can be used when there is no option for a software download and compression of a few files without advanced features is required. VLC works as a good choice if you already have the player installed on your system and basic compression is needed. For high-quality compression for all types of audio files, Wondershare UniConverter works as the best choice audio compression software. Not only audio compression, but the software also supports multiple useful features.
