by Brian Fisher • • Proven solutions
Adobe Media Encoder is well-known as the “all media processing”. With this media management tool, you are able to work with media across multiple applications, in a unified process. There is the ability to output any format, which is great if you have more than one device that you view media on. You can also create proxies, transcode, and ingest your media. However, here we would like to share the best Adobe Media Encoder Alternative, iSkysoft iMedia Converter Delxue. It is more powerful than Adobe. Now let's get to know it below.
- Part 1. Best Adobe Media Encoder Alternative [Strongly Recommended!]
- Part 2. How to Convert Videos using Adobe Media Encoder
Part 1. Best Adobe Media Encoder Alternative - UniConverter
A great alternative for all of your video needs is UniConverter. It's used to convert, edit, download and compress video. There are over 150 different formats available, like MP4, FLV, AVI, WMV, MOV, and etc. Along with converting any personal video that you may have, you can also burn your video to DVD. Lossless conversion supported which means HD quality video will continue to deliver HD quality on any device with the proper supported format.
Main Features of the Best Adobe Media Encoder Alternative
- Lossessly convert video and audio with 150+ formats at 90X faster speed with the Intel and NVIDIA GPU hardware acceleration
- Extract audio from a video easily.
- Edit video before conversion, such as trim, crop video, add subtitle, watermark and effect to a video.
- Download video from YouTube, Facebook and other up to 1000 online video sharing sites.
- Burn your video to DVD with pretty templates.
1. Video Tutorial on How to Convert Video Using UniConverter
2. Step-by-step Guide to Convert Video with Adobe Video Converter Alternative - iSkysoft
Like using Adobe, firstly please download and install UniConverter on your Mac or Windows PC (click the Free Download buttons above). It works well on macOS 10.7 Lion to 10.15 Catalina, and Windows 10/8/7/XP/Vista. Also, you can use this Adobe alternative to record and download video from YouTube, or compress video. Now follow the instructions below to learn how to convert video with UniConverter.
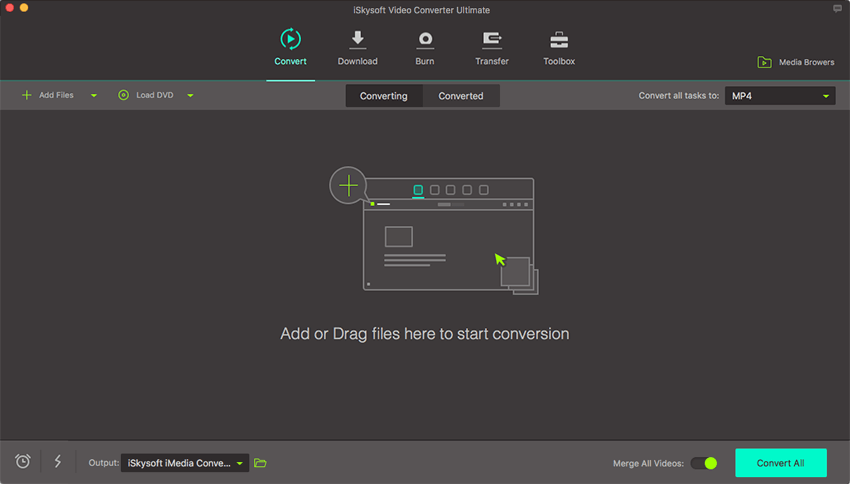
Step 1: Add video to Adoble Video Converter alternative
Open iSkysoft on your desktop. Simply grab the video and drag it to the program’s screen. A plus is being able to drag an entire folder onto the screen, when you have multiple files to convert. The files in the folder will be automatically added to the queue of the program. The batch conversion ability allows you to convert multiple files at one time.
Bonus: If the video is on your phone or camera, you can directly load the video by connecting the device to computer, and clicking the drop-down icon next to "Add Files".
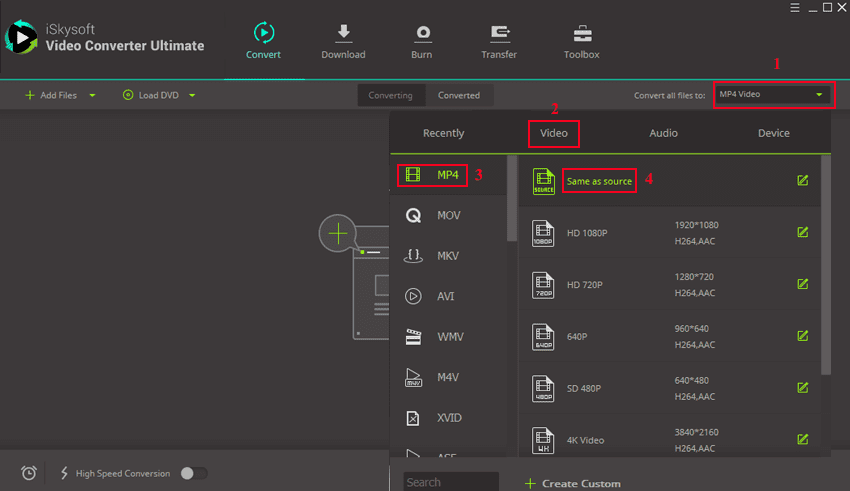
Step 2: Select the Format
The next step is to select the "Format" icon that displays a list of formats that you can choose from. In the list are the options to extract your videos to audio files. Once you have the proper format, you will see a Gear button that allows you to edit the format settings.
Bonus: By selecting an audio format, you will be able to extract audio from your video.
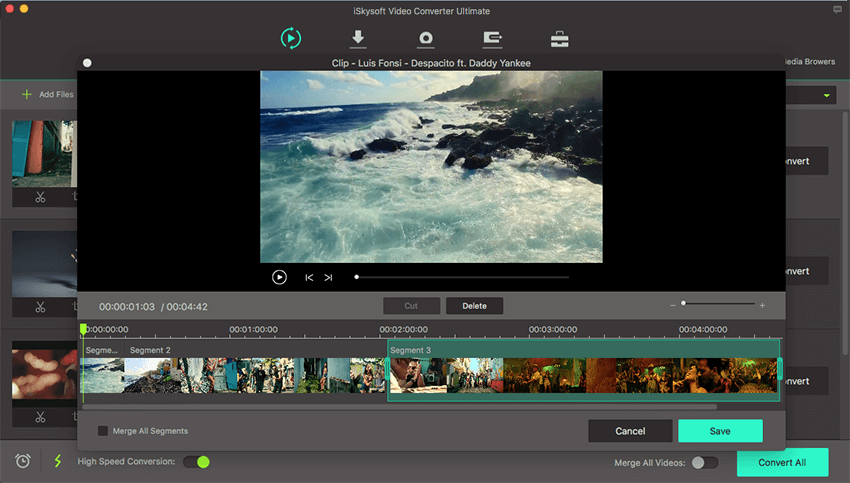
Tips: Before start converting, you can edit your video as needed. Learn the details about How to Edit Video.
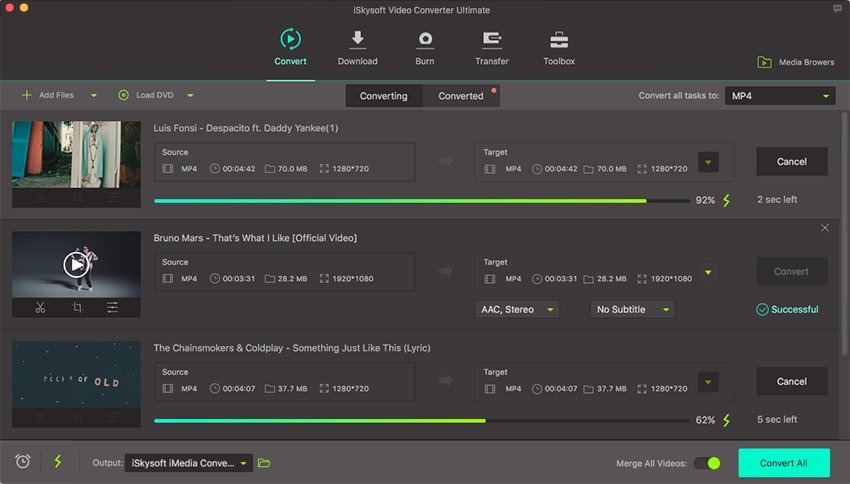
Step 3: Start Converting
The last step is converting the files. At the bottom of the screen, there is an option that allows you to change the output folder destination. Next, click the “Convert” button to begin the conversion process. It usually takes a few seconds to finish the conversion process.
Bonus: It enables you to transfer the converted video to mobile phones. Simply right click the converted video and choose "Add to transfer list". Connect your phone to the computer and go to the "Transfer" tab to finish the rest!
Part 2. How to Convert Videos using Adobe Media Encoder
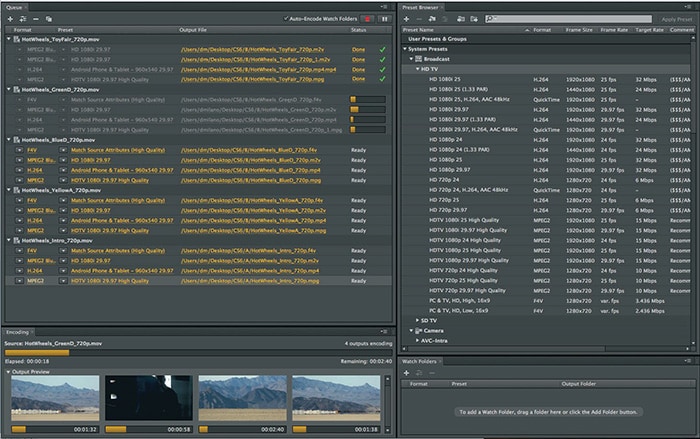
Step 1: Add Files. With the program running, the first step is to upload the files that you want to have converted. In the top, left corner of the program, there is a "+" button that you click to add the videos to your queue panel to be edited.
Step 2: Choose Format. Underneath the "Format" section of the files that were uploaded, there is the option to select which format to convert the video to. The format depends on the device that you plan use to watch the video. If you were to watch a video on an iPhone for example, selecting "" would be a great format for the video. This program doesn’t have AVI as a format, so you could convert the video to a QuickTime format. From there, the MOV (QuickTime) file can be converted to AVI through QuickTime Pro.
Step 3: Select Quality Preset. Before you choose the quality preset, you can check to find out the video’s original frame rate and horizontal/vertical resolution. To get this information, simply click the information under the "Preset". This will open the "Export Settings" window. At the bottom, you will see the "Source" section. This will show the original resolution and frame rate. There is the option of choosing a preset within the Export settings or choose from the preset list that is on the drop down menu of the main page.
Step 4: Choose Output. Next, you want to choose the destination of your converted file. This is the folder that you want the file to be saved. Click the section underneath "Output File".
Step 5: Convert. Now, you can begin converting. In the top, right corner of the program, you will see a green play button that you can click. You can watch a preview of the video, while the file is converting. The speed of the preview video will move at how fast the conversion process is going.

Brian Fisher
staff Editor