AI Background Remover - uniconverter
- Remove image backgrounds in batch.
- Change the photo background with the built-in templates.
- Upload the local images to switch pictures' backgrounds.
- Remove image background quickly with AI.
- Other features include a converter, recorder, downloader, compressor, and so on.
Are you a photo editor who needs to remove white background from the photo you are editing? Or are you a graphics designer who needs an image without its background for your design? Whichever you are, you are here because you are unsure how to remove the background from your photo. Do not worry. In this article, we have compiled eight tested and trusted ways to effectively get rid of the white background from your image. By the time you are done reading this article, you will have learned several methods and the right tools to utilize. So let's get right into it.
Part 1. Remove White Background from Image with Built-in Tools on Mac and Windows
Many people do not know this, but Windows and Mac computers come with built-in tools you can use to remove background right out of the box. Yes, that's right. You already have the software you can use on your PC. They are discussed in detail below.
Paint 3D
Your Windows 10 PC comes out of the box with a program installed called paint 3D. This is a modern version of the Microsoft Paint software on previous windows releases. To use paint 3D to remove the white background, follow these steps;
Detailed steps on how to remove white from the image with the use of Paint 3D
Step 1
Type in Paint 3D in the search menu and open the program. To open the image you want to edit, click on open and select your photo from where it is saved. Alternatively, you can go to where your image is, right-click on it and choose Edit with Paint 3D.
Step 2
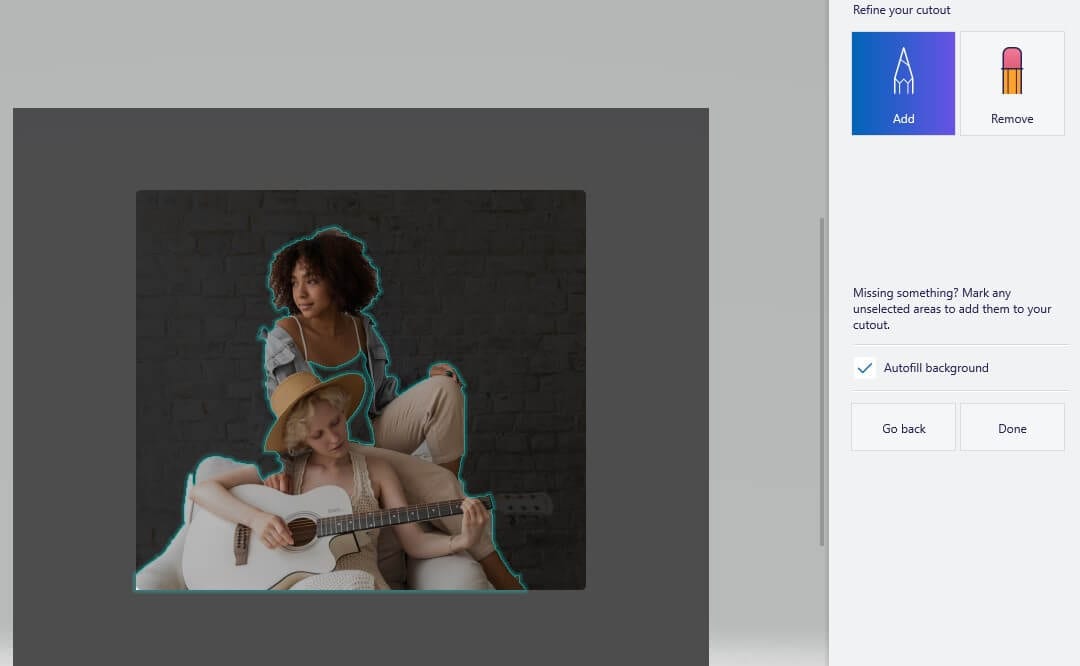
Click on the Magic Select tool at the top bar, and crop out unnecessary parts of the image. Click next, then use the Remove and Add options on the right to edit additional parts of the picture. Hit "Done" when you're through.
Step 3
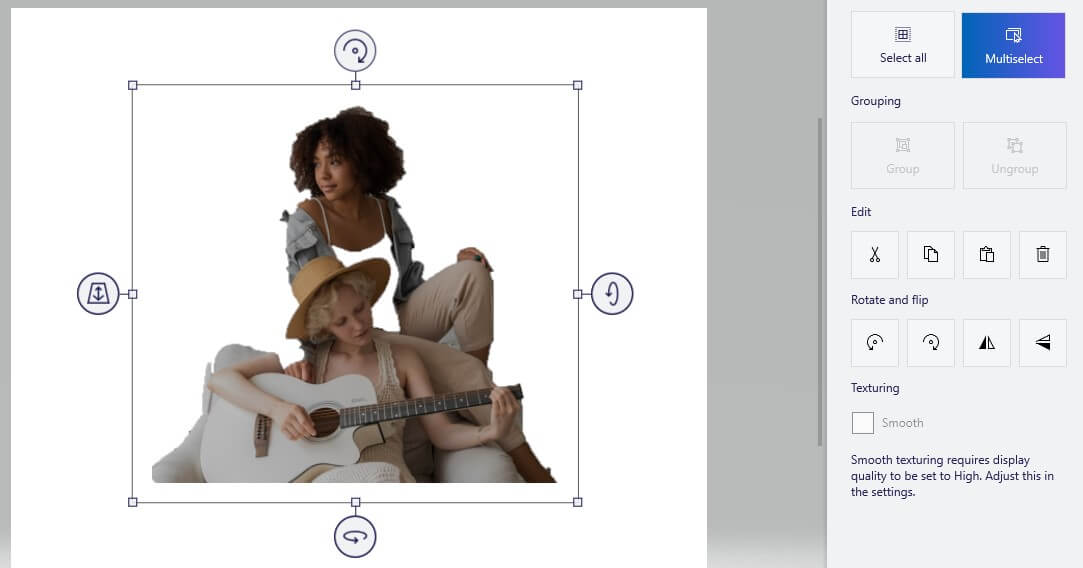
Now your image's background is removed, you can save the image on you local explore.
Pros
It is easily accessible, as you do not have to take any extra steps to get the software
It does not require any internet connection, as it is fully offline
The tools available for the removal of background is helpful
Cons
There is no automatic method of selecting the parts you want to remove
It takes some practice before processed images look perfect
It is only available for Windows 10 users
The interface is a bit complex
Preview
On Mac computers, the built-in tool useful for removing the white background from PNG is Preview. To get started:
Detailed steps on how to remove white background from png with Preview
Launch your Finder and locate the image you want to remove its background. Right-click on the image, hover on Open With and select Preview.
Step 1
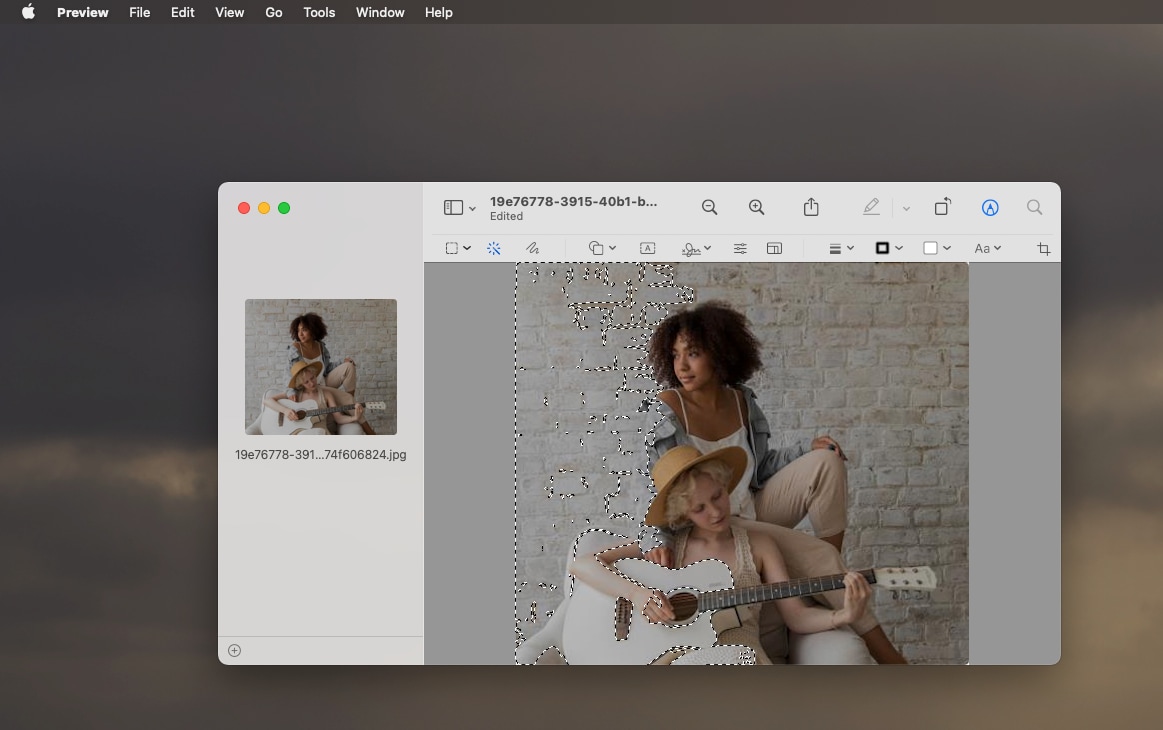
Once the program launches, click Markup on the toolbar. Click the Selection Tools drop-down and pick Smart Lasso on the left side. Start tracing your image around the parts where you want to keep. Be very careful not to exclude some parts of your image accidentally. Once you're done, you should see your selection.
Step 2
Click on edit, and then select Invert Selection. You can then tap your delete key to delete the background.
Step 3
Finally, you can now save the image to your storage.
Pros
The editing tools for background removal is self-explanatory
You can resize and crop the image after you've removed the background
It does not require any internet connection, as it is fully offline.
Cons
There is no automatic method of selecting the parts you want to remove
There is a learning curve for new beginners.
It is only available for Mac OS users.
The interface is a bit complex.
Part 2. Remove the White from Image Using Professional Remover
While it is very convenient to launch the preloaded editors and carry out the task, there are, however, some professional tools those editors and designers use, which are quite useful for removing the white background from logos and images. These tools ensure that your end product is not only professional-looking but is done with minimum stress to the user. Some of these tools are discussed below.
UniConverter
this is an AI-based bulk background remover. Essentially, it automatically removes the background for you, and it also can process more than one image at once. To use UniConverter to delete the white background, the following steps should be followed;
Detailed steps on how to get rid of white background with Uniconverter
Step 1
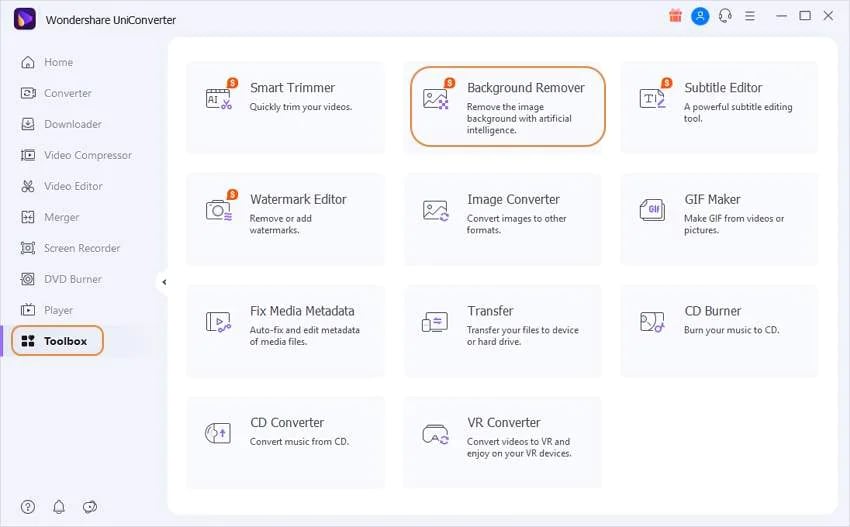
Get the software from their website (Windows and Mac) if you do not have it already, install it on your computer. Once the installation process is complete, launch the program.Go to the Toolbox section and choose Background Remover.
Step 2
Upload your images by clicking the Add Files icon. Check the Select All box if you have added more than one image to the program. Then click on the Start button.
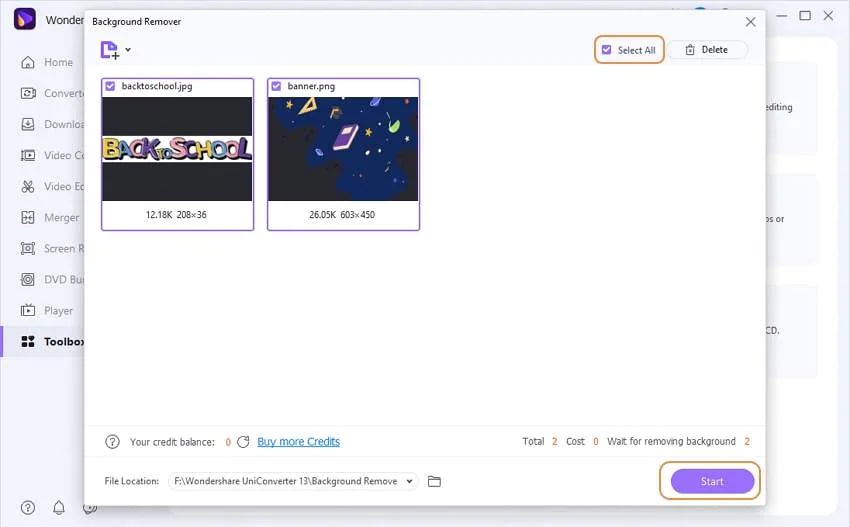
Step 3
Once done, click on the Edit icon on the images to do more editing on Images's background. Then click Export to save images
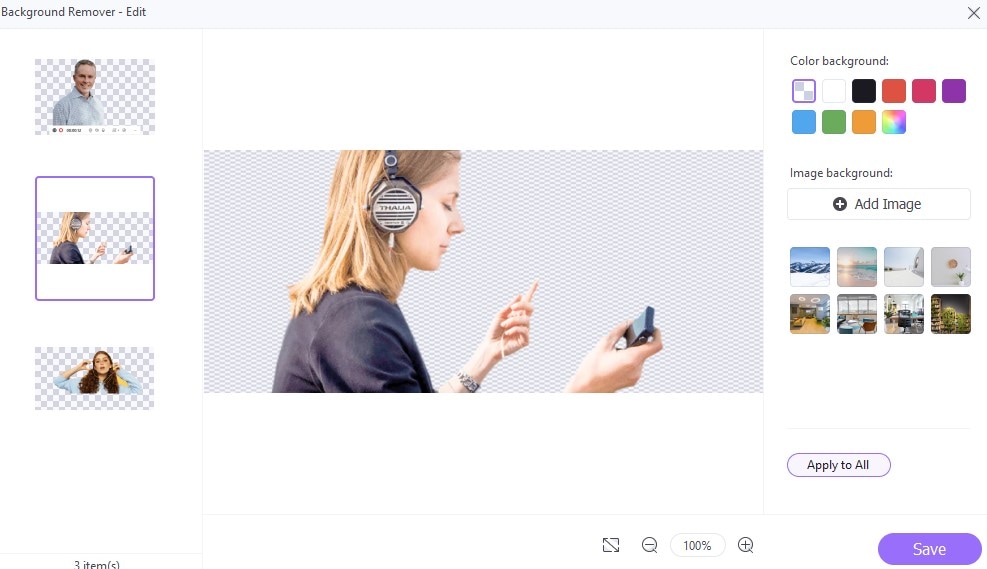
Pros
It has a simple interface.
There is the ability to remove backgrounds automatically.
It also can process more than one image at a time.
Cons
It is not a free tool, and you have to pay to use the app after your first ten pictures.
The image usually lose its quality after removing the background

Wondershare uniconverter 13 - Best Video Converter for Mac/Windows
5,481,435 people have downloaded it.
uniconverter supports 1000+ formats and handles 90X faster conversion, ensuring that high quality is delivered at all times.
You can add multiple files since the program does batch conversion of files.
The GUP acceleration can help you download online videos at high speed.
You can use the editing suite to remove video background, edit watermark and subtitles, and auto-trim videos.
This software facilitates file transfer to devices like Android and iPhone among others once the conversion is complete.
uniconverter is also capable of handling video compression hence ensures you acquire the video sizes you desire.
Adobe Photoshop
Another professional tool widely used everywhere is Adobe Photoshop. It is an image editor/graphic design tool produced by Adobe, a company focused on producing tools for editing documents and files and creative apps. To use Photoshop to remove the white background, follow the steps below;
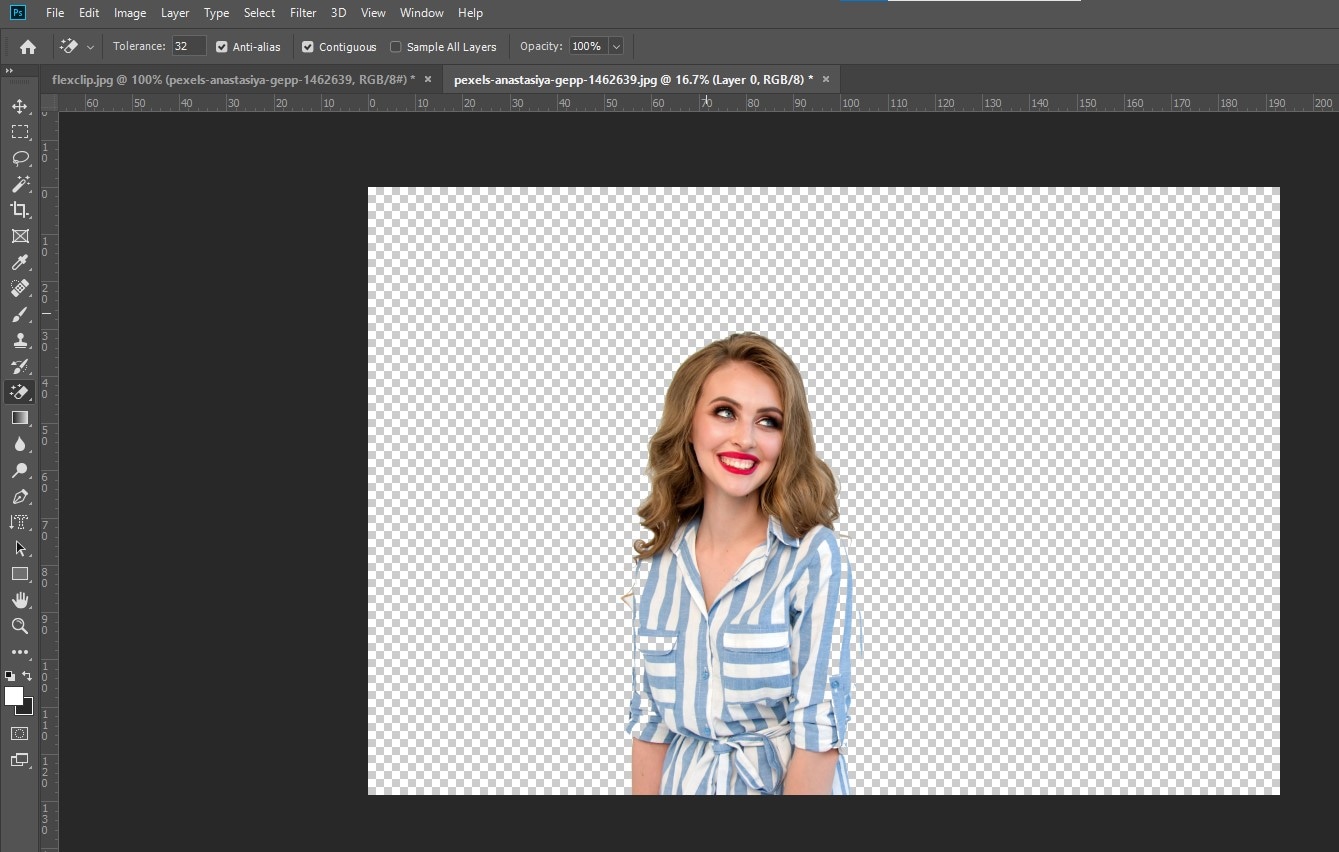
Detailed steps on how to remove white background photoshop with Adobe
Step 1
Open your image with Photoshop. Go to the Layers Panel and select Image Layer. If it is locked, click on the lock icon to unlock it. If it is unlocked already, do nothing.
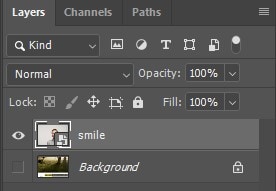
Step 2
Next, go up to Background eraser tool on the left side and right-click on it to get the drop-down. Select Magic Eraser Tool in the drop-down. Then click on the photo to erase background.
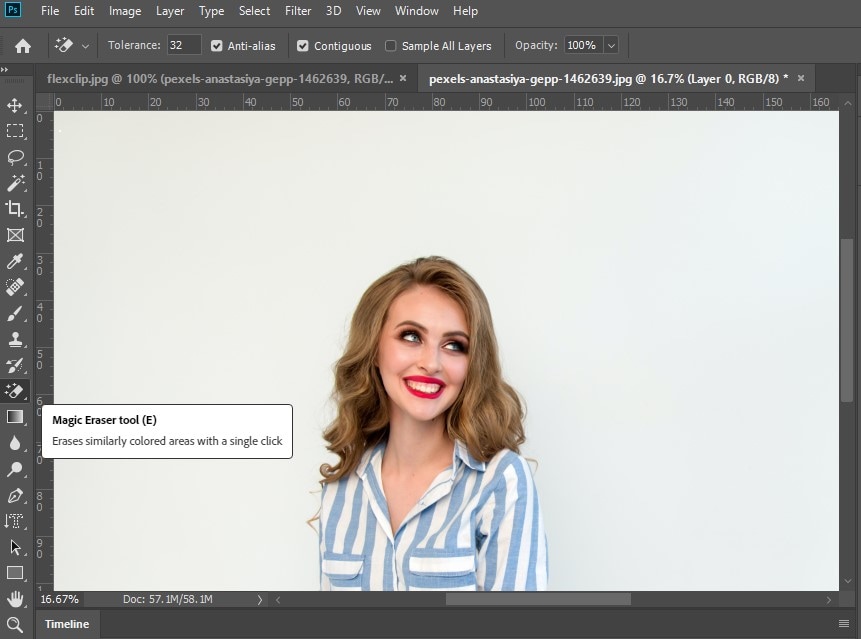
Step 3
Now the background is removed automatically, now you can save the image or continue editing it.
Pros
Adobe Photoshop supports almost all image formats
It is available on all platforms.
It is relatively easy to use, as background removal is immediate and automatic
Cons
This function is not available in versions older than Photoshop CC 2020.
It has a learning curve for beginners.
Leawo Photo BG Remover
A professional tool most people are unaware of, but can also help delete white background is Leawo Photo BG Remover. It is system software that can automatically remove background or manually for more precise adjustments. To use Leawo Photo BG Remover, do the following;
Detailed steps on how to remove white-out background of photo with Leawo Photo
Step 1
Download the software from their website and install it on your computer. Launch Leawo Photoins and enter Leawo Photo BG Remover module.
Step 2
Click on Add Photo or Add Photo Folder to load the image or images you wish to delete their background. By default, the tool automatically removes the background from your image after you load them.

Step 3
Click on Output in the bottom right corner to enter the Output settings panel, where you can then save the picture(s) with their background already removed for you.
Step 4
However, if you're not satisfied with the result, you can go to Settings and select the Calculate option to recalculate the removal of the background. It will then remove the background again with some differences. You can also double-click each image for more precise adjustments.
Pros
It is great for removing the background of bulk pictures
There is no size limit.
It also supports manual adjustments to removing the background of images.
Cons
There is the presence of a watermark on your result if you're using the free version. You have to subscribe to get full access to the tool, including any watermark omission.
There is no preview option on Leawo.
For Win 7 or later (64-bit)
For macOS 10.12 or later
Part 3. Remove White Background from PNGs Utilizing Online Tools
Apart from the professional tools available for background removal,, which we have discussed above, we also have some online tools that can help us remove the white background from logos and images. These websites offer services such as removing white background for free, processing multiple photos at once, and in some cases, tools to continue editing your image.
Fotor
One of such online tools is Fotor, which is an online automatic photo background remover. To use the tool, follow the step below to delete white background.
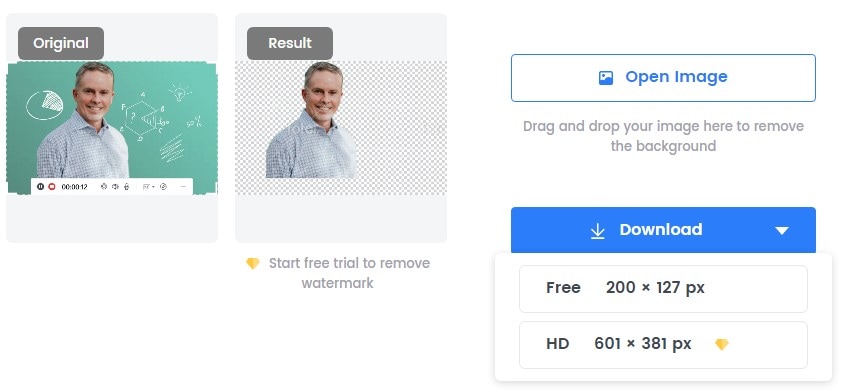
Detailed steps on how to remove white-out background with Fotor
Open Fotor's website to access the background remover.
Step 1: Click on Open Image. Select the image you want to remove its background and click on the Background Remover button to edit the background.
Step 2: In a few seconds, Fotor will remove the background from your image automatically, and a preview of the edited image will be shown.
Step 3: Once you're done, click on Download at the top of the toolbar to download the edited image in PNG format with a transparent background. JPG or PDF format is also available as an option to save the file.
Pros
It is very convenient to use.
It is very simple to use.
It is easily accessible.
Cons
The edited image is covered with a watermark that mostly renders the image useless if you're using the free trial.
It does not allow for further adjustments to the image.
Slazzer
Another online tool that is great for removing the white background photo editor/ images is Slazzer. To use Slazzer, make sure you follow the detailed steps highlighted below:
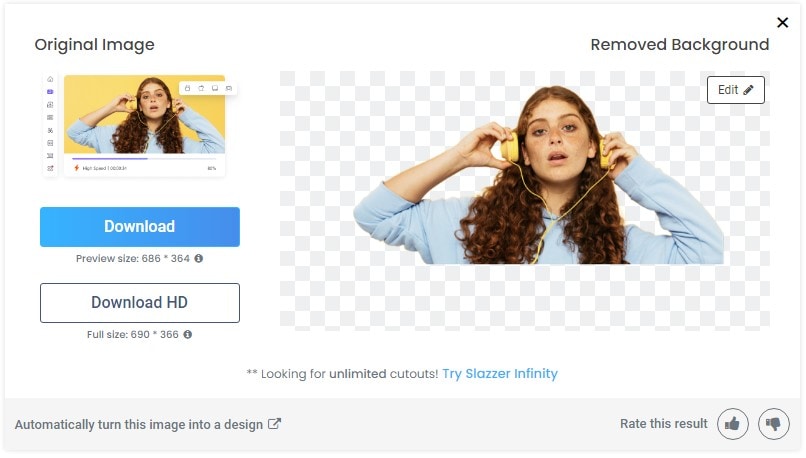
Detailed steps on how to remove white background free with Slazzer
Step 1: Open the website, click on Upload Image and select the image you want to remove its background.
Step 2: Once the image is uploaded, the tool will automatically remove the background from the image.
Step 3: You will have the option of downloading the Preview, or the main image. You have to sign up on the website to download the main image.
Pros
It has a simple interface
It is free of watermarks.
You can download the images once you sign up for free on the website.
Cons
Downloading full images up to 25-megapixel cost credits, which can be purchased on the website.
FocoClipping
this is also an online tool that can be used to remove white background from the image. It supports cutting out the background of images containing more than one person.

Detailed steps on how to delete white background with FocoClipping
Step 1: Load the website, Click on Upload Image and select the image you want. Then click Open
Step 2: The website will have automatically removed the image's background. To make any further adjustments to the image, you can then use the Manual Remove button available at the top. It allows you to erase unneeded parts, define and refine the edges, etc.
Step 3: Once you are satisfied with the results, you can download it. Click on the Download button at the top right corner of your window. You will be given the option of downloading the image in png or jpg format.
Pros
It allows bulk removal of images.
It supports cutting out the background of images containing more than one person.
It has a simple interface.
Cons
The output format always comes with watermark
It does not deliver a better result when the size of the image is large
It has file limitations i.e. You can only process the image not less than 12MB in size
Conclusion
Now that some of the popular and not so popular tools for getting rid of the white background from photos have been discussed in detail, the next thing is to try them out by yourself. Whether you are a graphics designer, a photo editor, or some average jock looking to remove background from your image, you will surely agree that images without background are very useful, as they can be used again and again. It is important to discover the tool that works well for you. All the tools are not the same, and you will have to make a decision depending on your need.
For Win 7 or later (64-bit)
For macOS 10.12 or later

