by Brian Fisher • • Proven solutions
The WinX UniConverter Deluxe is your video conversion software with all of the frills. The software’s primary focus is to provide you with HD quality video for every format. This means you can convert video from an HDTV/HD-camcorder, Blu-ray video, MPEG, 1080p multi-track HD videos, 4K UHD videos, and many other types of videos. And, the converting speed is enhanced to process 16x faster than your regular video conversion. There is also the variety of device presets for your finished product, like Apple TV (4), Chromecast, iPhone 7/7 Plus/SE/6s, and Android to name a few devices.
- Part 1. Step-by-step Guide to Convert Videos using WinX UniConverter Deluxe
- Part 2. Recommend the Best WinX UniConverter Deluxe Alternative
Part 1. Step-by-step Guide to Convert Videos using WinX UniConverter Deluxe
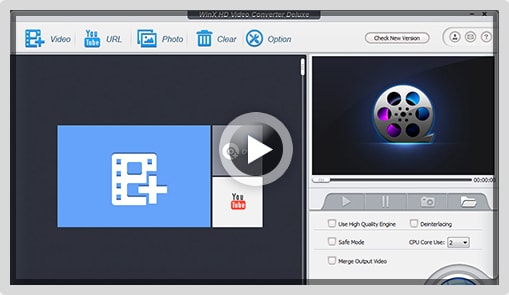
Step 1: Add Files. Once the WinX UniConverter Deluxe program is opened, you can select to add any videos that you want to convert by select the "+Video" option, along the top of the screen. You also have the option of simply dragging and dropping the file, from its folder onto the screen of the program.
Step 2: Select Output. From this point, you can specify your video’s output (where do you plan to use the video). Once you select the device that will be playing the video, you will have another list of the models for that device. This means that if you were converting for an iPhone device, you may have an iPhone 7 or an iPhone 6s.
Step 3: Destination Folder. At the bottom of the screen, you will see the option to select where you want your file to be saved, after it has been converted.
Step 4: Convert. After you have selected the destination, there is a large "RUN" button in the bottom, right corner of the program. You select this button to start the conversion. And, you have the option of choosing to shut down the computer or having the destination folder opened, after the conversion is complete.
Another great option is having the ability to merge multiple videos into one video. When you have multiple videos that will be converted, there is an option on the right side to "Merge Output Video" before you select to "RUN" the conversion.

Part 2. Best WinX UniConverter Deluxe Alternative - UniConverter
A powerful alternative to WinX UniConverter Deluxe is the popular UniConverter. This software takes on the same abilities and goes even further than converting your personal video and audio. You can also take your collection of DVDs and convert them into various formats, like FLV, AVI, MP4, and MOV. At the same time, they are constantly adding to the various formats that you can convert to. There are currently more than 150 different formats that you can choose from, and you never have pay a fee for upgrading your software with the latest formats. And, you don’t have to sacrifice quality for the many different formats available. This means that you maintain your HD quality, when the conversion is done. And, you can expect some of the fastest processing times, because iSkysoft utilizes Intel and NVIDIA GPU hardware acceleration.
User Guide on How to Convert Videos with WinX UniConverter Deluxe Alternative
Step 1: Add Your Files
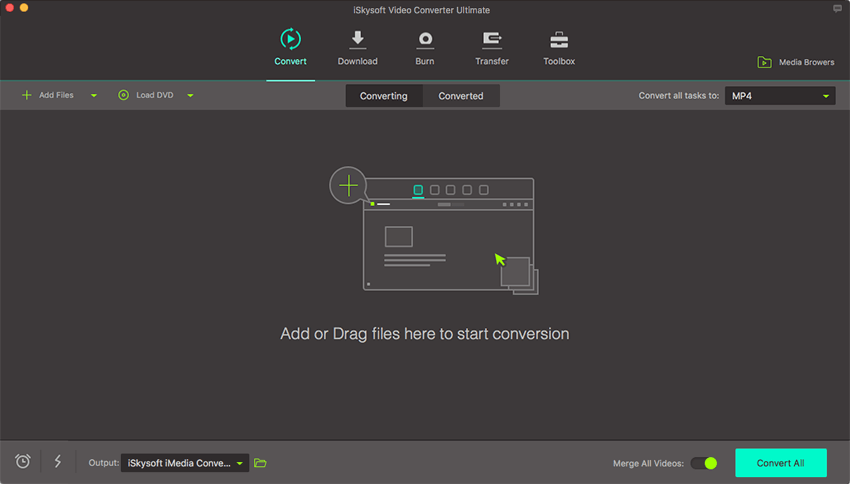
After you have launched the program, you will see the option to "Convert", "Burn", and "Download" at the top of the screen. Like WinX UniConverter Deluxe, you can drag your videos onto the program to add them for conversion. You also have the option of searching for your file and selecting it. iSkysoft takes it a step further by giving you an ability to drag an entire folder. If you have a number of videos you want to convert, by dragging the entire folder, all of the videos will appear on the program to be converted. This eliminates grabbing each file, individually.

Step 2: Select the Format
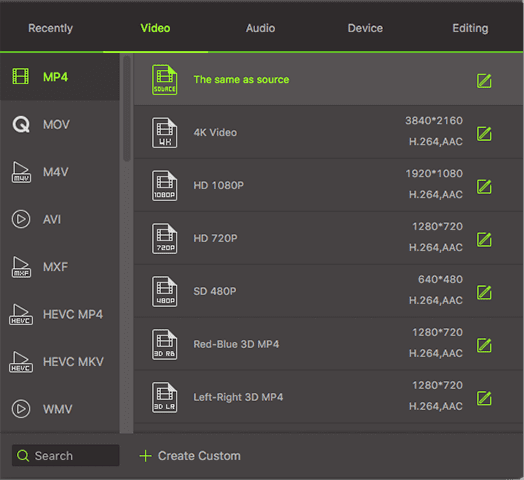
You select the "Format" icon, and there will be a list of different icons that appear for the different format options that you can choose from. One of those options having the audio extracted from your video into various formats, such as WAV, MP3, and AAC. Afterwards, there is a Gear button that allows you to change the settings of the format.

Step 3: Convert
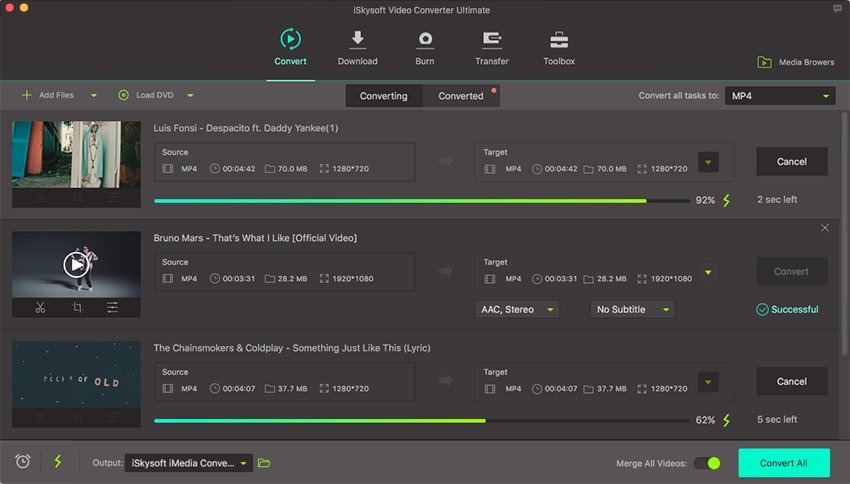
After you have selected your format and made any necessary changes, you can now select to convert the file(s). An option will be available to select the output for your file, which is the folder after it is converted. Once you have the location, you select the "Convert" button to begin the process. As the file is being converted, the status is next to it to show you how much time remains on your conversion. A message will appear to alert you when the conversion has completed. You will also have the option of opening the folder that the file has been saved to.

By having the ability to convert videos from your camera, mobile phone, and even your favorite DVDs, this powerful software is an all-in-one for all your needs.

Brian Fisher
staff Editor