by Brian Fisher • • Proven solutions
PavTube Video Converter is the best DVR & TiVo recording converter. With this converter, users can convert any HD videos into other portable devices or HD Media supported format. It supports many devices such as Amazon Kindle Fire, Samsung Galaxy, Apple TV, iPhone, Asus, Nook Tablets and more devices. It is a suitable tool for batch processing of any video format. You can also add .srt, .ssa & .ass subtitles in your video files. Capture your favorite scenes from any movie or video. It provides good online support and provides great results. It is a perfect tool for AMD GPU encoding easily. It can convert any video with rapid speed and least quality loss issues.
- Part 1. Step-by-Step Guide to Convert Videos using Pavtube Video Converter
- Part 2. Recommend the Best Pavtube Video Converter Alternative
Part 1. Step-by-Step User Guide to Convert Videos using Pavtube Video Converter
PavTube is a great converter which supports wide array of Video sources, Input files, devices and many more. It has many Editing software’s and DVD burning tools for flexible conversions. Check here to get detailed guide on how to convert videos with Pavtube Video Converter.
Step 1: Add any Video in the Program. Install PavTube Video Converter and open the program. To add videos, click "File" menu at the top of the main interface. Under that, click "Add Video/Audio" or choose "Add from Folder". Choose the video which has to be converted.
Step 2: Select Output Format/Device. At the bottom of the main interface, select "Format" and choose any output format from the drop-down menu. It has a huge resource of output formats such as Custom videos, common videos, Common Audio, Fina Cut Pro, HLS Streaming, HD/3D Video and many more.
Step 3: Edit the Video File. Select any editing tool from the main interface to open the Video Editor. It will open a new window for more editing tools. With its help, you can play, preview, add effects trim, add watermark, crop, insert subtitles, adjust volume or reset settings as per your requirement.
Step 4: Start Conversion. Hit the "Convert" button to start conversion. When the conversion is done, click the output folder to check the converted file.

Part 2. Recommend the Best Pavtube Video Converter Alternative
UniConverter is an ultimate video converting tool which can convert videos, audio, download videos from online, edit & preview, burn or backup DVD in an efficient manner. It is the fastest media converter in the market. That’s why it is considered as the best alternative for PavTube Video converter, as iMedia supports more than 150 media formats along with new format upgrades with any new entry. Moreover, it is popular for its best customer support as it provides one to one support for any kind of software related issues.
UniConverter - Video Converter
Get the Best Alternative to Pavtube Video Converter:
- Built-In Features: Video Converter, Media Browser, Video Editor, DVD Kit & Online Video Downloader.
- Best Quality Output: Forget about video quality loss with UniConverter as it always converts with original video quality.
- Create or Burn to DVD: Add Videos & burn to DVD Folder/DVD DISC/DVD ISO File or DVD IFO File.
- Download from 1,000+ Sites: VEVO, Dailymotion, YouTube, Hulu, Vimeo & more.
- Extensive Device Support: iPhone, XBOX, PSP, OCULUS, SAMSUNG, GEAR VR, iPad, Apple TV, LG, HTC and more.
- Several Video Editing Features: Crop, Merge Videos, Add Metadata, Rotate, Trim or combine videos with ease.
User Guide to Convert Videos with Pavtube Video Converter Alternative
Step 1: Open the program
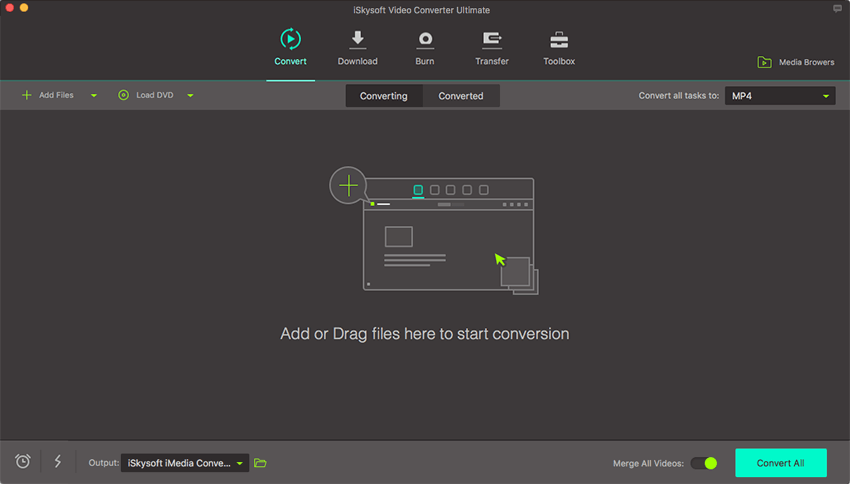
Open UniConverter to convert videos from your PC. In the main interface, there are 3 tabs for converting videos, downloading videos or burn videos to DVD. Choose the "Convert" option to convert your favorite video.
Start converting by using the drag & drop method in the program. Alternatively, open the "File" menu and tap "Load Media Files" option. After that, you can see a list of video files which were added for conversion.

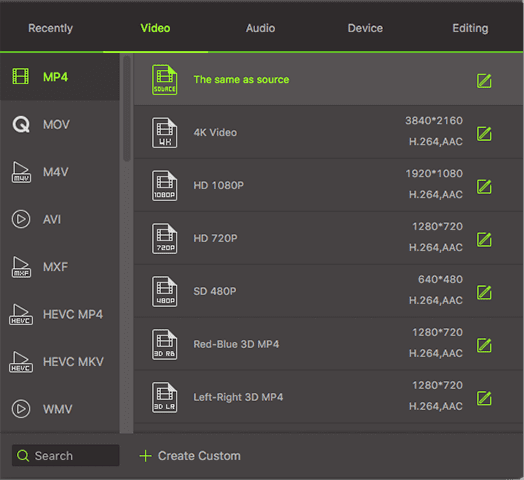
Step 2: Click & Choose from Video Category
Choose any output format from it. It supports six categories which are Video formats, Device formats, Audio formats & more. Choose Video type to choose any video file format. You can also share or upload your video online after conversion through the Web-Sharing option.

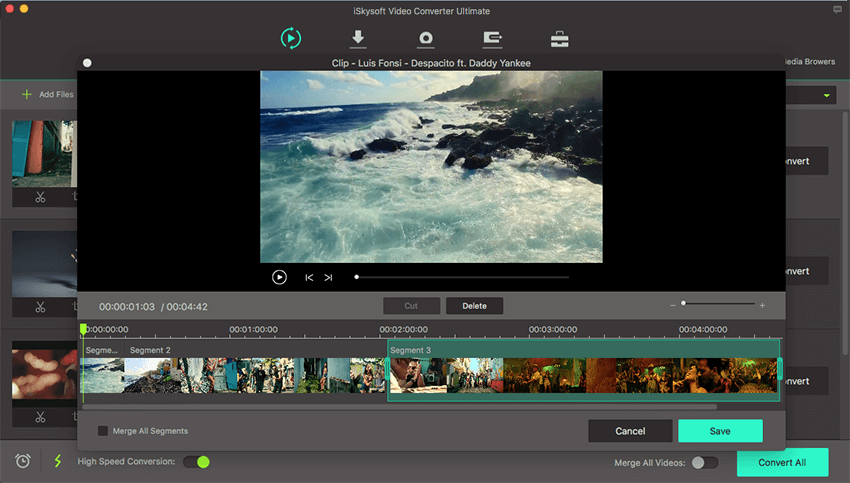
Step 3: Editing (Optional)
With its video editing tools, you can convert any video into amazing movie. Choose Editing option, to use any of its customization tools such as bit rate, resolution, codecs, frame rate, trim, crop and many more. Moreover, you can also create custom presets.

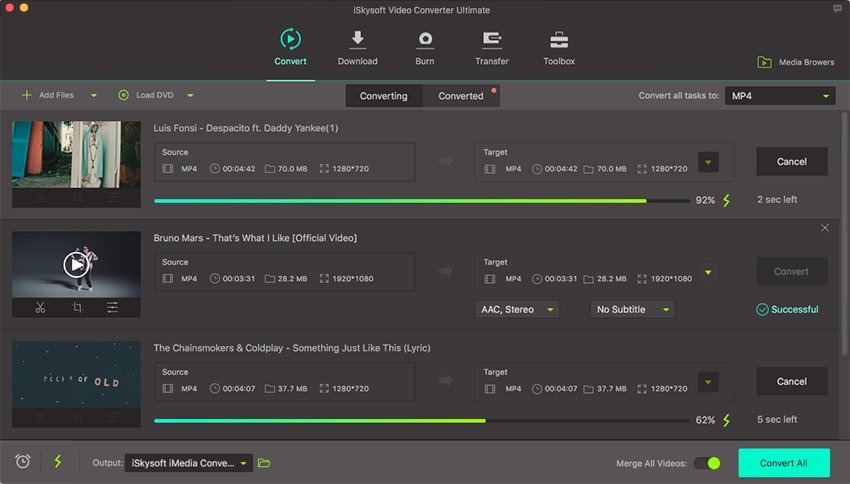
Step 4: Convert
Modify the destination file by checking the output folder at the bottom of the interface. If not, then default folder will be automatically used for saving the converted file format. Finally, hit "Convert" to complete the conversion process. You can view its progress in its status bar. When the video is converted, user will receive a prompt message & they can open the folder to view the converted media file format.


Brian Fisher
staff Editor