by Brian Fisher • • Proven solutions
Movavi is an ideal program for fast conversions and great output quality. It is one of the video converters in the market, which covers all the device lists, presets & media formats. It provides flawless conversions & amazing output quality. Its most renowned feature is that it supports up to 100 profile/devices such as gaming systems, televisions, smartphones, set-top boxes, tablets & so on. You directly convert any media type to any specific device. You can convert any video with one single click. It can also convert a lengthy video within seconds. It is an excellent video converter, as it is very easy-to-use with no quality loss issues.
- Part 1. Step-by-Step User Guide to Convert Videos using Movavi Video Converter
- Part 2. Recommend the Best Movavi Video Converter Alternative
Part 1. Step-by-Step User Guide to Convert Videos using Movavi Video Converter
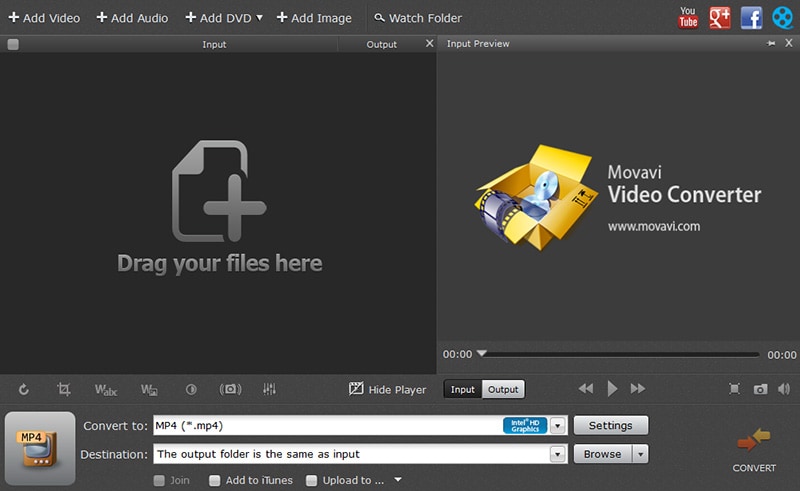
In terms of speed, customization functions & quality Movavi makes a great choice for video conversions. Apart from video conversions, users can also convert audio file formats. Here are some easy steps on how to convert videos with the help of Movavi Video Converter. First of all, please download the Movavi Video Converter in your Mac or Windows PC.
Step 1: Import Your Video Files. Launch Movavi Video Converter and import videos. Click "Add Media" option at the top of the interface. You can open videos in any format or resolution. Even HD Videos can be easily converted. It has wide range of input formats such as WebM, MOV, MP4, FLV, MTS, DivX, MPEG, SWF, AVI & many more.
Step 2: Choose Device or Output Format. Get started by choosing any preset, device or upload to any website. Choose exactly the file format which is needed. It supports all video, image & audio formats along with some codecs. What’s more, with just one click you can convert your videos into more than 200 mobile devices. Alternatively, users can also upload videos to video hosting websites or social networks with ease.
Step 3: Customize(Edit) your Video. Before conversion, you can modify you video and make it amazing by using its editing tools such as Stabilize/Enhance quality, Cut/Join, Crop/Rotate, Add Captions or Watermarks.
Step 4: Convert Videos within minutes. With its super-speedy conversion mode, you can convert videos with original quality. Click "Folder" icon to choose the file where the converted media file has to be saved. Click "Convert" to start conversion.
Part 2. Recommend the Best Movavi Video Converter Alternative
Movavi Video Converter lacks some minor features which has kept it behind the race. It has omitted some functions which are necessary for daily video converter users. Features like Burn Video to DVD and Download videos from social websites like Vimeo, Facebook or YouTube. That’s why UniConverter is in the top of the race, as it consists of all the necessary & special features for making your video amazing.
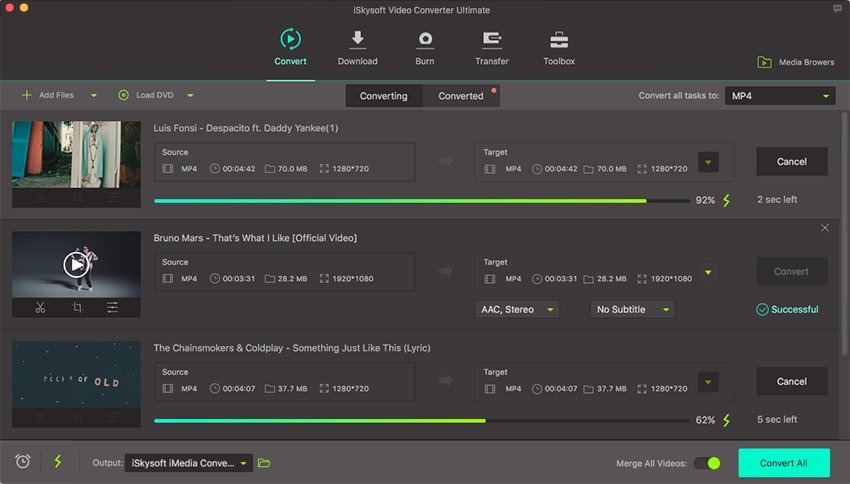
UniConverter - Video Converter
Get the Best Alternative to Movavi Video Converter:
- Compact & Professional Tool: Convert, Playback, Edit, Burn, Download or Upload Videos.
- UniConverter is very easy-to-use, 90X super-speedy & faster conversions with intact quality. Its Intel & GPU acceleration technology boosts its conversion speed.
- Easily Convert Videos: Load, Edit, Choose Output format & Convert.
- DVD Burn or Copy: Copy/Backup DVD files in a Video or Burn any number of videos to DVD.
- Multiple Conversions made easy: Convert Multiple Videos simultaneously.
- Supports All Mac & Windows Versions: macOS 10.12 Sierra, 10.11 El Capitan, 10.10 Yosemite, 10.9 Mavericks, 10.8 Mountain Lion, 10.7 Lion and Windows 10/8/7/XP/Vista.
User Guide to Convert Videos with Movavi Video Converter Alternative
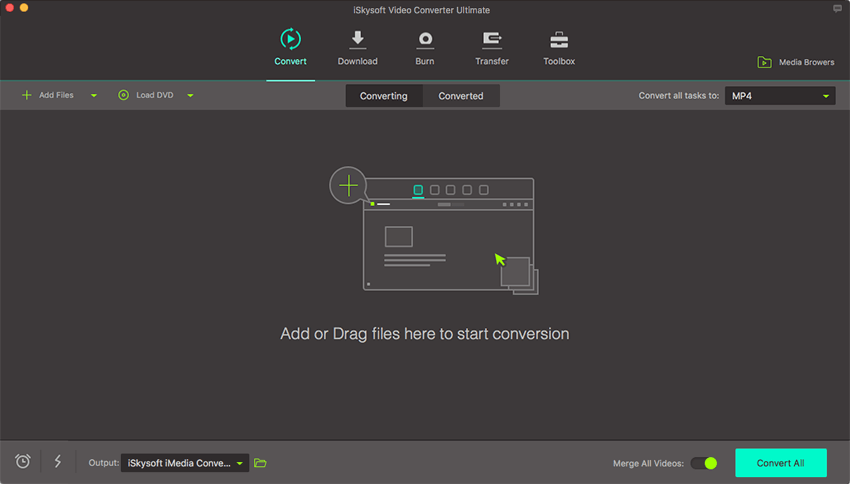
Step 1: Open Video Files
Add Video Files in any format in the program & start converting. You cn also process Audio, Image or DVD files for Conversions. Use the "Load Media Files" from "File" menu or Drag & drop feature to import video files easily.
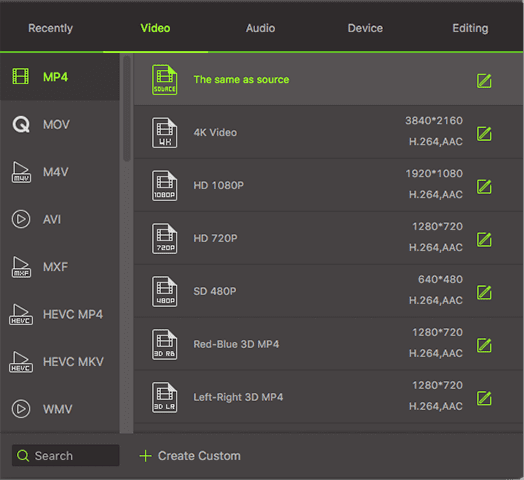
Step 2: Select Any Output Format/Device
Best Output Quality is guaranteed if you use UniConverter. Choose the right output format which is desired. You can also choose image formats, audio formats or change codecs as per your requirement. Also, be sure to be amazed with its wide range of handy device lists for your convenience.
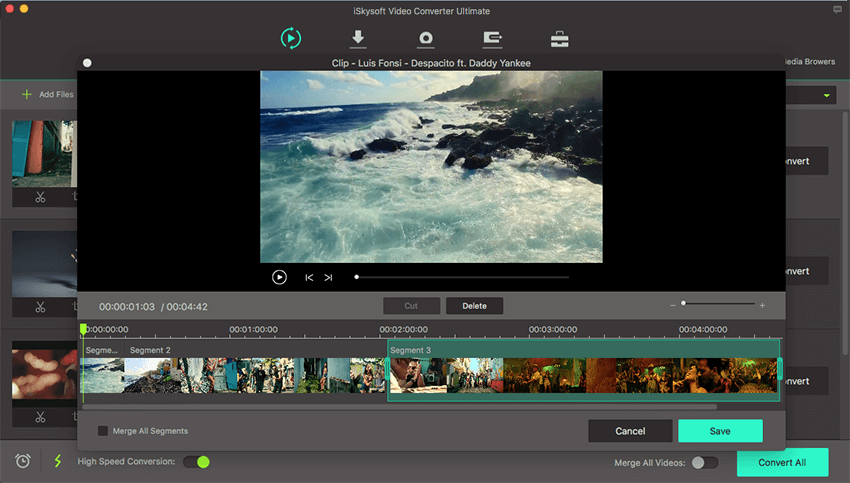
Step 3: Modify Output Settings
Edit your video if you want to enhance or improvise your video in any manner. It supports all the essential features along with many other functions. Its editing features include: Crop, Trim, Rotate, Cut, Enhance Quality, Change Codecs, Bit rate, Sample rate, Add Watermark or Subtitles & many more.
Step 4: Convert Videos in a Jiffy
Be sure to choose the output folder so that the converted file is saved in your PC. Click the "Convert" button to convert the video. You will get a prompt message when it is complete. With UniConverter, you will be surely surprised with its super-speedy conversions. It can convert videos in an efficient manner by keeping the original quality of the files effectively.

Brian Fisher
staff Editor