by Brian Fisher • • Proven solutions
Miro Video Converter is a very simple and convenient tool to convert any type of media file into MP3, MP4, Ogg Theora, WMV and other media formats. It also supports many devices, where you can convert directly to any specific device like iPhone, Smartphone, Theora & so on. It’s a simple program for quick conversion of videos to any of your devices. You can control file size or aspect ratio. Its best for WebM conversions as it supports good quality output file with HD or SD output formats. What’s more, users can also create Thumbnails. Its best suited for FFmpeg conversions as it is identical to other UI converters. Miro Video Converter supports macOS 10.6 or later.
- Part 1. Step-by-Step User Guide to Convert Videos By using Miro Video Converter
- Part 2. Recommend the Best Miro Video Converter Alternative
Part 1. Step-by-Step User Guide to Convert Videos By using Miro Video Converter
Follow these simple steps to convert videos with the help of Miro Video Converter.
Step 1: Open Video Converter & Choose Videos. Drag & drop Videos or Choose files from your Mac to start conversion. Miro supports many device categories and media file formats for quick conversions. You can convert to WebMD SD, Apple devices, Android or other output format.
Step 2: Edit Videos in Miro. Even though it has limited editing tools, it supports basic functions like "Create Thumbnails", change custom size, adjust aspect ratio & so on. You can also choose "Clear and Start Over" option to undo any settings & start converting videos from the beginning.
Step 3: Choose Output format & Convert. You can convert videos to any video, audio or same media format with ease. If you want to choose video output format, you can choose from WebM HD, MP4, WebM SD & Ogg Theora. Choose and select "Convert" to start conversion. You video will be converted within few minutes.
Miro Video Converter has many drawbacks such as limited video output formats, device support, lack of editing tools, merge, split, download from online & many more. This tool seems like a quick converter.

Part 2. Recommend the Best Miro Video Converter Alternative
Miro Video Converter is not an ideal tool if you need an all-in-one media solution for converting videos along with many other functions. Instead of going for Miro Video converter, you can choose UniConverter. It’s an award-winning product, specially reviewed by software product experts and users.
UniConverter - Video Converter
Get the Best Alternative to Miro Video Converter:
- This program is not only an all-in-one video converter, but it consists of wide array of media formats, devices, optimized presets, essential editing tools, advanced settings and many more.
- It is a perfect video converter, which supports super-fast video conversions.
- Its highlighting function, is the DVD-Kit which consists of many functions such as Convert, DVD backup, Burn DVD, Copy DVD, Create Video & so on.
- You can create an amazing video with its functions such as add watermark, adjust volume, add effects, adjust saturation and adjust brightness/contrast.
- It provides original output quality unless the user wants to change encode settings or compress audio files.
- Edit & Convert to Devices: Apple devices, VR devices, PSP, HTC, Android & so on.
- Supports All Mac & Windows Versions: macOS 10.12 Sierra, 10.11 El Capitan, 10.10 Yosemite, 10.9 Mavericks, 10.8 Mountain Lion, 10.7 Lion and Windows 10/8/7/XP/Vista.
Step-By-Step User Guide to Convert Videos with Miro Video Converter Alternative
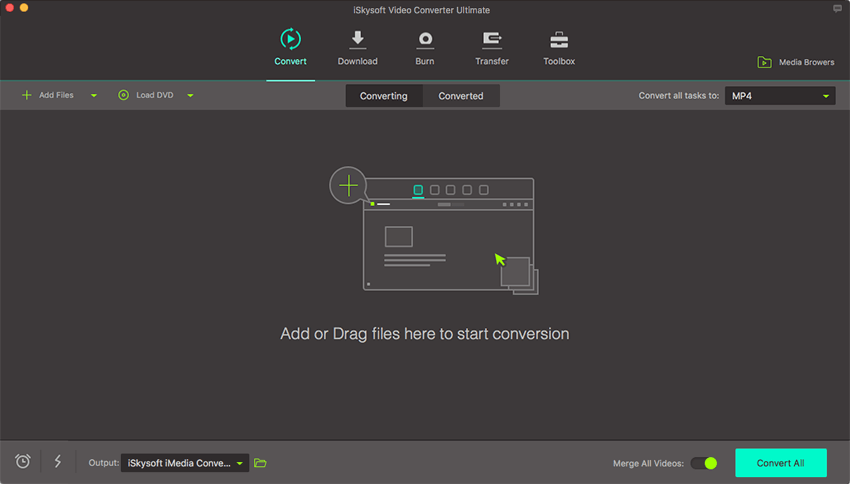
Step 1: Open Video Converter & Import Media files
Install the UniConverter and double-click the program icon to open it. You will see 3 functions on top of the main interface: Convert, Download & Burn. Choose "Convert" to start video conversions. First of all, you need to import media files for video conversions. You can start it by using the drag-and-drop feature or you can add media files in the application.
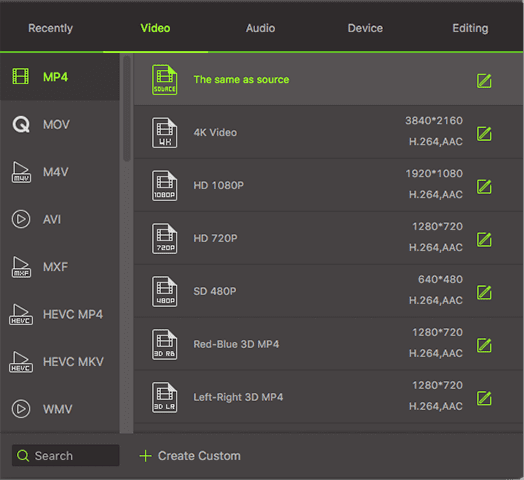
Step 2: Select Output Video Format
UniConverter supports wide range of media output formats such as MOV, MP3, AVI, 4K MOV, MP4, 3GP & so on. You can also choose other output formats such as Audio, HD, 3D or optimized presets to directly convert to your device supported formats. Choose your desired media format as per your requirement. You can also choose web sharing services from the list.
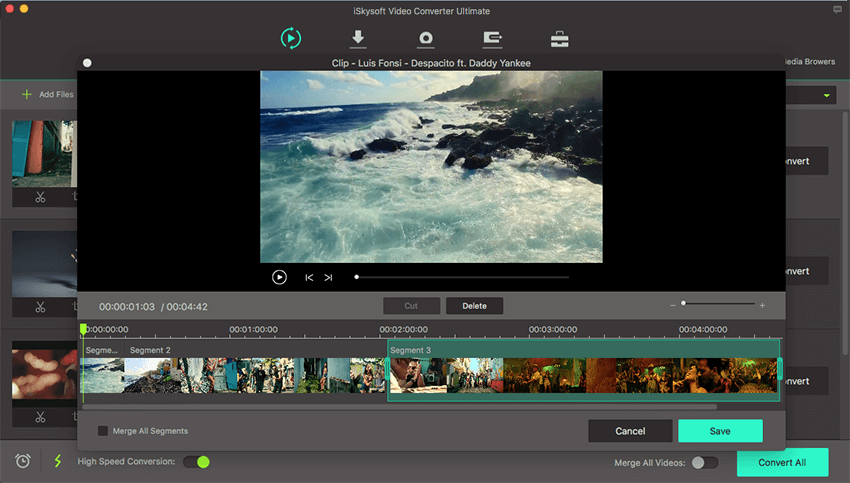
Step 3: Change Video Settings (Optional)
Users can also change media settings such as bit rate, resolution, Frame rate, Codec, Sample rate and so on. Customize your video or audio file with its in-built video editor.
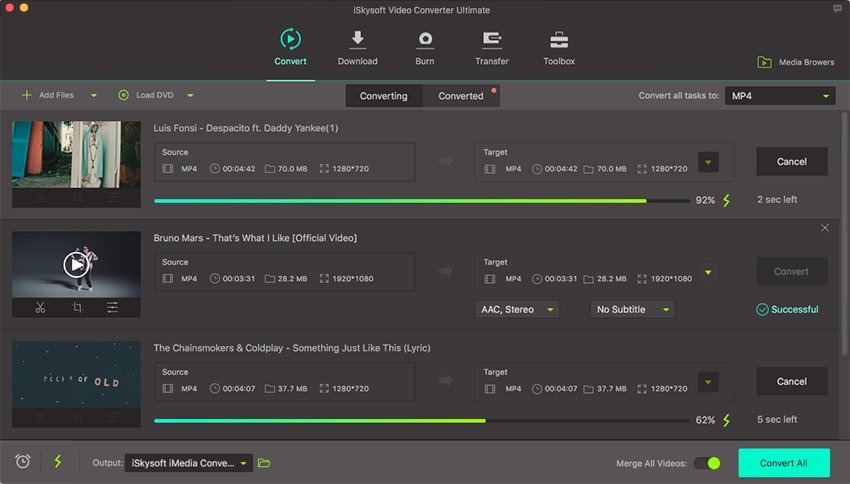
Step 4: Convert Video into target media format
Now, choose the output folder icon and select the file where you want the output file to be saved. When all the settings are complete, choose "Convert" to complete the task. You can keep a track of the conversion process in its progress bar. Rest assured, the video will surely get converted within minutes. You will receive a prompt message when the conversion is done.

Brian Fisher
staff Editor