by Brian Fisher • • Proven solutions
MacX Video Converter Pro is the Mac video converting tool. It’s a popular video converter as it supports more than 100 video and audio file formats. You can also convert with other popular video/audio formats such as AVI, 4K UHD, VOB, AVCHD, WMV, M2TS and many more. Users can easily play video or audio files in QuickTime, Final Cut Pro, iMovie or iTunes with ease. MacX has the ability to download any videos from online and convert to any device supported format such as PS4, Android devices, Apple devices, WP8 and more. It works efficiently as YouTube Video Converter and downloader. With its powerful Screen recorder, you can capture any screenshot with it.
- Part 1. Step-by-Step User Guide to Convert Videos using MacX Video Converter Pro
- Part 2. Recommend the Best MacX Video Converter Pro Alternative
Part 1. Step-by-Step User Guide to Convert Videos using MacX Video Converter Pro
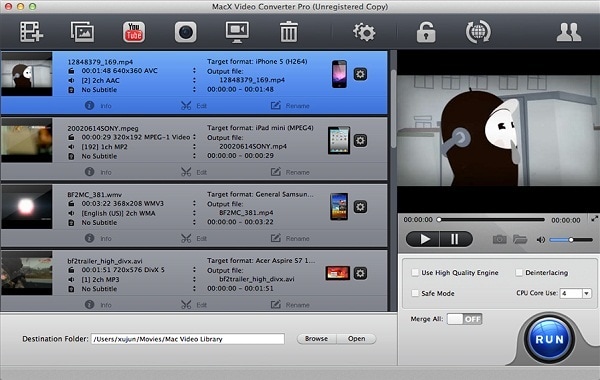
MacX Video Converter is a feature-rich video converter which has the ability to convert any type of video for playback in your macOS. It has extremely simple and intuitive interface. It supports speedy conversions with many unique functions too. Read the following user guide on how to convert any video with MacX Video Converter Pro.
Step 1: Import Video. Install MacX Video Converter Pro and run the program to start video conversion. To import the video file, click "Add Videos" to add one or more videos in a go. You can also drag video files in the program.
Users can also use "Photos", YouTube URL and other options. You can use its "Camera Video Recorder" while watching any video online and convert it to any device or upload it to your Facebook page. What’s more, create photo slideshow along with music for amazing experience.
Step 2: Select Output Video/Audio Format. Select File in the window, to choose the output video or audio format from the list. You can also choose an output profile such as iPad, Apple TV, iTunes, idvd, Final Cut Pro, iMovie, Air Playit Video or any other device and select "Done" to apply the setting.
Edit Settings: Use any of its editing tools such as Crop the video, Add Subtitle, clip any part of the video, Add Watermark, Merge videos, Record video, record screen, Adjust Parameter settings, Extract Picture, edit video file name, Video Recorder and many more options if needed.
Step 3: Choose Destination Folder & Click "Run". At the bottom of the MacX program, select & choose the destination folder to save the file after it gets converted.
Click "Run" to start conversion and wait for some time. You can also cancel the video conversion anytime.

Part 2. Recommend the Best MacX Video Converter Pro Alternative
UniConverter is available in two different platforms such as Windows and Mac. It has special optimized presets which can be used to directly convert movies, music files or videos in any manner.
UniConverter - Video Converter
Get the Best Alternative to MacX Video Converter Pro:
- This program supports 150+ output formats such as MP4, 3GP, M4V, FLV, WMA, WMV, AVI, TIF, MP3, MPG, OGG and many more.
- Distinct Video Editing Options: Add Trim Marker, Confirm Trimming, Crop, Cut, Add Subtitle, Add Watermark, Rotate etc.
- Download online videos from Vevo, Hulu, Vimeo, YouTube, Break and more.
- Convert or Burn DVD: You can easily convert DVD files, burn videos to DVD, or copy DVD files whenever you want.
- Compatible with Windows 10/8/7/XP/Vista and macOS 10.12 Sierra or earlier.
User Guide to Convert Videos with MacX Video Converter Pro Alternative
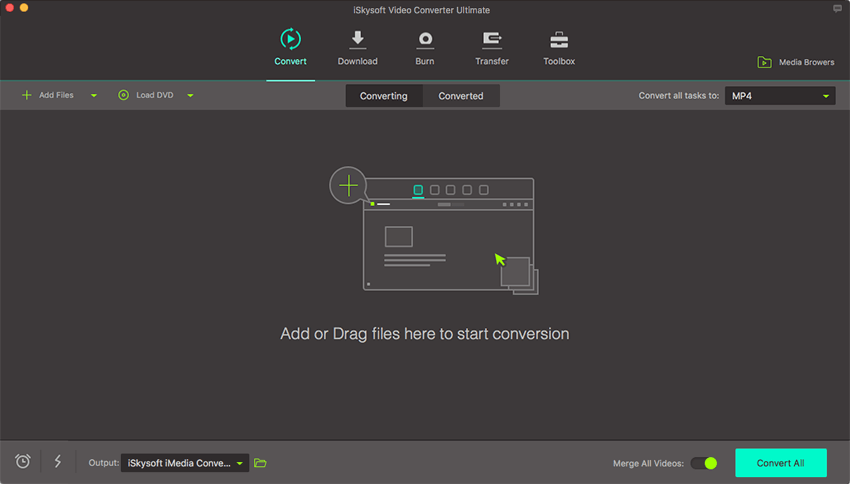
Step 1: Import Videos
Open the program, by double-clicking the software icon. It has 3 tabs on top of the main window: Convert/ Burn or Download. To convert, you have to choose the "Convert" icon. It has mainly 2 methods to add videos in the program. You can use videos from your PC or DVD. Use the Browse/Search videos option from the Media Browser, to open the video files. The easiest & simplest method is the drag & drop method where you just have to drag & drop the videos in the main interface of the program.

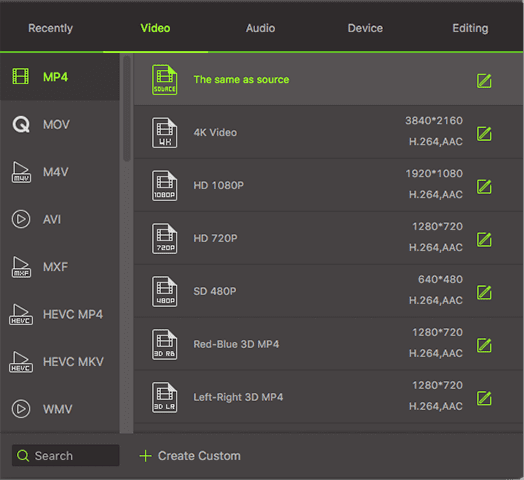
Step 2: Set Output Format
The output format supports more than 150 media formats. You can select from the "Video" or "Audio" category. Alternatively, you can choose "Device" category to directly convert videos into device supported format.

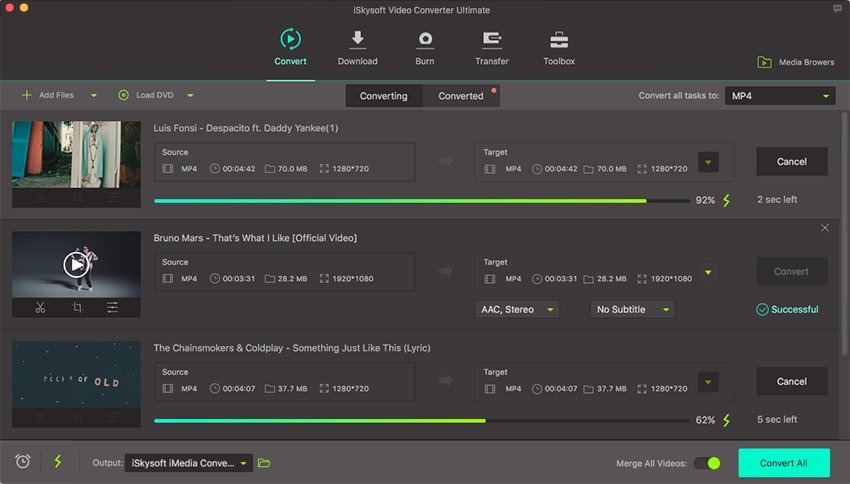
Step 3: Finish Conversion Process
Choose the output folder and select any output file. Now, tap the "Convert" button to complete the conversion process. When its complete, a prompt message will pop up. Click it, if you want to check the converted video file.


Brian Fisher
staff Editor