by Brian Fisher • • Proven solutions
AVC Any Video Converter is an all-in-one option for converting any type of video that you may have. Not only can you convert your personal videos, but you can also download videos from the popular YouTube and over 100 different sites. And, those videos can be downloaded in batches. You can convert the media from your CDs and DVDs into more than 200 different formats, which can be played on a number of different devices. Along with converting, you can burn the video onto your own personal DVDs to save and share your memories.
- Part 1. How to Convert Videos using AVC Any Video Converter
- Part 2. Recommend the Best AVC Any Video Converter Alternative
Part 1. How to Convert Videos using AVC Any Video Converter
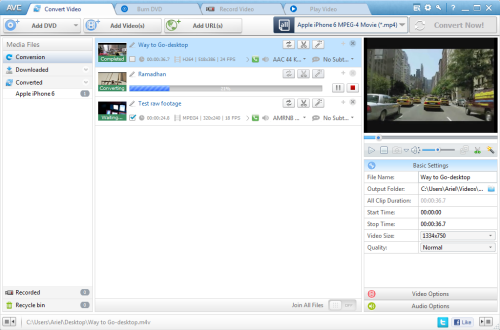
Step 1: Add the Files. After you have accessed the AVC Any Video Converter program, you will see and click the tab that says, “Add Video(s)”. This is where you can select your video or multiple videos to be converted. The next step is a drop-down list of video formats to choose from, along the right side of the program. This is the format that you want your video to be, when your file is converted. Once you have the file(s) that you want to convert, the next step is your option to edit your videos.
Step 2: Modify the Video. On the video file that you have uploaded to be converted, you will see a preview window of the video. Underneath the preview window, you can select “Video Option”. This will open a menu that allows you to change the Video Codec and modify the Video Bitrate and Frame Rate.
Step 3: Convert. Once the video has been uploaded and modified to your liking, the next step is to finish with the conversion. At the top of the program, you will see the tab that says, “Convert Now” that you select to begin the conversion process.

Part 2. Recommend the Best AVC Any Video Converter Alternative - UniConverter
One of the best choices, when it comes to selecting a program that is similar to the AVC Any Video Converter, is the UniConverter. Converting your personal videos and audio is just a part of what this program can do. It is also popular for converting DVDs, which can be converted into MP4, MOV, AVI and FLV formats. iSkysoft continues to add new formats to their program and you never have to pay for your program to be updated. The program is currently able to convert over 150 formats. Even with the large number of formats being supported, your videos will remain their HD quality after conversion. They also offer Intel and NVIDIA GPU hardware acceleration, so that the videos are converted at the quickest time possible.
User Guide to Convert Videos with AVC Any Video Converter Alternative
Step 1: Adding Video Files
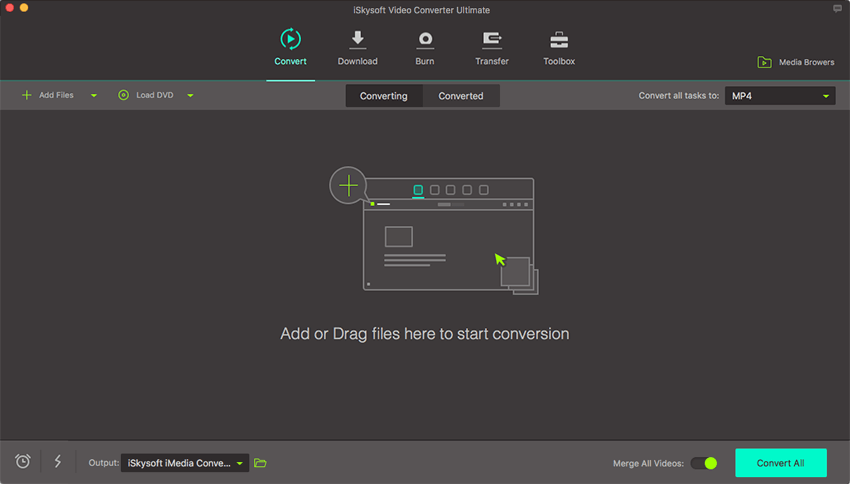
As soon as you open the program, you will have three key options at the top of the screen. You can “Convert”, “Burn”, and “Download”. This program gives you the option to eliminate some steps in selecting your videos for converting. You can simply grab the file from its folder and drag it to the program to be converted. iSkysoft takes it a step further and allows you to drag an entire folder. Since you are able to convert multiple files at one time, you don’t have to worry grabbing each individual video. Once you place the folder onto the program, it will automatically place the files in a list to be converted. You also still have the option of searching for your files and selecting them.

Step 2: Choose the Format
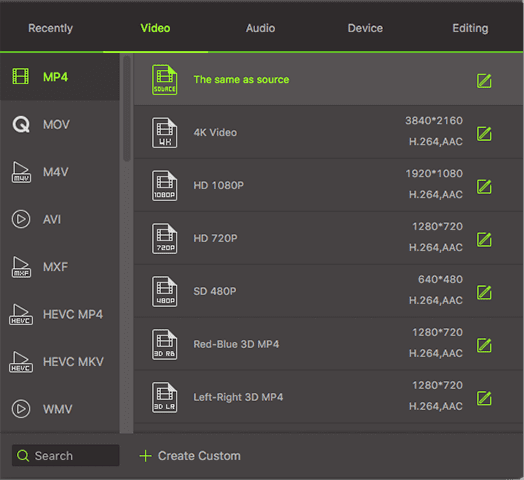
Once you select the “Format” icon, there will be a list of icons that appear of the different format options that are available. You will also have an option that allows you to extract audio from a video file. The audio can be extracted to MP3, AAC, WAV, and other audio formats. From there, you are able to go even further and change the format’s settings. A Gear button will appear to make changes to the format.

Step 3: Convert
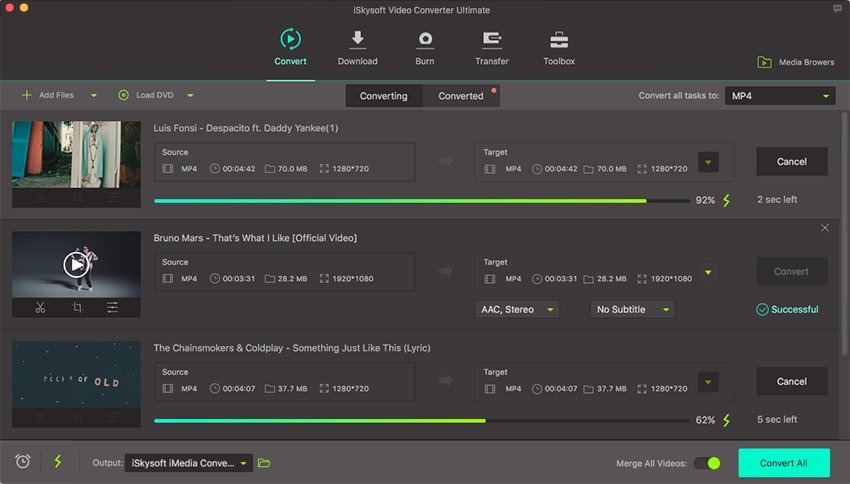
Setting the format takes you to the final step of converting the file. There will also be an option that appears for you to change the files output, which allows you to select the folder of where you want the file to go, after it has been saved. Finally, you select the “Convert’ button to begin converting the file. While your file is being converted, next to it is a meter that show the status of the conversion. Once the file is converted, you will receive a message that alerts you of the completion. There is also an option that appears to open the folder that the file has been saved to. This feature works great for converting in batches.


Brian Fisher
staff Editor