by Brian Fisher • • Proven solutions
What Are AMV Files?
AMV or Anime Music Video is popular among anime fans. This usually refers to a clip of video that has been edited from some particular anime episode in such that the original audio is stripped out and their favorite music is inserted. The result is often a collaboration of multiple shots from different episodes of the anime title resulting in often powerful emotionally charged music videos. Sites like AnimeMusicVideos.org have many guides and a forum to help with the creation. This article will show you how to make an AMV with iMovie.
How to Make AMV with iMovie on Mac
iMovie is a video editing software application sold by Apple Inc. for Mac, iPhone, iPad, iPad mini and iPod touch. It processes high definition video from HD camcorders, also AVCHD camcorders and -compressed videos from MPEG-4 or QuickTime Movie files. You can Make AMV with iMovie easily. Most of all, AnimeMusicVideos.org will not recommend users adopting downloaded material. You'd better buy the DVDs to make sure get footage in good quality. You can wait until the anime you need is licensed and a Region1 DVD is released or go to YesAsia or Amazon Japan to buy the Region2 DVD straight from Japan.

Detailed Guide to Make AMV with iMovie on Mac
Step 1. Convert DVD
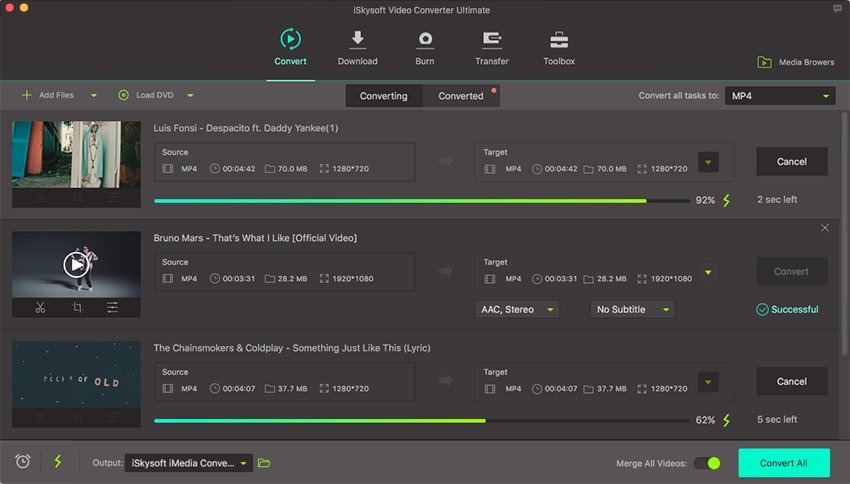
The first step is to convert the DVD since the data on DVDs are encrypted using Macrovision's technology, CSS. In this one we'll use a program called UniConverter. It's an all-in-one multimedia toolkit to convert video/DVD. You can download it for free here. After importing the DVD movie from "Add Files", you need to convert the file into a QuickTime file. Just chose QuickTime "MOV" format as the output format in the format list.

Step 2. Importing Clips
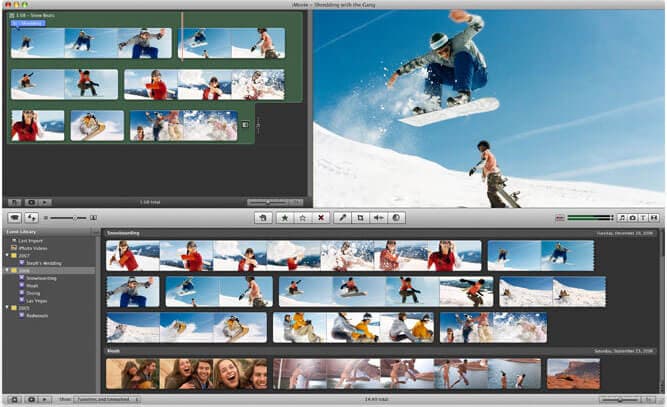
Go to "File" > "Import" to load source files to iMovie. You'll find the video file at bottom of the interface. Select the segment you want and drag and drop to the timeline.
Step 3. Applying Transition
After adding your song, you should then add some bookmarks (COMMAND+B) of where a possible transition or scene emphasis should take place. There are three kinds of transitions: openings, closings, and combiners. To add a transition, open the "Transition" pane from the middle toolbar, and drag and drop a transition to anywhere you want.
Step 4. Adding Titles
It's easy to add text in iMovie. To get started, click the little "T" icon in the middle to open "Title" pane in which many title templates are included. Just drag and drop to the timeline and make settings such as duration. You can simply press "Space" key to preview the title anytime you want.
Step 5. Exporting AMV from iMovie
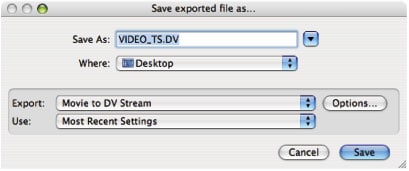
When you're done, you're ready to get it converted to DivX. Just go to "Share" menu on top. From there, you should see a sheet and choose "Export Using QuickTime".
Step 6. Export to DV
Click the "Export" dropdown menu and choose "Movie to DV Stream". My movie, which is almost four minutes long (which includes the intro in the beginning of the movie) may be as large as 835 MB. The export process took around 6 minutes on my computer. Once we have our DV file exported, it needs to be converted over. This is where UniConverter for Mac comes in. The process is very simple.

Tips about iMovie
One thing is that any media you load to iMovie will be converted to DV (or DVCPRO, Digital8, DVCAM... whatever name you like) automatically. You will have no other choice and go on work with the DV format till the video is exported. While if you do not like to work on DV format (like want to use DVCPRO50 instead), you will probably need to learn to use Final Cut instead. The other thing is if you are using various sources of footage, you'd better make sure all the footage has the same pixel ratio (16:9, 4:3, etc.). If so, when exporting, nothing will look distorted.

Brian Fisher
staff Editor