
- Movavi's Niche: Movavi Photo Editor bridges the gap between basic apps and complex software, ideal for everyday users.
- Pros & Cons: Enjoy intuitive AI enhancements and filters, but note limited advanced features and subscription costs.
- Best Use: Perfect for quick social media fixes; unsuitable for professional-grade retouching or complex graphic design.
- Compare Wisely: Movavi excels in user-friendliness; consider GIMP for free power or Affinity Photo for pro one-time purchase.
- Avoid Pitfalls: Beware of over-processing, subscription fatigue, and limited professional workflow integration.
- UniConverter Advantage: For efficient, high-quality background removal, UniConverter offers reliable, ad-free GPU-accelerated processing.
- Decision Time: Choose Movavi for simplicity and quick edits, but opt for alternatives if advanced professional features are essential.
In this article
- Part 1: What is Movavi Photo Editor?
- Part 2: Movavi Photo Editor: Core Features, Pros, and Cons
- Part 3: Movavi Photo Editor: Ideal Use Cases and Limitations
- Part 4: Movavi Photo Editor and Alternatives Comparison
- Part 5: Risks and Pitfalls to Consider
- Part 6: How to Use UniConverter for Efficient Background Replacement
- Part 7: Conclusion
- Part 8: FAQs
Movavi Photo Editor: A Comprehensive Review and Comparison
When I first started dabbling in photo editing, I was overwhelmed by the sheer number of options available. Many promised professional results but came with a steep learning curve or a hefty price tag. That's when I stumbled upon Movavi Photo Editor. It positioned itself as an accessible tool for everyday users, and I was curious to see if it could deliver on that promise. This Movavi Photo Editor review will delve into its features, compare it with its competitors, and help you decide if it's the right fit for your photo editing needs. I’ll share my personal experiences and insights, guiding you through its strengths and weaknesses, and ultimately help you make an informed decision.
Part 1: What is Movavi Photo Editor?
Movavi Photo Editor is a user-friendly photo editing software designed for both beginners and casual users who want to enhance their images without getting bogged down by complex tools. It's developed by Movavi, a company known for creating intuitive multimedia software. My initial impression was that it aimed to simplify tasks that often feel daunting in more professional-grade editors. It focuses on providing quick, effective solutions for common photo problems, making it an attractive option for those who aren't looking to become professional retouchers but still want their photos to look great. This review will explore whether it truly lives up to its promise of simplicity and efficiency.
Market Position and Target Audience
* Bridging the Gap: It sits comfortably between basic mobile editing apps and advanced desktop software like Photoshop.
* Everyday Enthusiasts: Ideal for social media users, hobby photographers, and anyone wanting to quickly improve personal photos.
* Ease of Use Over Complexity: Its primary appeal lies in its straightforward interface and automated features, catering to those who prioritize speed and simplicity.
Part 2: Movavi Photo Editor: Core Features, Pros, and Cons
From my experience, Movavi Photo Editor shines in its ability to make complex edits feel effortless. It offers a range of tools that are surprisingly powerful for its target audience. I've found myself relying on it for quick touch-ups and creative enhancements more often than I expected. Its core capabilities revolve around image correction, object removal, background changes, and artistic effects. It's not about deep, pixel-level manipulation, but rather about making your photos pop with minimal effort.
Pros:
* Intuitive Interface for Quick Edits: I was genuinely impressed by how easy it was to navigate. Everything is clearly labeled, and the workflow is logical, allowing me to jump right into editing without needing a tutorial.
* Powerful AI-Powered Enhancements for Beginners: The AI tools are a game-changer for someone like me who isn't an editing expert. Features like automatic enhancement and object removal work surprisingly well, saving a lot of time and effort.
* Extensive Collection of Filters and Effects: If you love experimenting with different looks, you'll appreciate the vast library of filters and effects. It's easy to preview and apply them, giving my photos a fresh feel.
Cons:
* Limited Advanced Editing Capabilities for Professionals: While great for quick fixes, I quickly hit its limits when I needed more precise control over layers, masks, or complex color grading. It's definitely not a Photoshop replacement.
* Subscription Model Can Be Costly Over Time: Initially, the price seemed reasonable, but the subscription model can add up. For occasional use, I started questioning if the ongoing cost was justified compared to a one-time purchase alternative.
Part 3: Movavi Photo Editor: Ideal Use Cases and Limitations
I’ve found Movavi Photo Editor to be incredibly useful for specific scenarios, but it definitely has its boundaries. If you're like me and primarily want to make your photos look better for sharing online, it's a fantastic tool. However, if your aspirations lean towards professional-grade photography or graphic design, you'll quickly find yourself wanting more. It’s all about understanding what it’s designed for and what it isn’t.
Best Use Case: Quick Photo Fixes for Social Media
For me, this is where Movavi Photo Editor truly excels. When I need to quickly crop an image, remove an unwanted person from the background, or apply a trendy filter before posting to Instagram, it's my go-to. The AI background removal is particularly impressive for creating clean product shots or fun profile pictures. It’s fast, efficient, and the results are usually more than adequate for online sharing.
Limited Use Case: Professional-Grade Retouching and Complex Compositing
I once tried to use it for a more complex photo project involving multiple layers and intricate masking, and that's when its limitations became very apparent. It lacks the granular control and robust layer management that professionals require. If you’re looking to do high-end portrait retouching, create elaborate photo manipulations, or work with RAW files with full control, you’ll find Movavi Photo Editor falls short. It's simply not built for that level of detail and complexity.
Part 4: Movavi Photo Editor and Alternatives Comparison
When I look at Movavi Photo Editor, I see a tool that prioritizes ease of use. But how does it stack up against others I've tried? It's crucial to understand where each product shines, as my needs might differ from yours.
| Feature/Scenario | Movavi Photo Editor | Adobe Photoshop Express | GIMP | Affinity Photo |
| Beginner-Friendly Edits | Excellent | Very Good | Moderate | Good |
| AI-Powered Enhancements | Strong | Good | Limited | Moderate |
| Advanced Layer Editing | Limited | Moderate | Strong | Excellent |
| Batch Processing | Good | Moderate | Good | Excellent |
| Cost | Subscription | Free (Basic) | Free | One-time Purchase |
Key Differentiators:
Movavi truly excels in user-friendliness and those AI-driven quick fixes that save me so much time. Photoshop Express, on the other hand, offers a good balance, especially if you're primarily editing on your mobile device. GIMP, while free and powerful, has a steeper learning curve that I found a bit daunting initially. Affinity Photo is a fantastic professional alternative to Photoshop, offering a one-time purchase, which I appreciate, but it's still more complex than Movavi.
Part 5: Risks and Pitfalls to Consider
While Movavi Photo Editor offers a lot of convenience, I've also encountered some potential downsides that are worth considering before you commit. It's not all smooth sailing, and being aware of these risks can save you some headaches down the line.
Potential for Over-Processing Images
I've noticed that it's very easy to go overboard with the automatic enhancements and filters. What starts as a subtle improvement can quickly turn into an unnatural, overly saturated, or "plastic" looking image. It's tempting to just click the "enhance" button, but I've learned to use these features sparingly and with a critical eye to maintain a natural look.
Subscription Fatigue and Hidden Costs
The subscription model is a double-edged sword. While it keeps the software updated, I've experienced "subscription fatigue" from having too many monthly payments. Also, sometimes there are additional packs or features that aren't included in the base subscription, leading to unexpected costs if you want to unlock everything. Always check what's included before subscribing.
Limited Integration with Professional Workflows
If you're working on a larger project that involves other professional software, Movavi Photo Editor might feel like a standalone island. I've found that exporting and importing files between Movavi and other tools can sometimes be clunky, and it lacks the seamless integration that more industry-standard applications offer. This can disrupt a professional workflow.
Data Privacy Concerns with Cloud Features
While convenient, any cloud-based features or options to share directly from the software raise questions about data privacy. I always make sure to review their privacy policy, especially if I'm uploading sensitive or personal photos. It's a general concern with many software, but something to keep in mind when using any tool that connects to the internet.
Part 6: How to Use UniConverter for Efficient Background Replacement
Sometimes, Movavi Photo Editor might not handle batch processing for background removal as efficiently as I'd like, or the edge detection might not be perfect. When I encounter issues like pixelated exports, inconsistent image quality, or fuzzy edges after background replacement, I often turn to UniConverter. It’s a robust, all-in-one solution that has consistently delivered high-quality results for me, without any ads or hidden costs. Its GPU acceleration ensures speedy processing, and I can trust it to maintain image quality. For those looking to remove background without losing quality, this tool is particularly effective.
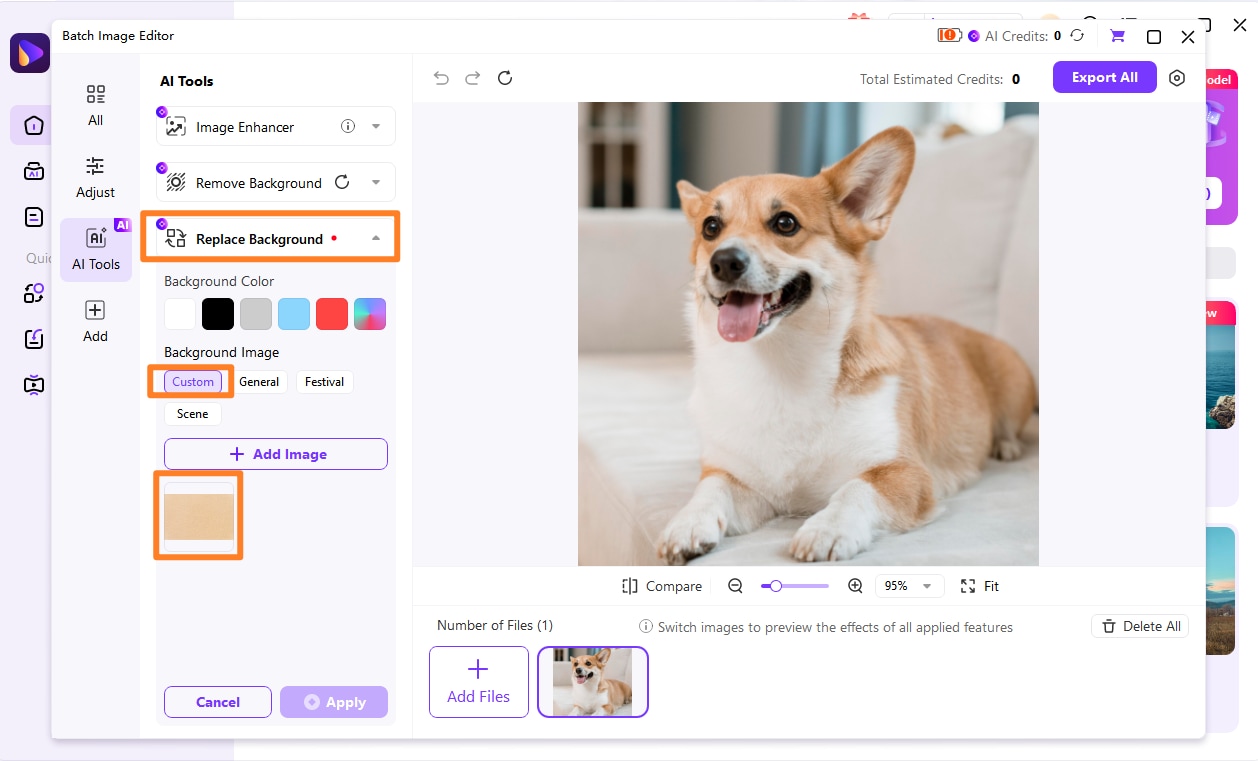
Step 1: Open UniConverter and Choose Background Replacer
First, I launch UniConverter and navigate to the "Toolbox" section. From there, I select the "Background Replacer" feature. It's usually quite prominent and easy to find. This feature is excellent for achieving a high-definition background remover experience.
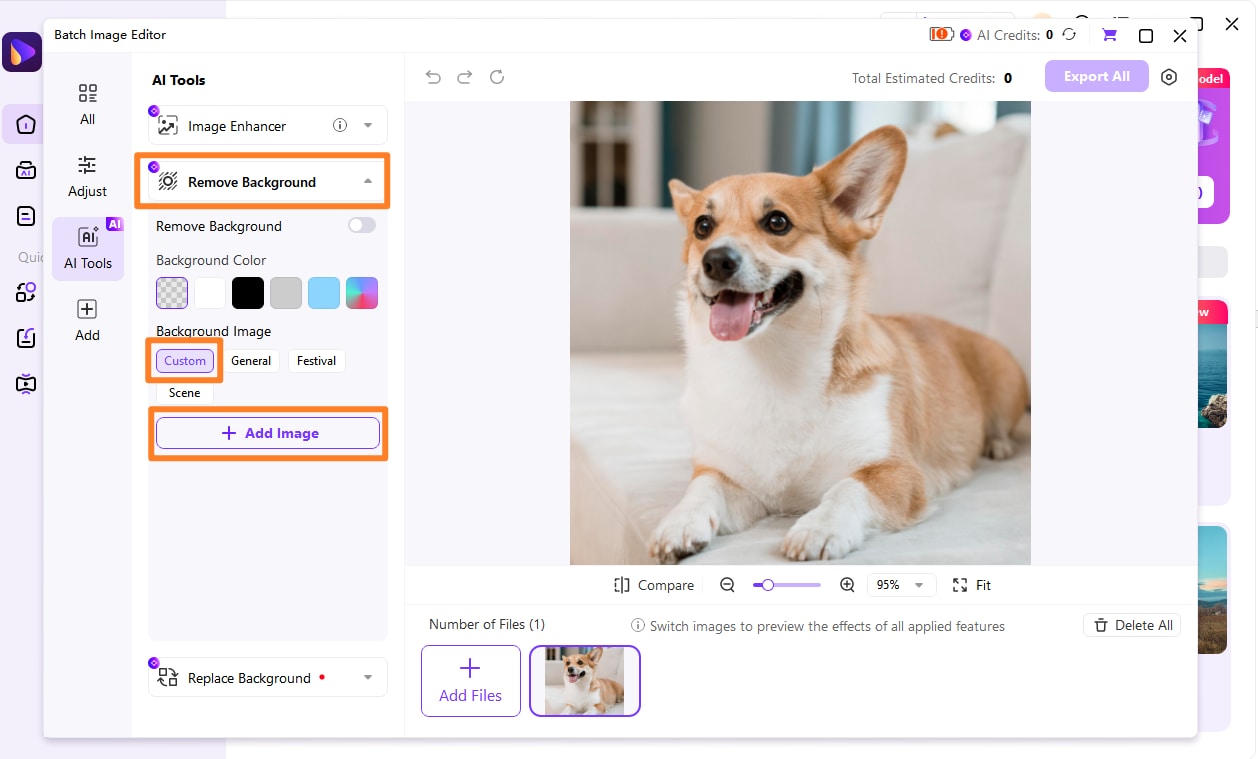
Step 2: Upload the Images
Next, I simply drag and drop the images I want to edit into the designated area. UniConverter supports various formats, so I don't have to worry about compatibility.
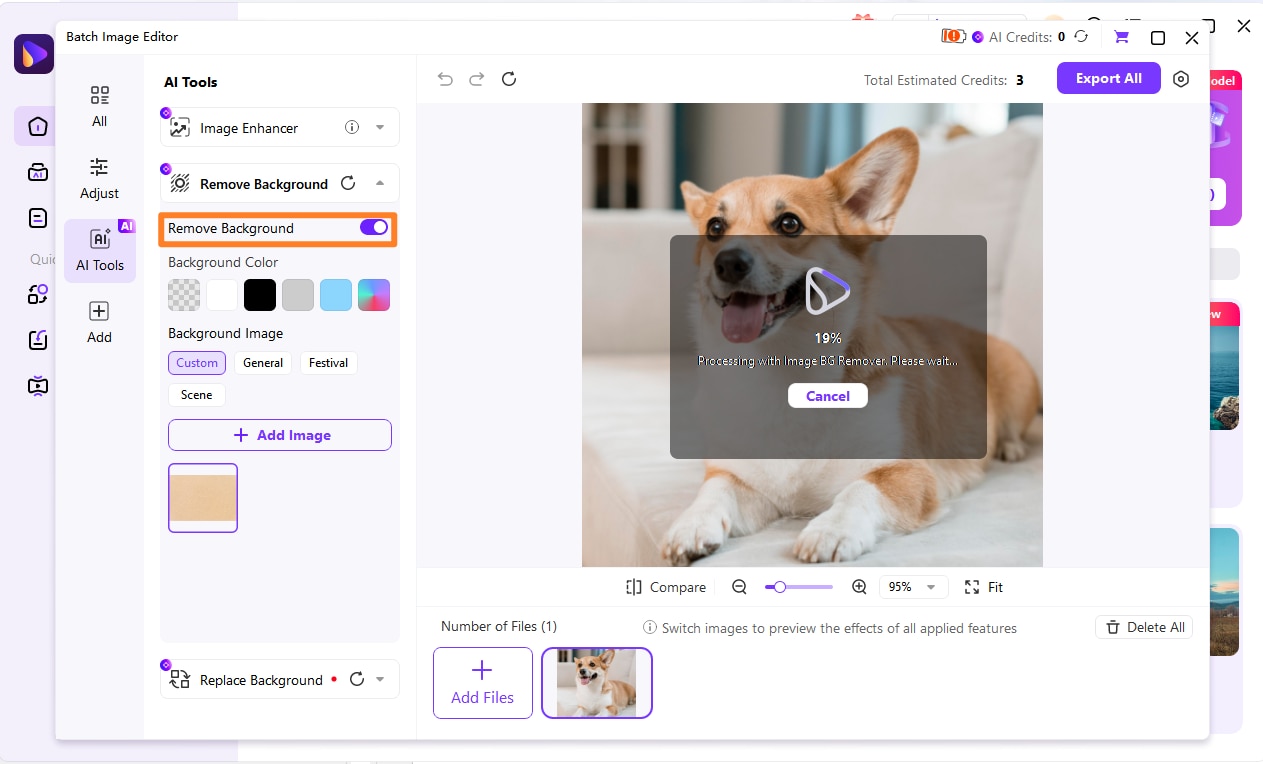
Step 3: Click to Preview Images
After uploading, I click on each image to preview the background removal. This allows me to make any necessary adjustments or fine-tune the edges if needed, ensuring a perfect cut-out.
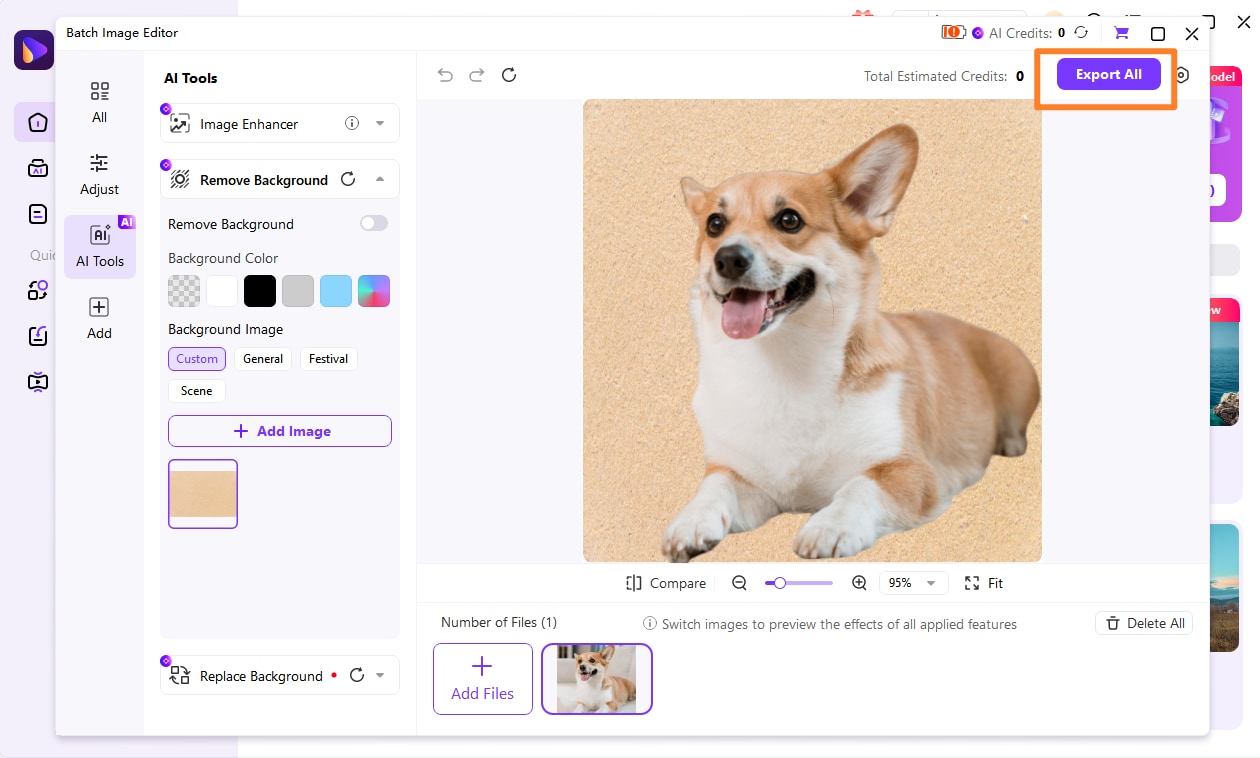
Step 4: Preview and Export Images
Once I'm satisfied with the results, I can preview all the edited images. Then, I simply click the "Export" button to save them to my desired location, usually in high quality and without any loss.

Seeking a Movavi Photo Editor Alternative?
Part 7: Conclusion
After spending considerable time with Movavi Photo Editor review, I can confidently say it's a solid choice for anyone looking for an easy-to-use photo editing tool for quick fixes and creative enhancements. It truly shines for social media enthusiasts, hobby photographers, and anyone who wants to improve their photos without a steep learning curve. The AI-powered features are genuinely impressive for simplifying complex tasks, making it accessible to a broad audience. However, if you're a professional photographer or graphic designer needing advanced layer control, precise masking, or extensive RAW file manipulation, you'll likely find its capabilities limiting. In such cases, alternatives like Affinity Photo or even GIMP might be more suitable. For those who prioritize speed, simplicity, and effective automated tools for everyday photo improvements, Movavi Photo Editor offers excellent value. Just be mindful of the subscription model and avoid over-processing your images.
Part 8: FAQs
-
1. Is Movavi Photo Editor suitable for professional photographers?
No, it's generally not suitable for professional photographers. While it offers some useful tools, it lacks the advanced features, granular control, and robust workflow integration required for professional-grade retouching, complex compositing, and extensive RAW file editing. Professionals would find its capabilities too limited.
-
2. Can I use Movavi Photo Editor on multiple devices?
The ability to use Movavi Photo Editor on multiple devices depends on the specific license you purchase. Some licenses are single-device, while others might allow installation on a limited number of devices. It's crucial to check the licensing terms before purchasing if you plan to use it across several computers.
-
3. What are the main differences between Movavi Photo Editor and Photoshop?
The main differences lie in their complexity, target audience, and feature sets. Movavi Photo Editor is designed for ease of use, quick edits, and beginners, focusing on automated tools. Photoshop, on the other hand, is an industry-standard professional tool offering unparalleled depth, advanced layer editing, precise control, and extensive features for complex graphic design and photo manipulation, but it comes with a much steeper learning curve.
-
4. Does Movavi Photo Editor offer a free trial?
Yes, Movavi Photo Editor typically offers a free trial. This trial usually allows you to use the full features of the software for a limited period (e.g., 7 or 14 days) or with certain limitations, such as watermarks on exported images. It's a great way to test the software before committing to a purchase.
-
5. How does Movavi Photo Editor handle RAW image files?
Movavi Photo Editor can open and perform basic edits on RAW image files. However, its RAW processing capabilities are not as extensive or precise as dedicated RAW converters found in professional software like Adobe Lightroom or Capture One. You'll be able to make adjustments, but without the deep control over parameters that professionals expect from RAW editing.
