
- Value: Kdenlive offers powerful, free, open-source video enhancement, ideal for budget-conscious users seeking professional-grade results.
- Comparison: Kdenlive excels in customization and community support but may lag behind paid alternatives in processing speed and advanced AI features.
- Decision: Choose Kdenlive for detailed control and complex projects like archival restoration, but consider alternatives for quick fixes or high-volume batch processing.
- Efficiency: UniConverter provides a streamlined, user-friendly alternative for efficient, stable, and GPU-accelerated video enhancement, especially for batch tasks.
In this article
- Part 1: What is Kdenlive Video Enhancer?
- Part 2: Kdenlive Video Enhancer: Core Features, Pros & Cons
- Part 3: Target Users & Use Cases
- Part 4: Kdenlive Video Enhancer and Alternatives Comparison
- Part 5: Risks & Pitfalls to Consider
- Part 6: How to Use UniConverter to Efficiently Enhance Videos
- Part 7: Conclusion
- Part 8: FAQs
This Kdenlive Video Enhancer review delves into the capabilities of Kdenlive's video enhancement features, evaluating its strengths and weaknesses in various real-world scenarios. As an open-source, non-linear video editor, Kdenlive offers a robust suite of tools, and its enhancement functionalities are particularly appealing to users seeking professional-grade results without a hefty price tag. This review will provide a comprehensive analysis of its core features, compare it against leading competitors like DaVinci Resolve and Adobe Premiere Pro, and offer insights into its ideal use cases and potential pitfalls. We aim to equip users with the necessary information to make an informed decision regarding their video enhancement needs, addressing common pain points such as low-light footage, noise reduction, and color correction.
Part 1: What is Kdenlive Video Enhancer?
Kdenlive Video Enhancer refers to the integrated set of tools within the Kdenlive open-source video editing software designed to improve the visual quality of video footage. These tools encompass a range of functionalities, from basic color correction and exposure adjustments to more advanced noise reduction, sharpening, and stabilization. Kdenlive, being a free and open-source application, aims to democratize professional video editing, making powerful enhancement capabilities accessible to a broader audience. This review will specifically address how effectively Kdenlive's enhancement features perform in practical scenarios, helping users understand its true potential and limitations.
Addressing Common Video Enhancement Challenges
* Overcoming Low-Light and Noisy Footage: Many users struggle with footage shot in suboptimal lighting conditions, leading to grainy or unclear visuals.
* Achieving Professional Color Grading: Bringing a consistent and cinematic look to videos often requires sophisticated color correction and grading tools.
* Stabilizing Shaky Handheld Shots: Unsteady camera work can detract from the viewing experience, necessitating effective stabilization solutions.
* Balancing Performance with Quality: Users seek enhancement tools that deliver high-quality results without excessively taxing their system resources or requiring a steep learning curve.
Part 2: Kdenlive Video Enhancer: Core Features, Pros & Cons
Kdenlive Video Enhancer provides a comprehensive suite of tools for improving video quality, catering to various post-production needs. Its core capabilities are built around flexibility and user control, allowing for detailed adjustments.
* Advanced Noise Reduction: Effectively minimizes grain and digital noise in low-light or high-ISO footage.
* Sharpening Filters: Enhances detail and clarity, making soft images appear crisper.
* Integrated Color Grading Tools: Offers a wide array of color wheels, curves, and scopes for precise color correction and artistic grading.
* Video Stabilization: Reduces camera shake, providing smoother and more professional-looking footage.
* Luma and Chroma Keying: Enables advanced compositing and background removal for creative effects.
Pros:
* Advanced Noise Reduction & Sharpening for Low-Light Footage
* Integrated Color Grading Tools for Professional Look
* Flexible Workflow for Diverse Project Needs
Cons:
* Steep Learning Curve for Beginners
* Resource-Intensive for High-Resolution Enhancements
Part 3: Target Users & Use Cases
Kdenlive Video Enhancer is particularly well-suited for users who are comfortable with a more hands-on approach to video editing and desire extensive control over their enhancement process. It appeals to independent filmmakers, documentary creators, and content creators who prioritize customization and open-source flexibility over a streamlined, automated workflow.
Best Use Case: Enhancing Archival Footage for Documentary Production
For documentary filmmakers working with older, often low-quality archival footage, Kdenlive's advanced noise reduction, sharpening, and color grading tools are invaluable. Users can meticulously restore and enhance historical videos, bringing clarity and consistency to diverse source materials. The ability to fine-tune every parameter allows for a respectful and accurate restoration, crucial for historical projects. This scenario often involves significant time investment, which Kdenlive's detailed controls accommodate perfectly.
Limited Use Case: Quick Fixes for Social Media Clips on a Tight Deadline
While Kdenlive can perform quick enhancements, its comprehensive interface and manual controls make it less ideal for users needing rapid, one-click solutions for social media content. For creators on a tight deadline who simply need to brighten a clip or apply a basic filter, the learning curve and the time required to navigate Kdenlive's extensive options can be a hindrance. Simpler, more automated tools would be more efficient in such fast-paced scenarios.
Part 4: Kdenlive Video Enhancer and Alternatives Comparison
Kdenlive Video Enhancer stands out for its open-source nature and robust feature set, but it faces strong competition from both free and paid alternatives.
| Feature / Product | Kdenlive Video Enhancer | DaVinci Resolve | Adobe Premiere Pro | Shotcut |
| Processing Speed | Moderate (CPU/GPU dependent) | Fast (GPU optimized) | Fast (GPU optimized) | Moderate |
| Output Quality | High (with skilled use) | Excellent | Excellent | Good |
| Ease of Use | Moderate to Difficult | Moderate | Moderate | Easy |
| Customer Support | Community Forums | Extensive (Paid) | Extensive (Paid) | Community Forums |
| Security | Open-Source (High) | Proprietary (High) | Proprietary (High) | Open-Source (High) |
Kdenlive offers unparalleled open-source flexibility, making it a strong choice for users who value customization and community support. DaVinci Resolve excels in color grading and overall professional output, especially with its free version, making it a powerful contender for high-end projects. Adobe Premiere Pro, part of the Creative Cloud ecosystem, provides seamless integration with other Adobe products and is a standard in many professional studios. Shotcut, also open-source, offers a simpler interface and is a good option for beginners seeking basic editing and enhancement without the complexity of Kdenlive or Resolve. Each product caters to different user needs, balancing features, ease of use, and cost.
Part 5: Risks & Pitfalls to Consider
Using any video enhancement software, including Kdenlive, comes with potential risks and pitfalls that users should be aware of, especially when aiming for professional-grade results. Understanding these can help manage expectations and avoid common mistakes.
Impact of Enhancement on Original Footage Quality
One significant risk is the potential for degradation of the original footage if enhancements are applied too aggressively or incorrectly. Over-sharpening can introduce artifacts, while excessive noise reduction can lead to a "plastic" or unnatural look, stripping away fine details. It's crucial to work with copies of original files and apply enhancements incrementally, constantly monitoring the output.
Potential for Over-Processing and Unnatural Results
The temptation to over-process footage is high, especially for beginners. Pushing color saturation, contrast, or sharpness too far can result in an unnatural, artificial, or cartoonish appearance. This can detract from the authenticity of the video and make it less appealing to viewers. A subtle approach often yields more professional and aesthetically pleasing results.
Hardware Requirements for Optimal Performance
Video enhancement, particularly for high-resolution footage (4K and beyond), is extremely resource-intensive. Kdenlive, while efficient, can still demand significant CPU and GPU power, as well as ample RAM. Users with older or underpowered hardware may experience slow processing times, frequent crashes, or an inability to work with complex enhancement stacks, leading to frustration and delays.
Inconsistent Enhancement Quality Across Different Clips
When working on projects with multiple clips from various sources or shot under different conditions, achieving consistent enhancement quality can be challenging. Applying the same enhancement preset to all clips might not yield uniform results, leading to visual discrepancies within the final video. This often requires clip-by-clip adjustments, which can be time-consuming and require a keen eye for detail.
Part 6: How to Use UniConverter to Efficiently Enhance Videos
While Kdenlive offers robust enhancement tools, some users might find its learning curve steep or its resource demands too high for quick, efficient processing, especially for batch enhancements or when dealing with unstable results. For those seeking a more streamlined, user-friendly, and powerful alternative for video enhancement, UniConverter stands out as an excellent choice. UniConverter provides an all-in-one solution with GPU acceleration, stable and lossless processing, and support for batch enhancement across a wide range of formats, making it a reliable tool for quickly improving video quality without ads or complex settings. For instance, its advanced features can even help you remove background without losing quality from your videos, or even change video background with ease, offering a comprehensive suite for all your editing needs.
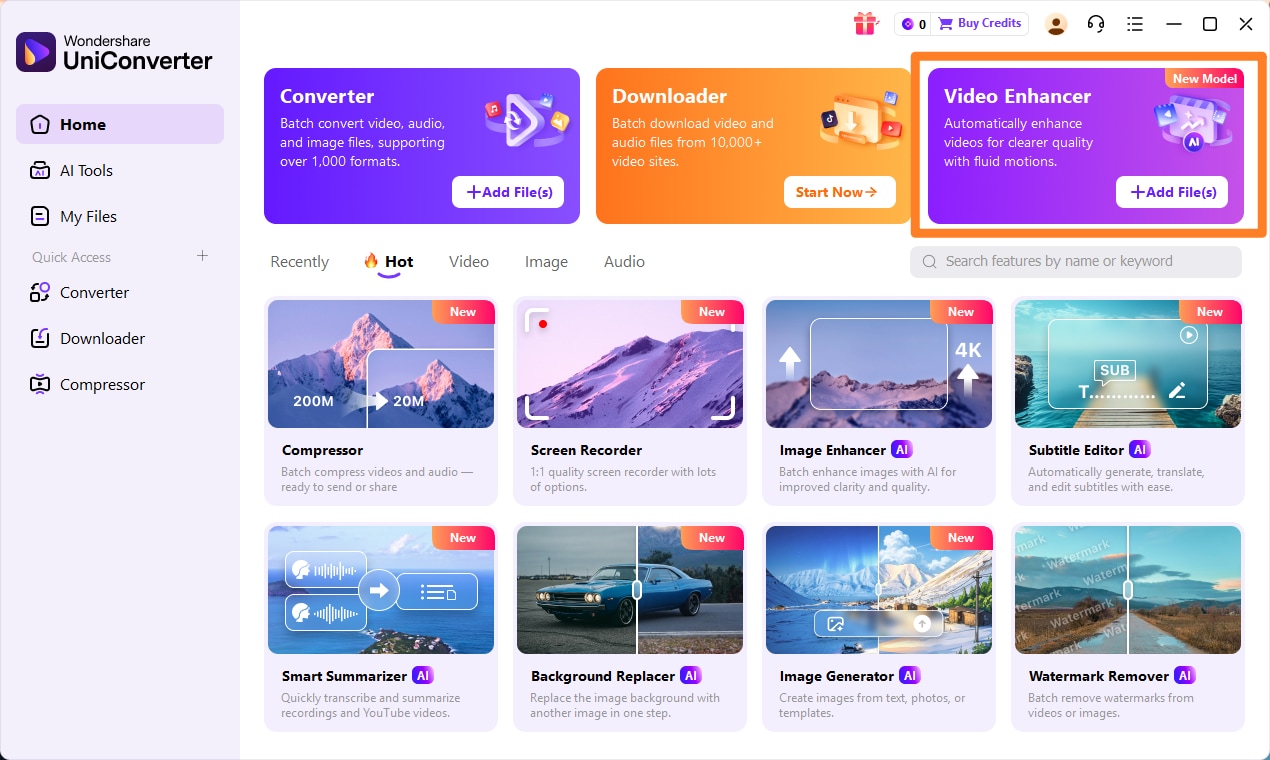
Step 1: Open UniConverter and Choose Video Enhancer
Launch UniConverter on your computer. From the main interface, navigate to the "AI Lab" section and select the "Video Enhancer" tool. This will open the dedicated enhancement module.
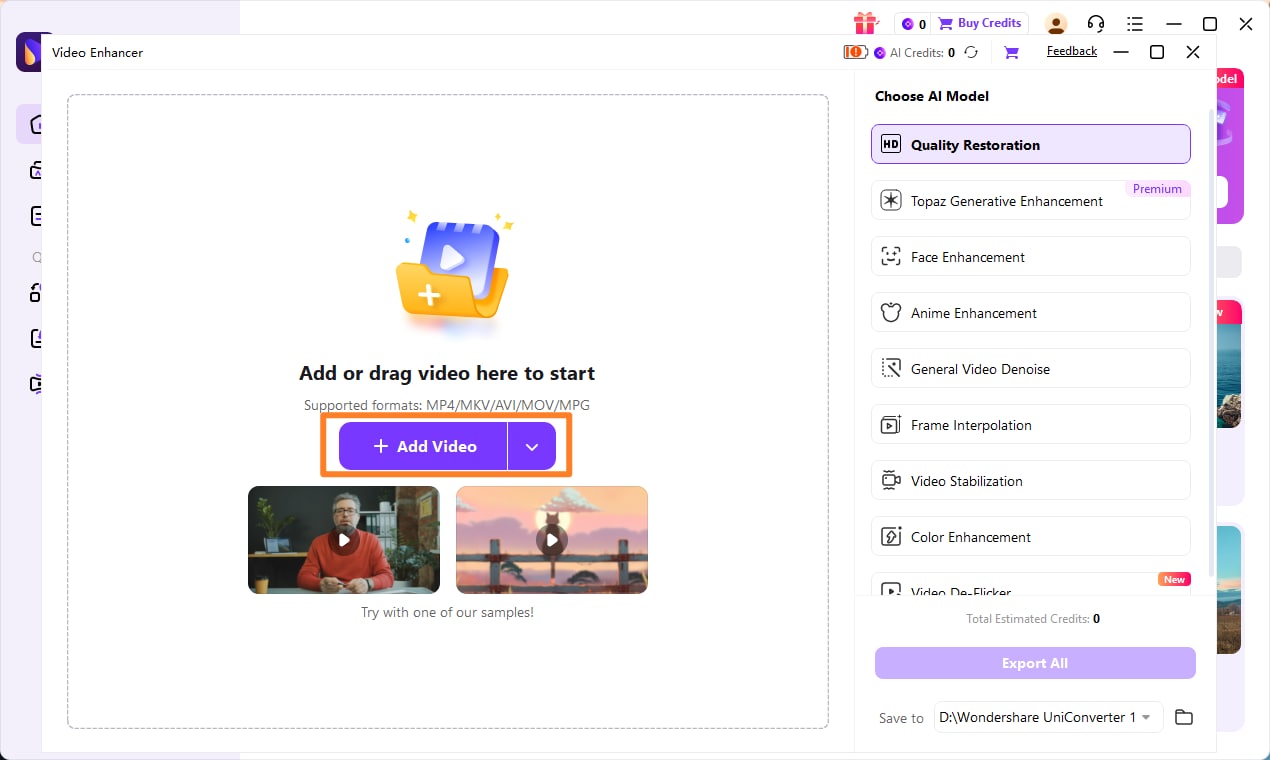
Step 2: Upload the Videos
Click on the "Add Files" button or drag and drop the video files you wish to enhance into the UniConverter interface. You can add multiple videos for batch processing.
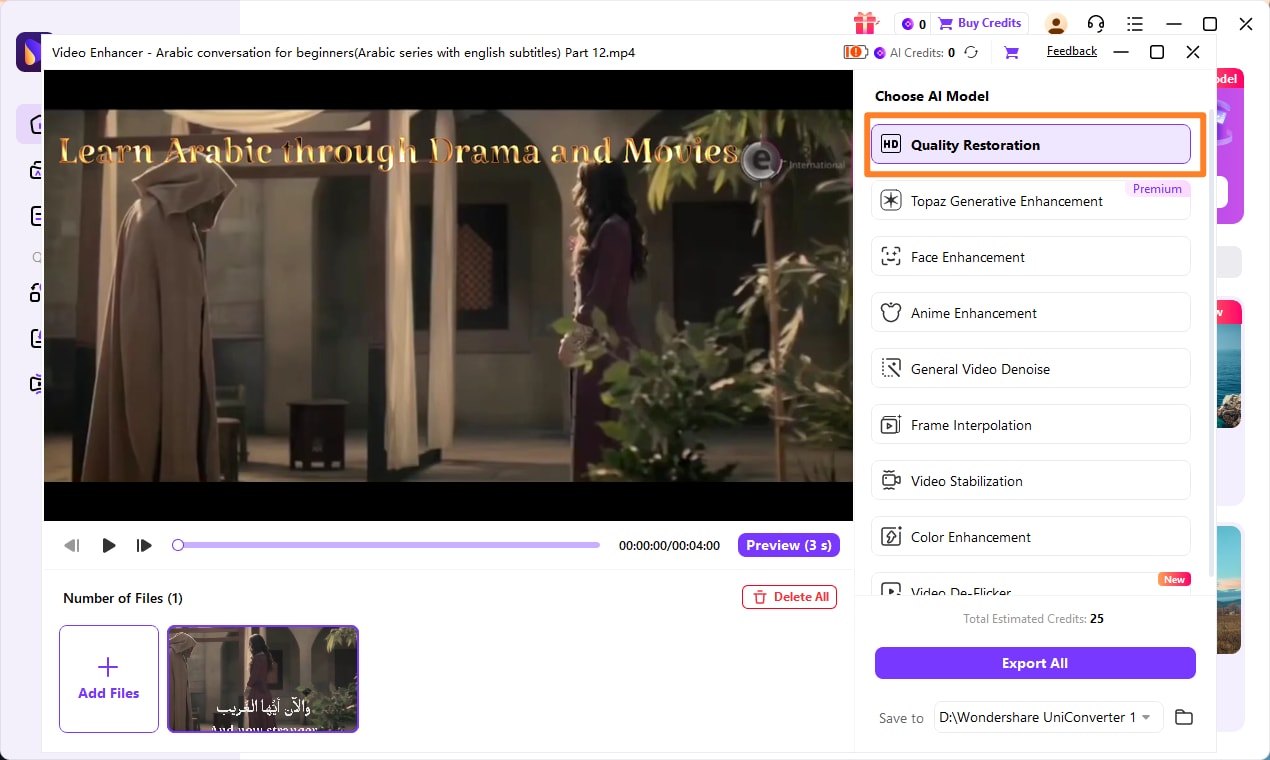
Step 3: Choose Enhancement Model
UniConverter offers various AI enhancement models. Select the most suitable model based on your needs, such as "AI Upscale" for resolution improvement, "AI Denoise" for noise reduction, or "AI Color Correction" for color optimization. Adjust other parameters like output resolution and format as required. You can also explore options to change video background or utilize the online background remover for specific creative effects.
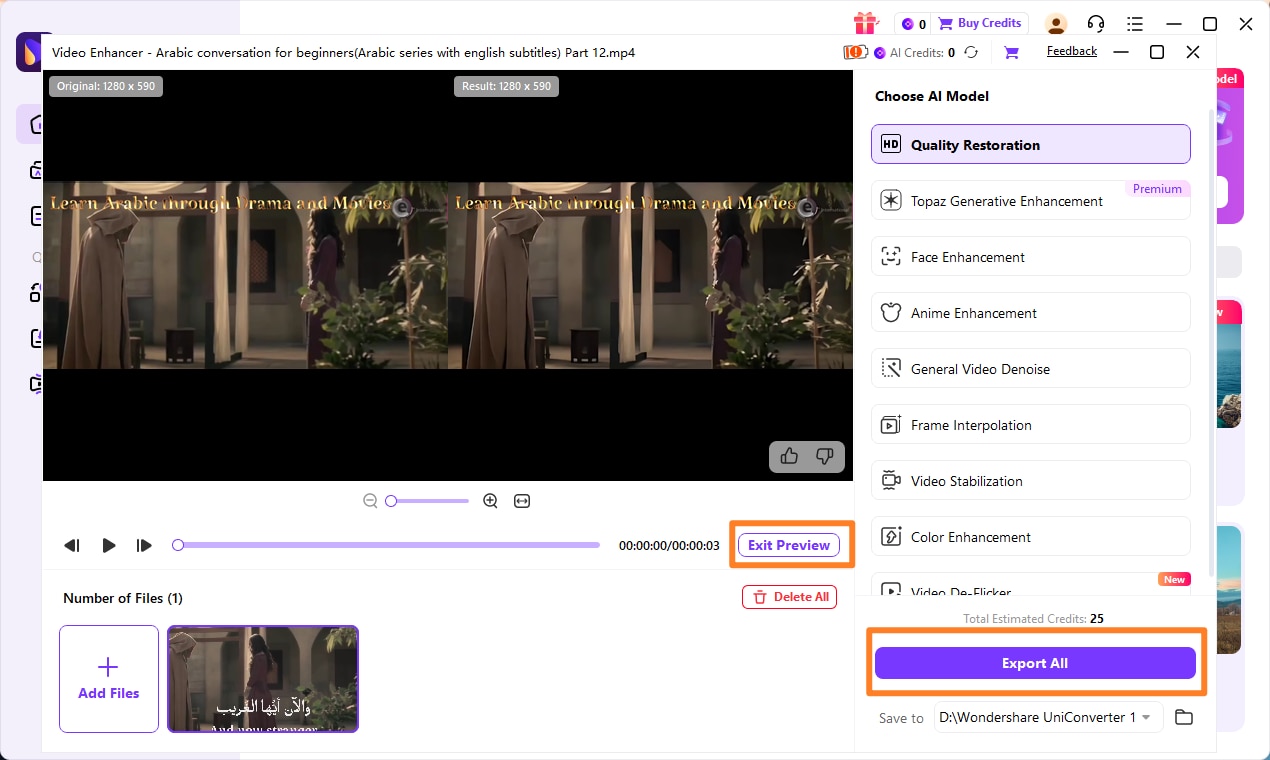
Step 4: Preview and Save the Enhanced Video
After selecting your enhancement options, click "Preview" to see the changes. Once satisfied, click the "Export" button to save your enhanced video to the desired location on your computer.

Enhance Videos Beyond Kdenlive's Built-in Tools?
Part 7: Conclusion
This Kdenlive Video Enhancer review has explored the capabilities and limitations of Kdenlive's integrated video enhancement tools. While Kdenlive offers a powerful, open-source solution for advanced noise reduction, sharpening, and color grading, its steep learning curve and resource-intensive nature make it best suited for experienced editors and specific use cases like documentary archival footage restoration. Beginners or those needing quick fixes for social media clips might find it less efficient. When compared to commercial alternatives like DaVinci Resolve and Adobe Premiere Pro, Kdenlive provides significant flexibility and cost savings, but it may not match their sheer processing speed or extensive professional ecosystem integration. Users should also be mindful of potential pitfalls such as over-processing and hardware limitations. For those seeking a more straightforward, efficient, and stable enhancement experience, particularly for batch processing or when facing quality inconsistencies, alternatives like UniConverter offer a compelling, user-friendly solution. Ultimately, the choice depends on the user's skill level, project requirements, and budget constraints.
Part 8: FAQs
-
1. Is Kdenlive Video Enhancer free to use?
Yes, Kdenlive is an open-source software, meaning its video enhancer and all other features are completely free to use and distribute.
-
2. Can Kdenlive enhance 4K video?
Kdenlive can process and enhance 4K video, but it is very resource-intensive. Optimal performance for 4K enhancement requires a powerful computer with a strong CPU, ample RAM, and a dedicated GPU.
-
3. How does Kdenlive compare to paid video enhancers?
Kdenlive offers many features found in paid enhancers, especially in color grading and noise reduction. However, paid enhancers like DaVinci Resolve Studio or Adobe Premiere Pro often provide more advanced AI-driven tools, faster processing, and dedicated customer support, which Kdenlive, as a community-driven project, might lack.
-
4. What are the system requirements for Kdenlive Video Enhancer?
For basic HD editing, a dual-core CPU, 4GB RAM, and an integrated GPU might suffice. For 4K video enhancement, a quad-core or higher CPU, 16GB+ RAM, and a dedicated GPU (NVIDIA or AMD) with at least 4GB VRAM are highly recommended for a smooth experience.
-
5. Does Kdenlive offer real-time preview for enhancements?
Kdenlive offers a real-time preview, but its fluidity depends heavily on your system's hardware and the complexity of the enhancements applied. For demanding effects or high-resolution footage, the preview might stutter or require rendering before smooth playback.
