
- Value: Ashampoo Photo Optimizer simplifies photo enhancement with one-click optimization for everyday users.
- Comparison: It excels in quick batch processing for social media, unlike complex professional software.
- Decision: Choose Ashampoo for effortless improvements; avoid if advanced, granular editing is required.
- Alternative: UniConverter offers superior AI-driven, lossless enhancement and batch processing for diverse media needs.
- Caution: Be aware of potential over-optimization, intrusive ads, and limited advanced editing capabilities.
In this article
- Part 1: What is Ashampoo Photo Optimizer?
- Part 2: Ashampoo Photo Optimizer: Core Features, Pros, and Cons
- Part 3: Ashampoo Photo Optimizer: Ideal Users and Use Cases
- Part 4: Ashampoo Photo Optimizer and Alternatives Comparison
- Part 5: Risks and Pitfalls to Consider
- Part 6: How to Use UniConverter to Efficiently Enhance Images
- Part 7: Final Verdict and Recommendations
- Part 8: FAQs
When I first started dabbling in photography, I quickly realized that not every shot comes out perfect straight from the camera. That's where image enhancers come in, and Ashampoo Photo Optimizer review has been a name that consistently pops up. This tool promises to make your photos shine with minimal effort, and I've spent some time putting it through its paces. In this review, I'll share my honest experience, diving into its features, comparing it with alternatives, and helping you decide if it's the right fit for your photo editing needs. I’ll cover everything from its one-click magic to its limitations, giving you a clear picture of what to expect.
Part 1: What is Ashampoo Photo Optimizer?
Ashampoo Photo Optimizer is essentially a digital darkroom assistant designed to breathe new life into your photos. It's built on the premise of simplicity and efficiency, aiming to deliver professional-looking results without requiring you to be a pro yourself. I initially thought it might be just another basic photo editor, but it quickly became clear that its focus is squarely on automated enhancement.
The Need for Effortless Photo Enhancement
When I look at the current landscape of digital photography, I see a few recurring pain points that tools like Ashampoo Photo Optimizer try to address:
* Time-consuming manual adjustments: Let's face it, not everyone has hours to spend tweaking every slider in Photoshop. We want quick results.
* Inconsistent photo quality: My camera roll is a mixed bag of great shots and "almost there" photos that just need a little boost.
* Overwhelming complexity of professional software: For many, the steep learning curve of advanced editing suites is a major deterrent.
This is where Ashampoo Photo Optimizer steps in, promising to simplify the process and democratize photo enhancement for everyone.
Part 2: Ashampoo Photo Optimizer: Core Features, Pros, and Cons
From my experience, Ashampoo Photo Optimizer really shines in its core ability to quickly improve photos. It's not about deep, artistic manipulation, but rather about making good photos look great with minimal fuss. The main thing I noticed is how it tries to automate common adjustments.
Core Capabilities:
* One-Click Optimization: This is the star of the show. It analyzes your image and applies what it deems the best corrections for exposure, contrast, and color.
* Automatic White Balance and Contrast Adjustment: I found this particularly useful for correcting photos taken in tricky lighting conditions.
* Red-Eye Correction: A classic, but still necessary for those flash photos.
* Image Rotation and Cropping: Basic but essential tools for framing your shots.
* Noise Reduction: It attempts to clean up grainy photos, which can be a lifesaver for older or low-light shots.
Pros:
* One-Click Optimization for Instant Results: This feature is genuinely impressive for quick fixes. I often use it as a starting point.
* Intuitive User Interface for Beginners: You don't need a manual to figure this out. Everything is clearly laid out.
* Comprehensive Suite of Basic Editing Tools: Beyond the one-click, it has enough basic tools to handle most everyday photo needs.
Cons:
* Limited Advanced Editing Capabilities: If you're looking for layer support or complex masking, this isn't it. It's not a Photoshop replacement.
* Subscription Model for Full Features: I was a bit disappointed to find that some of the more interesting features are locked behind a subscription, even after a one-time purchase for a specific version.
Part 3: Ashampoo Photo Optimizer: Ideal Users and Use Cases
After spending some time with Ashampoo Photo Optimizer, I've got a pretty good handle on who this software is really for and where it shines. It's definitely not a one-size-fits-all solution, but it excels in specific niches.
Best Use Case: Quick Batch Processing for Social Media Uploads
For me, the absolute sweet spot for Ashampoo Photo Optimizer is when I'm preparing a bunch of photos for social media. Think about it: you've got a hundred vacation photos, and you just want them all to look a bit brighter, more vibrant, and generally "better" before you share them. The one-click optimization and batch processing features are a godsend here. I can literally drag and drop a folder of images, hit "optimize," and within minutes, I have a set of much-improved photos ready for Instagram or Facebook. It saves me so much time compared to opening each one individually in a more complex editor.
Limited Use Case: Professional-Grade Retouching for High-Resolution Prints
On the flip side, if your goal is professional-grade retouching for high-resolution prints or client work, Ashampoo Photo Optimizer simply won't cut it. I tried to use it for a portrait where I needed precise skin smoothing and intricate color grading, and it just didn't have the granular control or advanced tools required. For instance, if you need to meticulously remove blemishes, adjust specific color channels, or work with layers for composite images, you'll quickly hit its limitations. It's designed for broad, automatic enhancements, not detailed, pixel-level manipulation. For those scenarios, I always turn to more robust software.
Part 4: Ashampoo Photo Optimizer and Alternatives Comparison
When I'm looking at image enhancers, I always consider how they stack up against the competition. It’s not just about what one tool can do, but how it performs relative to others, especially given different needs and budgets. Here's a quick comparison of Ashampoo Photo Optimizer review against some other popular options I've tried, including UniConverter, which has surprised me with its capabilities.
| Feature / Product | Ashampoo Photo Optimizer | UniConverter (Image Enhancer) | Adobe Lightroom | GIMP (GNU Image Manipulation Program) |
| Processing Speed | Fast (especially batch) | Very Fast (GPU accelerated) | Moderate | Moderate |
| Output Quality | Good (auto-enhancement) | Excellent (AI-driven, lossless) | Excellent | Excellent |
| Ease of Use | Very High | High | Moderate | Low (steep learning curve) |
| Customer Support | Responsive | Responsive | Excellent | Community-driven |
| Security | Local processing | Local processing | Cloud/Local | Local processing |
| Pricing Model | One-time/Subscription | One-time/Subscription | Subscription | Free |
| Batch Processing | Yes | Yes | Yes | Yes |
| AI-Powered Enhance | Yes | Yes | Yes | Limited |
From my perspective, Ashampoo Photo Optimizer excels in sheer ease of use for quick, automated enhancements. If you just want to click a button and have your photos look better, it's fantastic. However, UniConverter's image enhancer really impressed me with its AI-driven quality and speed, often delivering more natural and lossless results, especially for batch processing. Lightroom is the professional standard for a reason, offering unparalleled control, but it comes with a subscription and a learning curve. GIMP, while free and powerful, is definitely for those who don't mind a more complex interface. For me, if I need a quick and high-quality batch enhancement without deep editing, UniConverter is often my go-to.
Part 5: Risks and Pitfalls to Consider
While I've found Ashampoo Photo Optimizer to be quite handy for quick enhancements, I've also run into a few potential issues and things you should be aware of before diving in. It's not all sunshine and one-click magic, and understanding these risks can save you some headaches down the line.
Potential Privacy Concerns with Cloud Features
I noticed that some versions or features of Ashampoo products, including Photo Optimizer, might integrate with cloud services for things like sharing or backup. While convenient, this always raises a red flag for me regarding privacy. If you're uploading your personal photos to their servers, even temporarily, it's worth checking their privacy policy to understand how your data is handled. I always prefer to keep my sensitive photos on my local machine unless absolutely necessary.
Intrusive Advertisements in Free Version
If you're considering the free version or a trial, be prepared for advertisements. I found them to be quite intrusive at times, popping up and interrupting my workflow. It's a common tactic for free software, but it can definitely detract from the user experience. For me, it was enough to consider upgrading or looking for an alternative just to avoid the constant interruptions.
Image Quality Degradation with Over-Optimization
This is a big one for me. While the one-click optimization is often good, it's not foolproof. I've seen instances where the software "over-optimized" an image, leading to unnatural colors, blown-out highlights, or crushed shadows. It's like it tried too hard to make the photo "perfect" and ended up making it worse. You have to be careful and always review the results, especially if you're processing a large batch. Sometimes, less is more, and the automatic settings can be a bit aggressive.
Compatibility Issues with Older Operating Systems
I've also encountered some compatibility issues, particularly when trying to run newer versions of Ashampoo Photo Optimizer on older operating systems. While it might technically install, I've experienced crashes, slow performance, or certain features not working correctly. It's crucial to check the system requirements before purchasing, especially if your computer isn't the latest model. It's frustrating to buy software only to find it doesn't play nice with your current setup.
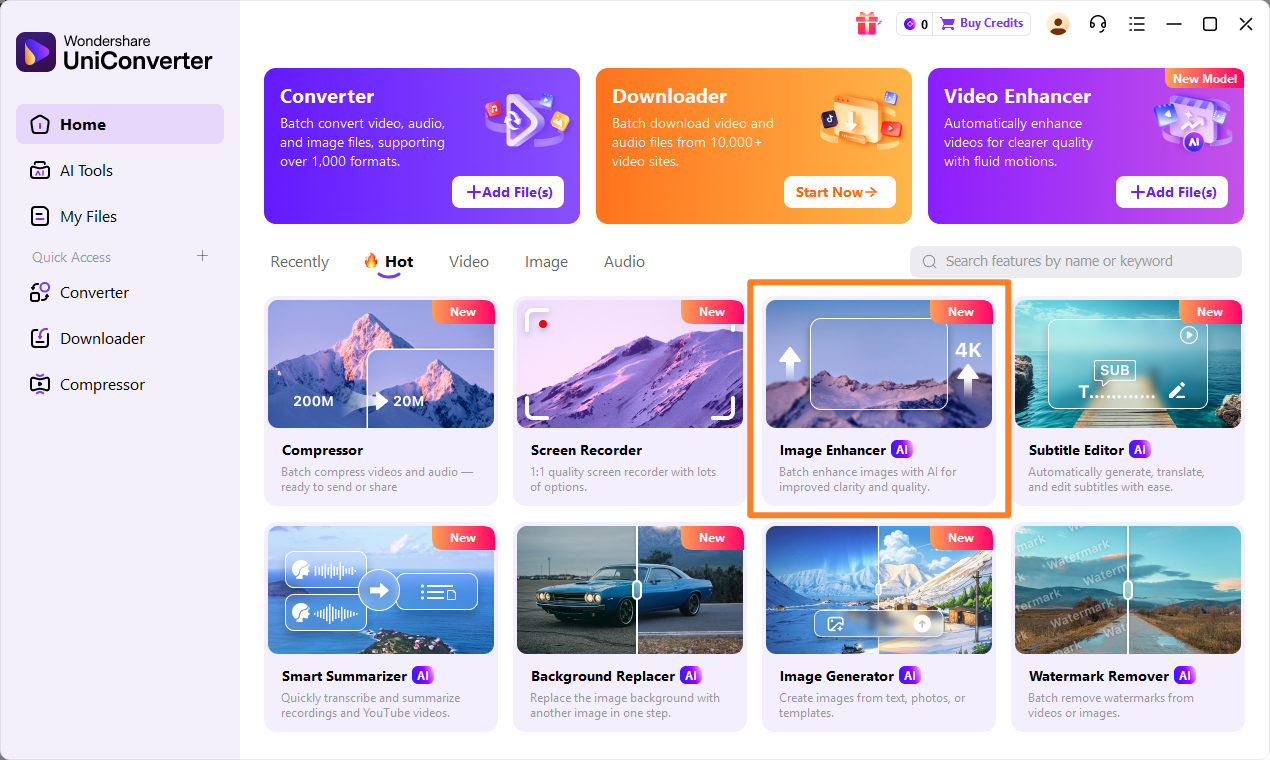
Part 6: How to Use UniConverter to Efficiently Enhance Images
Sometimes, I find that dedicated image enhancers, while good, fall short when I need a more robust, all-in-one solution, especially for batch processing or when dealing with various media types. That's where UniConverter comes in. When other tools struggle with batch enhancements, inconsistent quality, or simply lack the features I need, I turn to UniConverter. It's not just a video converter; its image enhancer is surprisingly powerful, offering stable, lossless enhancements with GPU acceleration and no annoying ads. It’s become my go-to for a comprehensive media toolkit. For instance, it can help you fix pixelated videos and even upscale anime with ease. If you're looking to enhance image resolution, this tool provides an effective solution. You can also unblur a video using its advanced capabilities.
Step 1: Open UniConverter and Choose Image Enhancer
First, I launch UniConverter. On the main interface, I navigate to the "Toolbox" section and select the "Image Enhancer" feature. It's usually pretty easy to spot.
Step 2: Upload the Images
Next, I simply drag and drop the images I want to enhance into the UniConverter window. Alternatively, I can click the "Add Files" button to browse and select them. It supports various formats, which is super convenient.
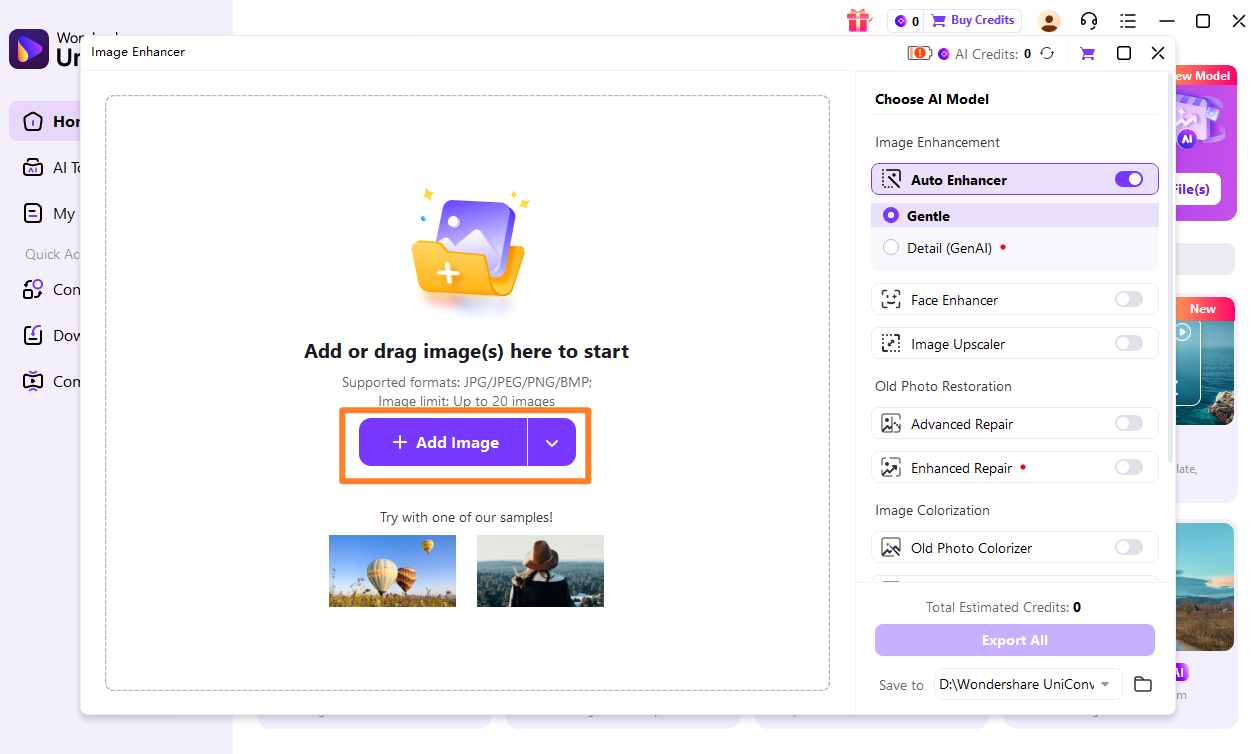
Step 3: Choose Enhancement Model
Once my images are loaded, I get to choose the enhancement model. UniConverter often provides different AI models for various types of enhancement, like general improvement, portrait, or landscape. I pick the one that best suits my photos' needs.
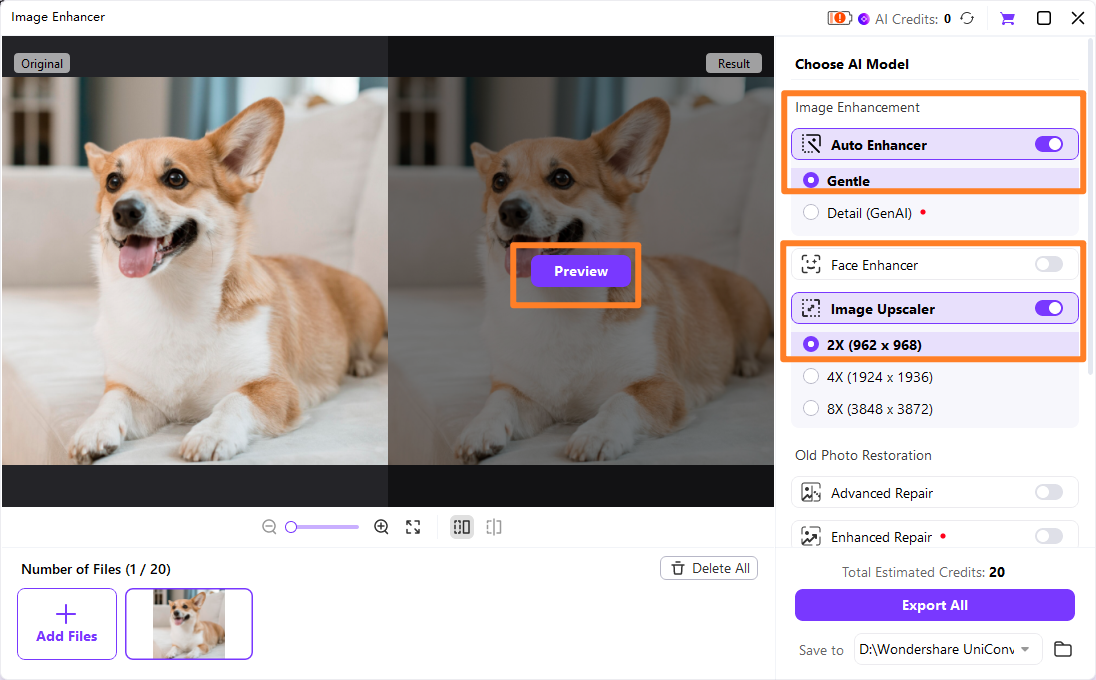
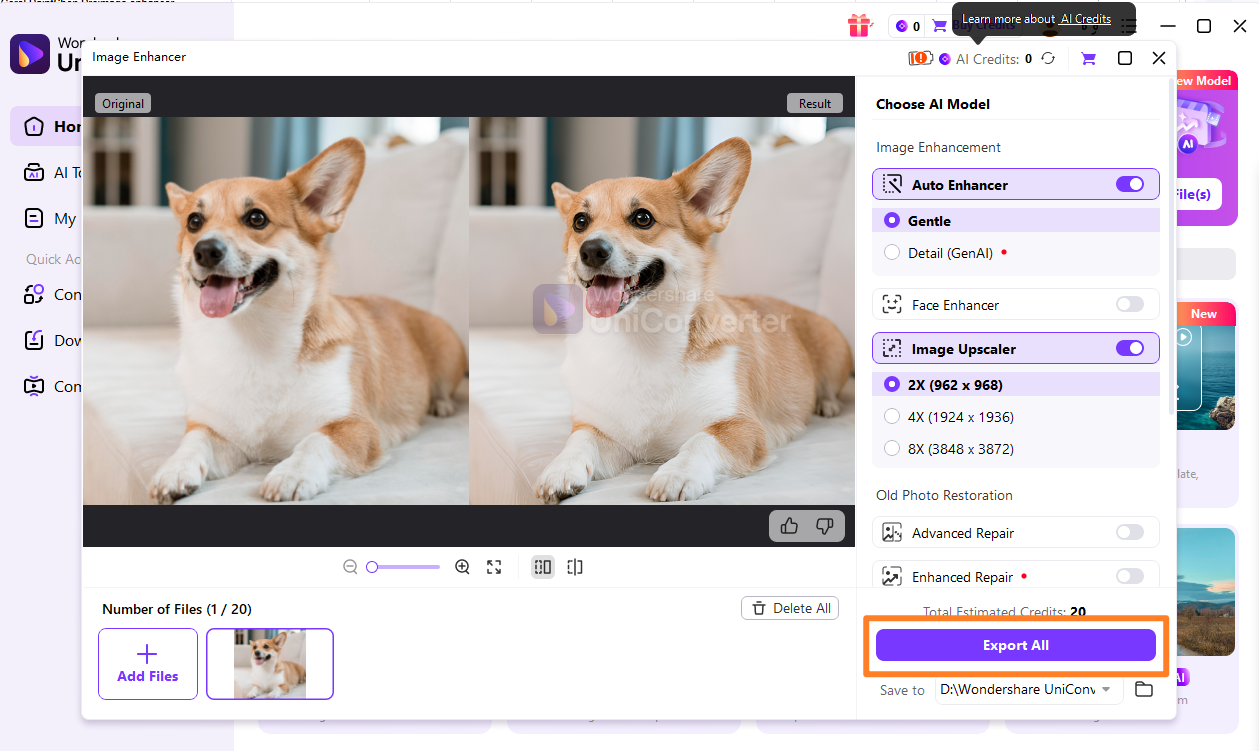
Step 4: Preview and Save the Enhanced Images
Before saving, I always use the preview feature to see the "before and after" of my images. This allows me to make any final adjustments or simply confirm the enhancement looks good. Once satisfied, I click "Start" to process and save my enhanced photos.

Seeking an Ashampoo Photo Optimizer Alternative?
Part 7: Final Verdict and Recommendations
After putting Ashampoo Photo Optimizer through its paces, my Ashampoo Photo Optimizer review concludes that it’s a tool with a clear purpose and audience. It excels at what it promises: quick, automated photo enhancements. For casual users who simply want their everyday photos to look better without diving into complex editing, it’s a fantastic choice. The one-click optimization is genuinely effective for common issues like poor lighting or dull colors, making it ideal for preparing photos for social media or sharing with family. However, for enthusiasts who crave more granular control over every aspect of their image, or for professionals who require advanced retouching capabilities, Ashampoo Photo Optimizer will likely feel limiting. Its lack of sophisticated tools for layer-based editing, precise color grading, or intricate selections means it can't replace dedicated professional software. In those scenarios, you'd be better off with tools like Adobe Lightroom or even UniConverter for its high-quality, AI-driven enhancements that offer a balance of automation and control without the complexity. Ultimately, your choice should align with your specific needs and how much time and effort you're willing to invest in photo editing.
Part 8: FAQs
-
1. Is Ashampoo Photo Optimizer a one-time purchase or subscription?
Ashampoo Photo Optimizer offers both one-time purchase options for specific versions and subscription models for continuous updates and premium features.
-
2. Can Ashampoo Photo Optimizer enhance raw image files?
While it can process various image formats, its primary strength lies in optimizing standard image files like JPEGs and PNGs, with limited support for raw formats.
-
3. How does Ashampoo Photo Optimizer compare to free online image enhancers?
Ashampoo Photo Optimizer generally offers more robust features, better control, and often higher quality results compared to most free online tools, which may have limitations on file size or processing power.
-
4. Does Ashampoo Photo Optimizer offer batch processing?
Yes, batch processing is one of its key strengths, allowing users to optimize multiple images simultaneously with a single click.
-
5. Is there a mobile version of Ashampoo Photo Optimizer?
Ashampoo Photo Optimizer is primarily a desktop application. While some mobile apps offer similar functionalities, there isn't an official mobile version of this specific software.
