
- Affinity Photo Value: Offers professional-grade editing and non-destructive workflow for a one-time purchase, ideal for detailed control.
- Affinity Photo Limitations: Features a steeper learning curve and limited AI, making it less suitable for quick, automated enhancements.
- User Suitability: Best for professionals and serious hobbyists needing precise manual control, not casual users seeking quick AI fixes.
- Competitive Edge: Stands out with its one-time purchase model against subscription-based rivals like Photoshop, but lacks AI depth.
- Potential Pitfalls: Risk of over-editing, performance issues with large files, and limited cloud/AI integration.
- UniConverter Alternative: Efficient for batch processing and AI-driven enhancements, offering speed and simplicity where Affinity Photo is overkill.
In this article
- Part 1: What is Affinity Photo?
- Part 2: Affinity Photo: Core Strengths and Weaknesses for Image Enhancement
- Part 3: Affinity Photo: Ideal Users and Use Cases
- Part 4: Affinity Photo vs. Competitors: A Comparative Analysis
- Part 5: Risks and Pitfalls When Using Affinity Photo for Image Enhancement
- Part 6: How to Use UniConverter Efficiently for Image Enhancement
- Part 7: Conclusion
- Part 8: FAQs
Affinity Photo as an Image Enhancer: A Comprehensive Review
When I first started diving deep into photo editing, I heard a lot of buzz about Affinity Photo. It's often touted as a powerful, one-time purchase alternative to industry giants, especially for those looking to enhance their images without a recurring subscription. In this review, I'll share my personal experience and insights into using Affinity Photo specifically as an image enhancer. We'll explore its strengths, weaknesses, and how it stacks up against other popular tools in various scenarios, helping you decide if it's the right fit for your workflow.
Part 1: What is Affinity Photo?
Affinity Photo emerged as a strong contender in the professional photo editing software market, positioning itself as a direct rival to Adobe Photoshop. Developed by Serif Europe, it quickly gained traction for offering a robust set of features at a one-time purchase price, a refreshing change from the subscription-based models prevalent today. My initial impression was that it aimed to provide a comprehensive suite for photographers and graphic designers, covering everything from basic adjustments to complex retouching. This review will specifically focus on its capabilities as an image enhancer, evaluating how well it performs in bringing out the best in your photos.
The Evolving Landscape of Image Enhancement Tools
The world of image enhancement is constantly changing, with new tools and technologies emerging regularly. This creates a few core challenges for us as users:
* Overwhelming Choices: The sheer number of available tools can make it hard to pick the right one.
* Balancing Power and Simplicity: We often struggle to find software that offers professional-grade control without being overly complex for everyday tasks.
* Cost vs. Features: Deciding between subscription models, one-time purchases, and free tools, while ensuring we get the features we need, is a constant dilemma.
* AI Integration: The rise of AI-powered features promises speed and automation, but their effectiveness and integration vary widely across different platforms.
Part 2: Affinity Photo: Core Strengths and Weaknesses for Image Enhancement
From my perspective, Affinity Photo offers a really solid foundation for image enhancement. It’s packed with tools that give you incredible control over your edits, which I personally appreciate.
Core Capabilities:
* Precise Color and Tone Adjustments: You get a full suite of tools like Curves, Levels, HSL, and White Balance, allowing for very fine-tuned color correction.
* Detailed Retouching Tools: Features like the Inpainting Brush, Clone Brush, and Healing Brush are excellent for removing imperfections and refining details.
* Layer-Based Editing: This non-destructive workflow is a game-changer, letting you make changes without permanently altering your original image.
* Advanced Masking and Selection: The selection tools are powerful, making it easy to isolate specific areas for targeted enhancements.
* RAW Development: It handles RAW files well, giving you a lot of flexibility to extract maximum detail and dynamic range before even starting your main edits.
Pros:
* Professional-grade editing tools for detailed adjustments: I've found it offers the kind of granular control I need for serious photo work.
* Non-destructive workflow for flexible enhancements: This is a huge plus for me; I can always go back and tweak things without starting over.
* One-time purchase model, no subscription: This was a major selling point for me, making it a more economical choice in the long run.
Cons:
* Steeper learning curve for beginners: I'll admit, it took me a while to get comfortable with its interface and all its functionalities.
* Limited AI-powered enhancement features compared to some competitors: If you're looking for one-click AI magic, you might find it lacking in that department.
Part 3: Affinity Photo: Ideal Users and Use Cases
From my experience, Affinity Photo really shines for a specific type of user, and it’s not always the best fit for everyone. I've found that its strengths lie in giving you complete control, which is fantastic if that's what you're after.
Best Use Case: Professional Photographers and Graphic Designers Requiring Precise Control
If you're a professional photographer, a graphic designer, or even a serious hobbyist who demands absolute control over every pixel, Affinity Photo is probably going to be right up your alley. I use it extensively when I need to perform intricate retouching, detailed color grading, or complex compositing. For instance, when I'm working on a portrait and need to meticulously smooth skin, enhance eyes, or correct specific color casts, its layer-based editing and precise selection tools are invaluable. It's also my go-to for preparing images for print, where color accuracy and sharpness are paramount. I appreciate that it doesn't try to guess what I want; it gives me the tools to achieve exactly what I envision.
Limited Use Case: Casual Users Needing Quick, AI-Driven Enhancements
On the flip side, if you're someone who just wants to quickly brighten a photo, make colors pop with a single click, or automatically fix common issues, Affinity Photo might feel like overkill. I've tried using it for quick social media edits, and honestly, it takes more time than I'd like. There aren't many "smart" or AI-driven features that can instantly enhance an image with minimal input. If your goal is speed and simplicity, and you're not looking to dive deep into manual adjustments, you might find its learning curve and extensive toolset more of a hindrance than a help. For those moments when I just need a quick fix, I often reach for other, more automated tools.
Part 4: Affinity Photo vs. Competitors: A Comparative Analysis
When I look at Affinity Photo alongside its competitors, I see it holding its own, but each tool has its own niche. Here’s how I’d break it down, based on my hands-on experience.
| Feature/Scenario | Affinity Photo | Adobe Photoshop | Luminar Neo | Topaz Photo AI |
| Detailed Retouching | Excellent | Excellent | Good | Fair |
| Batch Processing | Good | Excellent | Good | Excellent |
| AI Upscaling | Basic | Good | Excellent | Excellent |
| Color Correction | Excellent | Excellent | Good | Fair |
| Ease of Use (Beginner) | Moderate | Moderate | High | High |
| Pricing Model | One-time | Subscription | One-time/Subscription | One-time |
Key Differentiators:
From my perspective, Affinity Photo really shines when I need manual, precise control over every aspect of an image. It's like having a full artist's toolkit. In contrast, tools like Luminar Neo and Topaz Photo AI are fantastic when I'm short on time and need quick, AI-driven enhancements – they often do a surprisingly good job with minimal input. The pricing model is also a huge factor for me; Affinity Photo's one-time purchase is a breath of fresh air compared to Photoshop's ongoing subscription. However, the learning curve is something to consider; while Affinity Photo offers immense power, it demands more time to master than the more intuitive, AI-focused alternatives.
Part 5: Risks and Pitfalls When Using Affinity Photo for Image Enhancement
While I genuinely appreciate Affinity Photo's capabilities, I've also run into a few potential issues and things to watch out for, especially when using it for image enhancement. It's not a perfect tool, and understanding its limitations can save you some headaches.
Potential for Over-editing and Unnatural Results
Because Affinity Photo gives you such granular control, it's incredibly easy to go overboard with your edits. I've definitely found myself pushing sliders too far, resulting in images that look artificial or heavily processed. It's tempting to use every tool available, but sometimes less is more. Without a good eye and a sense of restraint, you can quickly turn a natural-looking photo into something that screams "edited." This isn't a flaw in the software itself, but rather a risk that comes with its powerful capabilities.
Performance Issues with Large Files or Complex Edits
I've noticed that when I'm working with very large RAW files, especially those from high-megapixel cameras, or when I stack many adjustment layers and complex masks, Affinity Photo can start to slow down. While it's generally well-optimized, my system (even with decent specs) sometimes struggles, leading to laggy brush strokes or delayed previews. This can be frustrating when you're in the middle of an intensive editing session and just want things to flow smoothly. It's something to keep in mind if your workflow frequently involves massive files or extremely intricate multi-layered projects.
Lack of Built-in Cloud Integration for Collaborative Work
One thing I genuinely miss when using Affinity Photo is robust cloud integration. Unlike some other platforms that seamlessly sync files across devices or offer easy collaborative features, Affinity Photo is primarily a desktop application. If I'm working on a project with others, or if I need to access my files from different locations, I have to rely on external cloud storage services and manually manage file versions. This adds an extra layer of complexity and can hinder a smooth collaborative workflow, which is a common requirement in many professional settings today.
Limited AI-driven Smart Enhancements
As I mentioned before, Affinity Photo isn't big on AI. While it excels at manual control, it lacks the "smart" features that some competitors offer for quick, automated enhancements. There's no one-click "enhance" button that intelligently adjusts exposure, contrast, and color based on AI analysis. If you're used to tools that can automatically de-noise, sharpen, or upscale images with minimal input, you'll find yourself doing a lot more manual work in Affinity Photo. This isn't necessarily a bad thing if you prefer manual control, but it's a definite pitfall if you're looking for AI-powered shortcuts.
Compatibility Challenges with Certain Niche File Formats
While Affinity Photo supports a wide range of common file formats, I've occasionally run into issues with more niche or proprietary formats, especially from older cameras or specialized equipment. While it generally handles RAW files well, there have been instances where specific camera RAW formats weren't fully supported or required an update. This can be a minor inconvenience, forcing me to convert files beforehand or use another tool for initial processing, which disrupts my workflow.
Part 6: How to Use UniConverter Efficiently for Image Enhancement
Sometimes, I find myself in situations where Affinity Photo's powerful, manual approach is just too much. If I'm dealing with a batch of images that need quick, consistent enhancements, or if I'm struggling with unstable results from other tools, I often turn to UniConverter. It's not a full-fledged editor like Affinity Photo, but it's incredibly efficient for specific enhancement tasks, especially when you need speed and simplicity without compromising too much on quality. It's become my go-to for avoiding issues like inconsistent enhancements or poor quality from other quick-fix solutions. UniConverter offers a clean, ad-free experience, supports a wide range of formats, leverages GPU acceleration for speed, and ensures stable, lossless batch enhancements, making it an all-in-one solution for these scenarios. For those looking to enhance image resolution or perform a general image enhancer function, this tool provides a streamlined workflow.
Step 1: Open UniConverter and Choose Image Enhancer
First, I launch UniConverter and navigate to the "AI Lab" section. Within that, I select the "Image Enhancer" tool. It's usually pretty prominent and easy to find. For quick online image enhancer needs, there are also web-based options available.
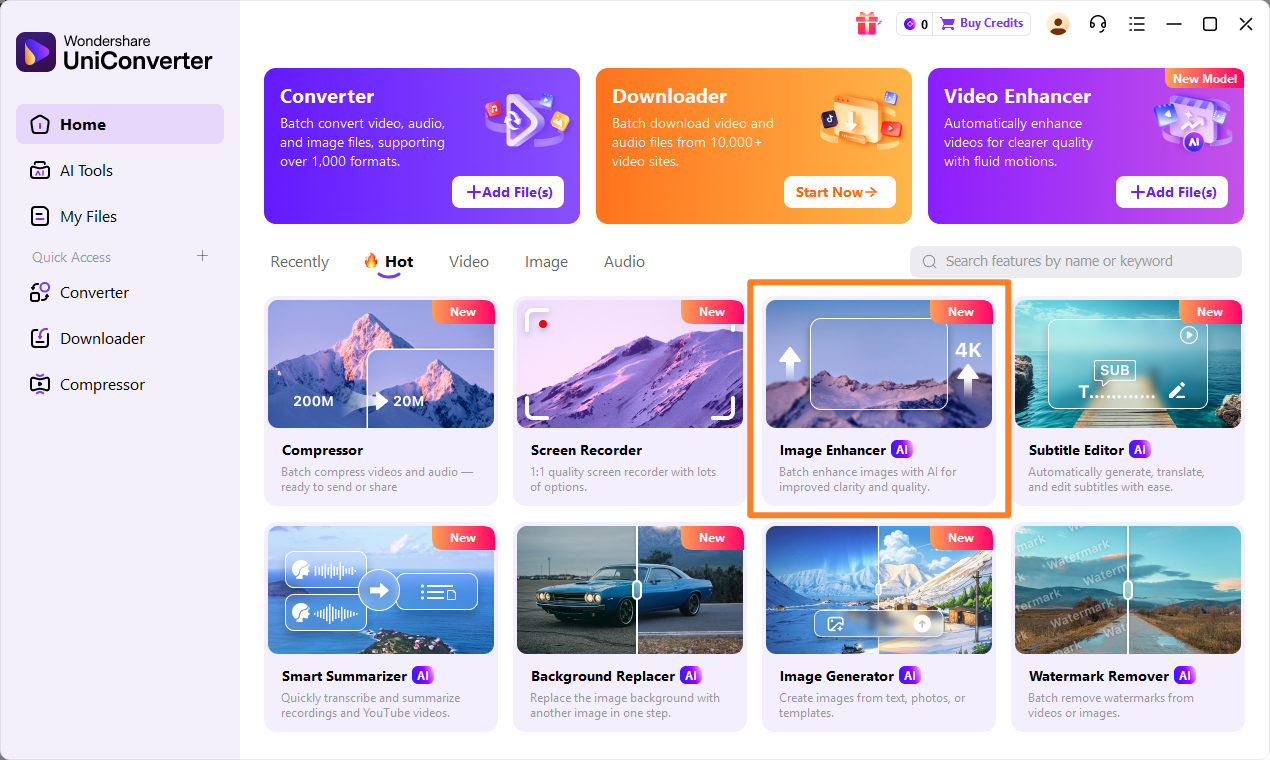
Step 2: Upload the Images
Next, I simply drag and drop the images I want to enhance directly into the UniConverter interface. You can also click the "Add Files" button to browse and select them. It handles multiple images at once, which is a huge time-saver.
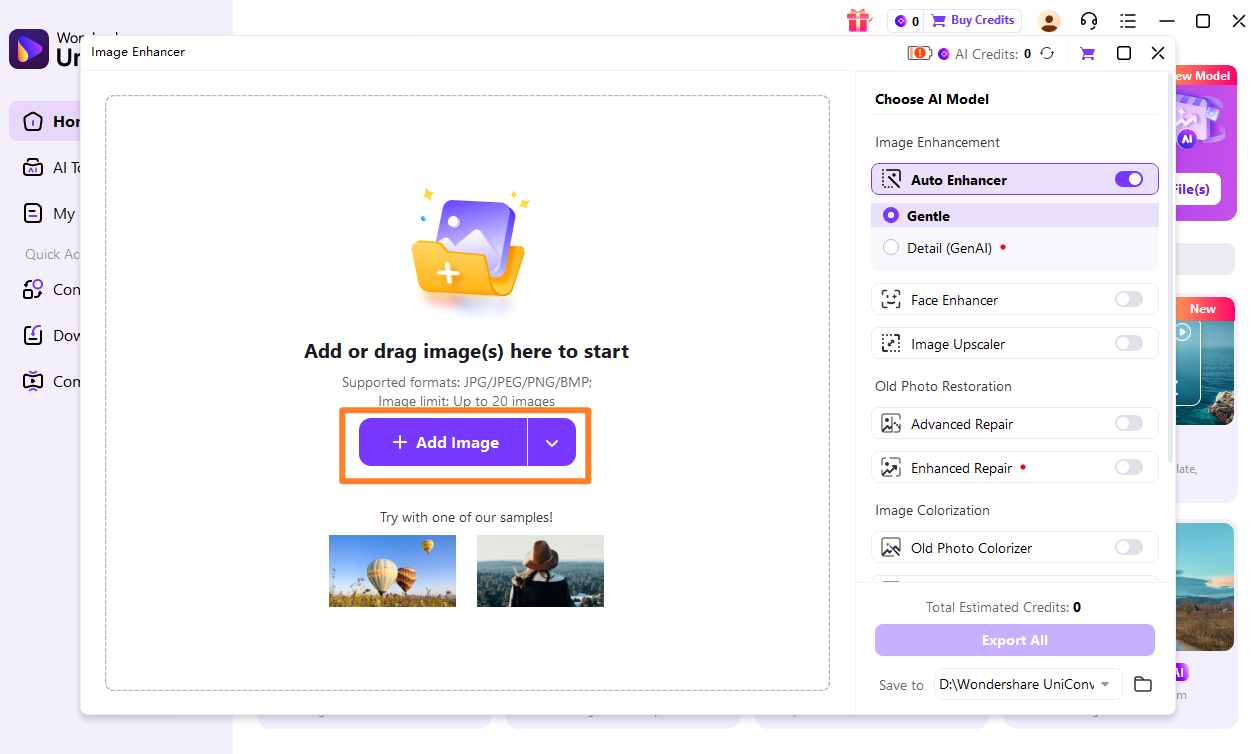
Step 3: Choose Enhancement Model
Once my images are loaded, I get to choose the enhancement model. UniConverter offers different options like "AI Upscale" or "AI Denoise" depending on what I need. I pick the one that best suits my goal for that batch of photos. This is particularly useful when you need to upscale video or improve the clarity of your visuals.
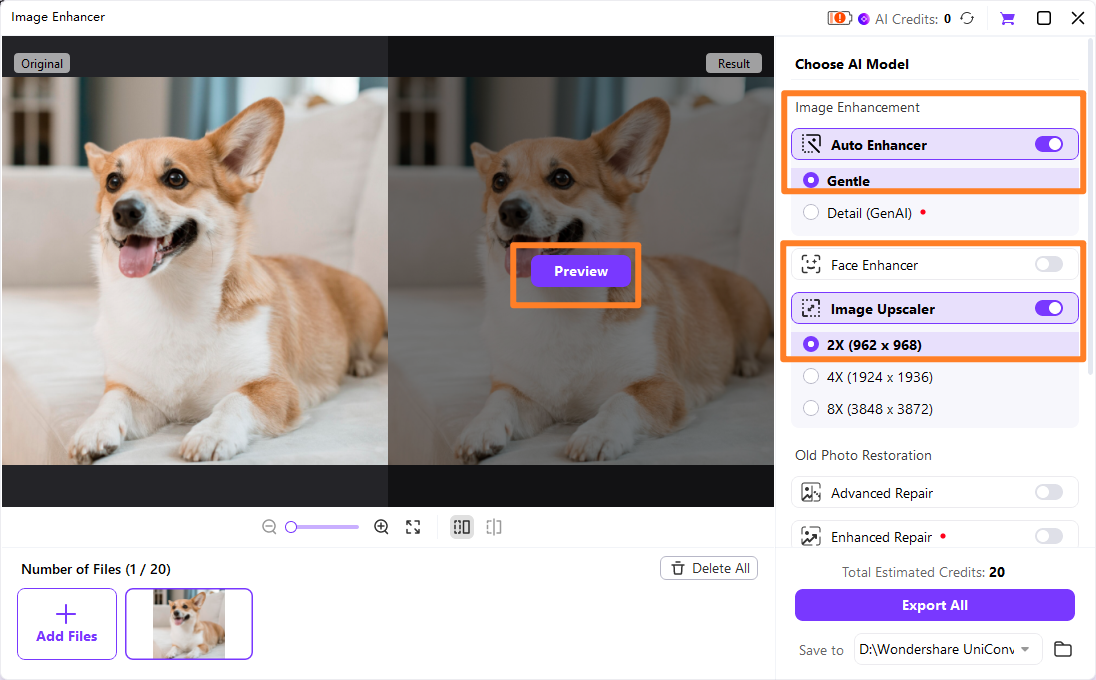
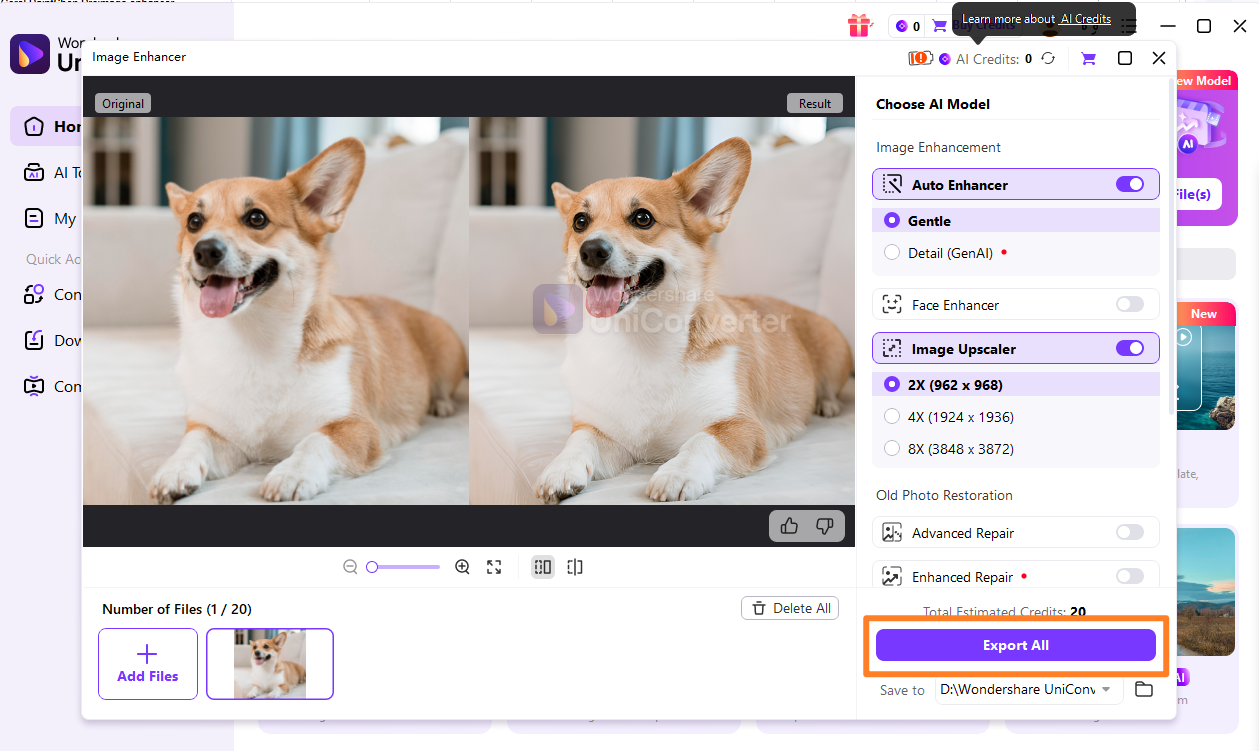
Step 4: Preview and Save the Enhanced Images
After selecting the model, UniConverter processes the images. I can then preview the enhanced results to make sure they look good. Once I'm happy, I just click "Export" to save my newly enhanced images to my desired location. This process is similar to how one might enhance video quality for better viewing.

Enhance Photos Beyond Affinity Photo
Part 7: Conclusion
After spending countless hours with Affinity Photo, especially in its role as an image enhancer, I can confidently say it's a formidable tool. For professionals and serious hobbyists who crave manual control and a non-destructive workflow, it's an excellent investment. Its one-time purchase model is a significant draw, offering a cost-effective alternative to subscription-based software. However, its steeper learning curve and limited AI-driven features mean it's not the best fit for everyone. If you're a beginner seeking quick, automated enhancements, or if your workflow heavily relies on AI for speed, you might find yourself looking elsewhere. Ultimately, the best choice depends on your specific needs, budget, and willingness to invest time in mastering its powerful capabilities.
Part 8: FAQs
-
1. Is Affinity Photo good for beginners?
Affinity Photo has a steeper learning curve than some other image enhancers, making it less ideal for absolute beginners seeking quick, automated results. However, with dedication, beginners can master its powerful tools.
-
2. Can Affinity Photo upscale images effectively?
Affinity Photo offers basic upscaling capabilities. For advanced AI-powered upscaling with minimal quality loss, dedicated AI image enhancers might be more suitable.
-
3. Is Affinity Photo a one-time purchase?
Yes, Affinity Photo is available as a one-time purchase, which can be a cost-effective option compared to subscription-based software in the long run.
-
4. How does Affinity Photo compare to Photoshop for image enhancement?
Both are professional-grade tools. Affinity Photo offers a similar feature set to Photoshop but with a different interface and a one-time purchase model. Photoshop often has more extensive third-party plugin support and AI features.
-
5. What are the best alternatives to Affinity Photo for quick image enhancement?
For quick and easy image enhancement, especially with AI features, alternatives like UniConverter, Luminar Neo, or Topaz Photo AI are excellent choices.
