
- TinyPNG Value: Excellent for quick, visually lossless image compression for web use, improving site speed.
- TinyPNG vs. Alternatives: Simpler than ImageOptim or Squoosh, but lacks their advanced controls and batch processing.
- Ideal Use: Best for bloggers and web developers needing fast optimization of individual or small batches of web images.
- Limitations: Not suitable for large-scale batch processing, high-resolution professional images, or offline work.
- Decision Factor: Choose TinyPNG for ease and speed; choose UniConverter for comprehensive, advanced, and offline media compression.
In this article
When I'm working on web projects, image optimization is always a top priority. I've heard a lot about TinyPNG Image Compressor review and how it helps reduce file sizes without noticeable quality loss. This review aims to explore TinyPNG's capabilities, compare it with other popular tools like Compressor.io, ImageOptim, and Squoosh, and ultimately help you decide if it's the right solution for your image compression needs. I'll dive into its core features, ideal use cases, potential pitfalls, and even suggest a comprehensive alternative for those seeking an all-in-one media management solution.
Part 1: What is TinyPNG?
TinyPNG is an online image compression tool that uses smart lossy compression techniques to reduce the file size of your PNG, JPEG, and WebP images. It's designed to make your websites load faster, save bandwidth, and improve overall user experience by delivering optimized images. My goal with this review is to determine if TinyPNG lives up to its reputation for efficiency and ease of use, especially when compared to other robust tools available in the market.
The Landscape of Image Compression
- The Need for Speed: In today's digital world, website loading speed is crucial for user retention and SEO rankings. Large image files are often the biggest culprits for slow loading times.
- Balancing Quality and Size: The challenge lies in reducing file size significantly without compromising the visual quality of the images.
- Diverse User Needs: From casual bloggers to professional web developers, everyone needs effective image compression, but their specific requirements can vary widely.
Part 2: TinyPNG: Core Features, Pros, and Cons
TinyPNG excels in its primary function: compressing images efficiently. I've found its core ability to shrink file sizes while maintaining visual integrity to be quite impressive. It handles various formats and offers a straightforward user experience.
Core Features:
- Smart Lossy Compression: Utilizes advanced algorithms to remove unnecessary data from images.
- Multi-Format Support: Compresses PNG, JPEG, and WebP files.
- Drag-and-Drop Interface: Simplifies the upload process for quick optimization.
- API for Developers: Offers an API for integrating compression into workflows.
- Preview Functionality: Allows you to see the original and compressed image side-by-side.
Pros:
- Highly efficient compression with minimal quality loss, often imperceptible to the human eye.
- User-friendly interface for quick and hassle-free optimization, making it accessible even for beginners.
- Supports multiple image formats (PNG, JPEG, WebP), covering most common web image types.
Cons:
- Limited advanced features for professional users who might need more granular control over compression settings.
- File size limitations for the free tier, which can be restrictive for larger projects or high-resolution images.
Part 3: TinyPNG: Ideal Users and Use Cases
TinyPNG is a fantastic tool for anyone who needs quick and effective image compression without diving into complex settings. I've found it particularly useful for specific scenarios where simplicity and speed are paramount.
Best Use Case: Optimizing Website Images for Faster Loading
If you're a blogger, a small business owner managing your own website, or a web developer looking for a quick way to optimize images before deployment, TinyPNG is your go-to. I often use it to compress hero images, product photos, and blog post graphics. The process is incredibly simple: drag, drop, and download. It significantly reduces page load times, which is crucial for SEO and user experience. For instance, I recently optimized a set of product images for an e-commerce site, and TinyPNG reduced their total size by over 70% without any noticeable visual degradation, leading to a much snappier product page.
Limitation Scenario: Batch Processing Large Volumes of High-Resolution Photos
While great for individual or small batches, TinyPNG's free tier has limitations on file size and the number of images you can process at once. If I'm working on a professional photography project with hundreds of high-resolution RAW or TIFF files that need specific compression parameters, TinyPNG isn't the ideal solution. Its lack of advanced settings for color profiles, metadata retention, or specific compression ratios means I'd need to look for a more robust desktop application or a service with a more powerful API and higher limits. Trying to compress a large photo library with TinyPNG would be a tedious and time-consuming task, hitting its free tier limits very quickly.
Part 4: TinyPNG and Alternatives Comparison
When it comes to image compression, TinyPNG is a strong contender, but it's important to see how it stacks up against other popular tools. I've put together a comparison to highlight the key differences.
| Feature/Tool | TinyPNG | Compressor.io | ImageOptim | Squoosh |
| Compression Efficiency | High | High | High | High |
| Batch Processing | Limited (free tier) | Yes | Yes | Yes |
| Advanced Settings | No | Limited | Yes | Yes |
| Supported Formats | PNG, JPEG, WebP | PNG, JPEG, SVG, GIF | PNG, JPEG, GIF | PNG, JPEG, WebP, AVIF |
| Desktop App | No | No | Yes (Mac only) | No (Web-based) |
Key Differentiators:
TinyPNG excels in simplicity and effective compression for web-ready images, making it incredibly easy to get good results quickly. However, when I need more control or have a large volume of images, competitors often offer more. Compressor.io is similar in its web-based approach but supports more formats like SVG and GIF. For desktop users, ImageOptim (Mac) provides advanced settings and batch processing offline. Squoosh, a Google project, offers a powerful web-based interface with granular control over compression algorithms and broader format support, including AVIF. If I'm just looking for a quick, high-quality compression for a few images, TinyPNG is perfect. But for complex projects requiring batch processing, offline capabilities, or fine-tuned control, I'd lean towards ImageOptim or Squoosh.
Part 5: Risks and Pitfalls to Consider
While online image compression tools like TinyPNG are incredibly convenient, it's crucial to be aware of the potential risks and limitations, especially when I'm dealing with sensitive or high-stakes projects.
Potential Quality Degradation for Specific Image Types
Although TinyPNG is known for "imperceptible" quality loss, I've found that for certain highly detailed images, or those with subtle gradients and textures, the lossy compression can sometimes introduce minor artifacts or banding. This might not be an issue for a blog post image, but for a professional print or a high-resolution display on a client's website, even slight degradation can be noticeable. I always recommend carefully reviewing the compressed output, especially for critical visuals.
Data Privacy Concerns with Online Tools
When I upload my images to an online service, I'm essentially entrusting my data to a third party. While TinyPNG states they delete images after a short period, there's always an inherent risk with any cloud-based service. For proprietary images, client work, or anything containing sensitive information, I become wary. I always consider the privacy policy and terms of service before uploading anything I wouldn't want potentially exposed.
Dependence on Internet Connection
Being a web-based tool, TinyPNG requires an active internet connection to function. This can be a significant drawback if I'm working offline, in an area with poor connectivity, or if I need to process images on the go without reliable access. In such scenarios, a desktop application would be a far more practical solution.
Free Tier Limitations and Upselling
The free version of TinyPNG, while generous for casual use, comes with limitations on file size and the number of images I can process per month. Once I hit these limits, I'm prompted to upgrade to a paid plan or use their API, which incurs costs. This can be a "pitfall" if I start a project assuming free usage and then find myself needing to pay unexpectedly to complete my work. It's essential to understand these limitations upfront to avoid workflow interruptions and unplanned expenses.
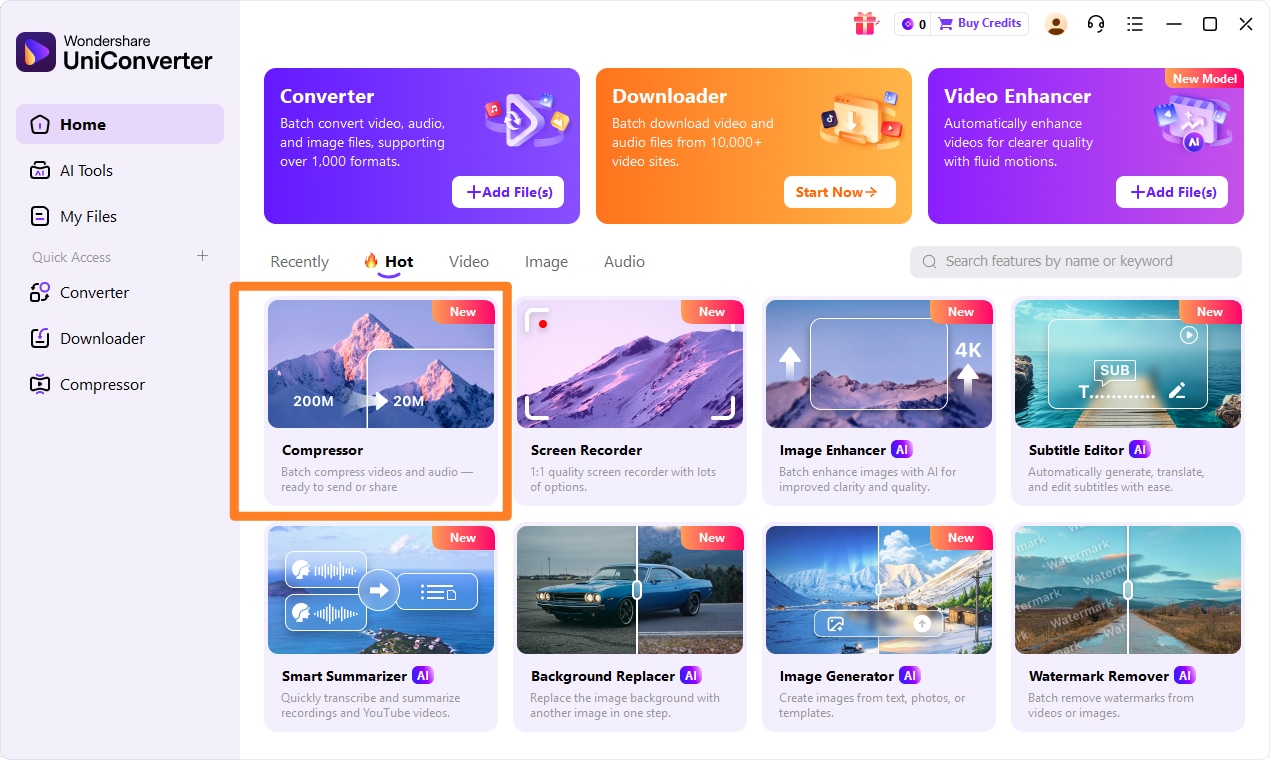
Part 6: How to Use UniConverter to Compress Efficiently
Sometimes, online tools fall short when I need to batch process, ensure stable compression, or avoid any quality loss. That's when I turn to UniConverter. It's a comprehensive solution that handles video, audio, and image compression with robust features, no ads, extensive format support, GPU acceleration, and stable, near-lossless results. It truly is an all-in-one media management tool.
Step 1: Launch UniConverter and Select "Compressor"
Open UniConverter on your desktop. On the main interface, navigate to the left sidebar and select the "Compressor" tool.
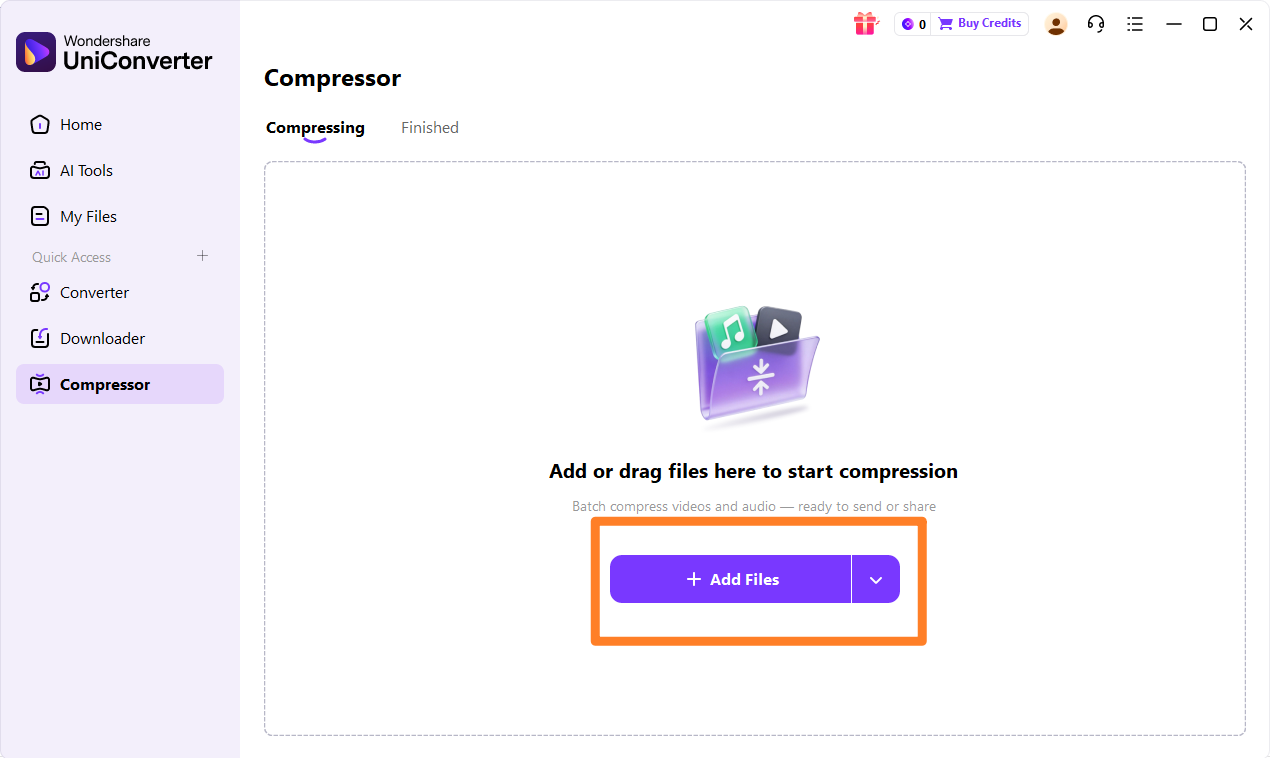
Step 2: Upload the Video, Audios or Images
Click on the "Add Files" button or simply drag and drop your video, audio, or image files into the UniConverter window. You can add multiple files for batch processing.
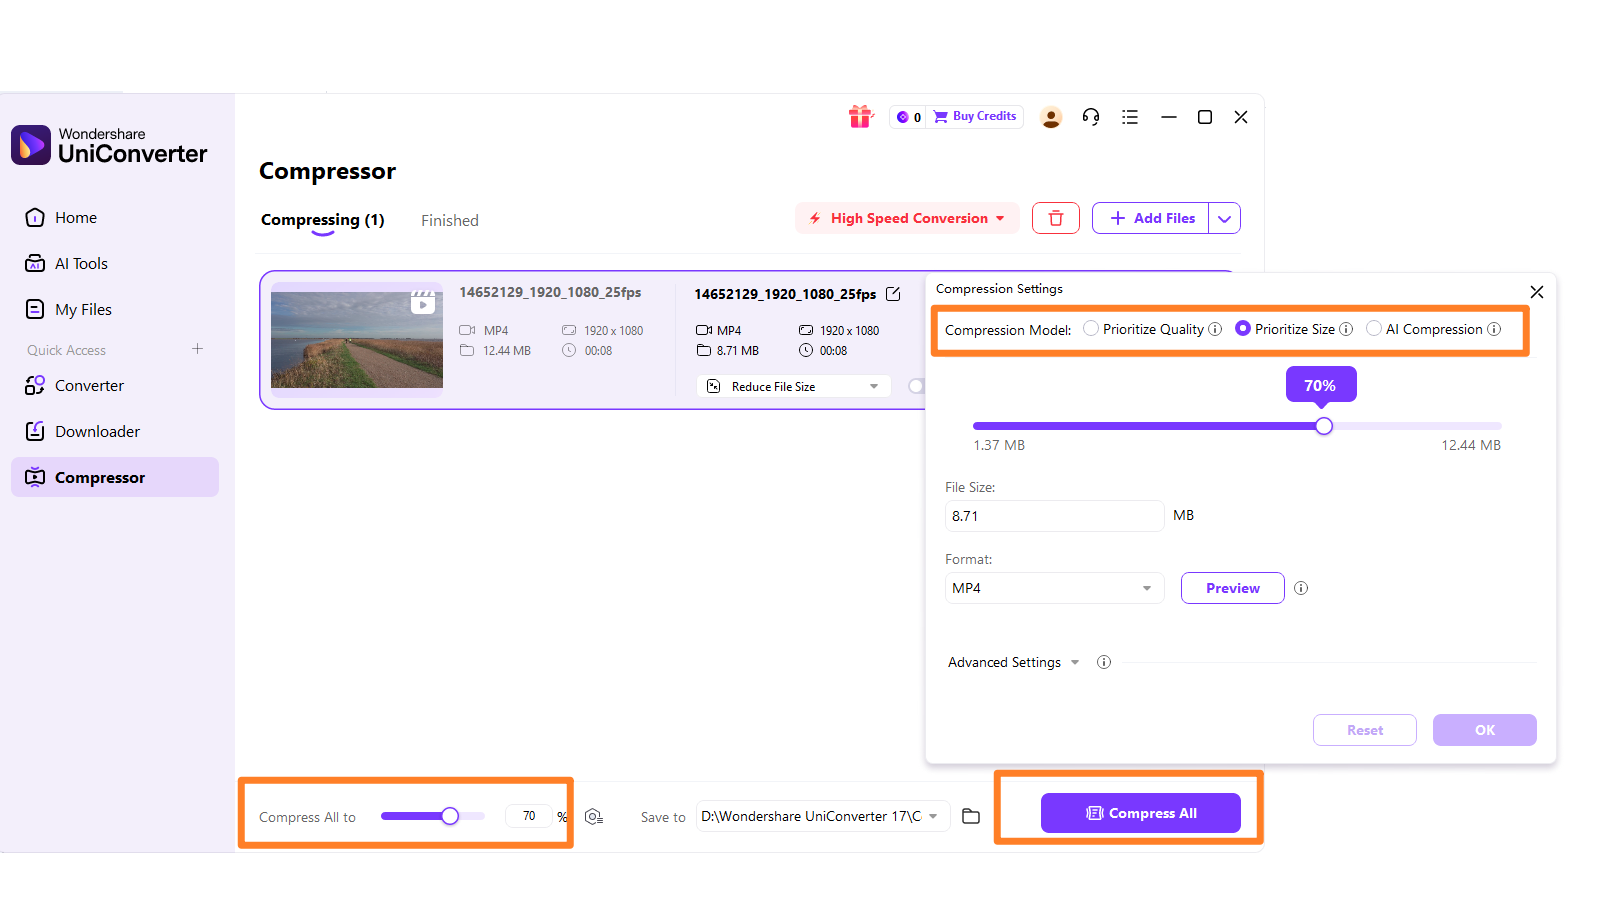
Step 3: Choose Required Parameters
For each file, you can adjust the compression settings. UniConverter allows you to select the output format, resolution, and quality. You can preview the compressed file size and quality before proceeding.
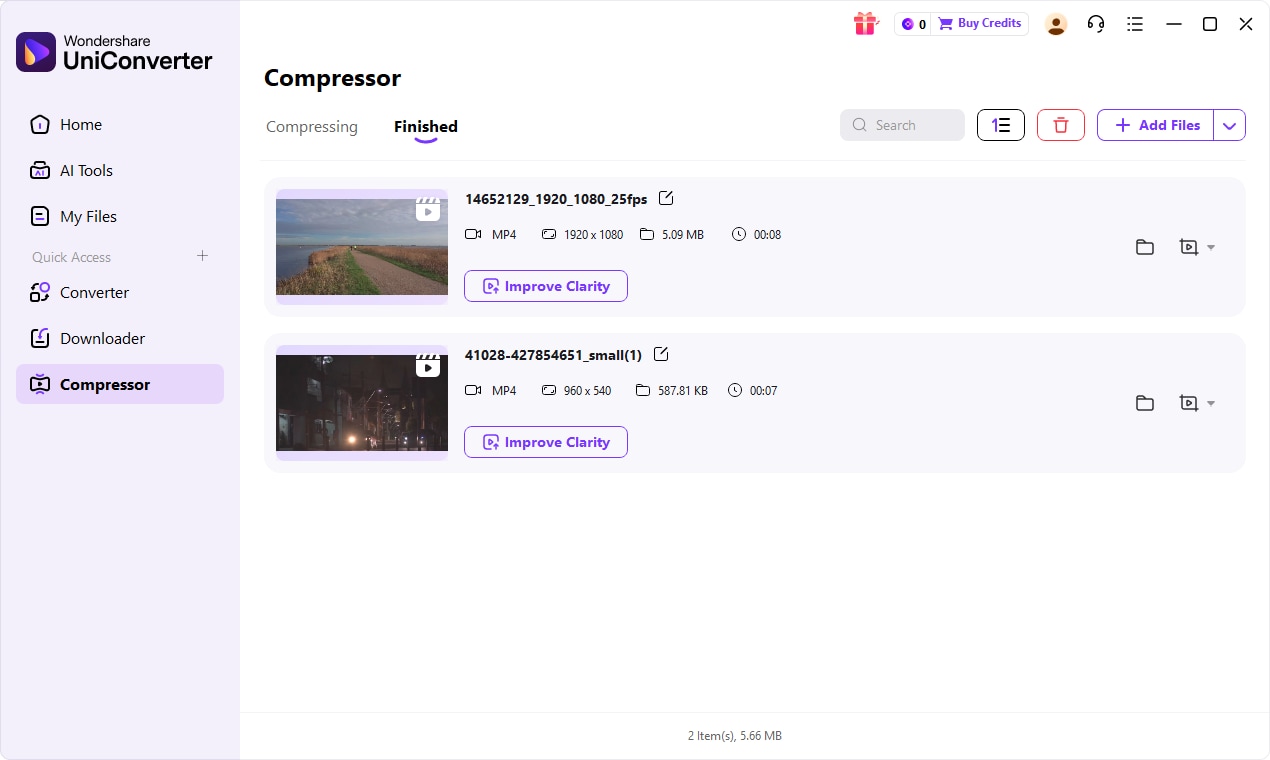
Step 4: Save the Compressed File
Once you're satisfied with the settings, click the "Compress" button. UniConverter will process your files quickly, often leveraging GPU acceleration. After compression, you can find your optimized files in the designated output folder.

Seeking a TinyPNG Alternative for Image Compression?
Part 7: Conclusion
After thoroughly exploring TinyPNG Image Compressor review and comparing it with its alternatives, I can confidently say that TinyPNG is an excellent tool for quick, efficient, and visually lossless image compression, especially for web developers and bloggers focused on improving website loading speeds. Its simplicity and effectiveness for PNG, JPEG, and WebP formats make it a go-to for everyday optimization tasks. However, for professional photographers, designers, or users with extensive batch processing needs, or those requiring advanced control over compression parameters, tools like ImageOptim, Squoosh, or a comprehensive solution like UniConverter offer more robust features. While TinyPNG excels in its niche, understanding its limitations regarding advanced features, batch processing, and dependence on an internet connection is crucial. For an all-in-one media management solution that handles diverse formats, offers advanced controls, and ensures stable, high-quality output without the typical online tool constraints, UniConverter stands out as a versatile and powerful alternative. Ultimately, the best tool depends on your specific workflow, volume of work, and the level of control you require.
Part 8: FAQs
-
1. Does TinyPNG reduce image quality noticeably?
TinyPNG uses smart lossy compression techniques that typically result in imperceptible quality loss for most web use cases. The algorithms are designed to remove redundant data without affecting the visual appearance.
-
2. Is TinyPNG free to use?
TinyPNG offers a free online tool with certain limitations on file size (up to 5MB per image) and quantity (up to 20 images at once). Paid plans and an API are available for higher usage and more features.
-
3. Can TinyPNG compress images in bulk?
The free online version has limited batch processing capabilities, allowing up to 20 images at a time. For larger batches or automated workflows, a paid API or alternative tools like UniConverter, which offers robust batch processing, are recommended.
-
4. What's the difference between lossy and lossless compression?
Lossy compression permanently removes some data from an image to achieve significantly smaller file sizes, which TinyPNG primarily uses. Lossless compression reduces file size without losing any data, meaning the image can be perfectly reconstructed to its original state.
-
5. Are there any offline alternatives to TinyPNG?
Yes, desktop applications like ImageOptim (for Mac) or UniConverter offer offline image compression capabilities. UniConverter, in particular, provides a comprehensive suite for various media types, including images, with advanced settings and batch processing without needing an internet connection.
