
- Value: PNGQuant offers superior lossy compression for PNGs, significantly reducing file sizes for web and game development.
- Comparison: Unlike lossless tools, PNGQuant prioritizes file size reduction, making it ideal where minor quality trade-offs are acceptable.
- Decision: Choose PNGQuant for automated, high-volume PNG optimization if comfortable with command-line interfaces.
- Value: UniConverter provides a user-friendly GUI alternative for comprehensive image, video, and audio management.
- Comparison: UniConverter excels where PNGQuant falls short: ease of use, GUI, and multi-format support.
- Decision: Opt for UniConverter if you need a versatile, all-in-one media compression tool with a visual interface.
- Value: Understand PNGQuant's risks: potential quality degradation, CLI dependency, and lack of built-in preview.
- Comparison: Other tools like TinyPNG or ImageOptim offer better ease of use or lossless options for specific needs.
- Decision: Evaluate your technical comfort and quality requirements to choose between CLI power and GUI convenience.
In this article
- Part 1: What is PNGQuant?
- Part 2: PNGQuant: Core Features, Pros, and Cons
- Part 3: PNGQuant: Ideal Users and Scenarios
- Part 4: PNGQuant & Competitors: A Comparative Analysis
- Part 5: Risks and Pitfalls of Using PNGQuant
- Part 6: How to Use UniConverter for Comprehensive Image Management
- Part 7: Conclusion
- Part 8: FAQs
PNGQuant Image Compressor: A Deep Dive into Lossy PNG Optimization
Welcome to my PNGQuant Image Compressor review! In today's digital landscape, image optimization is no longer a luxury but a necessity. High-quality images can significantly slow down website loading times, consume valuable bandwidth, and negatively impact user experience. This is where tools like PNGQuant come into play, promising to shrink your PNG files without a noticeable drop in visual fidelity. As a seasoned product reviewer, I'm here to cut through the marketing jargon and provide you with an honest, in-depth look at PNGQuant, comparing it against its competitors and helping you decide if it's the right tool for your specific needs. We'll explore its core features, ideal use cases, potential pitfalls, and even suggest a comprehensive alternative for those seeking a more integrated solution.
Part 1: What is PNGQuant?
PNGQuant is an open-source command-line utility designed specifically for lossy PNG image compression. Unlike lossless compression methods that reduce file size without discarding any data, PNGQuant employs a sophisticated algorithm to quantize the colors in a PNG image, effectively reducing the number of unique colors to a more manageable palette. This process, while technically "lossy," is often imperceptible to the human eye, especially when optimized correctly. Its primary goal is to achieve the smallest possible file size for PNG images while maintaining a high level of visual quality. This review aims to address the critical question: Can PNGQuant deliver on its promise of significant file size reduction without compromising image integrity for various user needs?
The Landscape of Image Compression Tools
* Growing demand for faster web experiences: Users expect websites to load instantly, making optimized images crucial for performance.
* Increasing size of digital assets: High-resolution images and graphics are becoming standard, leading to larger file sizes.
* Need for efficient workflows: Developers and designers require tools that can automate and streamline the image optimization process.
Part 2: PNGQuant: Core Features, Pros, and Cons
PNGQuant stands out for its focused approach to PNG optimization. Its core capability lies in its intelligent color quantization, which is the engine behind its impressive compression ratios. It's a tool built for efficiency and integration into automated workflows.
* Intelligent Color Quantization: Reduces the number of colors in an image to a smaller, optimized palette, drastically cutting file size.
* Alpha Channel Support: Preserves transparency, a critical feature for many PNG applications.
* Dithering Options: Allows for controlled noise introduction to minimize banding artifacts that can arise from color reduction.
* Batch Processing: Can process multiple images simultaneously, making it ideal for large projects.
* Customizable Quality Settings: Offers fine-grained control over the compression level, allowing you to balance file size and visual quality.
- Pros:
- Superior Compression Ratios for PNGs: I've consistently seen PNGQuant achieve some of the best file size reductions for PNGs compared to other tools.
- Command-Line Interface for Automation and Batch Processing: For me, the CLI is a huge advantage, allowing seamless integration into scripts and build processes.
- Open-Source and Free to Use: The fact that it's free and open-source makes it accessible to everyone and fosters community development.
- Cons:
- Steep Learning Curve for Non-Technical Users: If you're not comfortable with the command line, getting started with PNGQuant can be intimidating.
- Lossy Compression May Not Suit All Use Cases: There are specific scenarios where even minimal quality loss is unacceptable, and PNGQuant might not be the best fit.
Part 3: PNGQuant: Ideal Users and Scenarios
PNGQuant is a powerful tool, but its strengths truly shine for specific user groups and in particular contexts. It's not a one-size-fits-all solution, and understanding its ideal applications is key to leveraging its full potential.
- Scenario 1: Web Developers Optimizing Website Performance
For me, as a web developer, PNGQuant is indispensable. I use it to optimize all PNG assets before deploying them to production. This directly translates to faster page load times, better SEO, and an improved user experience. I can easily integrate it into my build scripts, ensuring every PNG is compressed automatically. For example, when working on a new website with numerous icons and illustrations, I run a batch script that processes all PNGs through PNGQuant, significantly reducing their size without any noticeable visual degradation on the live site. This is its best use case.
- Scenario 2: Game Developers Reducing Asset Sizes
Game developers often deal with thousands of image assets. Reducing the size of these assets is crucial for game performance, download times, and memory usage. PNGQuant can be a game-changer here. I've seen developers use it to compress UI elements, sprites, and textures, leading to leaner game builds. The command-line nature allows for easy integration into asset pipelines, automating the optimization process for every new asset added.
- Scenario 3: Graphic Designers Needing Maximum Quality Retention (Limitation)
While PNGQuant is excellent for web and game assets, I find it less suitable for graphic designers whose primary concern is absolute pixel perfection and who might need to retain every single color detail for print or very high-fidelity digital displays. Because it's a lossy compressor, even subtle color shifts can occur, which might be unacceptable in certain design contexts where color accuracy is paramount. For these scenarios, I often recommend lossless compression or no compression at all, depending on the final output medium.
Part 4: PNGQuant & Competitors: A Comparative Analysis
When I look at image compression tools, I'm not just looking at one feature; I'm evaluating the whole package. Here's how PNGQuant stacks up against some popular alternatives.
| Feature/Tool | PNGQuant | TinyPNG | ImageOptim | OptiPNG |
| Compression Type | Lossy | Lossy | Lossy/Lossless | Lossless |
| Interface | CLI | Web/API | GUI | CLI |
| Batch Processing | Yes | Yes | Yes | Yes |
| Ease of Use | Low | High | Medium | Low |
| Output Quality | Good | Very Good | Excellent | Excellent |
| Processing Speed | Fast | Medium | Medium | Slow |
| Customer Support | Community | Community | Community | |
| Security | Local | Cloud | Local | Local |
Key Differentiators: Lossy vs. Lossless, Interface, and Automation
From my experience, PNGQuant excels in raw compression power for PNGs, often achieving smaller file sizes than its lossless counterparts like OptiPNG. Its command-line interface makes it a dream for automation, but it's definitely not for everyone. TinyPNG, with its web-based interface, is incredibly user-friendly and offers excellent lossy compression, making it my go-to for quick, one-off optimizations. ImageOptim, a macOS-specific GUI tool, provides a good balance of ease of use and powerful optimization, often combining several tools (including OptiPNG) under the hood. OptiPNG is fantastic if you absolutely cannot tolerate any quality loss, but you'll trade off significant file size reductions. For me, the choice often comes down to whether I need maximum automation (PNGQuant), ultimate ease of use (TinyPNG), or a comprehensive desktop solution (ImageOptim).
Part 5: Risks and Pitfalls of Using PNGQuant
While I appreciate PNGQuant for its powerful compression, I've also learned to navigate its potential downsides. It's not a magic bullet, and being aware of these risks can save you a lot of headaches.
Potential for Noticeable Quality Degradation
My biggest concern with any lossy compressor, including PNGQuant, is the risk of visible quality loss. While it's generally excellent at maintaining visual fidelity, I've encountered situations, especially with images containing subtle gradients or a very limited color palette to begin with, where the color quantization can introduce banding or a "posterized" effect. This is particularly true if I push the compression settings too aggressively. It's crucial to always preview the output and compare it to the original, especially for critical visual assets.
Integration Challenges with Existing Workflows
For someone who isn't comfortable with command-line tools, integrating PNGQuant into an existing design or development workflow can be a significant hurdle. It requires scripting knowledge or the use of third-party wrappers. I've seen colleagues struggle with setting it up correctly, leading to frustration and wasted time. If your workflow is entirely GUI-based, forcing PNGQuant into it might disrupt your efficiency rather than enhance it.
Lack of Built-in Preview Functionality
Unlike many GUI-based tools or web services that offer a side-by-side comparison of the original and compressed image, PNGQuant, being a CLI tool, lacks this built-in preview. This means I have to manually open the original and the compressed file in an image viewer to assess the quality, which adds an extra step to the workflow and can be time-consuming when processing many images. This absence of immediate visual feedback makes iterative adjustments more cumbersome.
Dependency on Command-Line Proficiency
This is perhaps the most obvious pitfall. If you're not proficient with the command line, PNGQuant will have a steep learning curve. Understanding the various flags, arguments, and how to construct effective commands can be daunting. For casual users or those who prefer a visual interface, this dependency can make PNGQuant inaccessible or, at best, inefficient to use. It's a tool built for developers and automation enthusiasts, not necessarily for the average user.
Part 6: How to Use UniConverter for Comprehensive Image Management
Sometimes, I find myself needing a more versatile solution than a dedicated command-line tool, especially when dealing with various media types or when I want a user-friendly interface. When other tools fall short with batch compression, unstable results, or noticeable quality loss, I turn to UniConverter. It's a fantastic all-in-one solution that handles not just images but also video compression and audio compression, all while maintaining quality and offering a smooth experience without ads. It leverages GPU acceleration for speed and ensures stable, high-quality results for a wide range of formats.
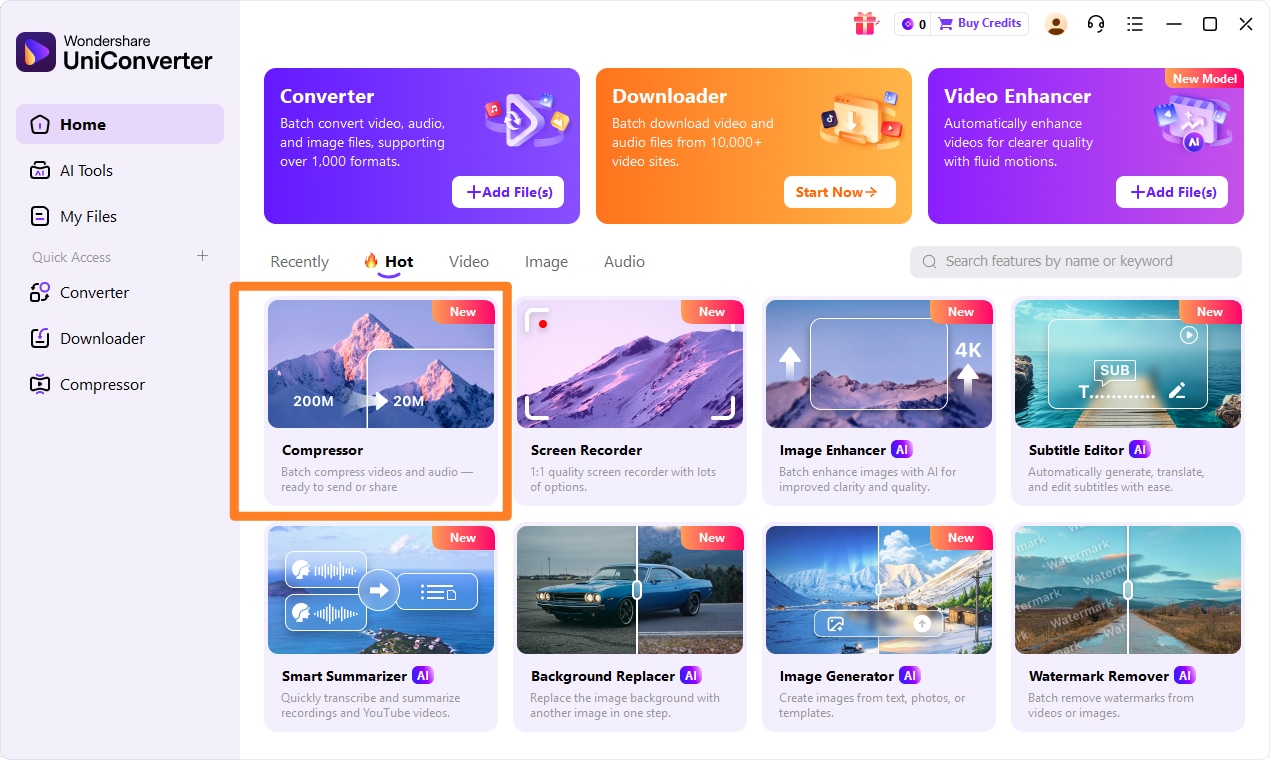
Step 1: Open UniConverter and Choose Compressor
Launch UniConverter on your computer. On the left sidebar, you'll find various tools. Click on the "Compressor" option to begin optimizing your media files.
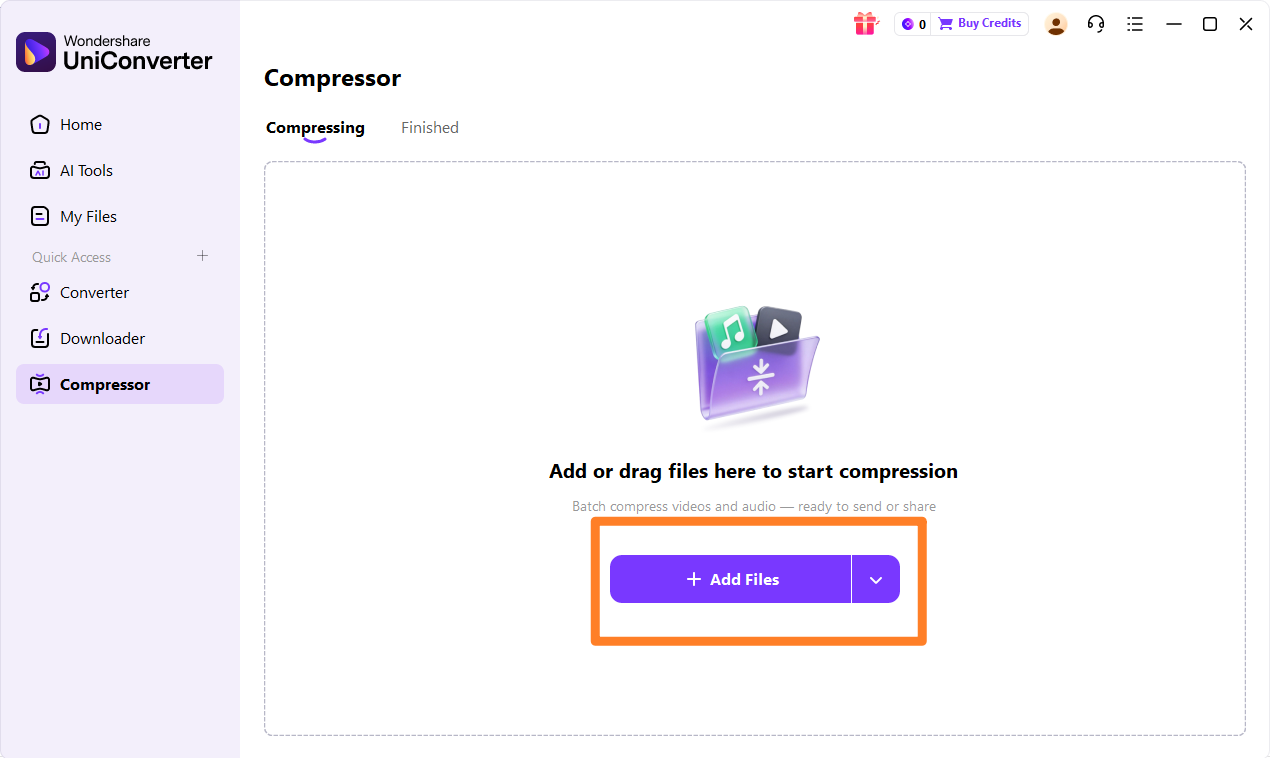
Step 2: Upload the Video, Audios or Images
Drag and drop your PNG images (or videos/audio files) directly into the UniConverter window. You can also click the "Add Files" button to browse and select your files.
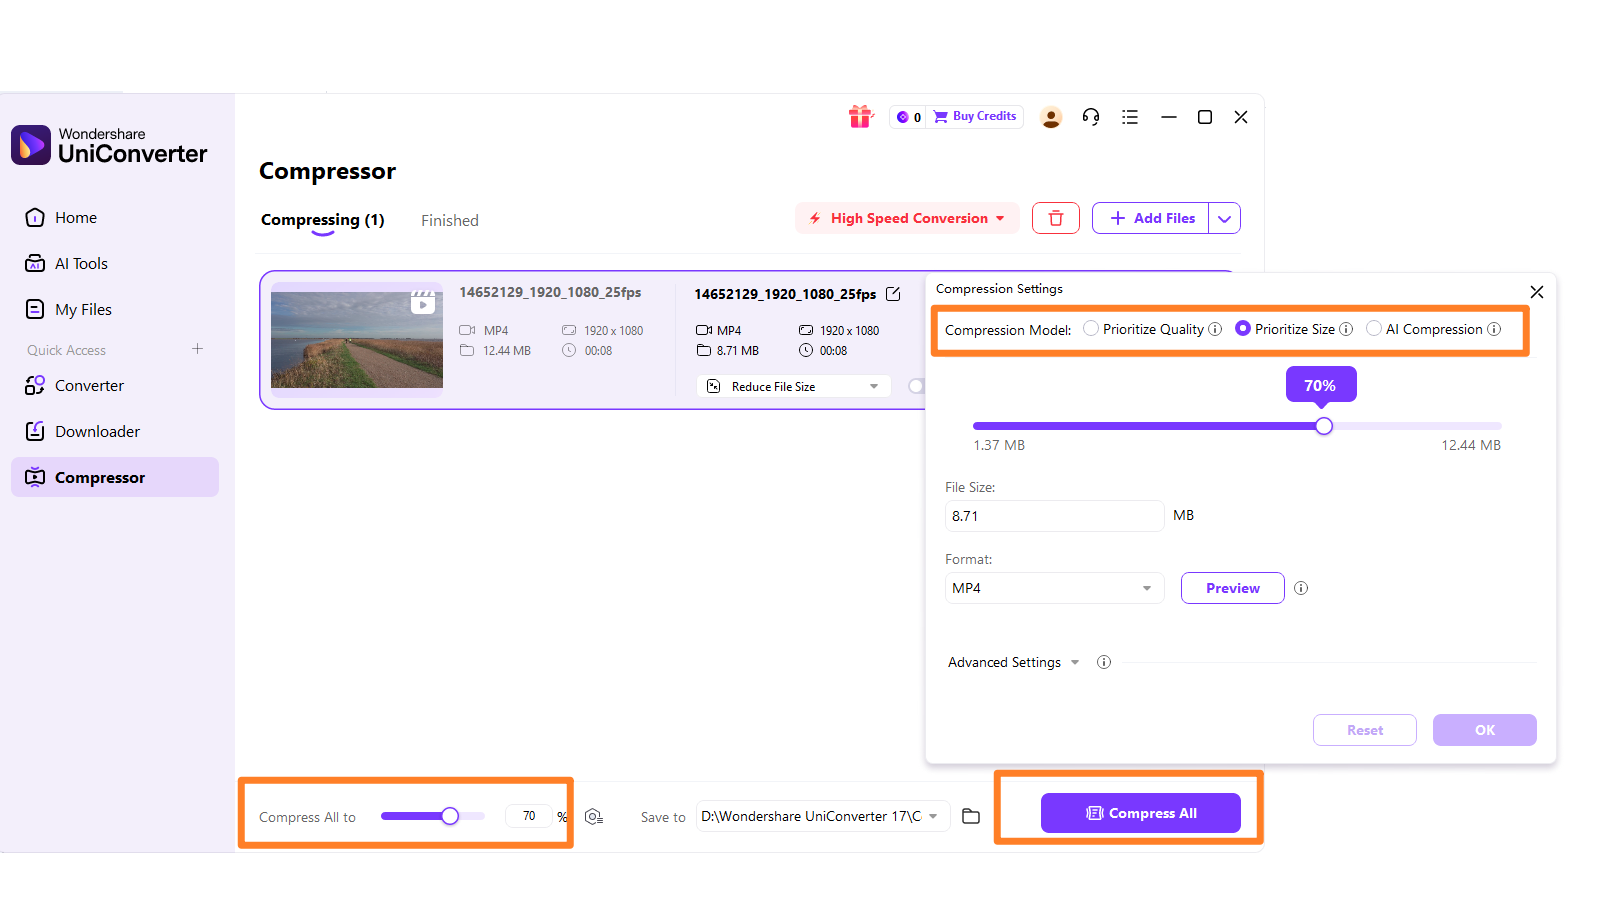
Step 3: Choose Required Parameters
Once your files are loaded, you can adjust the compression settings. UniConverter allows you to choose the output format, resolution, quality, and file size. For images, you can often select a quality percentage.
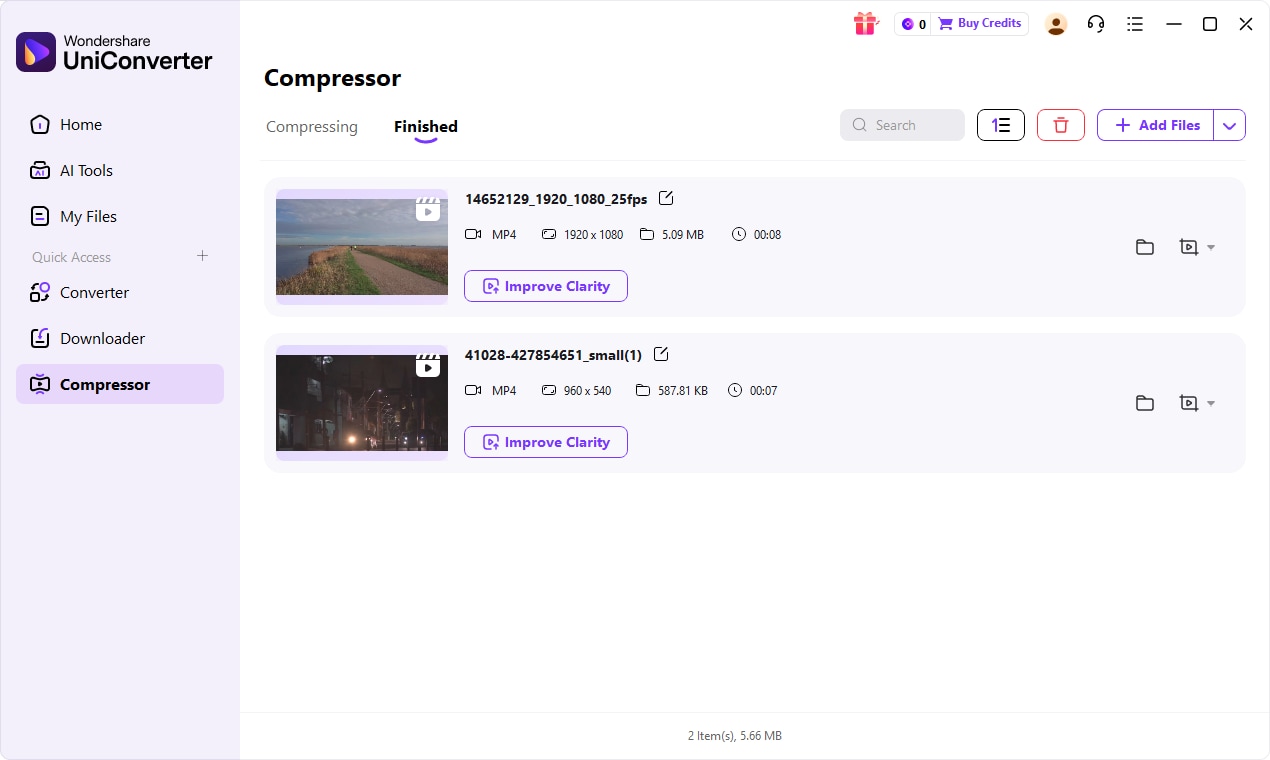
Step 4: Save the Compressed File
After setting your desired parameters, click the "Compress" or "Start All" button. UniConverter will quickly process your files. Once done, you can find your optimized images in the output folder.

Need a Better PNGQuant Alternative?
Part 7: Conclusion
After thoroughly exploring PNGQuant Image Compressor review, its features, and comparing it with alternatives, I can confidently say that it holds a significant place in the image optimization toolkit. For developers and automation enthusiasts who are comfortable with the command line, PNGQuant is an incredibly powerful, free, and open-source tool that delivers exceptional lossy PNG compression ratios. It's ideal for integrating into build pipelines and optimizing large batches of images for web and game development, where speed and file size are critical. However, for users who prioritize ease of use, a graphical interface, or absolutely no quality degradation, alternatives like TinyPNG, ImageOptim, or lossless compressors like OptiPNG might be more suitable. Graphic designers working on quality-critical projects should proceed with caution and always verify the output. Ultimately, the best tool depends on your specific workflow, technical comfort level, and the acceptable trade-off between file size and visual fidelity.
Part 8: FAQs
-
1. Is PNGQuant truly free to use?
Yes, PNGQuant is open-source and free to use under its license. You can download and use it without any cost.
-
2. Can PNGQuant compress other image formats like JPEG?
No, PNGQuant is specifically designed for PNG image compression. For JPEG optimization, you would need a different tool.
-
3. How does PNGQuant compare to lossless compressors like OptiPNG?
PNGQuant achieves significantly higher compression ratios by using lossy techniques, meaning it discards some image data. OptiPNG, on the other hand, focuses on lossless optimization, retaining all original data but resulting in smaller file size reductions. If you need maximum file size reduction and can tolerate minor quality changes, PNGQuant is better. If absolute pixel perfection is required, OptiPNG is the choice.
-
4. Is there a GUI version of PNGQuant available?
While PNGQuant itself is CLI-based, some third-party tools and applications integrate its functionality into a graphical user interface. You might find desktop apps that use PNGQuant under the hood for their PNG optimization features. If you prefer a GUI for all your media compression needs, UniConverter is an excellent option that offers a user-friendly interface for images, videos, and audio.
-
5. What are the typical file size reductions I can expect with PNGQuant?
Reductions can vary widely depending on the original image's complexity, color depth, and transparency. However, I commonly see file size reductions ranging from 30% to 70% or even more for highly detailed PNGs. For optimal results and to avoid quality degradation, I always recommend testing different quality settings.
