
- Pingo Image Compressor: Value for developers needing automated, high-efficiency image optimization via CLI.
- Pingo vs. Competitors: Comparison highlights Pingo's superior compression and automation, UniConverter's comprehensive features.
- Target Audience: Decision for Pingo is developers; casual users need GUI tools like UniConverter for simplicity.
- Risks & Pitfalls: Value understanding quality degradation, privacy, and inconsistent performance with image compressors.
- UniConverter: Decision for a user-friendly, feature-rich alternative offering stable, high-quality image compression.
In this article
- Part 1: What is Pingo Image Compressor?
- Part 2: Pingo Image Compressor: Core Features, Pros, and Cons
- Part 3: Pingo Image Compressor: Target Audience and Use Cases
- Part 4: Pingo Image Compressor & Competitors: A Comparative Analysis
- Part 5: Risks and Pitfalls When Using Image Compressors
- Part 6: How to Use UniConverter for Efficient Image Compression
- Part 7: Conclusion
- Part 8: FAQs
Pingo Image Compressor: A Deep Dive into Efficient Image Optimization
When I first stumbled upon Pingo Image Compressor, I was on a quest for a truly efficient way to shrink image file sizes without noticeable quality degradation. In the fast-paced world of web development and digital content creation, optimizing images is no longer a luxury but a necessity for faster loading times and improved user experience. This review will delve into Pingo's capabilities, comparing it with popular alternatives, and ultimately help you decide if it's the right tool for your specific needs. We'll explore its core features, ideal use cases, and potential pitfalls, providing a comprehensive look at this powerful, yet often overlooked, image optimization solution.
Part 1: What is Pingo Image Compressor?
Pingo Image Compressor is a powerful, open-source command-line interface (CLI) tool designed for lossless and lossy image compression. Developed with a focus on achieving the best possible compression ratios while preserving visual quality, Pingo has carved out a niche among developers and power users. Its primary goal is to make images as small as possible, which is crucial for web performance, reducing storage costs, and enhancing the overall user experience on digital platforms. My journey with Pingo began out of a need to automate image optimization for large-scale projects where manual processing was simply not feasible.
The Landscape of Image Compression Tools
The market for image compression tools is vast and varied, ranging from simple online drag-and-drop solutions to sophisticated desktop applications. However, many tools often fall short in one or more areas, leading to common user frustrations:
* Compromised Quality: Many compressors achieve small file sizes at the expense of noticeable image degradation.
* Lack of Automation: For large volumes of images, manual compression is time-consuming and inefficient.
* Limited Control: Users often lack fine-grained control over compression settings, leading to suboptimal results.
* Cost and Accessibility: Premium tools can be expensive, while free options might come with limitations or intrusive ads.
Part 2: Pingo Image Compressor: Core Features, Pros, and Cons
Pingo Image Compressor stands out with its robust compression algorithms and its CLI-first approach. It excels at processing various image formats, including PNG, JPG, and GIF, applying intelligent optimization techniques to reduce file sizes significantly. My experience shows that Pingo consistently delivers impressive results, especially for PNGs, often achieving smaller file sizes than many popular alternatives without visible quality loss.
Core Features:
* Advanced Compression Algorithms: Utilizes sophisticated techniques for both lossless and lossy compression.
* Multi-format Support: Handles PNG, JPG, and GIF images efficiently.
* Command-Line Interface: Enables powerful scripting and automation.
* Cross-Platform Compatibility: Works on Windows, macOS, and Linux.
* Open-Source Nature: Allows for community contributions and transparency.
Pros:
* Exceptional Compression Ratio with Minimal Quality Loss: I've consistently seen Pingo achieve some of the best compression rates while maintaining high visual fidelity.
* Batch Processing for High-Volume Workflows: Its CLI makes it incredibly easy to process hundreds or thousands of images with a single command, which is a huge time-saver for me.
* Open-Source and Free to Use: The fact that it's free and open-source is a massive advantage, especially for budget-conscious developers and small businesses.
Cons:
* Command-Line Interface (CLI) Can Be Intimidating for Beginners: If you're not comfortable with command lines, there's a steep learning curve, as there's no graphical user interface (GUI).
* Limited Feature Set Beyond Compression: Pingo is a specialist; it compresses images and nothing else. You won't find editing, resizing, or conversion features here.
Part 3: Pingo Image Compressor: Target Audience and Use Cases
Pingo Image Compressor is not a one-size-fits-all solution. Its strengths lie in specific scenarios and user profiles, making it an invaluable tool for some, and less ideal for others. I've found it particularly useful when dealing with large-scale image optimization tasks.
Best Use Case: Web Developers and Designers Optimizing Large Image Libraries
* Scenario: As a web developer, I often need to reduce the file size of hundreds of product images for an e-commerce website to improve loading speed without sacrificing visual quality. Pingo's CLI and high compression efficiency make it ideal for integration into automated build processes. I can write a simple script that automatically compresses all new images added to a directory, ensuring my website remains fast and responsive. This automation saves me countless hours and ensures consistent optimization across the entire image library.
Limited Use Case: Casual Users Needing a Simple Drag-and-Drop Solution
* Scenario: My friend, a casual user, wants to quickly compress a few photos before sharing them on social media. The lack of a graphical user interface (GUI) and advanced editing features makes Pingo less suitable for this user, who would prefer a more intuitive, visual tool. They just want to drag and drop their images, click a button, and be done. For them, learning command-line syntax for a handful of photos is an unnecessary hurdle, and they'd likely turn to an online compressor or a simple desktop app with a GUI.
Part 4: Pingo Image Compressor & Competitors: A Comparative Analysis
When I compare Pingo Image Compressor to its rivals, its CLI-first approach immediately stands out. While it might deter some, it's a significant advantage for others.
| Feature/Tool | Pingo Image Compressor | TinyPNG/TinyJPG | ImageOptim | UniConverter |
| Interface | CLI | Web-based GUI | Desktop GUI | Desktop GUI |
| Compression Ratio | Excellent | Very Good | Good | Excellent |
| Batch Processing | Yes | Yes (Paid) | Yes | Yes |
| Output Formats | PNG, JPG, GIF | PNG, JPG | PNG, JPG, GIF | All Major Formats |
| Additional Features | None | API, WordPress Plugin | Lossless Optimization | Conversion, Editing, Download |
| Pricing | Free | Freemium | Free | Paid |
Key Differentiators: Pingo's CLI-first approach vs. GUI-driven competitors
Pingo's strength lies in its raw compression power and scriptability. For me, integrating Pingo into my development workflow is seamless, allowing for automated, high-volume optimization. TinyPNG/TinyJPG offers a user-friendly web interface, making it accessible for quick, one-off compressions, though batch processing comes at a cost. ImageOptim, a desktop GUI tool, provides good lossless optimization, but I've found its compression ratios sometimes fall short of Pingo's. UniConverter, while a paid solution, offers a comprehensive suite of features beyond just compression, making it an all-in-one media toolkit. If you prioritize automation and maximum compression, Pingo is hard to beat. If ease of use for casual tasks is key, TinyPNG might be better. For a feature-rich solution, UniConverter is a strong contender.
Part 5: Risks and Pitfalls When Using Image Compressors
While image compressors are incredibly useful, I've learned that they come with their own set of risks and potential pitfalls that users should be aware of, especially when relying on free or online tools. It's not always as simple as just clicking "compress."
Potential for Unacceptable Quality Degradation
My biggest concern with many image compressors, particularly those that promise extreme file size reductions, is the potential for irreversible quality loss. While some degradation is expected with lossy compression, some tools can go too far, resulting in pixelation, color banding, or a general "muddiness" that makes the image unusable. I always recommend checking the output carefully, especially for critical images.
Privacy Concerns with Online Compressors
When I upload my images to online compression services, I'm always mindful of privacy. Many free online tools might collect data, display intrusive ads, or even retain copies of your images on their servers. For sensitive or proprietary images, this is a significant risk. Always read their privacy policy or opt for offline, reputable software.
Inconsistent Performance Across Different Image Types
I've noticed that not all compressors perform equally well across all image types. A tool that excels at compressing JPEGs might struggle with PNGs, or vice-versa. Some might introduce artifacts in GIFs. Relying on a single tool for all your compression needs without testing its performance on various image formats can lead to suboptimal results and unexpected quality issues.
Over-reliance on Default Settings
Many users, myself included at times, tend to stick with the default settings of an image compressor. However, these defaults are often a compromise and might not be ideal for your specific use case. For example, a default compression level might be too aggressive for a high-resolution print image or too lenient for a web banner. Experimenting with settings is crucial to find the sweet spot between file size and quality.
Lack of Advanced Editing Capabilities
Most dedicated image compressors are specialists; they compress and that's it. If I need to crop, resize, add watermarks, or perform any other edits, I'll need a separate tool. This can fragment my workflow and add extra steps, especially if I'm dealing with a large batch of images that require both compression and minor adjustments.
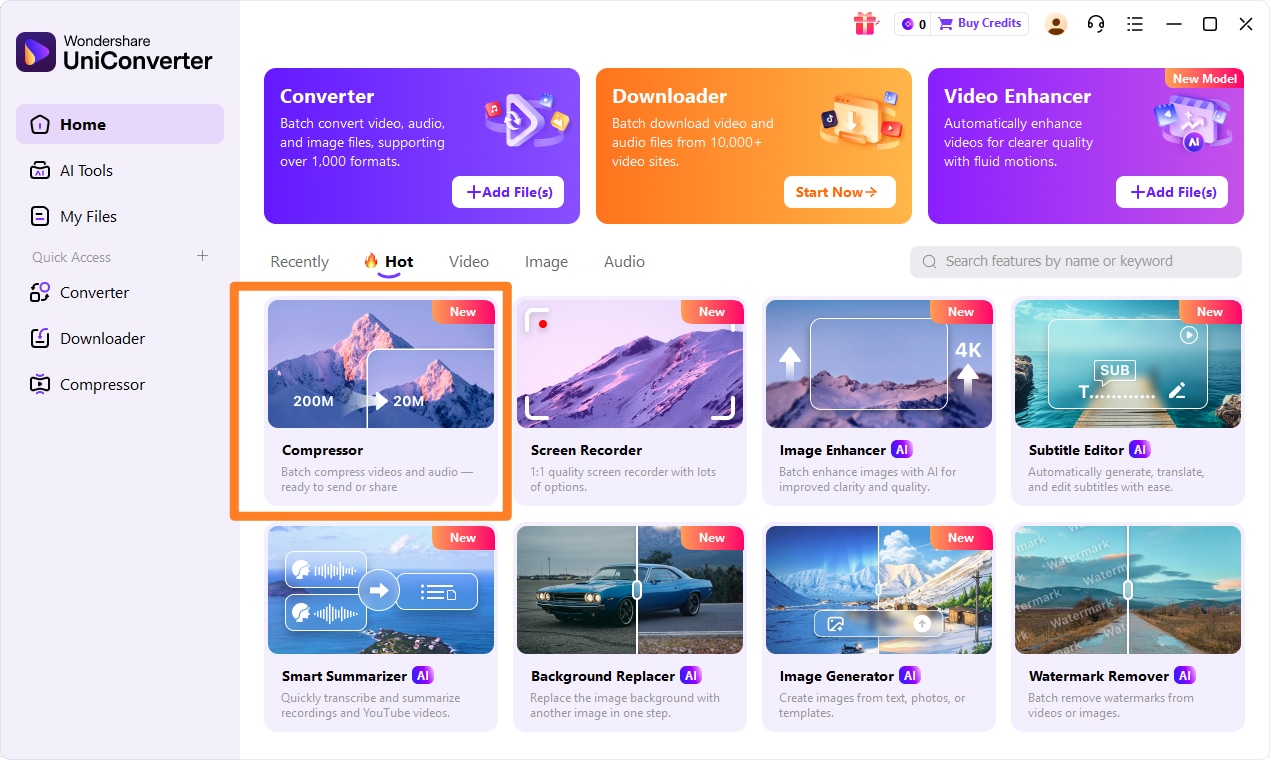
Part 6: How to Use UniConverter for Efficient Image Compression
Sometimes, other tools fall short with batch compression, unstable results, or significant quality loss. In such cases, I turn to UniConverter. It's a robust solution that avoids these common issues, offering a seamless and high-quality compression experience for both images and videos. UniConverter stands out with its ad-free interface, extensive format support, GPU acceleration for speed, stable and lossless compression options, and powerful batch processing capabilities. It truly is an all-in-one ultimate solution for all my media conversion and compression needs.
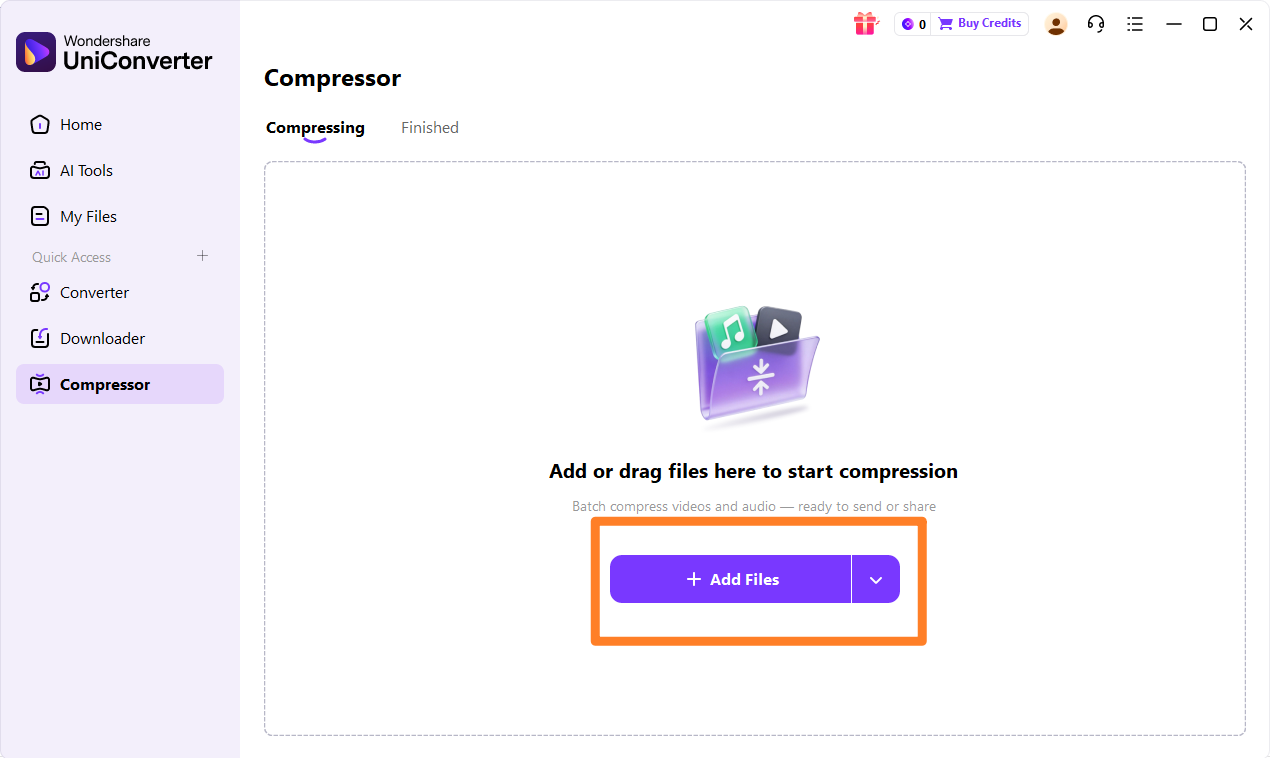
Step 1: Open UniConverter and Choose Compressor
First, I launch UniConverter on my desktop. From the main interface, I navigate to the "Toolbox" section and select the "Image Compressor" option.
Step 2: Upload the Video, Audios or Images
Next, I click the "Add Files" button or simply drag and drop the images I want to compress into the UniConverter window. I can add multiple images for batch processing.
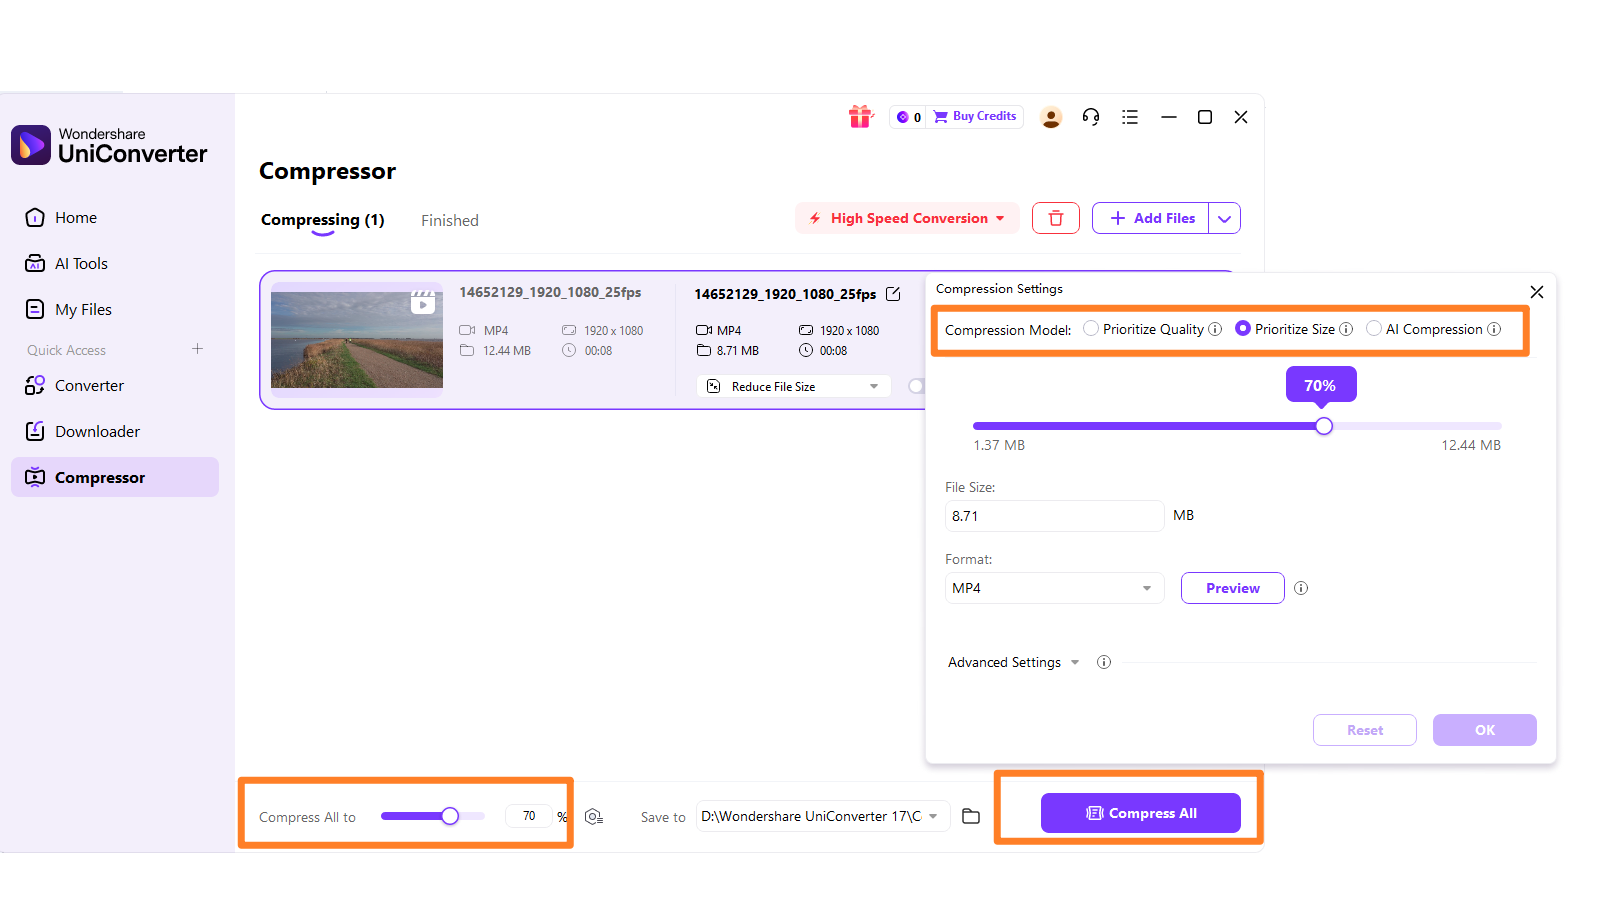
Step 3: Choose Required Parameters
After uploading, I can adjust the compression settings. I select the desired output format, compression quality (from lossless to various lossy levels), and even preview the estimated file size reduction.
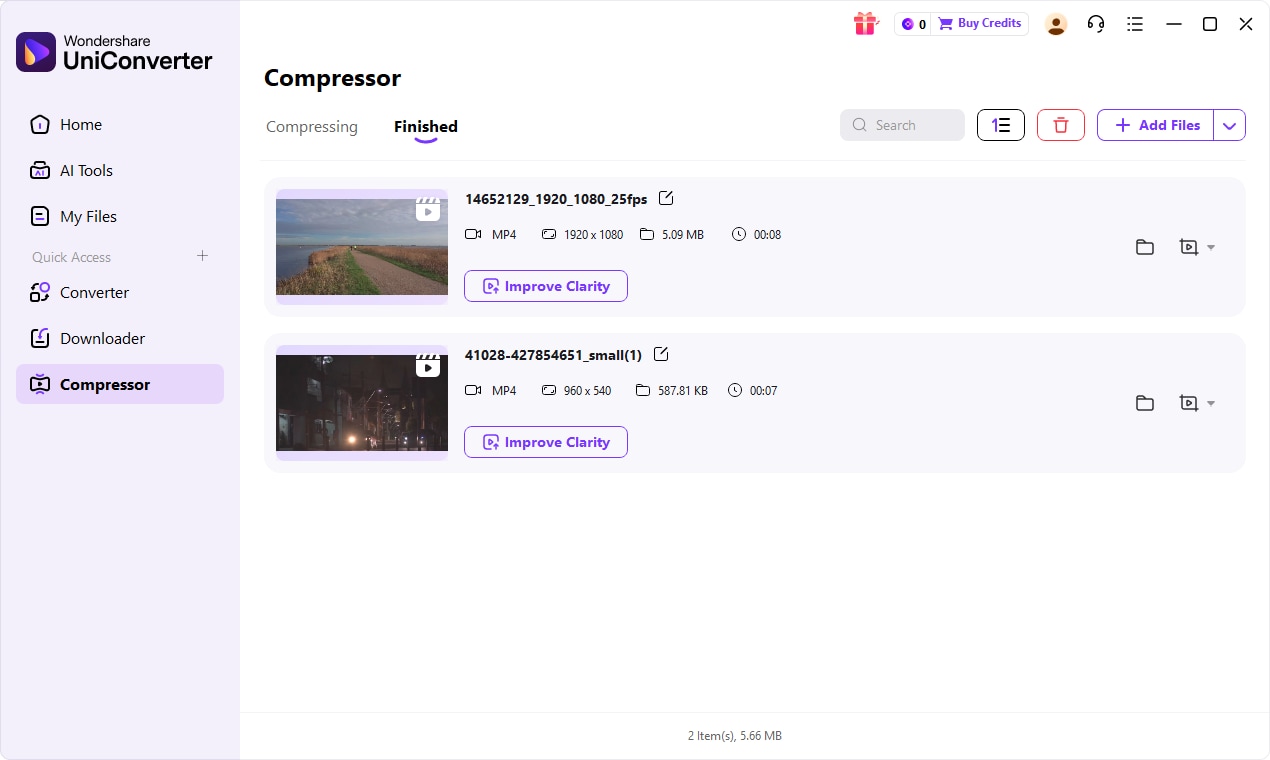
Step 4: Save the Compressed File
Once I'm satisfied with the settings, I click the "Compress" button. UniConverter quickly processes the images, and I can then choose the destination folder to save my optimized files.

Seeking a Pingo Image Compressor Alternative?
Part 7: Conclusion
In my journey through image optimization, Pingo Image Compressor has proven to be an indispensable tool for specific workflows. Its command-line interface, while a barrier for some, is its superpower for developers and power users who need automated, high-efficiency compression. For those managing large image libraries or integrating optimization into build processes, Pingo offers unparalleled control and superior compression ratios with minimal quality loss. However, its lack of a graphical user interface and limited feature set beyond compression means it's not suited for casual users seeking a simple drag-and-drop experience or those needing additional editing capabilities. For a broader audience, especially those who value ease of use, a rich feature set, and comprehensive media management, alternatives like UniConverter present a more versatile and user-friendly solution. Ultimately, the best tool depends on your technical comfort, the volume of images you process, and the specific requirements of your workflow. Choose Pingo if you're a developer focused on automation and raw compression power; opt for UniConverter or similar GUI tools if you prefer an all-in-one, intuitive experience.
Part 8: FAQs
-
1. What is the main advantage of Pingo Image Compressor?
Its primary advantage is its exceptional compression efficiency, especially for PNG files, achieved through a command-line interface. This makes it ideal for automated batch processing and integration into development workflows, offering superior file size reduction with minimal quality loss compared to many other tools.
-
2. Can Pingo Image Compressor be used on Mac and Windows?
Yes, Pingo Image Compressor is cross-platform and can be used on Windows, macOS, and Linux operating systems. You'll need to download the appropriate executable for your system and run it via the command line.
-
3. How does image compression affect SEO?
Image compression significantly impacts SEO by reducing page load times. Faster loading websites improve user experience, reduce bounce rates, and are favored by search engines, potentially leading to higher rankings. Optimized images also consume less bandwidth, which is beneficial for users on slower connections.
-
4. Is it possible to recover original image quality after compression?
It depends on the type of compression used. If you used lossless compression (like Pingo's default for PNGs), the original image data can theoretically be recovered, as no information is permanently discarded. However, with lossy compression (commonly used for JPEGs), some image data is permanently removed, making it impossible to fully recover the original quality.
-
5. What are the common types of image compression?
The two main types are lossless and lossy compression. Lossless compression reduces file size without discarding any image data, making it fully reversible (e.g., PNG optimization). Lossy compression achieves greater file size reduction by permanently removing some image data, which is irreversible but often visually imperceptible (e.g., JPEG compression). For a tool that offers both and more, UniConverter is a great option.
